Microsoft Teams approvals with custom connectors
You can use the approvals hub in Microsoft Teams to quickly integrate approvals workflows into existing line of business apps that do not have their own approvals system. You achieve this by using a custom connector to 'connect' to the existing line of business apps.
Tip
When you use the approvals hub, you get to manage all your approvals in a central location.
This article shows you how to:
- Create a custom connector.
- Add a trigger and actions to a custom connector.
- Create an approval flow.
- Use the approvals hub in Teams to manage approvals that you created with the flow.
Prerequisites
One of the following subscriptions:
Basic experience building flows and custom connectors.
Create a custom connector
Sign in to Power Automate.
Expand Data, and then select Custom connectors.
Select New custom connector, and then Create from blank from the dropdown list.
In the Connector name field, enter a name for the custom connector, and then select Continue.
In General Information, enter a Description and a Host.
At the bottom of the screen, select Security.
Select the authentication type that your API uses.
At the bottom of the screen, select Definition.
Add a trigger
You need a trigger to serve as the first step in the approval flow that you'll create.
Some common approval triggers are:
- When a new row is created.
- Wen a row is updated.
Tip
Both Webhook and polling triggers work with approval flows.
Continuing from the earlier steps, select New Trigger in the Triggers list.
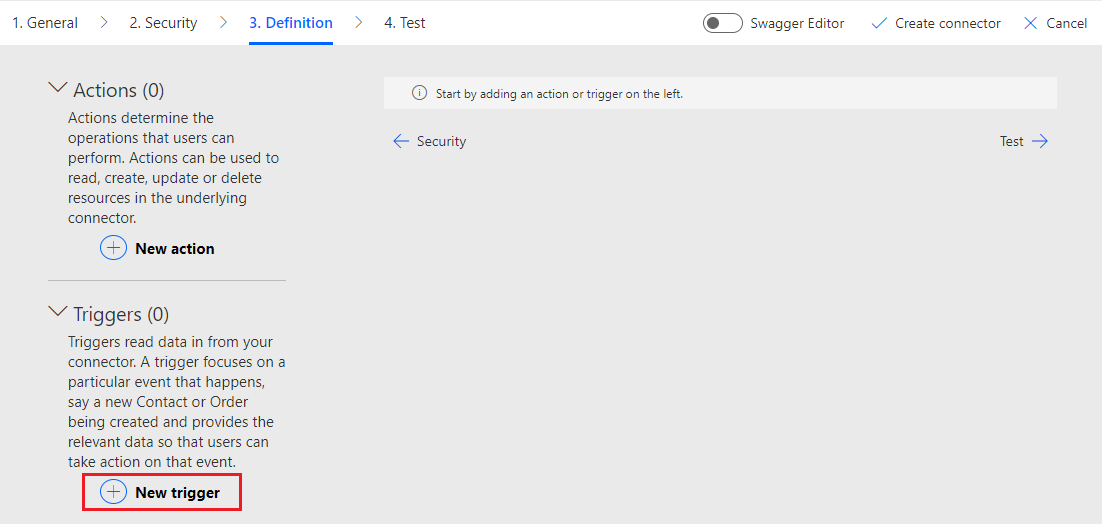
Enter a Summary, Description, Operation ID, and select a Trigger type.
Select either important or advanced for the visibility the trigger to make the trigger available when you create the approval flow.
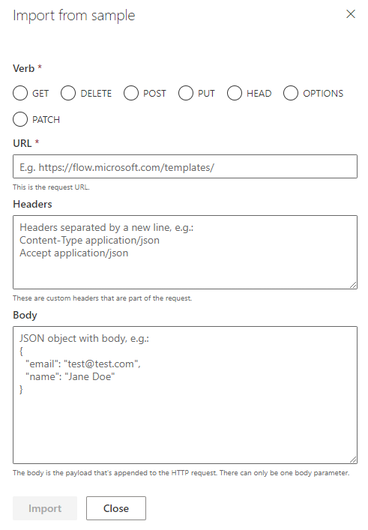
Below the Request heading, select Import from sample.
Define the Verb, URL, Headers, and Body for your trigger.
Add a response.
The response configuration depends on your trigger type (Webhook or polling). Webhook triggers require a callback URL parameter and a location header that contains a value that's used to delete the Webhook registration.
Configure the Webhook Response and Trigger configuration.
Configure the polling response to meet your needs.
Configure the trigger to meet your needs.
Create an approval flow
Now that you've created your custom connector, it's time to create your approval flow that uses the custom connector.
Sign in to Power Automate.
Select New flow, and then select Automated cloud flow.
Select Skip on the Build an automated cloud flow screen.
Select the Custom tab, and then select your new custom connector.
Select a trigger from your custom connector.
Select New step.
Search for "approvals", and then select Start and wait for an approval.
Select the Approval type, and then populate the required fields on the Start and wait for an approval card.
Select New step > Control > Condition.
Select the Choose a value text box, and then search the dynamic content for "Responses Approver response".
Update the condition with the desired result.
Important
The "Approve" or "Reject" approval responses are case sensitive.
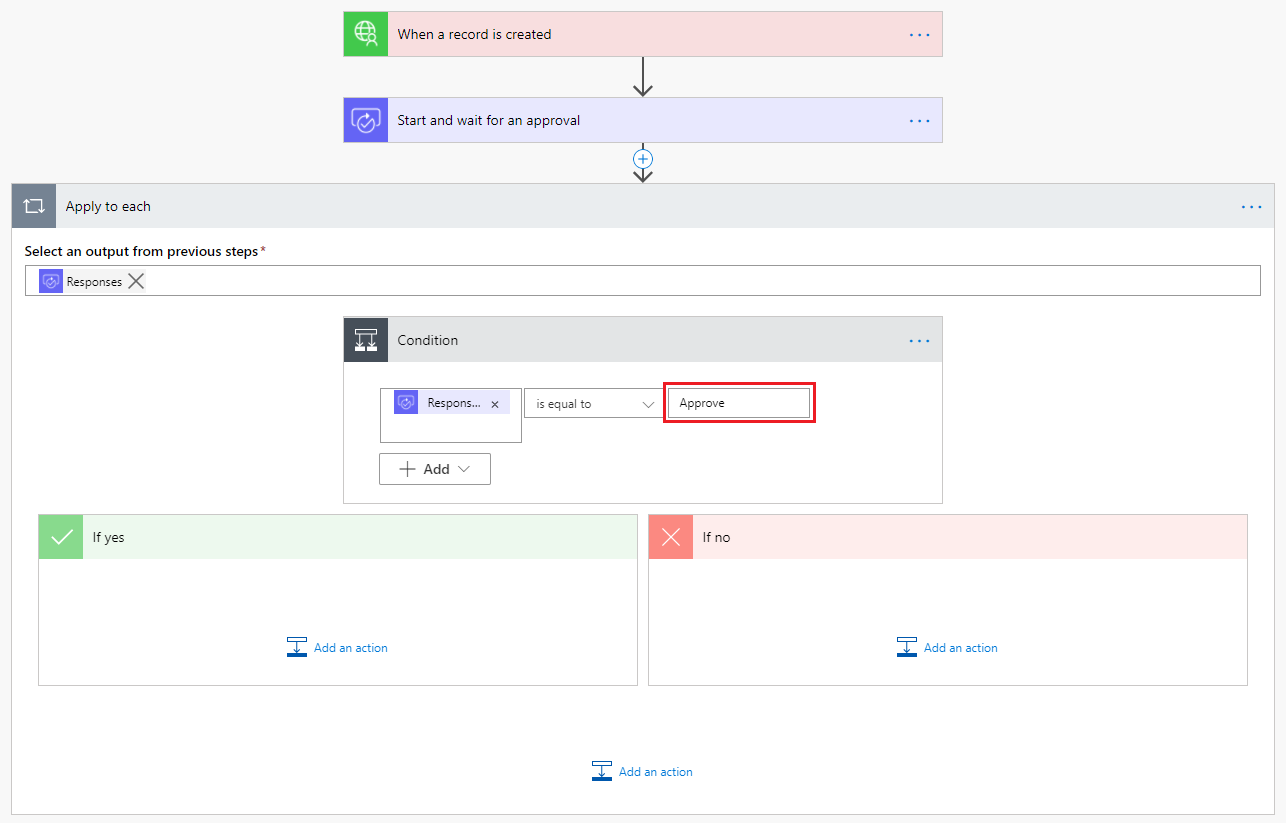
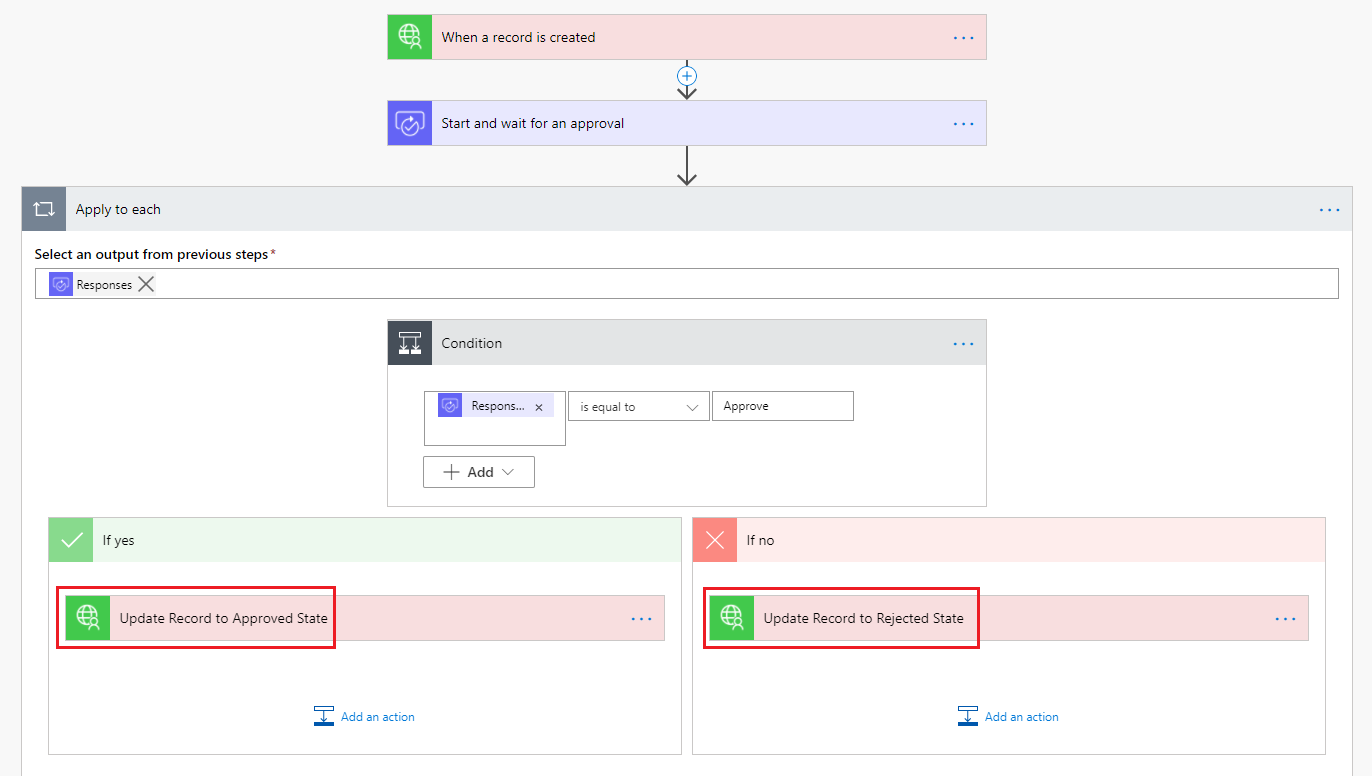
Add an action in both condition result sections.
Manage approvals generated by the approval flow
Sign in to Microsoft Teams.
Search for the approvals app, and then select it.
View your received and sent approvals.
Take an action that activates your custom connector’s trigger.
View the new approval request in flow run history.
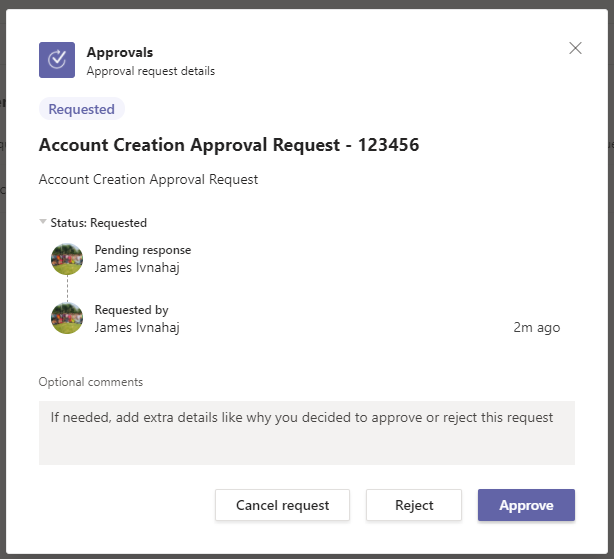
View the new approval request in the approvals app.
Select the approval request, review the details, and then select Reject or Approve.
View the completed approval request in flow run history.
View the completed approval request in approvals app.
Confirm in the target system the approval completion update steps were executed successfully.
See also
Feedback
Coming soon: Throughout 2024 we will be phasing out GitHub Issues as the feedback mechanism for content and replacing it with a new feedback system. For more information see: https://aka.ms/ContentUserFeedback.
Submit and view feedback for