When you register your Microsoft Entra app, you grant it permission to access various APIs. As your needs change, you might want to adjust these permissions. This article shows you how.
Note
Microsoft Entra app permissions are only applicable for these scenarios:
Embed for your organization
Embed for your customers with the master user authentication method
Edit the permission settings on your Microsoft Entra app
Permission changes can be made programmatically, or in the Azure portal.
Select your Microsoft Entra tenant by selecting your account in the upper right corner of the page.
Select App registrations. If you can't see this option, search for it.
From the Owned applications tab, select your app. The application opens in the Overview tab, where you can review the Application ID.
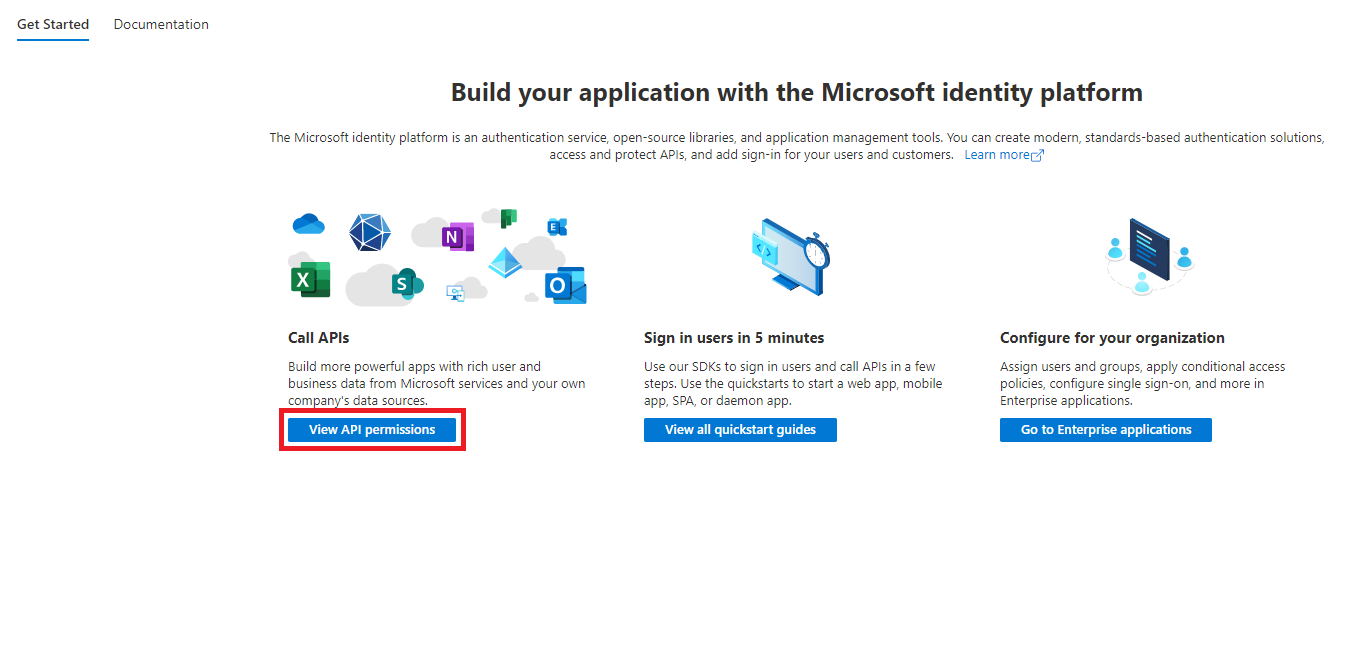
Select the View API permissions tab.
Select Add a permission.
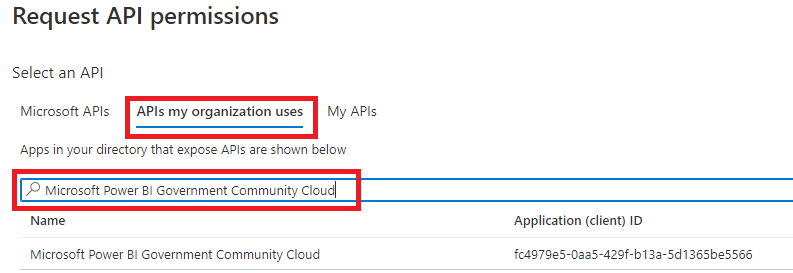
To add permissions, follow these steps (note that the first step is different for GCC apps):
From the Microsoft APIs tab, select Power BI service.
Note
For GCC apps, Select the APIs my organization uses tab, and search for either Microsoft Power BI Government Community Cloud OR fc4979e5-0aa5-429f-b13a-5d1365be5566.
Select Delegated Permissions and add or remove the specific permissions you need.
When you're done, select Add permissions to save your changes.
To remove a permission, follow these steps:
Select the ellipsis (...) to the right of the permission.
Select Remove permission.
In the Remove permission pop-up window, select Yes, remove.
To change your Microsoft Entra app permissions programmatically, you'll need to get the existing service principals (users) within your tenant. For information on how to do that, see servicePrincipal.
To get all the service principals within your tenant, call the Get servicePrincipal API without {ID}.
Check for a service principal with your app's application ID as the appId property. (displayName is optional.)
Grant Power BI permissions to your app, by assigning one of these values to consentType:
AllPrincipals - Can only be used by a Power BI admin to grant permissions on behalf of all the users in the tenant.
Principal - Use to grant permissions on behalf of a specific user. If you're using this option, add the principalId={User_ObjectId} property to the request body.
If you're using a master user, to avoid being prompted for consent by Microsoft Entra ID, you need to grant permissions to the master account.
The resourceIdc78a3685-1ce7-52cd-95f7-dc5aea8ec98e is tenant dependent and not universal. This value is the objectId of the Power BI Service application in Microsoft Entra ID. To get this value from the Azure portal, navigate to Enterprise applications > All applications, and search for Power BI Service.
Grant app permissions to Microsoft Entra ID, by assigning a value to consentType.
You can also change your Microsoft Entra app permissions using C#. For more information see the oAuth2PermissionGrant API. This method can be useful if you're considering automating some of your processes.
var graphClient = GetGraphClient();

currentState.createdApp = await graphClient.Applications
    .Request()
    .AddAsync(application);

System.Threading.Thread.Sleep(2000);

var passwordCredential = new PasswordCredential
{
    DisplayName = "Client Secret Created in C#"
};

currentState.createdSecret = await graphClient.Applications[currentState.createdApp.Id]
    .AddPassword(passwordCredential)
    .Request()
    .PostAsync();

var servicePrincipal = new ServicePrincipal
{
    AppId = currentState.createdApp.AppId
};

currentState.createdServicePrincipal = await graphClient.ServicePrincipals
    .Request()
    .AddAsync(servicePrincipal);

GraphServiceClient graphClient = new GraphServiceClient(authProvider);

// Use oAuth2PermissionGrant to change permissions
var oAuth2PermissionGrant = await graphClient.Oauth2PermissionGrants["{id}"]
               .Request()
               .GetAsync();
Coming soon: Throughout 2024 we will be phasing out GitHub Issues as the feedback mechanism for content and replacing it with a new feedback system. For more information see: https://aka.ms/ContentUserFeedback.