Create a launch URL
By creating a launch URL, you can open a new browser tab or window by adding the host.launchUrl() API call to the code of a Power BI visual.
Important
The host.launchUrl() method was introduced in Visuals API 1.9.0.
Sample
Import the IVisualHost interface and save the link to the host object in the constructor of the visual.
import powerbi from "powerbi-visuals-api";
import IVisualHost = powerbi.extensibility.visual.IVisualHost;

export class Visual implements IVisual {
    private host: IVisualHost;
    // ...
    constructor(options: VisualConstructorOptions) {
        // ...
        this.host = options.host;
        // ...
    }

    // ...
}
Usage
Use the host.launchUrl() API call and pass your destination URL as a string argument:
this.host.launchUrl('https://some.link.net');
Restrictions
Use only absolute paths, not relative paths. For example, use an absolute path such as
https://some.link.net/subfolder/page.html. The relative path,/page.html, won't be opened.Currently, only HTTP and HTTPS protocols are supported. Avoid FTP, MAILTO, and other protocols.
Best practices
Usually, it's best to open a link only as a response to a user's explicit action. Make it easy for the user to understand that clicking the link or the button results in opening a new tab. It can be confusing or frustrating for the user if a
launchUrl()call triggers without a user's action or as a side effect of a different action.If the link isn't essential for the visual to function properly, we recommend that you give the report's author a way to disable and hide the link. Special Power BI use cases, such as embedding a report in a third-party application or publishing it to the web, might require disabling and hiding the link.
Avoid triggering a
launchUrl()call from inside a loop, the visual'supdatefunction, or any other frequently recurring code.
A step-by-step example
Add a link-launching element
Add the following lines to the visual's constructor function:
    this.helpLinkElement = this.createHelpLinkElement();
    options.element.appendChild(this.helpLinkElement);
Add a private function that creates and attaches the anchor element:
private createHelpLinkElement(): Element {
    let linkElement = document.createElement("a");
    linkElement.textContent = "?";
    linkElement.setAttribute("title", "Open documentation");
    linkElement.setAttribute("class", "helpLink");
    linkElement.addEventListener("click", () => {
        this.host.launchUrl("https://learn.microsoft.com/power-bi/developer/visuals/custom-visual-develop-tutorial");
    });
    return linkElement;
};
Define the style for the link element with an entry in the visual.less file:
.helpLink {
    position: absolute;
    top: 0px;
    right: 12px;
    display: block;
    width: 20px;
    height: 20px;
    border: 2px solid #80B0E0;
    border-radius: 20px;
    color: #80B0E0;
    text-align: center;
    font-size: 16px;
    line-height: 20px;
    background-color: #FFFFFF;
    transition: all 900ms ease;

    &:hover {
        background-color: #DDEEFF;
        color: #5080B0;
        border-color: #5080B0;
        transition: all 250ms ease;
    }

    &.hidden {
        display: none;
    }
}
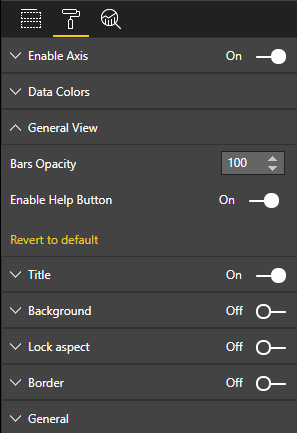
Add a toggling mechanism
To add a toggling mechanism, you need to add a static object so that the report's author can toggle the visibility of the link element. (The default is set to hidden.) For more information, see the static object tutorial.
Add the showHelpLink Boolean static object to the capabilities.json file's objects entry:
"objects": {
    "generalView": {
            "displayName": "General View",
            "properties":
                "showHelpLink": {
                    "displayName": "Show Help Button",
                    "type": {
                        "bool": true
                    }
                }
            }
        }
    }
Add the following lines in the visual's update function:
if (settings.generalView.showHelpLink) {
    this.helpLinkElement.classList.remove("hidden");
} else {
    this.helpLinkElement.classList.add("hidden");
}
The hidden class is defined in the visual.less file to control the display of the element.
Feedback
Coming soon: Throughout 2024 we will be phasing out GitHub Issues as the feedback mechanism for content and replacing it with a new feedback system. For more information see: https://aka.ms/ContentUserFeedback.
Submit and view feedback for