Install and set up the Onboarding Buddy template
As a Power Platform admin, you install, set up, and deploy the Onboarding Buddy template solutions for your organization. This article covers the following steps:
Step 1: Review prerequisites
Make sure that you have the required license and an environment and data policy in place before you start.
Confirm licensing
Make sure that your organization has the necessary licensing to use enterprise templates. Power Apps usage rights that are included with Microsoft 365 and Office 365 licenses aren't sufficient. You need one of the following Power Apps plans:
- Power Apps Premium
- Power Apps per app
- Power Apps per app pay-as-you-go-meter
- Power Apps use rights included with Dynamics 365 licenses
More license details are available in the Microsoft Power Platform Licensing Guide.
Tip
A free Power Apps Developer Plan is a great way to install the template for evaluation purposes.
Create environment and data policies
It's important to have a cohesive environment and data policy and required resources in place.
Administrators
Make sure that admins with the necessary privileges are available to assign licenses and create environments:
- Microsoft Entra ID Global or tenant User Administrator to assign Power Apps or Power BI licenses
- Power Platform Administrator to create environments
Environments
- Follow application lifecycle management (ALM) best practices in creating and managing environments.
- Make sure that a Power Platform environment is set up with a Dataverse database.
- Make sure that environment maker security role privileges, at a minimum, are assigned to the user who installs the solutions in that environment.
Data loss prevention policies
Make sure that the environment has access to the connectors used by the Onboarding Buddy template:
Step 2: Create connections
Cloud flows need specific connection references to work correctly. Connection references are included in the solution, but connectors often need to be set up manually. You need to set up four new connections for the Onboarding Buddy app.
It's best to create the connections before you import the solution. If you create the connections during import, you have to jump back and forth between browser windows.
Sign in to Power Apps and go to Connections.
Create a connection with each of these connectors:
Learn how to manage connections in canvas apps.
Step 3: Install solution files
You have two options for installing the Onboarding Buddy solution:
- Select Get it now on the template's AppSource page and an installation window opens automatically in the Power Platform admin center.
- Download a managed or unmanaged version of the solution files and manually import them into your environment.
Install from AppSource
Go to the Onboarding Buddy template in AppSource and select Get it now.
In the Install Onboarding Buddy window in the Power Platform admin center, select the developer environment that you prepared in the review prerequisites step.
Agree to the Terms and Privacy statements when prompted.
Select Install.
Two solutions are installed in your environment, Employee Experience Base and Onboarding Buddy. Learn more about the Onboarding Buddy template solutions.
Download and manually install solution files
Download the following managed or unmanaged solution files:
Sign in to Power Apps and select the environment you prepared in the review prerequisites step.
In the left side panel, select Solutions.
Select Import solution, and then find and select the
mpa_EmployeeExperienceBasefile you downloaded.Select Next, and then select Import.
After you receive the message that the import was successful, repeat steps 4 and 5 to import the
mpa_Onboarding Buddyfile you downloaded.Select Next and Next again.
For each of the connections listed, select the connection that was created in the import steps.
Select Next.
Skip the environment variable setup for now. The required URL values only become available after the apps are imported into the environment.
Select Import to start importing the Onboarding Buddy solution.
Step 4: Assign security roles
The Onboarding Buddy solution contains two security roles:
- Administrator: Assign this role to users who need access to the model-driven administration app to manage all reference data and view all records.
- User: Assign this role to all users of the Onboarding Buddy application.
All licensed users, whether or not they're members of a security group, must have a security role assigned. If users don't have a security role, they get a "data access denied" error when they try to run the app. Users can't access environments until they're assigned at least one security role for that environment.
Assign security roles in the Power Platform admin center.
Sign in to the Power Platform admin center.
In the left side panel, select Environments.
Select the environment where the solution is installed.
Select Users > See all.
Select user(s), select Manage security roles, and then select the appropriate roles for each user.
Select Save.
- Learn how to manage application users in the Power Platform admin center.
- Learn how to control user access to environments with security groups and licenses.
Step 5: Share the apps with program admins
If program managers need to contribute to configuring the Onboarding Buddy program, share both the Onboarding Buddy Admin app and the Onboarding Buddy app with them.
Step 6: Configure program parameters
Open the Onboarding Buddy Admin app and select Configurations.
Select New if you don't have any configurations yet, or select Edit if a configuration has been created. This table should only ever contain one record.
Set the three program-level options:
- Days after match to send first nudge email determines when the first emails go out to Buddies and Onboarders. These emails introduce the program and encourage matches to engage with each other.
- Days prior to end of match to send the last nudge email determines when the final emails go out to Buddies and Onboarders. These emails encourage matches to wrap up any final activities.
- Length of Buddy Match Period (days) determines how long matches last.
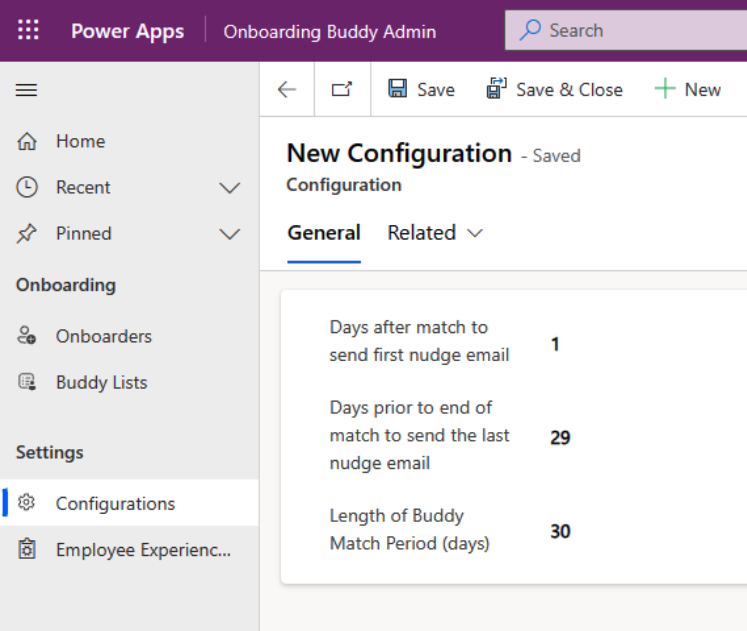
Select Save & Close.
Step 7: Populate the Onboarders table
The New Onboarders Sync flow runs every Saturday, automatically importing into the Onboarding table new employees who were set up in Microsoft Entra ID in the previous week. If you want new employees to be part of the program right away, enter them into the Onboarders table. You have two options, either run the flow or enter the records manually.
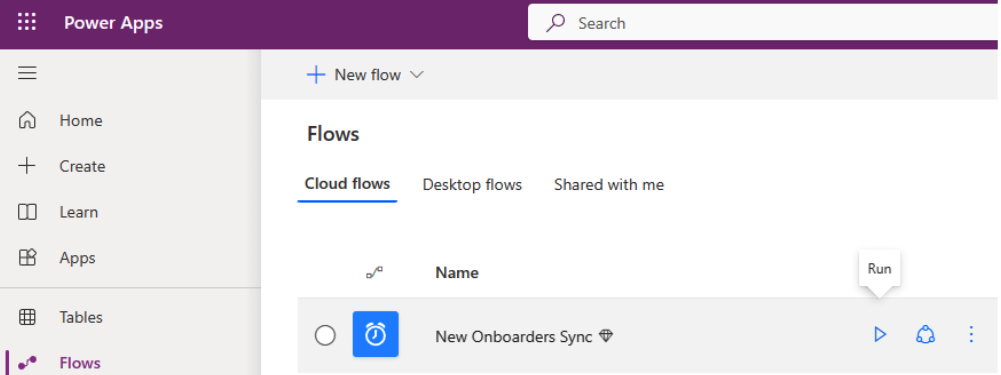
Run the flow
In Power Apps, in the left side panel, select Flows.
Hover over the New Onboarders Sync flow and select the Play icon (Run).
Manually create Onboarder records
In the Onboarding Buddy Admin app, select Onboarders.
Select New.
Enter information about the new employee. The most critical fields to populate are:
- Onboarder
- Name
- Job Title
- Organization
- Region
Select Save & Close.
Repeat for as many Onboarders as you need to create.
Step 8: Turn on cloud flows
In Power Apps, in the left side panel, select Solutions.
Select the Onboarding Buddy solution.
In the left side panel, select Cloud flows (4).
Select each of the four flows and make sure it's turned on.
Step 9: Share the Onboarding Buddy app
Share the Onboarding Buddy app with the users in your organization.
Tip
Share the app with the Onboarding Buddy program managers first so that they can configure the app to meet your organization's needs. After that configuration is complete, share the app to the wider organization.
Go to Power Apps and select the environment that contains the solution.
In the left side panel, select Solutions.
Select Onboarding Buddy.
In the left side panel, select Apps.
Select the Onboarding Buddy canvas app and select More actions (…) > Share.
Search for and select the security group or individuals who need access to the app. You can also verify user security roles here.
Add an optional email message.
Select Share.
Learn how to share a canvas app with your organization.
Note
If the Onboarding Buddy apps aren't shared with you and you can't access them directly in Power Apps, contact your administrator.
Step 10: Turn on auditing (optional)
Auditing isn't required, but we recommend turning it on so that it's easy to see who creates and updates records in the future.
Go to the Power Platform admin center and select the environment where the solution is installed.
Select Settings, and then select Start Auditing.
Next step
Learn how to customize the Onboarding Buddy app.
See also
Feedback
Coming soon: Throughout 2024 we will be phasing out GitHub Issues as the feedback mechanism for content and replacing it with a new feedback system. For more information see: https://aka.ms/ContentUserFeedback.
Submit and view feedback for