Tutorial: Create an ASP.NET Core Blazor WebAssembly app using Microsoft Dataverse
Use the steps in this tutorial to create a Blazor WebAssembly app that connects to the Dataverse. The focus of this article is to understand the necessary steps to authenticate a user with a specific Dataverse instance and retrieve data.
Blazor WebAssembly is one of two hosting models available for ASP.NET Core Blazor. The other is Blazor Server. For a complete description of the differences, see ASP.NET Core Blazor hosting models.
This tutorial depends on the instructions in the Secure an ASP.NET Core Blazor WebAssembly standalone app with Microsoft Entra ID article. Because Dataverse uses Microsoft Entra ID for authentication, this tutorial describes how to modify the basic app created using the app template provided so that it can connect to Dataverse.
Goal
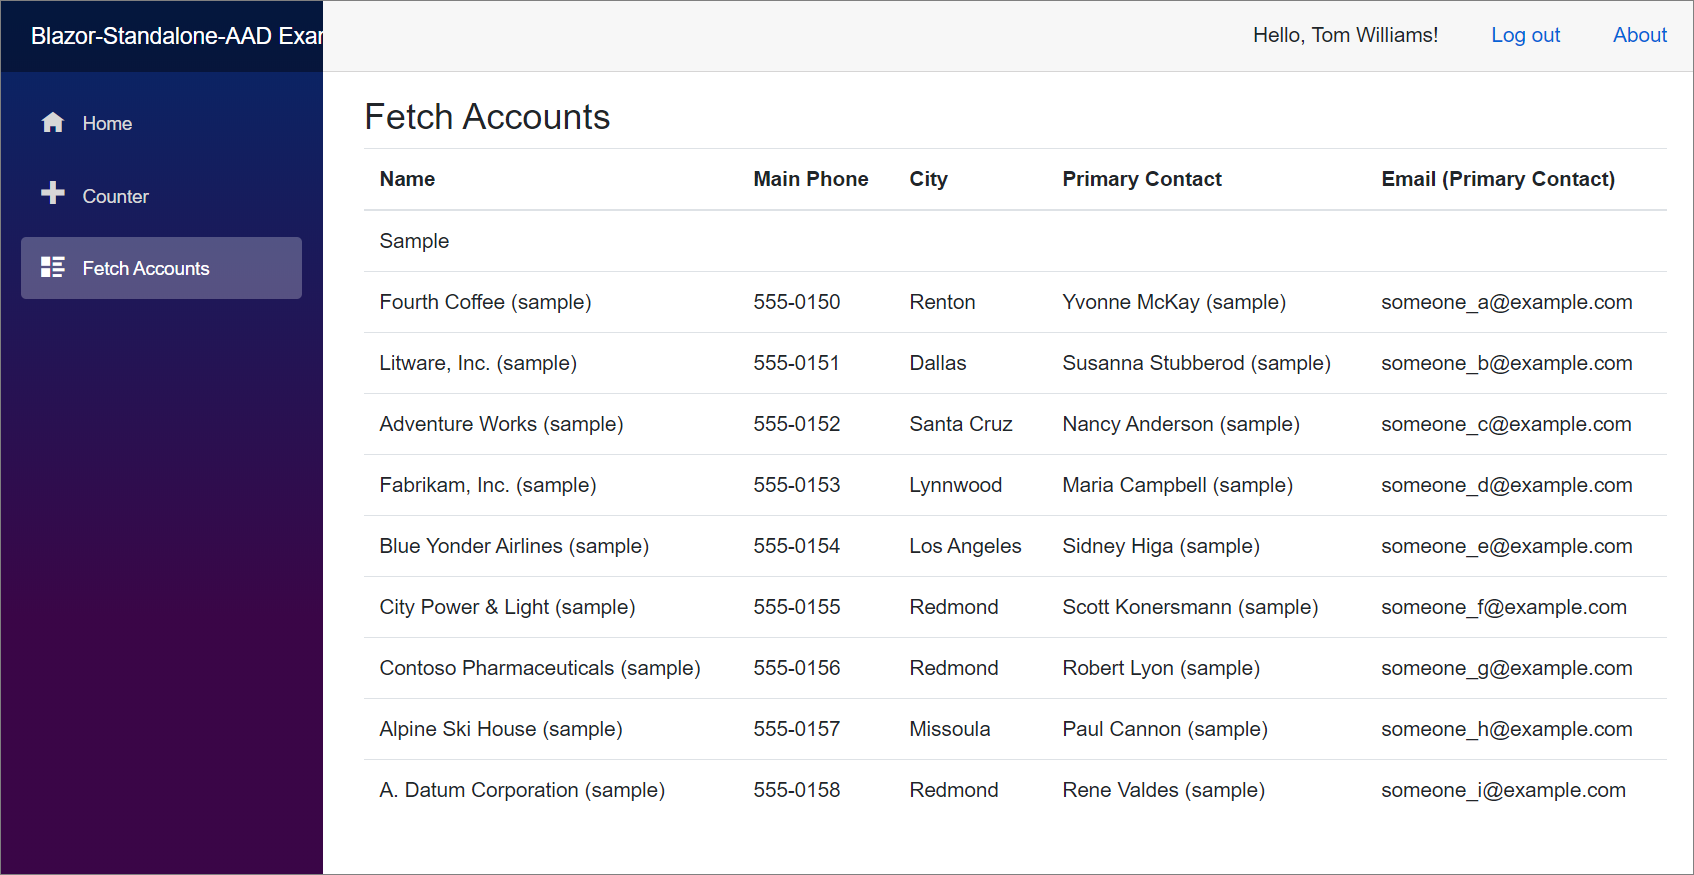
When you complete this tutorial, you have a Blazor WebAssembly app that displays data from the Dataverse Account table that the authenticated user has access to.
Prerequisites
To complete this tutorial, you must have:
- Access to a Dataverse environment with a database
- A Dataverse user with a security role that provides read access to the Account and Contact tables
- Understanding of the C# programming language
- Understanding of ASP.NET Core Blazor is helpful but not required
- The latest version of Visual Studio 2022 with the ASP.NET and web development workload installed.
Step 1: Verify prerequisites and information about the database
Let's make sure that your environment is configured properly, and you understand where to perform the actions in Step 2.
Verify Dataverse database
Sign in to Power Apps.
Select Solutions in the navigation pane.

If you don't see a list of installed solutions, use the environment selector at the top to choose a different environment that has a database. Otherwise create a new environment.
Get the Dataverse Web API URI
You need the instance Web API Service Root URL. This URL is found on the Developer Resources page of your Dataverse environment.
Follow the instructions found in View or download developer resources to copy the Url.
It looks something like this: https://yourorgname.api.crm.dynamics.com/api/data/v9.2/
Navigate to the Microsoft Entra ID portal
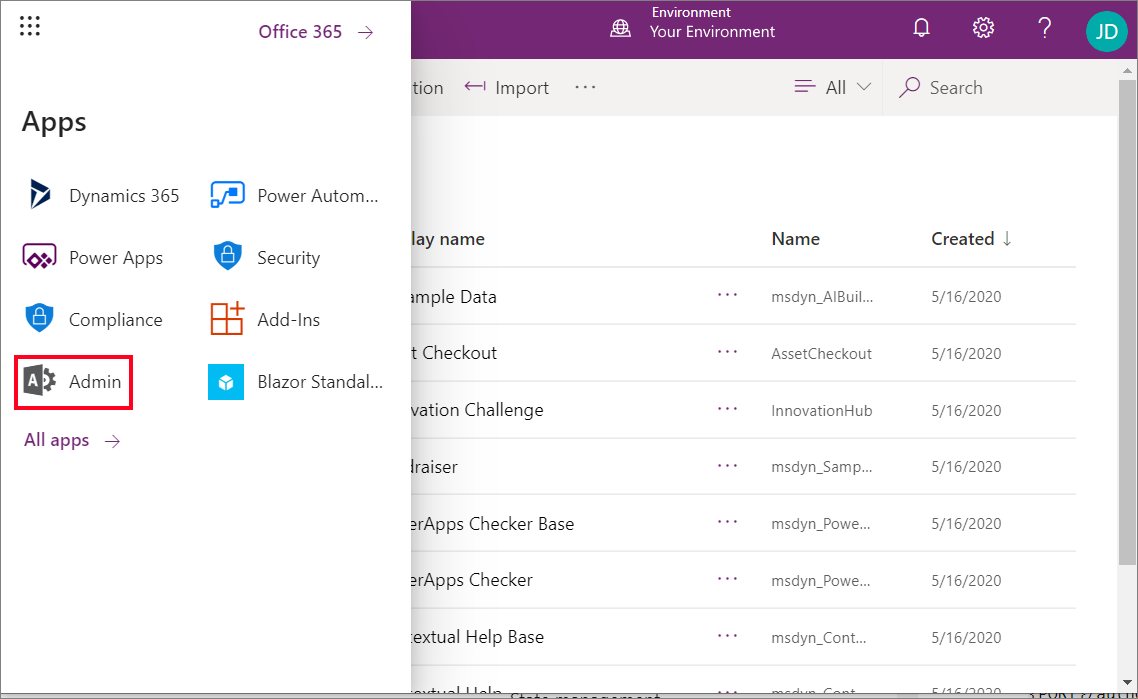
Sign in to Power Apps.
Select the 'waffle' icon at the top left, and select Admin.
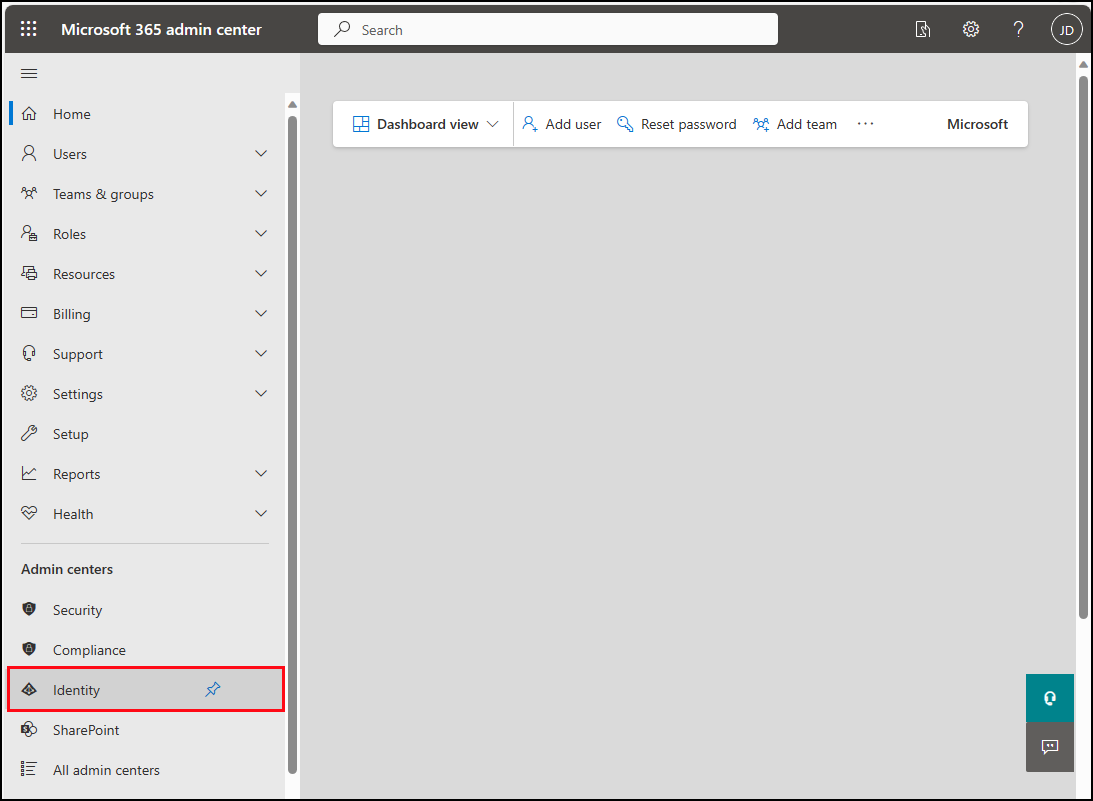
In the left navigation of the Microsoft 365 admin center, select Show all and select Identity.
In the Microsoft Entra admin center, expand the Applications node in the left navigation pane and select App registrations.
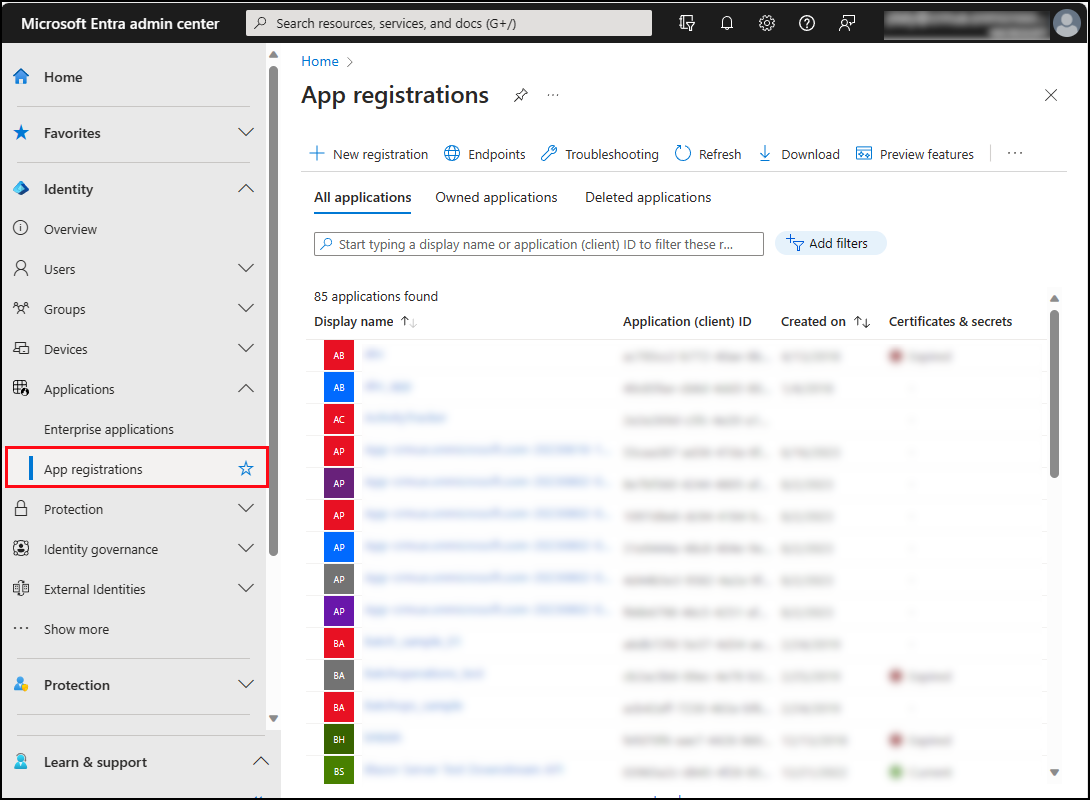
This is where you will start step 2.
Step 2: Create a Blazor WebAssembly standalone app using Microsoft Entra ID for authentication
The Secure an ASP.NET Core Blazor WebAssembly standalone app with Microsoft Entra ID article provides a complete set of instructions to create the app.
These steps describe how to create an app registration in Microsoft Entra ID and run a .NET Core CLI command to generate the scaffold for the basic app with support for Microsoft Entra ID authentication.
Note
These instructions use the .NET Core CLI command to generate the app. There is a Visual Studio project template to create a Blazor WebAssembly app, but this tutorial hasn't been verified using that template.
Go to Secure an ASP.NET Core Blazor WebAssembly standalone app with Microsoft Entra ID and follow the instructions there to generate the basic app project.
Verify that the app runs
After completing the steps in Secure an ASP.NET Core Blazor WebAssembly standalone app with Microsoft Entra ID, you should be able to press F5 in Visual Studio to run the app.
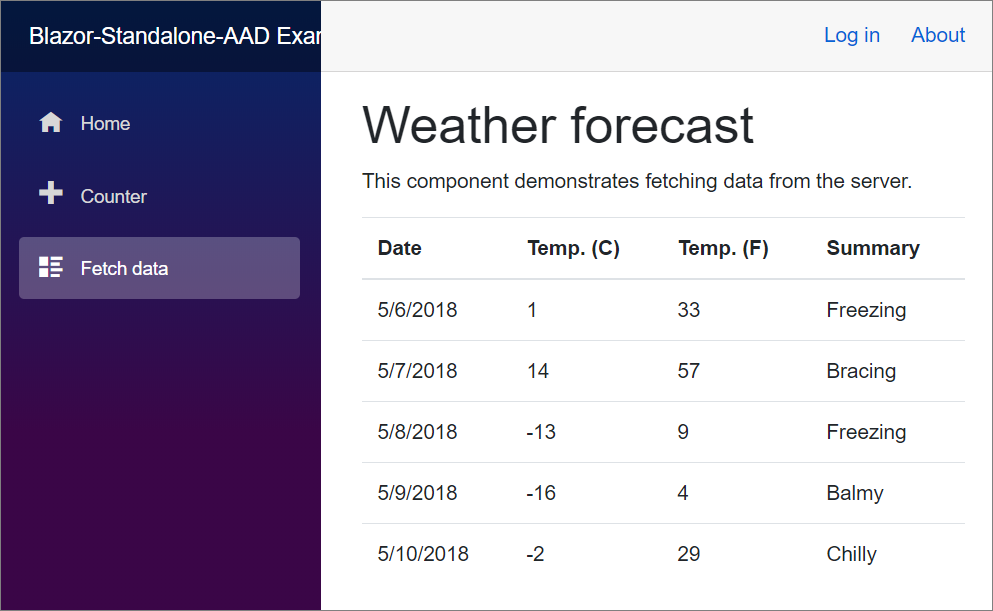
At this point, all the capabilities of the app work whether you log in or not. Only members of the Microsoft Entra ID tenant can sign in.
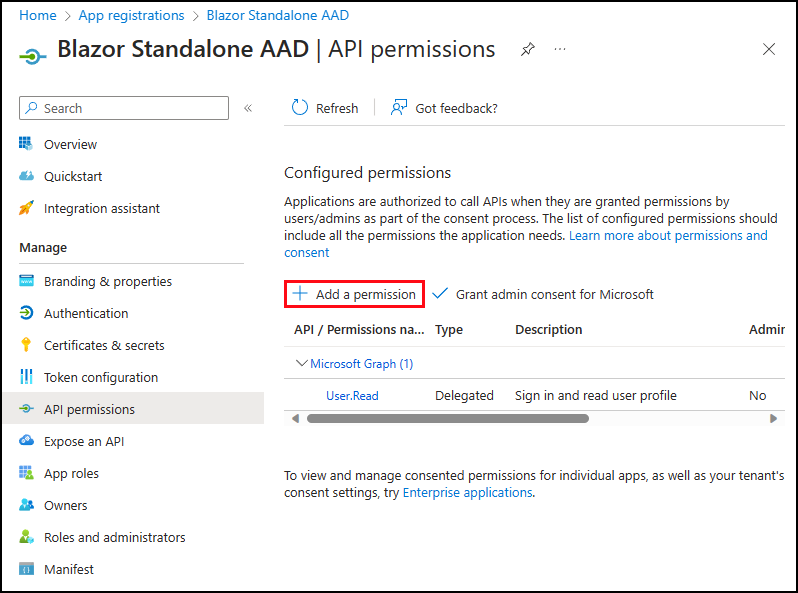
Step 3: Grant API permissions
To connect to Dataverse, you must configure permissions for the app to connect.
Return to your app registration in Microsoft Entra ID, In the API permissions section, select Add a permission.
In the Request API permissions area, select APIs my organization uses and search for Dataverse.

Select Dataverse.
Select the user_impersonation permission
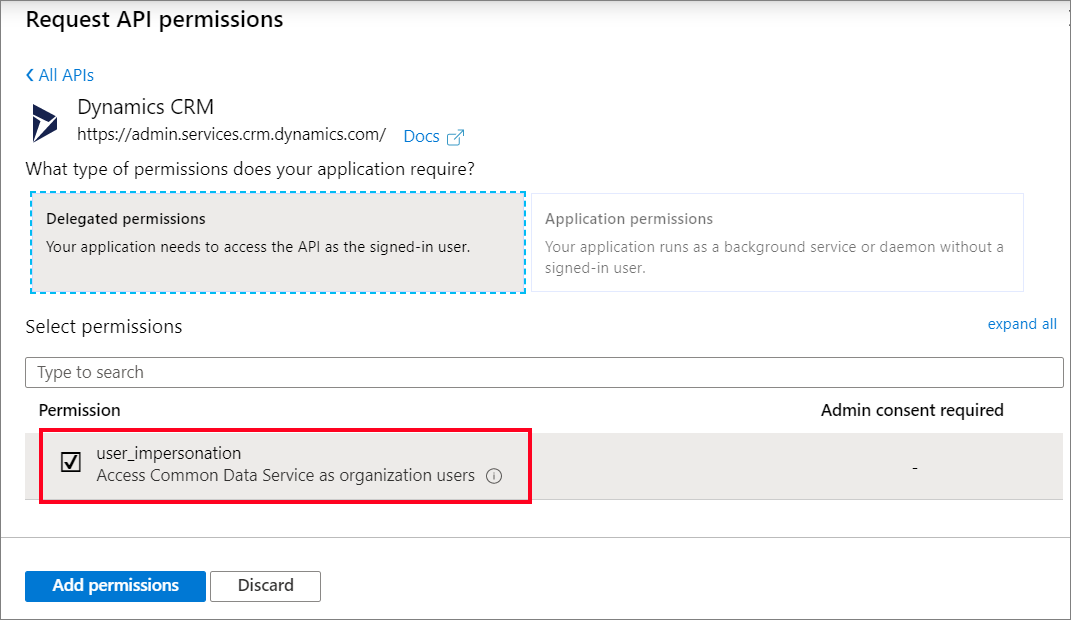
Note
Dynamics CRM, Common Data Service, and Dataverse refer to the same service.
Select Add permissions.
(Optional) For the Configured permissions, select Grant Admin consent for [Your Microsoft Entra ID tenant name]. In the screenshot below the tenant name is 'Default Directory'. Yours may be different.
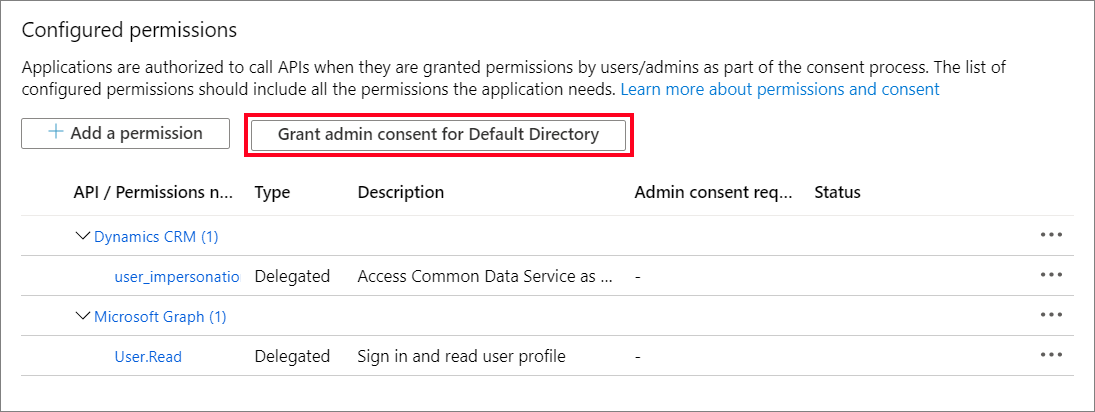
If you don't grant admin consent here, you have the option when you log in to the application next time.
Step 4: Apply code changes
Apply changes to the following files to enable displaying Dataverse data in the application.
\wwwroot\appsettings.json
Apply the changes in the following After tab to add configuration data for your connection to Dataverse.
22222222-2222-2222-2222-222222222222represents your tenant ID.11111111-1111-1111-1111-111111111111represents the application (client) ID value you created in your application registration.- Make sure to replace
https://yourorg.api.crm.dynamics.comwith the URL you copied earlier.
{
  "AzureAd": {
    "Authority": "https://login.microsoftonline.com/22222222-2222-2222-2222-222222222222",
    "ClientId": "11111111-1111-1111-1111-111111111111",
    "ValidateAuthority": true
  }
}
Program.cs
Install the
Microsoft.Extensions.HttpNuGet package.- In the solution explorer, right-click the project and select Manage NuGet Packages....
- Select Browse and search for
Microsoft.Extensions.Http. - Install the latest version of the package.

Replace the generated code in the Before tab with the code in the After tab.
BlazorSampleis the name of the project you created, so it varies.
using Microsoft.AspNetCore.Components.Web;
using Microsoft.AspNetCore.Components.WebAssembly.Hosting;
using BlazorSample;

var builder = WebAssemblyHostBuilder.CreateDefault(args);
builder.RootComponents.Add<App>("#app");
builder.RootComponents.Add<HeadOutlet>("head::after");

builder.Services.AddScoped(sp => new HttpClient { BaseAddress = new Uri(builder.HostEnvironment.BaseAddress) });

builder.Services.AddMsalAuthentication(options =>
{
    builder.Configuration.Bind("AzureAd", options.ProviderOptions.Authentication);
    options.ProviderOptions.DefaultAccessTokenScopes
        .Add("https://graph.microsoft.com/User.Read");
});

await builder.Build().RunAsync();
Add \Pages\FetchAccounts.razor
This is a new page that displays the account information.
In solution explorer, right select Pages and select Add > Razor Component… from the context menu and name it
FetchAccounts.razor.Replace the code in the file with the following code:
@page "/fetchaccounts"
@using Microsoft.AspNetCore.Components.WebAssembly.Authentication
@using System.Net.Http.Headers
@using System.Net.Http.Json
@using Microsoft.Extensions.Logging;
@using System.Text.Json.Serialization;
@inject IAccessTokenProvider TokenProvider
@inject IHttpClientFactory ClientFactory
@inject ILogger<FetchAccounts> logger;

<AuthorizeView>
    @*Only show the list if the user is signed in and authorized*@
    <Authorized>
        <h3>Fetch Accounts</h3>

        @if (accounts != null)
        {
            <table class="table">
                <thead>
                    <tr>
                        <th>Name</th>
                        <th>Main Phone</th>
                        <th>City</th>
                        <th>Primary Contact</th>
                        <th>Email (Primary Contact)</th>
                    </tr>
                </thead>
                <tbody>
                    @foreach (Account account in accounts.value)
                    {
                        <tr id="@account.accountid">
                            <td>
                                @((account.name != null)
                                ? account.name
                                : string.Empty)
                            </td>
                            <td>
                                @((account.telephone1 != null)
                                ? account.telephone1
                                : string.Empty)
                            </td>
                            <td>
                                @((account.address1_city != null)
                                ? account.address1_city
                                : string.Empty)
                            </td>
                            <td>
                                @((account.primarycontactid != null)
                                ? (account.primarycontactid.fullname != null
                                    ? account.primarycontactid.fullname
                                    : string.Empty)
                                : string.Empty)
                            </td>
                            <td>
                                @((account.primarycontactid != null)
                                ? (account.primarycontactid.emailaddress1 !=null
                                    ? account.primarycontactid.emailaddress1
                                    : string.Empty)
                                : string.Empty)
                            </td>
                        </tr>
                    }
                </tbody>
            </table>
        }
        else
        {
            <p><em>@message</em></p>
        }
    </Authorized>
    <NotAuthorized>
        <h3>Authentication Failure!</h3>
        <p>You're not signed in.</p>
    </NotAuthorized>
</AuthorizeView>


@code {

    //The collection of Account records to display
    private AccountCollection accounts;

    //An informational message
    private string message = "Loading...";

    //Contains data about an error returned from the Web API
    private Error error;

    // Method invoked when the component is ready to start, having received its initial parameters from its parent in the render tree.
    // Override this method if you will perform an asynchronous operation and want the component to refresh when that operation is completed.
    protected override async Task OnInitializedAsync()
    {
        // Tries to get an access token for the current user with the default set of permissions.
        var tokenResult = await TokenProvider.RequestAccessToken();

        // If the token request was successful
        if (tokenResult.TryGetToken(out var token))
        {
            //Creates an HttpClient based on the named definition found in Program.Main
            var client = ClientFactory.CreateClient("DataverseClient");

            //Prepare the request to get the data
            var request = new HttpRequestMessage()
            {
                Method = HttpMethod.Get,
                RequestUri = new Uri($"{client.BaseAddress}accounts?" +
                "$select=name,telephone1,address1_city&" +
                "$expand=primarycontactid($select=fullname,emailaddress1)")
            };
            //Add the access token
            request.Headers.Authorization = new AuthenticationHeaderValue("Bearer", token.Value);
            //Specify a JSON result is expected
            request.Headers.Accept.Add(new MediaTypeWithQualityHeaderValue("application/json"));
            //Limit the number of results to 10
            request.Headers.Add("Prefer", "odata.maxpagesize=10");

            //Send the request
            var response = await client.SendAsync(request);

            if (response.IsSuccessStatusCode)
            {
                //Parse the JSON returned into a strongly typed AccountCollection
                accounts = await response.Content.ReadFromJsonAsync<AccountCollection>();
            }
            else
            {
                //Parse the JSON returned into a strongly typed Error
                error = await response.Content.ReadFromJsonAsync<Error>();
                error.statuscode = (int)response.StatusCode;
                error.reason = response.ReasonPhrase;
                //Display a message to the user
                message = "An error occurred.";
                //Log the details so they can be seen in the browser console
                logger.LogError($"{error.detail.message}");

            }

        }
        else
        {
            // Notify user that the token request was not successful
            message = "There was a problem authenticating.";
        }

    }


    // The result will be a JSON object with an array of entities set to the value property
    public class AccountCollection
    {
        public Account[] value { get; set; }
    }

    //Just the properties of the Account EntityType used for this sample
    // See https://learn.microsoft.com/power-apps/developer/data-platform/webapi/reference/account
    public class Account
    {

        public Guid accountid { get; set; }

        public string name { get; set; }

        public string telephone1 { get; set; }

        public string address1_city { get; set; }

        public Contact primarycontactid { get; set; }

    }

    //Just the properties of the Contact EntityType that are expanded from the Account entity
    // See https://learn.microsoft.com/power-apps/developer/data-platform/webapi/reference/contact
    public class Contact
    {

        public string fullname { get; set; }

        public string emailaddress1 { get; set; }
    }

    // Contains the error data returned by the Web API and the HttpMessageResponse
    public class Error
    {
        [JsonPropertyName("error")]
        public ErrorDetail detail { get; set; }
        public int statuscode { get; set; }
        public string reason { get; set; }

    }

    //Contains data from the Web API
    //See https://learn.microsoft.com/powerapps/developer/data-platform/webapi/compose-http-requests-handle-errors#parse-errors-from-the-response
    public class ErrorDetail
    {
        public string code { get; set; }
        public string message { get; set; }

    }
}
This code does the following:
- Ensures that only authenticated users can view the page with data.
- Defines a table to display Account data after it's retrieved.
- Requests an accesstoken and then uses that token with a HttpRequestMessage to retrieve data from Dataverse.
- Defines classes to enable typed data when the JSON returned from the service is deserialized.
\Shared\NavMenu.razor
Edit this file to add the fetchaccounts razor component page.
Add this node where ever you like within the <nav class="flex-column"> element.
<div class="nav-item px-3">
   <NavLink class="nav-link" href="fetchaccounts">
         <span class="oi oi-list-rich" aria-hidden="true"></span> Fetch Accounts
   </NavLink>
</div>
Step 5: Verify it works
In Visual Studio, press F5 to launch the app with the code changes.
Before logging in, navigate to Fetch Accounts. You should expect to see the failure notification.
Sign in as a user who has access to the Dataverse data.
Note
Users can expect to see a dialog like this the first time they log in:

You must click Accept to continue.
Navigate to Fetch Accounts and verify that the Account data is displayed as expected:
See also
Use the global Discovery service from a Blazor WebAssembly
Quickstart: Blazor Server Web API sample (C#)
Secure an ASP.NET Core Blazor WebAssembly standalone app with Microsoft Entra ID
Walkthrough: Register an app with Microsoft Entra ID
Use OAuth with Dataverse
Use the Dataverse Web API
Feedback
Coming soon: Throughout 2024 we will be phasing out GitHub Issues as the feedback mechanism for content and replacing it with a new feedback system. For more information see: https://aka.ms/ContentUserFeedback.
Submit and view feedback for