Create a solution
To locate and work with just the components you’ve customized, create a solution and do all your customization there. Then, always remember to work in the context of the custom solution as you add, edit, and create components. This makes it easy to export your solution so that it can be backed up or imported to another environment.
Note
For information about implementing healthy application lifecycle management (ALM) using solutions, see the Power Platform ALM guide.
To create a solution:
Sign in to Power Apps and select Solutions from the left navigation. If the item isn’t in the side panel pane, select …More and then select the item you want.
Select New solution and then complete the required columns for the solution.
Field Description Display Name The name shown in the list of solutions. You can change this later. Name The unique name of the solution. This is generated using the value you enter in the Display Name column. You can edit this before you save the solution, but after you save the solution, you can’t change it. Publisher You can select the default publisher or create a new publisher. We recommend that you create a publisher for your organization to use consistently across your environments where you will use the solution. See Solution publisher later in this article. Version Enter a number for the version of your solution. This is only important if you export your solution. The version number will be included in the file name when you export the solution. Select Save.
After you save the solution, you may wish to add information to columns that aren’t required. These steps are optional. Use the Description column to describe the solution and choose an HTML web resource as a Configuration Page for the solution. The configuration page is typically used by ISVs who distribute solutions. When this is set, a new Configuration node appears below the Information node to display this web resource. Developers will use this page to include instructions or controls to allow you to set configuration data or launch their solution.
Add solution components
After you’ve created your solution, it won’t contain any solution components. You can create new components to be added to the solution or add existing components to your new solution.
Create components in a solution
You can use the New command to create different types of components. This takes you to a different create experience depending on the component type that you choose. After you finish creating the component, it will be added to the solution.

Add an existing component to a solution
With solutions that are unmanaged and not the default one, you can use the Add existing command to bring in components that aren’t already in the solution.

Note
The list of existing components will be different depending on the version and solutions imported in your environment.
When you add an existing table, rather than select Include all components or Include table metadata, use the Select components option to only add the table components that have been updated. With solution segmentation, you export solution updates with selected table assets, such as table columns, forms, and views, rather than entire tables with all the assets. Create a segmented solution with table assets
Many of the customizations you’ll want to do will involve tables. You can use the table filter to show a list of all the tables in the current solution that can be customized in some way. Once you drill into a table, you can see the components that are part of the table as shown with the account table in the following screenshot.

Publish changes
When you make unmanaged changes in an environment, some components, such as forms, tables, model-driven apps, site maps, and views are saved in an unpublished state. The publish action promotes these changes to an active state and makes them available to end users and for export.
Publish your customizations
Select Solutions from the left navigation. If the item isn’t in the side panel pane, select …More and then select the item you want.
Select the solution that you want to publish to open it.
From the list of commands, select Publish all customizations.

Important
Preparing customizations may take some time. If you see a message that the browser page has become unresponsive, wait for the page to become responsive, and don't close it.
Solution publisher
Every app you create or customization you make is part of a solution. Every solution has a publisher. You specify the publisher when you create a solution.
The solution publisher indicates who developed the app. For this reason, you should create a solution publisher that is meaningful. You can view the solution publisher for a solution by selecting Settings from the Solutions area in Power Apps. For more information about the solution publisher, see Solution publisher in the Power Platform ALM guide.
Note
The Common Data Services Default Solution is associated with the Microsoft Dataverse Default Publisher. The default customization prefix will be randomly assigned for this publisher, for example it could be cr8a3. This means that the name of every new item of metadata created for your organization will have this prepended to the names used to uniquely identify the items.
Create a solution publisher
- In Power Apps, select Solutions. If the item isn’t in the side panel pane, select …More and then select the item you want.
- On the command bar, select New solution, in the right pane select the Publisher drop down list, and then select + Publisher.

- In the New Publisher form, enter the required and optional information:
- Display Name. Enter the display name for the publisher.
- Name. Enter the unique name for the publisher.
- Prefix. Enter the publisher prefix you want.
- Option Value Prefix. This column generates a number based on the publisher prefix. This number is used when you add options to choices and provides an indicator of which solution was used to add the option.
- Contact Details. Optionally, you can add contact and address information.
- Select Save and Close.
Note
Do not use _upgrade as part of the solution name. _upgrade is an internal reserved word for the solution upgrade process.
Change a solution publisher
You can change a solution publisher for an unmanaged solution by following these steps:
- In Power Apps, select Solutions, select … next to the solution you want, and then select Settings. If the item isn’t in the side panel pane, select …More and then select the item you want.
- In the Solution settings pane, select Edit publisher.
- Edit the Display name and Prefix columns to the values you want. The Option Value Prefix column generates a number based on the publisher prefix. This number is used when you add options to choices and provides an indicator of which solution was used to add the option.
- In addition to the prefix, you can also change the solution publisher display name, contact information, and address in the Contact Details section.
- Select Save and Close.
Create a segmented solution
Use solution segmentation so that you only include table components that are updated when you distribute solution updates. More information: Use segmented solutions in the Power Platform ALM guide
Create a segmented solution with table assets
To create a segmented solution, start with creating an unmanaged solution and add only the components that you've updated. The wizard-like setup takes you step by step through the process of adding table assets.
For example, imagine that you've created a new custom table that doesn't exist in any other environment named Custom table and also added a new column named topten for the account table. To create a segmented solution, follow these steps.
Go to Power Apps and then select Solutions. If the item isn’t in the side panel pane, select …More and then select the item you want.
Select New solution and create a solution. Enter information in the required columns. Select Create.
Open the solution you created. On the command bar, select Add Existing, and then select Entity.
In the Add existing entities pane, select one or more tables you want to add to the solution. For example, select Account and Custom table. Select Next.
In the Select Entities pane, you can choose from the assets to include:
Include all components. This option includes all components and metadata associated with the table. It can include other tables or table components such as business process flows, reports, connections, and queues.
Include entity metadata. This option includes only the metadata associated with the table. Metadata includes the table attributes, such as auditing, duplicate detection, or change tracking.
Select components. This option lets you individually select each component that’s associated with the table, such as columns, relationships, business rules, views, forms, and charts.
Don't include any components.
For this example, because Custom table has never been imported into the target environment, next to Custom table select Include all components. Under Account, choose Select components.

Since only the topten custom column is new to the account table, select Top Ten, and then select Add.
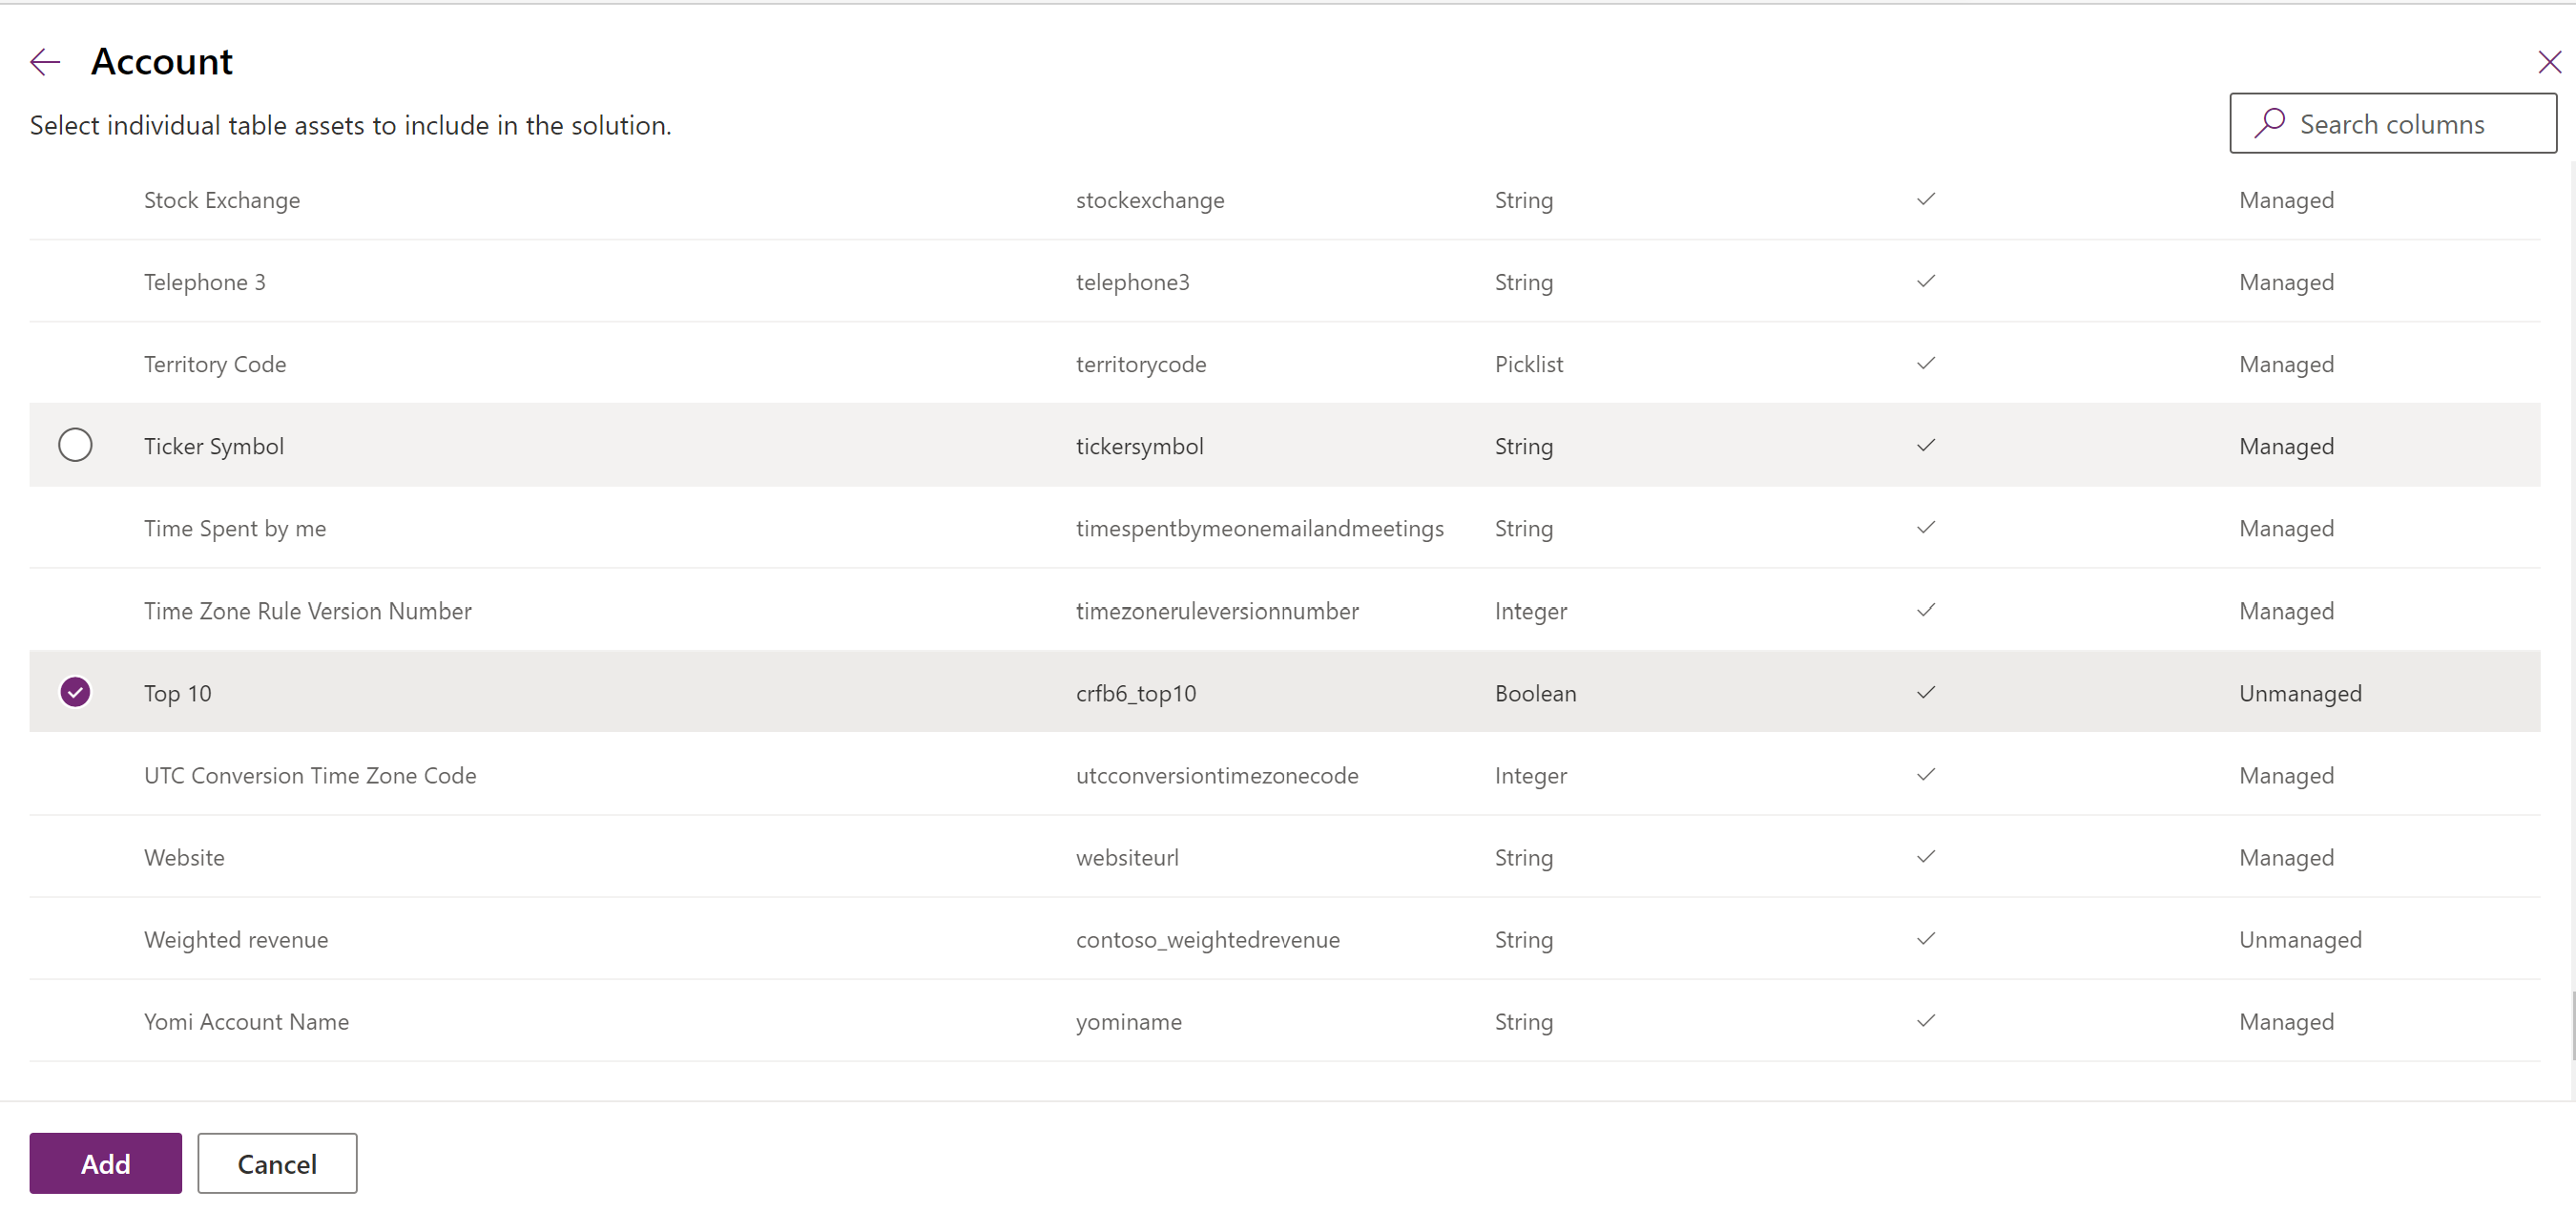
Select Add to add the components to the solution.
Create a segmented solution using solution explorer
The following illustrations provide an example of creating a segmented solution by choosing table assets from the Account, Case, and Contact tables.
Note
The case table is included with some Dynamics 365 applications, such as Dynamics 365 Customer Service.
Start by opening an unmanaged solution you created. Choose the table component.

Then, select the solution components.

Follow the wizard. In Step 1, starting in alphabetical order, select the assets for the first table, the Account table, as shown here.

Open the Fields tab and select the Account Number column.

In Step 2, for the Case table, add all assets.

In Step 3, add the Anniversary column for the Contact table.

As a result, the segmented solution that’s created contains three tables, Account, Case, and Contact. Each table contains only the assets that were chosen.

Limitations
- Solution size is limited to 32 MB.
- Number of solutions is limited by Microsoft Dataverse capacity.
- Number of objects in a solution is limited by Dataverse capacity.
See also
Use solutions
For developers: Create, export, or import an unmanaged solution
Feedback
Coming soon: Throughout 2024 we will be phasing out GitHub Issues as the feedback mechanism for content and replacing it with a new feedback system. For more information see: https://aka.ms/ContentUserFeedback.
Submit and view feedback for