Disable AutoSave in a model-driven app
AutoSave helps app users focus on their work without having to manage saving data in the form. Most people appreciate not having to explicitly save data each time they update a row, but some organizations might have customizations that were designed expecting an explicit save. For these organizations there are options to manage how AutoSave is applied.
How AutoSave works
By default all main forms for Updated tables and classic tables have AutoSave enabled. After a row is created (initially saved), any changes made to a form are automatically saved 30 seconds after the change is made. If no changes are made in the form, the automatic save doesn't occur while the form is open. After a change is made, the 30-second period before an AutoSave begins again. If someone else has updated the same row while you're editing it, those changes are retrieved and displayed in the form when AutoSave occurs.
With AutoSave enabled, the save button only appears for the initial save of the row. After the row is created, the save button in the command bar isn't shown, but you can see a ![]() button in the lower right corner that shows if there are any unsaved changes. This control is also displayed if AutoSave is disabled.
button in the lower right corner that shows if there are any unsaved changes. This control is also displayed if AutoSave is disabled.
You can select this button to save the row and refresh data in the form immediately. When AutoSave is enabled the row is saved whenever you navigate away from a row or close a separate window displaying a row. There's no need for the Save & Close button that appears in forms for tables that aren't updated.
Should you disable AutoSave?
If you have plug-ins, workflows, or form scripts that execute when a row is saved, they'll run each time AutoSave occurs. This might lead to undesirable behaviors if these extensions weren't designed to work with AutoSave. Whether AutoSave is enabled or not, plug-ins, workflows, and form scripts should be designed to look for specific changes, and shouldn't execute indiscriminately for each save event.
If you have auditing configured for a table, each save is treated like a separate update. If someone lingers on a form with unsaved changes for more than 30 seconds, you'll see an another entry only if they add more data after the AutoSave is performed. If you have reports that depend on auditing data and treat each save as an individual "touch" of a row, you might see an increase in the frequency of touches. If you're using this approach, you should consider that individual user behaviors make it an unreliable metric with or without AutoSave enabled.
Disable AutoSave for the organization
If you determine that AutoSave causes problems with extensions you're using, Power Platform admins can disable it for the environment. There's no setting to disable AutoSave for individual tables or forms.
- Sign into the Power Platform admin center, go to Environments, and then open the environment you want.
- Select Settings on the command bar.
- Expand Product, and then select Behavior.
- Under Basic behavior, for the Auto save, select Off.
Disable AutoSave for a form
If you want to disable AutoSave for specific table forms, you can add code to the OnSave event in a table.
Note
By using this method, auto-save isdisabled for the form, but data will still be saved when you select the ![]() button in the lower-right corner. If you attempt to navigate away from a form or close a form where data has been changed you get a prompt to save changes before you're allowed to navigate away or close the form.
button in the lower-right corner. If you attempt to navigate away from a form or close a form where data has been changed you get a prompt to save changes before you're allowed to navigate away or close the form.
Using the below procedure causes the Save and close button on the form to not work, as it calls preventDefault on saveMode 2, which references Save and Close. You can remove the getSaveMode() == 2 check below to avoid this, but then the form autosaves when you attempt to navigate away from the form or close the form where data has changed. The Save and Continue button also doesn't not work for this reason.
Sign in to Power Apps.
Select Tables on the left navigation pane, select the table that you want, and then select the Forms area. If the item isn’t in the side panel pane, select …More and then select the item you want.
You can also make adjustments to the tables from within a solution. To do this, select Solutions on the left pane, select the table, and then select the Forms area. If the item isn’t in the side panel pane, select …More and then select the item you want.
Open the form you want to edit.
Select Switch to classic to edit the form in the classic form designer.
Create a JavaScript web resource and add it to the form:
In the form editor, in the Form group, choose Form Properties.
On the Events tab, below Form Libraries choose Add.
In the Look Up Row dialog box, choose New.
Enter the following information in the web resource form:
Title Reference Name preventAutoSave Display Name Prevent AutoSave Type Script (JScript) Next to the Type column, choose Text Editor.
In the Source column, paste the following code:
function preventAutoSave(econtext) {
    var eventArgs = econtext.getEventArgs();
    if (eventArgs.getSaveMode() == 70 || eventArgs.getSaveMode() == 2) {
        eventArgs.preventDefault();
    }
}
Choose OK to close the text editor.
Choose Save to save the web resource and then close the web resource window.
In the Look Up Row dialog the new web resource you created will be selected. Choose Add to close the dialog.
Configure the
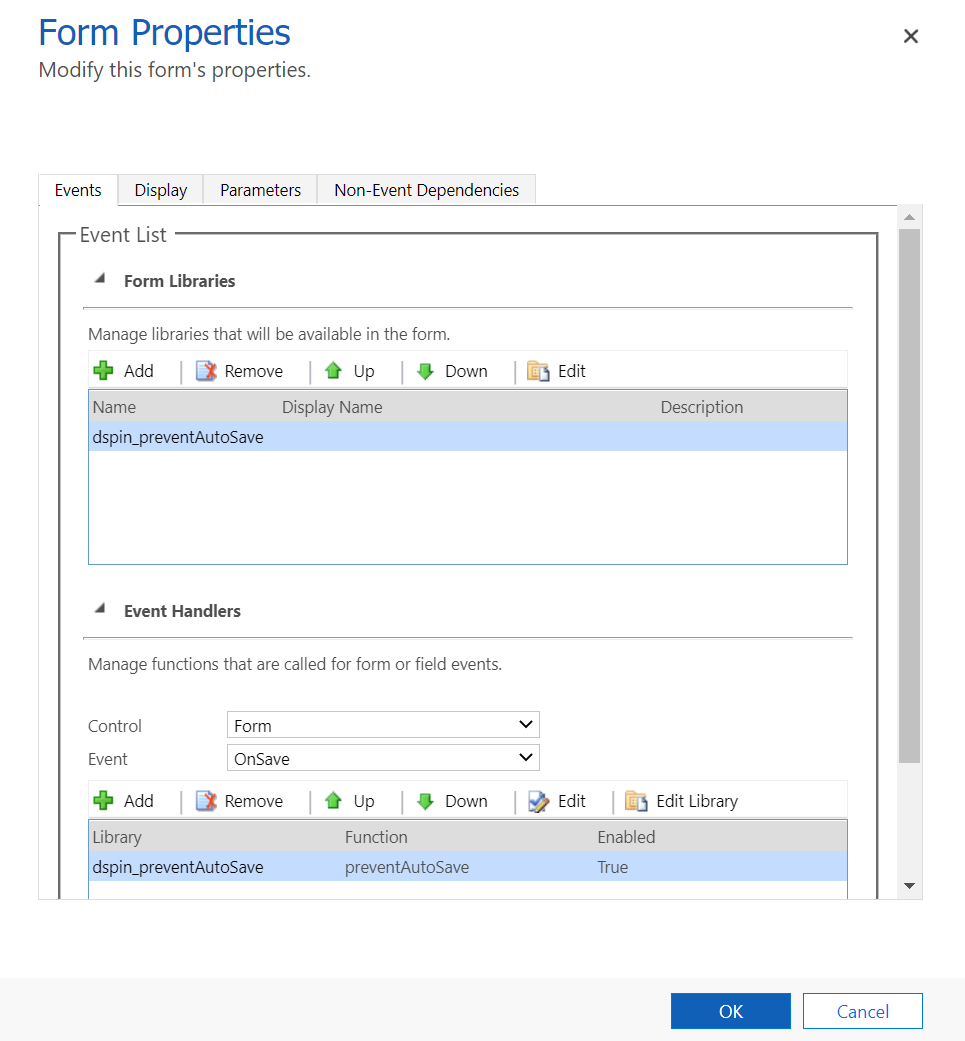
OnSaveevent:In the Form Properties window, in the Event Handlers section, set Event to OnSave.
Select Add.
In the Handler Properties window, set Library to the web resource you added in the previous step.
Type '
preventAutoSave' in the Function column. This is case sensitive. Don't include quotation marks.Make sure that Enabled is checked.
Check Pass execution context as first parameter.
Important
If you don't do this the script will not work.
The Handler Properties dialog should look like this. The customization prefix: "new_" might vary based on the customization prefix set for the default publisher for your organization.

Select OK to close the Handler Properties dialog.
If there are any other event handlers for the
OnSaveevent, use the green arrows to move this one to the top.The Form Properties should display as follows. Note in the example shown here, the update has taken place from within a solution and as a result the publisher prefix (dspin_) isn't the same as the one provided by the default publisher (new_). This is because a different publisher is used for the solution.
Select OK to close the Form Properties dialog.
Select Save and Close to close the form.
In the solution explorer, select Publish All Customizations.
After you apply this script to the OnSave event, when users edit a row using this form the message unsaved changes appears in the bottom right corner of the form just as it would if AutoSave wasn't disabled. But this message won't go away until people select the ![]() button next to it.
button next to it.
Next steps
Feedback
Coming soon: Throughout 2024 we will be phasing out GitHub Issues as the feedback mechanism for content and replacing it with a new feedback system. For more information see: https://aka.ms/ContentUserFeedback.
Submit and view feedback for