Configure UI Controls
Tip
Check out our newest documentation on extension development using the Azure DevOps Extension SDK.
This example shows the steps before you can add a control to the hub that we created in Add a hub.
Get the Client SDK and add it to your project.
sdk/scripts/VSS.SDK.jsReference the SDK from your HTML page.
 <head>
 	<title>Sample app</title>
 	<script src="sdk/scripts/VSS.SDK.js"></script>
 </head>
Add a div element in the body of the page to contain the grid.
<div id="grid-container"></div>In the script element, before calling
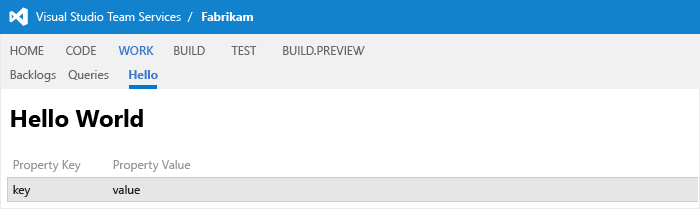
VSS.notifyLoadSucceeded(), initialize the VSS SDK.// Sets up the initial handshake with the host frame VSS.init({ // Our extension explicitly notifies the host when we're done loading explicitNotifyLoaded: true, // We are using some Azure DevOps Services APIs, so we need the module loader to load them in usePlatformScripts: true, usePlatformStyles: true });Create a grid and load it with data. (Replace your current call to
VSS.notifyLoadSucceeded()with the following snippet)// Load Azure DevOps Services controls VSS.require(["VSS/Controls", "VSS/Controls/Grids"], function (Controls, Grids) { // Initialize the grid control with two columns, "key" and "value" var dataSource = []; dataSource.push({key: "key", value: "value"}); Controls.create(Grids.Grid, $("#grid-container"), { height: "1000px", // Explicit height is required for a Grid control columns: [ // text is the column header text. // index is the key into the source object to find the data for this column // width is the width of the column, in pixels { text: "Property key", index: "key", width: 150 }, { text: "Property value", index: "value", width: 600 } ], // This data source is rendered into the Grid columns defined above source: dataSource }); VSS.notifyLoadSucceeded(); });Refresh the page to see the grid.