Create custom contextual tabs on the ribbon
This sample accomplishes the following tasks using Office ribbon APIs.
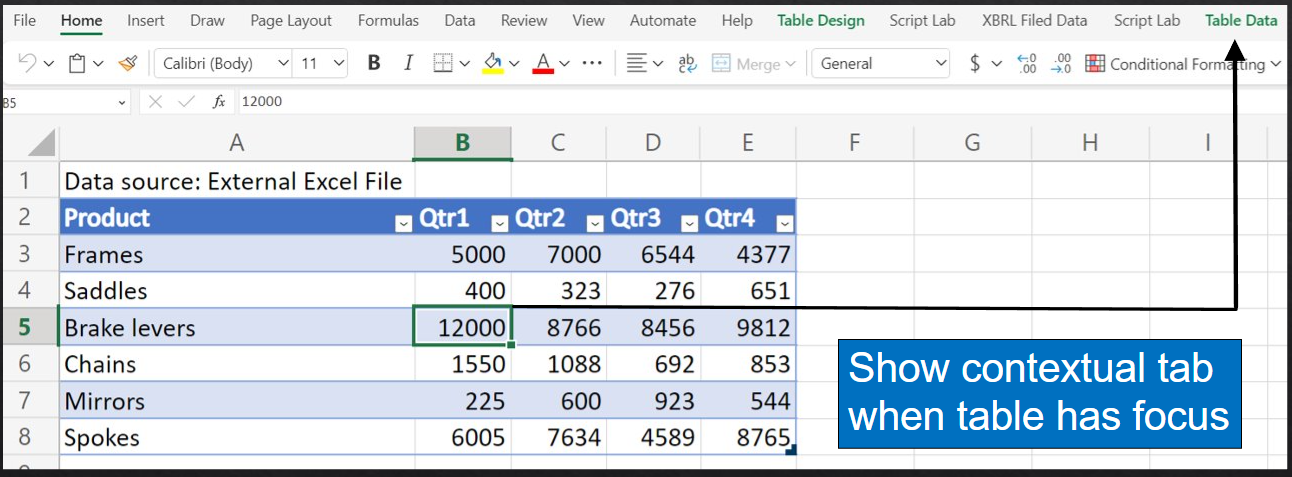
- Creates a custom contextual tab named Table Data.
- Creates a table in Excel. When the focus is inside the table, the custom tab is displayed.
- When the focus is outside the table, the custom tab is hidden.
Applies to
- Excel on Windows
- Excel on the web
- PowerPoint on Windows
Prerequisites
- Microsoft 365
Run the sample
Run this sample in Excel in a browser. The add-in web files are served from this repo on GitHub.
Download the manifest.xml file from this sample to a folder on your computer.
Open Office on the web.
Choose Excel, and then open a new document.
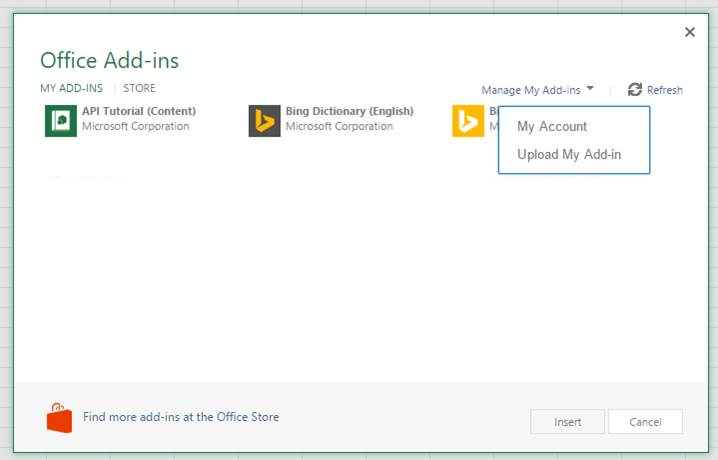
Open the Insert tab on the ribbon and choose Office Add-ins.
On the Office Add-ins dialog, select the MY ADD-INS tab, choose Manage My Add-ins, and then Upload My Add-in.
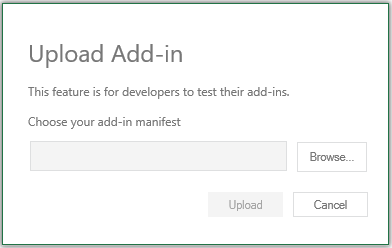
Browse to the add-in manifest file, and then select Upload.
Verify that the add-in loaded successfully. You will see a PnP contextual tabs button on the Home tab on the ribbon.
Take the following actions to try out the add-in and the contextual tab.
- Use the task pane to import data from either the the mock Excel file, or mock SQL Database. Selecting Import data in the task pane creates the sales table.
- Select a cell, or range, inside the sales table to display the Table Data contextual tab on the ribbon.
- On the Table Data contextual tab you can:
- Submit changes you made in the table to the mock data source.
- Refresh the table from the mock data source which overwrites any changes you made.
- Use Show task pane to show the add-in's task pane if it was closed.
- Import data and update the table to use data from the mock Excel file or mock SQL database.
- Select a cell, or range, outside the sales table to hide the Table Data contextual tab.
Key parts of this sample
This sample inserts a table of fictitious sales data for Contoso. The data is pulled from one of two mock data sources: a mock Excel file, or a mock SQL database. The user can select which data source to use either in the task pane, or in the contextual tab.
After the sales table is created, the sample creates a contextual tab named Table Data. When you select any cell or range inside the table, the contextual tab is displayed on the ribbon. When you select any cell or range outside the table, the contextual tab is hidden.
The contextual tab supports commands related to working with the sales data. When you make changes you can submit them and update the mock data source. Or you can refresh the table from the mock data source.
Shared JavaScript runtime
Contextual tabs requires the manifest.xml file to specify loading the shared JavaScript runtime. For more information on configuring the shared runtime, see Configure your Office Add-in to use a shared JavaScript runtime
Describe and update the contextual tab using JSON
The src/commands/ribbonJSON.js file describes the full contextual tab's buttons, groups, and menu items. It returns the JSON from the getContextualRibbonJSON() function and the sample code stores this JSON in a global variable.
Update the contextual tab UI visibility
As buttons, or the tab itself are set to be visible or not, the g.contextualTab global variable is used to always maintain the correct contextual tab state. When the tab needs to be updated on the ribbon (to turn a UI element on or off) a call is made to Office.ribbon.requestUpdate(). This occurs in the setContextualTabVisibility() function in src/utilities/utilities.js.
Handle context changes
When you build your own add-in, you'll need to decide what context determines which tabs or UI elements are shown. For this sample, we want to show the contextual tab when the focus is in the table. Also we want to enable the Refresh and Submit buttons when changes are made to the table.
When the user imports data to create the table, createSampleTable() adds an onSelectionChanged event handler, and onChanged event handler. Later, as the user moves the selection into or out of the table, the onSelectionChanged() function is called, which can display the contextual tab when the selection is inside the table. When the user makes changes to the table, onSelectionChange() is called, and the Refresh and Submit buttons are enabled.
See more details in the following code excerpt, or refer to these functions in the src/utilities/utilities.js file.
async function createSampleTable(mockDataSource) {
  //...//

     //Add event handlers
    salesTable.onSelectionChanged.add(onSelectionChange);
    salesTable.onChanged.add(onChanged);

    //...//
}

/**
 * Handles the onSelectionChange event. If selection is inside the table, the Contoso custom tab is shown.
 * Otherwise the Contoso custom tab is hidden.
 * @param  {} args The arguments for the selection changed event.
 */
function onSelectionChange(args) {
  let g = getGlobal();
  if (g.isTableSelected !== args.isInsideTable) {
    g.isTableSelected = args.isInsideTable;
    setContextualTabVisibility(args.isInsideTable);
  }
}

/**
 * Handles the onChanged event. When data in the sales table is changed,
 * enable the refresh and submit buttons.
 */
function onChanged() {
  let g = getGlobal();
  //check if dirty flag was set (flag avoids extra unnecessary ribbon operations)
  if (!g.isTableDirty) {
    g.isTableDirty = true;

    //Enable the Refresh and Submit buttons
    setSyncButtonEnabled(true);
  }
}
Run the sample from Localhost
If you prefer to host the web server for the sample on your computer, follow these steps.
Open the /src/commands/ribbonJSON.js file.
Edit line 9 to refer to the localhost:3000 endpoint as shown in the following code.
const sourceUrl = "https://localhost:3000";Save the file.
You need http-server to run the local web server. If you haven't installed this yet you can do this with the following command.
npm install --global http-serverUse a tool such as openssl to generate a self-signed certificate that you can use for the web server. Move the cert.pem and key.pem files to the webworker-customfunction folder for this sample.
From a command prompt, go to the web-worker folder and run the following command.
http-server -S --cors . -p 3000To reroute to localhost run office-addin-https-reverse-proxy. If you haven't installed this you can do this with the following command.
npm install --global office-addin-https-reverse-proxyTo reroute run the following in another command prompt.
office-addin-https-reverse-proxy --url http://localhost:3000Follow the steps in Run the sample, but upload the
manifest-localhost.xmlfile for step 6.
Questions and feedback
- Did you experience any problems with the sample? Create an issue and we'll help you out.
- We'd love to get your feedback about this sample. Go to our Office samples survey to give feedback and suggest improvements.
- For general questions about developing Office Add-ins, go to Microsoft Q&A using the office-js-dev tag.
Additional resources
Demonstration video:
Solution
| Solution | Authors |
|---|---|
| Create custom contextual tabs on the ribbon | Microsoft |
Version history
| Version | Date | Comments |
|---|---|---|
| 1.0 | February 11, 2021 | Initial release |
| 1.1 | May 11, 2021 | Removed yo office and modified to be GitHub hosted |
Copyright
Copyright (c) 2021 Microsoft Corporation. All rights reserved.
This project has adopted the Microsoft Open Source Code of Conduct. For more information, see the Code of Conduct FAQ or contact opencode@microsoft.com with any additional questions or comments.