Create a new Azure Mobile App
Log in to the Azure portal. If you do not have an Azure subscription, the free trial or included credits from Visual Studio Dev Essentials will more than suffice for completing this walkthrough.
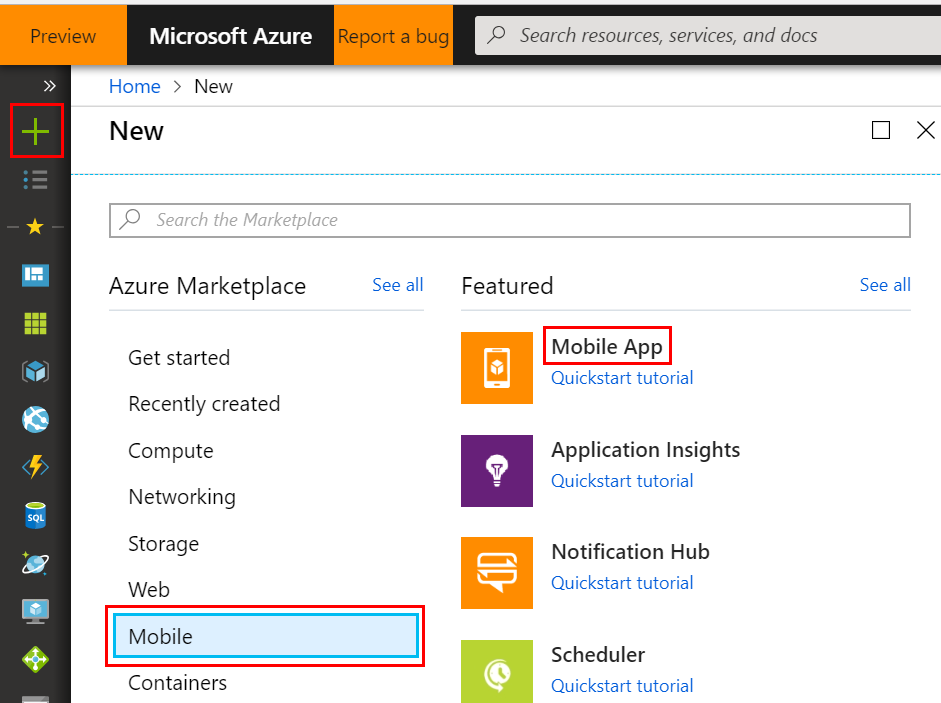
Once inside the portal:
- Select New > Mobile > Mobile App.
Configure the new Mobile App: Setting | Description --- | --- App Name | This will be used to create the URL for connecting to the Azure Mobile App backend. You must choose a unique name, indicated by the green checkmark. Subscription | Choose the subscription the new Mobile App will use for billing. Resource Group | Resource groups allow easier management of related resources. By default Azure creates a new resource group with the same name as the new app. The default setting works well for the walkthrough. App Service Plan/Location | The service plan dictates the computing power, location, and cost of the resources Azure uses to host your new Mobile App. By default Azure will create a new service plan with some default settings. This is the simplest option for this walkthrough. However, you can use this menu to customize a new service plan's pricing tier or geographic location. Additionally, settings for a service plan can be modified after deploying it.
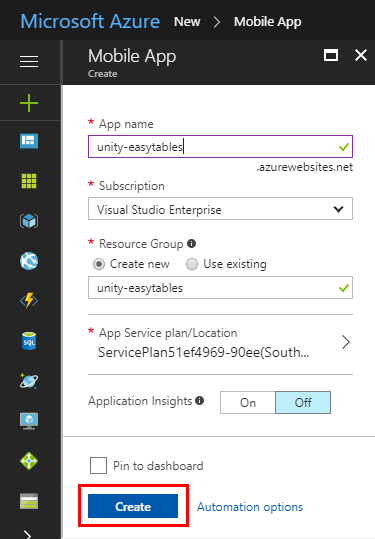
Click Create and give Azure a few minutes to deploy the new resource. You will see a notification in the Azure Portal when deployment has completed.
Add a new data connection
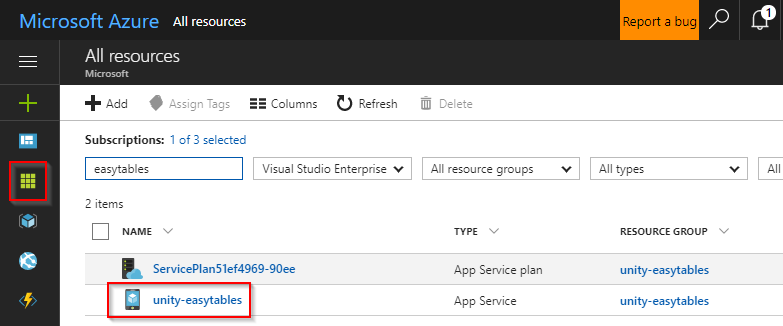
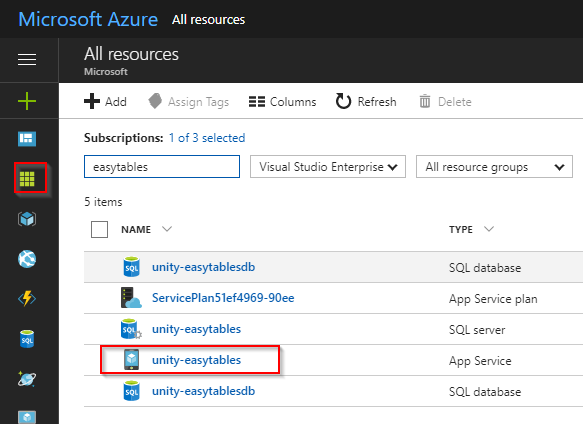
Once deployment has completed, click the All resources button and then select the newly created Mobile App.
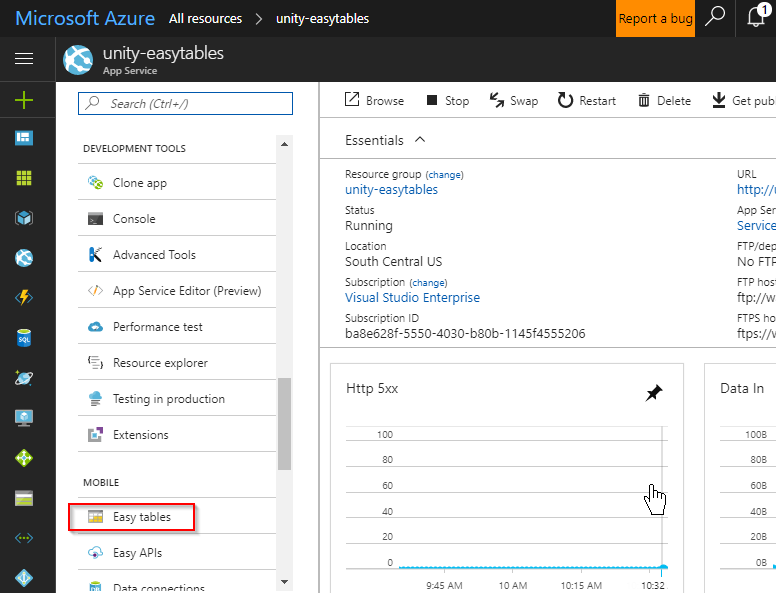
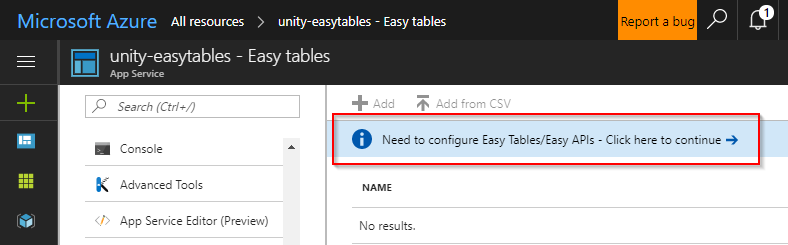
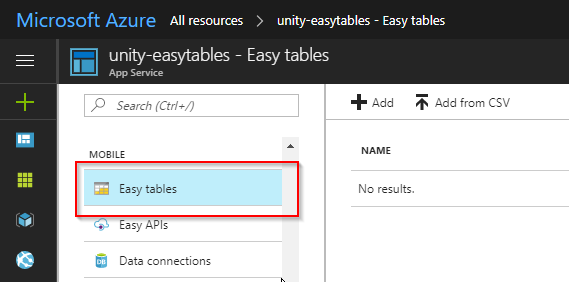
In the newly opened blade, scroll down in the left side-menu and click the Easy Tables button, listed under the MOBILE heading.
Click the blue Need to configure Easy Tables/Easy APIs notice displaying along the top of the Easy Tables blade on the right side of the screen.
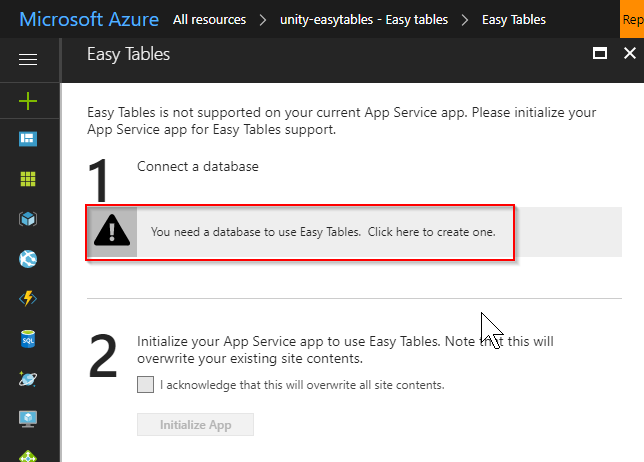
Click the notice that says You need a database to use Easy Tables. Click here to create one.
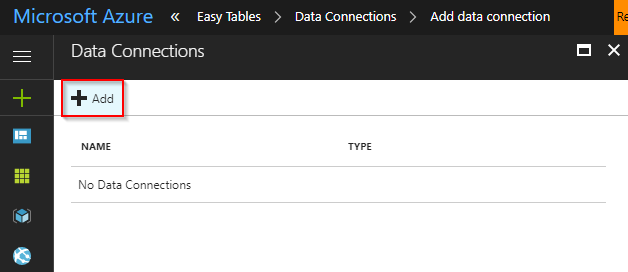
On the Data Connections blade, click the Add button.
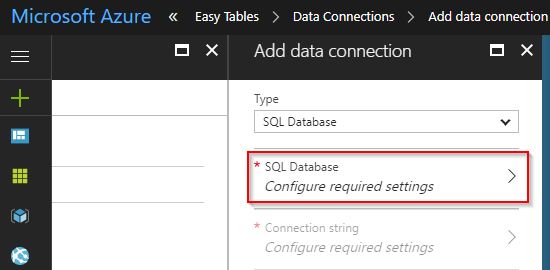
On the Add a data connection blade, select SQL Database.
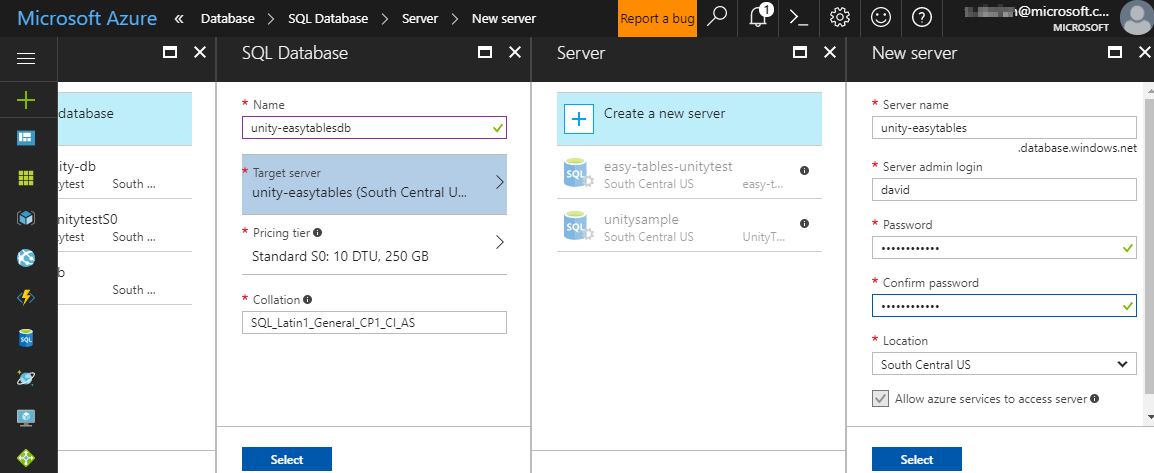
A blade will open for configuring a new SQL database and SQL server:
- Name: Enter a name for the database.
- Target server: Click Target server to open the New server blade.
- Server name: Enter a name for the server.
- Server admin login and Password: Create a username and password for the server admin.
- Location: Choose a nearby location for the server.
- Ensure that the Allow azure services to access server checkbox remains checked.
- Click Select to complete server configuration.
- Pricing tier: Leave the default setting for the walkthrough. This can be modified later.
- Collation: Leave the default setting.
- Click Select to complete configuration of the database.
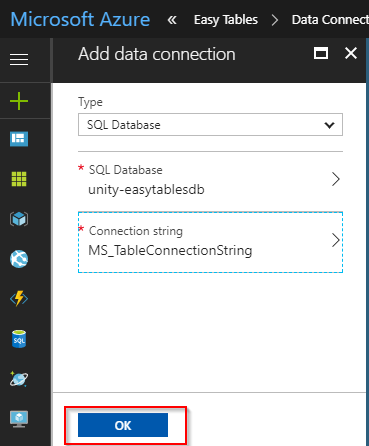
Back at the Add data connection blade, click Connection String. When the Connection string blade appears, leave the default settings and click OK.
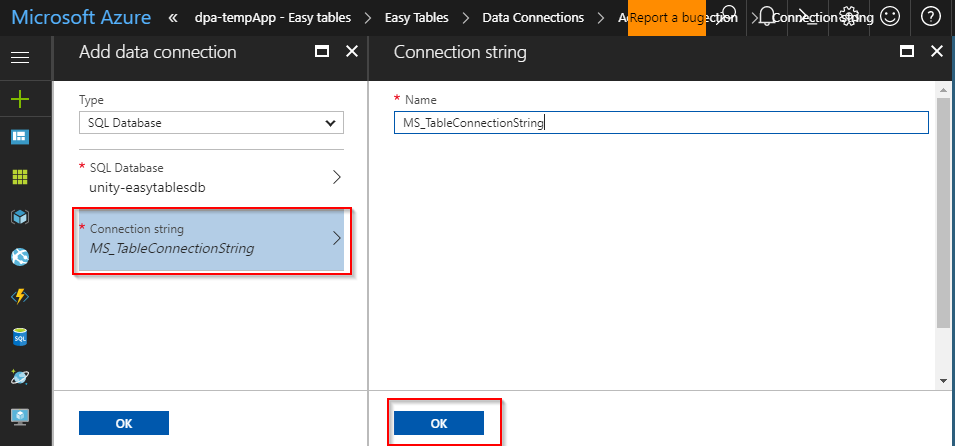
Back at the Add data connection blade, the text MS_TableConnectionString should no longer be in italics. Click OK and give Azure a few minutes to create the new data connection. A notification will arrive when the process is complete.
Complete the Easy Table initialization
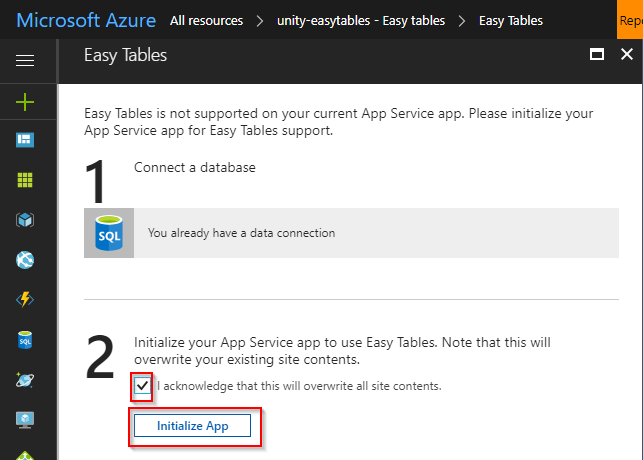
Once the new data connection has been created successfully, click the All resources button, and again navigate back to the Mobile App. It is important to complete this step to refresh the Easy Table configuration notice.
Scroll down and select Easy Tables, and once more select the blue Need to configure Easy Tables/Easy APIs notice.
This time the blade that appears should state that "You already have a data connection" below the 1 heading. Under the 2 heading, click the checkbox that says I acknowledge that this will overwrite site contents.
Click Initialize App and wait a few minutes for Azure to complete the initialization process. Note that the button may read "Create TodoItem table" instead of "Initialize App." Either way, click it. A new notification will announce when the process is complete.
Create Easy Tables
Now that you have a Mobile App on Azure with Easy Tables initialized, it's time to build the tables that will keep track of data sent from a Unity game.
Setup the crash heatmap table
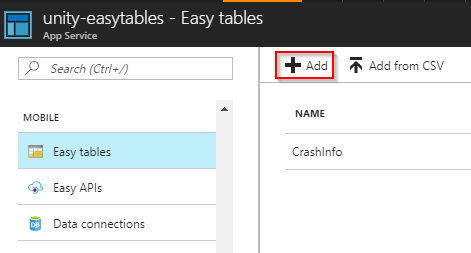
In the Azure portal, click All resources and then select the Mobile App that you configured for Easy Tables in the previous steps.
Scroll down to the Mobile heading and select Easy Tables. There should no longer be any notice about initializing your app for Easy Tables.
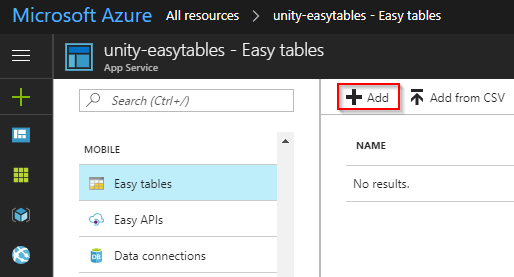
Click the Add button in the Easy Tables blade on the right side of the screen.
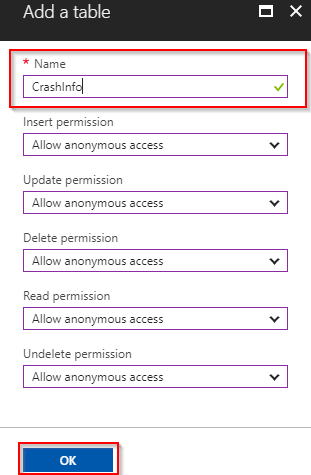
Name the table "CrashInfo" and click OK. Leave the rest of the options with their default settings.
A notification will announce when the new table has been created.
Note
With Easy Tables, the table schema is actually dynamically created as data is added. This means appropriate data columns do not have to be manually set up during this step.
Setup the leaderboard table
Go back to the Easy Tables blade and click Add to add a second table.
Name the new table "HighScoreInfo" and click OK. Leave the rest of the options at their default settings.
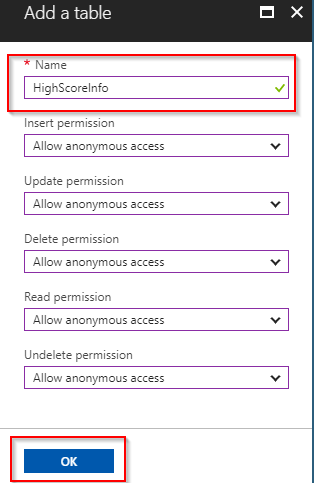
A notification will announce when the new table has been created.