Add a workflow to a SharePoint-hosted SharePoint Add-in
Important
The SharePoint Add-In model in SharePoint Online has been retired as of November 27th 2023, checkout the full retirement announcement to learn more.
Retirement means that the feature will not get any new investments, but it's still supported. End-of-life means that the feature will be discontinued and is no longer available for use.
This is the sixth in a series of articles about the basics of developing SharePoint-hosted SharePoint Add-ins. You should first be familiar with SharePoint Add-ins and the previous articles in this series, which you can find at Get started creating SharePoint-hosted SharePoint Add-ins | Next steps.
Note
It's recommended that Microsoft Power Automate be used for apps and process automation. Starting with Visual Studio 2022, Workflow templates have been removed from SharePoint Add-in Projects. For more information please see Guidance: Migrate from classic workflows to Power Automate flows in SharePoint
Tip
If you have been working through this series about SharePoint-hosted add-ins, you have a Visual Studio solution that you can use to continue with this topic. You can also download the repository at SharePoint_SP-hosted_Add-Ins_Tutorials and open the BeforeWorkflow.sln file.
In this article, you add a workflow in the Employee Orientation SharePoint Add-in that notifies the Human Resources (HR) department that a new employee is ready to fill out the HR paperwork.
Add a workflow to an add-in
In Solution Explorer, right-click the project, and select Add > New Folder. Name the folder Workflows.
Right-click the new folder, and select Add > New Item. The Add New Item dialog opens to the Office/SharePoint node.
Select Workflow and give it the name HR_Intake. When prompted to select the type of workflow, select List Workflow, and then select Next.
On the next page of the wizard, enable the Yes, associate ... option, and then set the drop-down controls to the following values:
- The library or list to associate your workflow with: New Employees in Seattle
- The history list:
<create new> - The Task list:
<create new>
Select Next.
On the last page of the wizard, enable only the option to start the workflow automatically when an item is changed.
Select Finish.
The Office Developer Tools for Visual Studio then does the following:
- Creates an HR_Intake workflow in the Workflow folder, with a child Workflow.xaml file that is open in the workflow designer.
- Creates a WorkflowTaskList list instance where tasks that are part of the workflow are created and updated.
- Creates a WorkflowHistoryList list instance, which is a log of the various steps in each execution of the workflow as they occur.
Design the workflow
The workflow sends an email to notify an HR staffer that the new employee has finished the Tour of building stage of orientation and is ready to fill out the HR intake paperwork. Any change in an existing item on the New Employees in Seattle list triggers the workflow, but the workflow does nothing unless the Orientation Stage field of the list item is set to HR paperwork. If it is, an email is sent to an HR staffer and a task for that employee is added to the WorkflowTaskList.
Note
At various times when designing your workflow, a blue diamond symbol with an exclamation mark in it (  ) will appear on one or more items in the workflow designer. These report temporary errors. (Hover the cursor over the symbol to see a brief message, or look in the Visual Studio Error List for details.) These are side effects of the incompleteness of the workflow. They should all be gone when you have finished this procedure.
Open the Toolbox pane in Visual Studio, expand the SP - List node, and then drag LookupSPListItem into the Sequence in the designer.
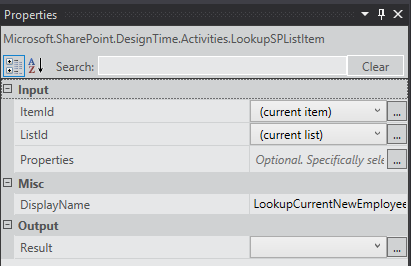
Select the LookupSPListItem so that its properties appear in the Visual Studio Properties pane. Set the following properties to these values:
- ItemID: (current item)
- ListID: (current list)
- DisplayName: LookupCurrentNewEmployee
The Properties pane should now look like the following:
Figure 1. Properties pane of LookupSPListItem
Select anywhere outside the pane to save your changes. The designer surface should now look like this.
Figure 2. Sequence in the workflow designer
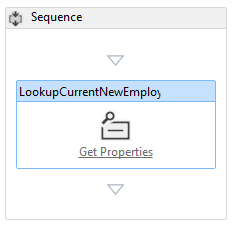
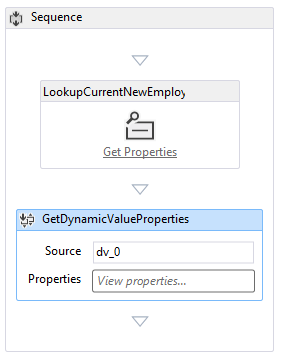
Select the Get Properties link inside the (newly renamed) LookupCurrentNewEmployee activity in the designer. This adds a GetDynamicValueProperties activity to the sequence.
Select the Define… text in the GetDynamicValueProperties activity. This will open the Properties dialog.
Set the Entity Type to List Item of list_instance_name, where list_instance_name is New Employees in Seattle.
In the Path column, select the top cell, and then select Orientation Stage from the drop-down.
Select the cell under it, and then select Employee from the drop-down.
Select Populate Variables. This creates variables named OrientationStage and Title and assigns each of the values of the corresponding fields in the current item of the New Employees in Seattle list. The Properties dialog should now look like the following:
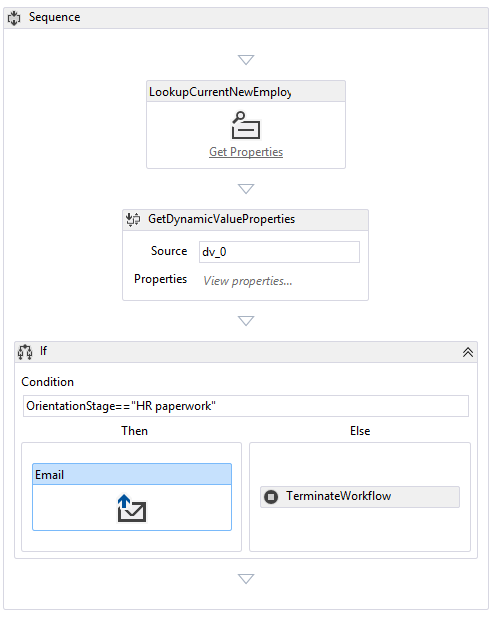
Select OK. The designer surface should now look like the following:
Figure 4. Workflow designer
Open the Toolbox pane in Visual Studio, expand the Control Flow node, and then drag If into the bottom of the Sequence under the GetDynamicValueProperties.
In the Condition box of the If, enter OrientationStage=="HR paperwork".
Open the Toolbox pane in Visual Studio, expand the SP - Utilities node, and then drag Email into the Then box of the If activity.
Select the Email activity. In the Properties pane, set the values of the Body, Subject, and To properties. In each case, choose the callout button . . . for the property and use the Expression Editor that opens to set the property's value as in the following table. These are C# string expressions, so use quotation marks exactly as shown. The
Titlehere is a variable that you assigned earlier to the Title field of the list item (which holds the name of the employee).- Body:
Title + " is waiting in the lobby to fill out benefits and employment forms." - Subject:
Title + " is ready for HR paperwork" - To:
new System.Collections.ObjectModel.Collection<string>() {"your_O365_email"}
Replace the placeholder, your_O365_email, with the identity that you use to sign in to your Office 365 developer account, such as
*alias*@*O365domain*.sharepoint.com. This is a C# string so it must be in quotation marks.- Body:
Open the Toolbox pane in Visual Studio, expand the Runtime node, and then drag TerminateWorkflow into the Else box of the If activity.
Select the TerminateWorkflow activity and in the Properties pane, set the Reason to the following, including the quotation marks:
"Not at HR paperwork stage.". The designer should now look the following:Figure 5. Workflow designer when the workflow is complete
Run and test the add-in
Use the F5 key to deploy and run your add-in. Visual Studio makes a temporary installation of the add-in on your test SharePoint site and immediately runs the add-in. The Workflow Manager's Test Service Host console also opens.
When the add-in's default page opens, open one of the items for editing, and set the value of Orientation Stage to HR paperwork.
In the Test Service Host console, an indication appears that the workflow has started. Shortly after, there is an indication that the workflow has completed. The following is an example:
Figure 6. Test Service Host console

Note
If the Test Service Host console does not open, you may need to enable workflow debugging. Right-click the project name in Solution Explorer and select Properties. Open the SharePoint tab on the Properties pane and select the Enable Workflow debugging check box.
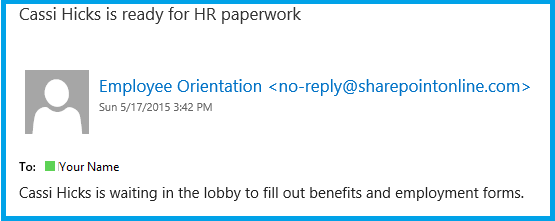
Go to the email inbox (Outlook) of your Office 365 developer account. There is an email with the subject "Employee is ready for HR paperwork" where Employee is the name of the employee whose item you edited. The body of the email says "Employee is waiting in the lobby to fill out benefits and employment forms." The following is an example:
Figure 7. Email sent by workflow
Tip
If the workflow begins but never completes, and the email is not sent, try ending the debugging session and trying F5 again a few times before you conclude there is something wrong in your code. Sometimes the problem is in SharePoint Online. If you are still having problems, try adding a content type called ListFieldsContentType, if there isn't one already, to the ContentTypes section of the schema.xml file. The following is an example of the markup:
<ContentType ID="0x0100781dd48170b94fdc9706313c82b3d04c" Name="ListFieldsContentType" Hidden="TRUE"></ContentType>Copy the entire FieldRefs section of the NewEmployee content type into this new content type. Save the project, retract, and try F5 again.
To end the debugging session, close the browser window or stop debugging in Visual Studio. Each time that you select F5, Visual Studio retracts the previous version of the add-in and installs the latest one.
You will work with this add-in and Visual Studio solution in other articles, and it's a good practice to retract the add-in one last time when you are done working with it for a while. Right-click the project in Solution Explorer and select Retract.
Next steps
In the next article in this series, you'll add a custom page and style to a SharePoint-hosted SharePoint Add-in.
Feedback
Coming soon: Throughout 2024 we will be phasing out GitHub Issues as the feedback mechanism for content and replacing it with a new feedback system. For more information see: https://aka.ms/ContentUserFeedback.
Submit and view feedback for