Add jQueryUI Accordion to your SharePoint client-side web part
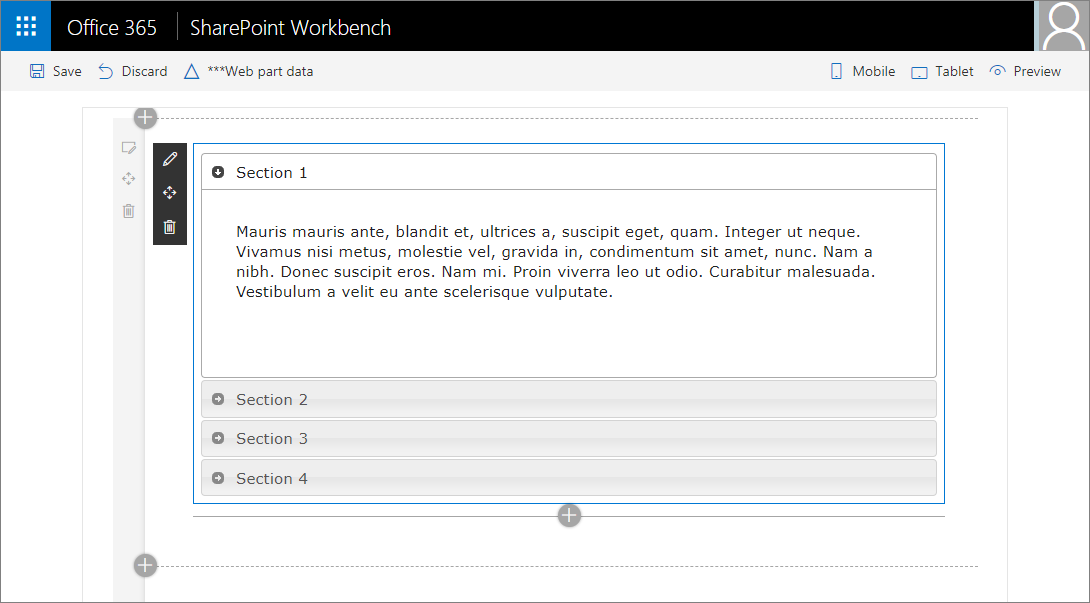
Adding the jQueryUI Accordion to your web part project involves creating a new web part, as shown in the following image.
Ensure that you've completed the following steps before you start:
You can also follow these steps by watching this video on the Microsoft 365 Platform Communtiy (PnP) YouTube Channel:
The developer toolchain uses Webpack & SystemJS to bundle and load your web parts. This includes loading any external dependencies such as jQuery or jQueryUI. To load external dependencies, at a high level, you need to:
- Acquire the external library, either via NPM or download it directly from the vendor.
- If available, install the respective framework's TypeScript type declarations.
- If required, update your solution configuration to not include the external dependency in your web part bundle.
Create a new web part project
Create a new project directory in your favorite location:
md jquery-webpartGo to the project directory:
cd jquery-webpartCreate a new project by running the Yeoman SharePoint Generator from within the new directory you created:
yo @microsoft/sharepointThe Yeoman SharePoint Generator will prompt you with a series of questions. For all questions, accept the default options except for the following questions:
- Which type of client-side component to create?: WebPart
- Which framework would you like to use?: No JavaScript framework
At this point, Yeoman installs the required dependencies and scaffolds the solution files, including the web part. This might take a few minutes.
Install jQuery and jQuery UI NPM Packages
The web part uses jQuery and the Accordion included in the jQuery UI project. To use these, add them to the project's dependencies:
In the console, execute the following to install the jQuery NPM package:
npm install jquery@2Next, execute the following to install the jQueryUI NPM package:
npm install jqueryuiNext, we need to install the TypeScript type declarations for our project to simplify the development process.
In the console, execute the following commands to install the type declaration packages:
npm install @types/jquery@2 --save-dev
npm install @types/jqueryui --save-dev
Exclude external dependencies from web part bundle
By default, all dependencies referenced in your project's code are included in the resulting web part bundle. In most cases, this isn't ideal because it unnecessarily increases the file size. You can configure the project to exclude the dependencies from the web part bundle and instead, instruct the SharePoint Framework runtime to load them as dependencies before the web part's bundle is loaded.
In Visual Studio Code (VS Code), open the file config\config.json.
This file contains information about your bundle(s) and external dependencies.
The
bundlesproperty contains the default bundle information. In this case, the jQuery web part bundle. When you add more web parts to your solution, you see one entry per web part."bundles": { "j-query-web-part": { "components": [ { "entrypoint": "./lib/webparts/jQuery/JQueryWebPart.js", "manifest": "./src/webparts/jQuery/JQueryWebPart.manifest.json" } ] } },The
externalsproperty contains the libraries that should not be included in the generated bundle. The bundling process will also use values of this property to configure the SharePoint Framework's module loader to load the references libraries prior to loading the web part bundle."externals": {},Exclude
jQueryandjQueryUIfrom the generated bundle by adding the following two modules to theexternalsproperty:{ "externals": { "jquery": "node_modules/jquery/dist/jquery.min.js", "jqueryui": "node_modules/jqueryui/jquery-ui.min.js" }, }Now when you build your project,
jQueryandjQueryUIare not bundled into your default web part bundle.The completed config.json file should look similar to the following:
{
  "$schema": "https://developer.microsoft.com/json-schemas/spfx-build/config.2.0.schema.json",
  "version": "2.0",
  "bundles": {
    "j-query-web-part": {
      "components": [
        {
          "entrypoint": "./lib/webparts/jQuery/JQueryWebPart.js",
          "manifest": "./src/webparts/jQuery/JQueryWebPart.manifest.json"
        }
      ]
    }
  },
  "externals": {
    "jquery": "node_modules/jquery/dist/jquery.min.js",
    "jqueryui": "node_modules/jqueryui/jquery-ui.min.js"
  },
  "localizedResources": {
    "JQueryWebPartStrings": "lib/webparts/jQuery/loc/{locale}.js"
  }
}
Build the Accordion
At this point, the project is configured to depend on jQuery and jQueryUI, but to not include the in the resulting solution's bundle. The next step is to implement the web part by adding the Accordion to the web part.
Add the Accordion HTML
In VS Code, Add a new file MyAccordionTemplate.ts in the ./src/webparts/jQuery folder.
Add class
MyAccordionTemplatethat contains the HTML for the accordion. Add the following code to the MyAccordionTemplate.ts file:export default class MyAccordionTemplate { public static templateHtml: string = ` <div class="accordion"> <h3>Section 1</h3> <div> <p> Mauris mauris ante, blandit et, ultrices a, suscipit eget, quam. Integer ut neque. Vivamus nisi metus, molestie vel, gravida in, condimentum sit amet, nunc. Nam a nibh. Donec suscipit eros. Nam mi. Proin viverra leo ut odio. Curabitur malesuada. Vestibulum a velit eu ante scelerisque vulputate. </p> </div> <h3>Section 2</h3> <div> <p> Sed non urna. Donec et ante. Phasellus eu ligula. Vestibulum sit amet purus. Vivamus hendrerit, dolor at aliquet laoreet, mauris turpis porttitor velit, faucibus interdum tellus libero ac justo. Vivamus non quam. In suscipit faucibus urna. </p> </div> <h3>Section 3</h3> <div> <p> Nam enim risus, molestie et, porta ac, aliquam ac, risus. Quisque lobortis. Phasellus pellentesque purus in massa. Aenean in pede. Phasellus ac libero ac tellus pellentesque semper. Sed ac felis. Sed commodo, magna quis lacinia ornare, quam ante aliquam nisi, eu iaculis leo purus venenatis dui. </p> <ul> <li>List item one</li> <li>List item two</li> <li>List item three</li> </ul> </div> <h3>Section 4</h3> <div> <p> Cras dictum. Pellentesque habitant morbi tristique senectus et netus et malesuada fames ac turpis egestas. Vestibulum ante ipsum primis in faucibus orci luctus et ultrices posuere cubilia Curae; Aenean lacinia mauris vel est. </p> <p> Suspendisse eu nisl. Nullam ut libero. Integer dignissim consequat lectus. Class aptent taciti sociosqu ad litora torquent per conubia nostra, per inceptos himenaeos. </p> </div> </div>`; }Save the file.
Import the Accordion HTML
In VS Code, open ./src/webparts/jQuery/JQueryWebPart.ts.
Add the following
importstatement immediately after the existingimportstatements at the top of the file:import MyAccordionTemplate from './MyAccordionTemplate';
Import jQuery and jQueryUI
Import jQuery to your web part in the same way that you imported
MyAccordionTemplate.Add the following
importstatement after the existingimportstatements:import * as jQuery from 'jquery'; import 'jqueryui';The jQueryUI project uses an external CSS file to implement it's user experience. Your web part needs to load this CSS file at runtime:
To load a CSS file at runtime, use the SharePoint module loader by utilizing the
SPComponentLoaderobject.Add the following
importstatement.import { SPComponentLoader } from '@microsoft/sp-loader';Load the jQueryUI styles in the
JQueryWebPartweb part class by adding a constructor and use theSPComponentLoader.Add the following constructor to your web part:
public constructor() {
  super();

  SPComponentLoader.loadCss('//code.jquery.com/ui/1.11.4/themes/smoothness/jquery-ui.css');
}
This code does the following:
- Calls the parent constructor with the context to initialize the web part.
- Asynchronously loads the accordion styles in the CSS file from a CDN.
Render the Accordion
In the jQueryWebPart.ts file, locate the
render()method.Set the web part's inner HTML to render the accordion HTML by replacing the contents of the
render()method with the following:this.domElement.innerHTML = MyAccordionTemplate.templateHtml;jQueryUI Accordion has a few options that you can set to customize the accordion. Define a few options for your accordion after the existing
this.domElement.innerHTML = MyAccordionTemplate.templateHtml;line of code:const accordionOptions: JQueryUI.AccordionOptions = { animate: true, collapsible: false, icons: { header: 'ui-icon-circle-arrow-e', activeHeader: 'ui-icon-circle-arrow-s' } };The jQueryUI typed declaration allows you to create a typed variable called
JQueryUI.AccordionOptionsand specify the supported properties.If you play around with the IntelliSense, you'll notice that you'll get full support for available methods under
JQueryUI.as well as the method parameters.Finally, initialize the accordion:
jQuery('.accordion', this.domElement).accordion(accordionOptions);As you can see, you use the variable
jQuerythat you used to import thejquerymodule. You then initialize the accordion.The final
render()method should look like this:public render(): void { this.domElement.innerHTML = MyAccordionTemplate.templateHtml; const accordionOptions: JQueryUI.AccordionOptions = { animate: true, collapsible: false, icons: { header: 'ui-icon-circle-arrow-e', activeHeader: 'ui-icon-circle-arrow-s' } }; jQuery('.accordion', this.domElement).accordion(accordionOptions); }Save the file.
Preview the web part
In your console, ensure that you're still in the jquery-webpart folder, and execute the following to build and preview your web part:
gulp serve --nobrowserOnce the web server starts, open a browser and navigate to a SharePoint site's hosted workbench to test your project. For example:
https://contoso.sharepoint.com/sites/devsite/_layouts/workbench.aspx.On the workbench, select the + (plus sign) to show the list of web parts, and add the jQuery web part. You should now see the jQueryUI Accordion!
In the console where you have gulp serve running, select CTRL+C to terminate the task.
Feedback
Coming soon: Throughout 2024 we will be phasing out GitHub Issues as the feedback mechanism for content and replacing it with a new feedback system. For more information see: https://aka.ms/ContentUserFeedback.
Submit and view feedback for