How to reinstall the Migration Manager agent
You may find it necessary to reinstall the Migration Manager agent on one of your computers, especially if it encounters issues.
- From the new SharePoint admin center, select Migration center. You need to sign in with an account that has admin permissions for your organization.
- Under For file shares, select "Get started" or "View Tasks."
- Select the Agents tab, and highlight the agent you want to delete. Select Delete.
- Remaining on the Agents tab, select + Add.
- Select Download agent setup file.
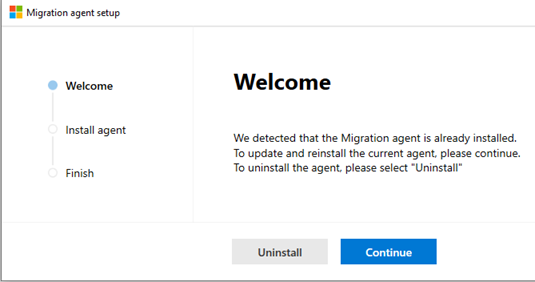
- Select Continue to reinstall the agent.
- Select Next
- Enter the SharePoint admin username and password of the environment where you will be migrating your content. Select Next.
- Enter your Windows credentials that will provide access to all the file shares that contain the content you want to migrate. Select Install.
- Test agent access (optional) or select Close. After the setup is completed, the new agent will be added to the available agents that can be assigned tasks.
Feedback
Coming soon: Throughout 2024 we will be phasing out GitHub Issues as the feedback mechanism for content and replacing it with a new feedback system. For more information see: https://aka.ms/ContentUserFeedback.
Submit and view feedback for