Registering your application in Azure AD
NOTE: We have built a quick registration tool for registering Skype for Busines Trusted Applications in Azure and Skype for Business Online, that eliminates the need to register an Application manually in Azure portal. You can find the portal at https://aka.ms/skypeappregistration
This article shows you how to register your service application in the Azure Portal at https://portal.azure.com. Before running your service application, you need to register it with Azure Active Directory, even if you are hosting your app outside of Azure. Application registration lets you set the permissions that your service applications needs and the sign on and application id URLs used for application authentication.
Register your application with Azure AD
Sign in to the Classic Azure Management Portal, then do the following:
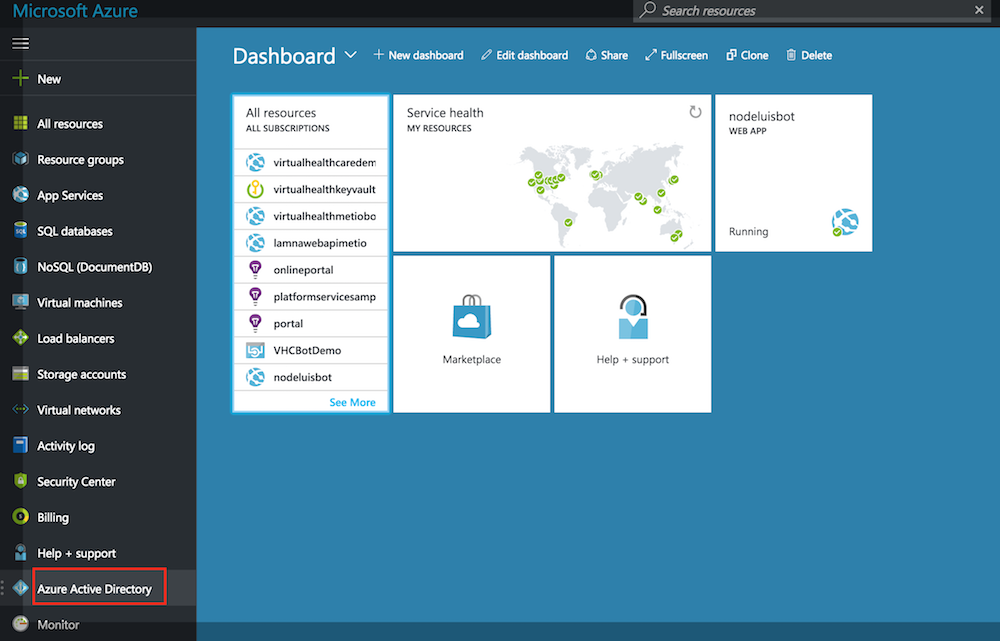
- Click the Azure Active Directory tab in the left column and select the directory linked to your Skype for Business subscription.
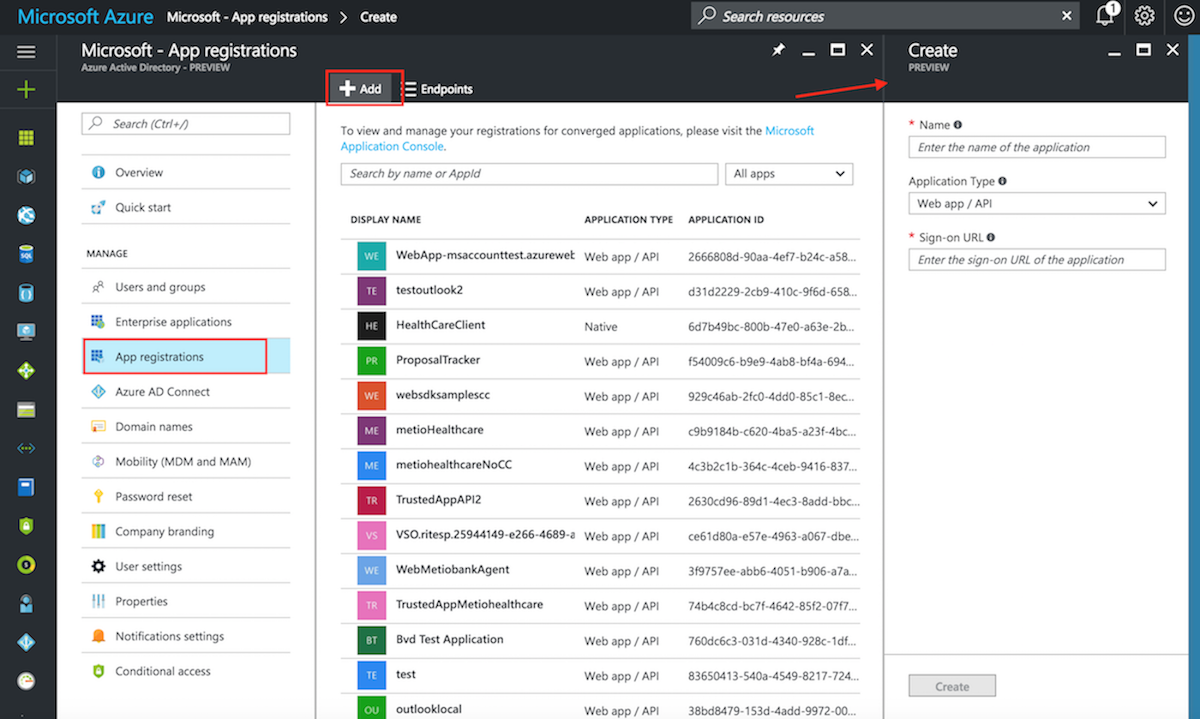
- Select the App registration tab in the left column and then Add at the top of the screen.
- Choose name for your application, such as
demosaas, and select Web application and/or web API as its Type. The value of Sign-on URL is the URL at which your application is hosted.
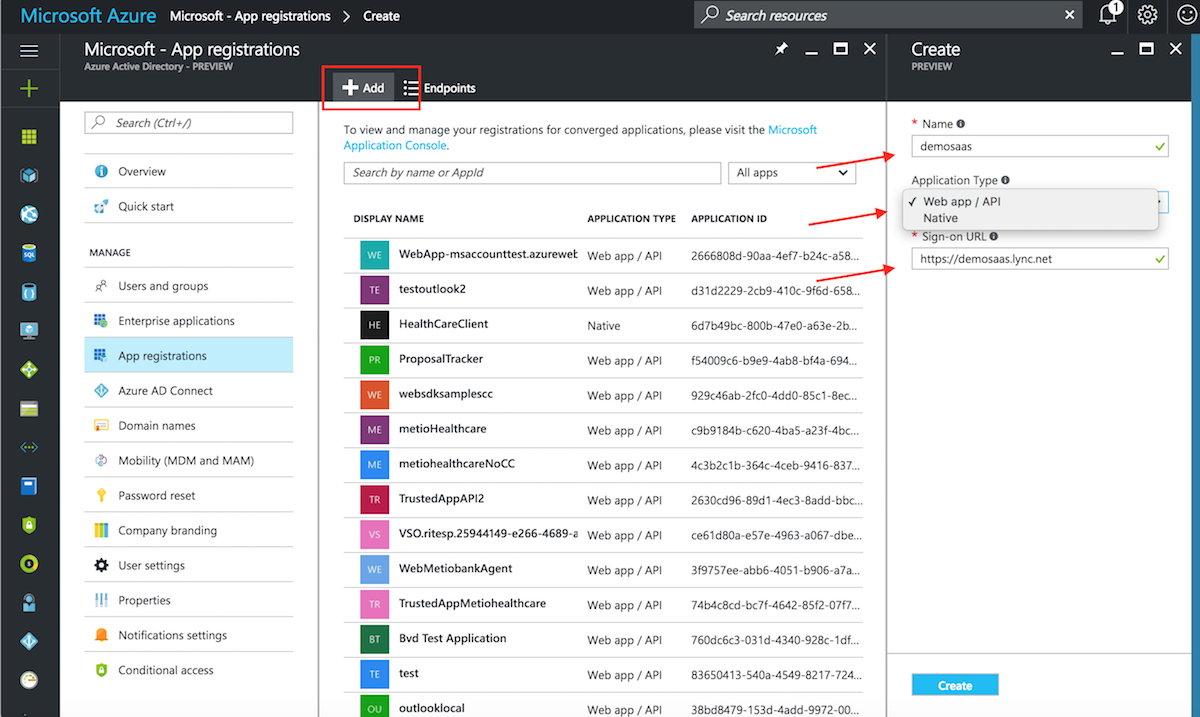
Click the Create button and "Application created" message will splash on screen and your application will be added to the list of applications.
Use search bar at the top to find your application in the list. Select your application and under the Settings tab, click Required permissions.
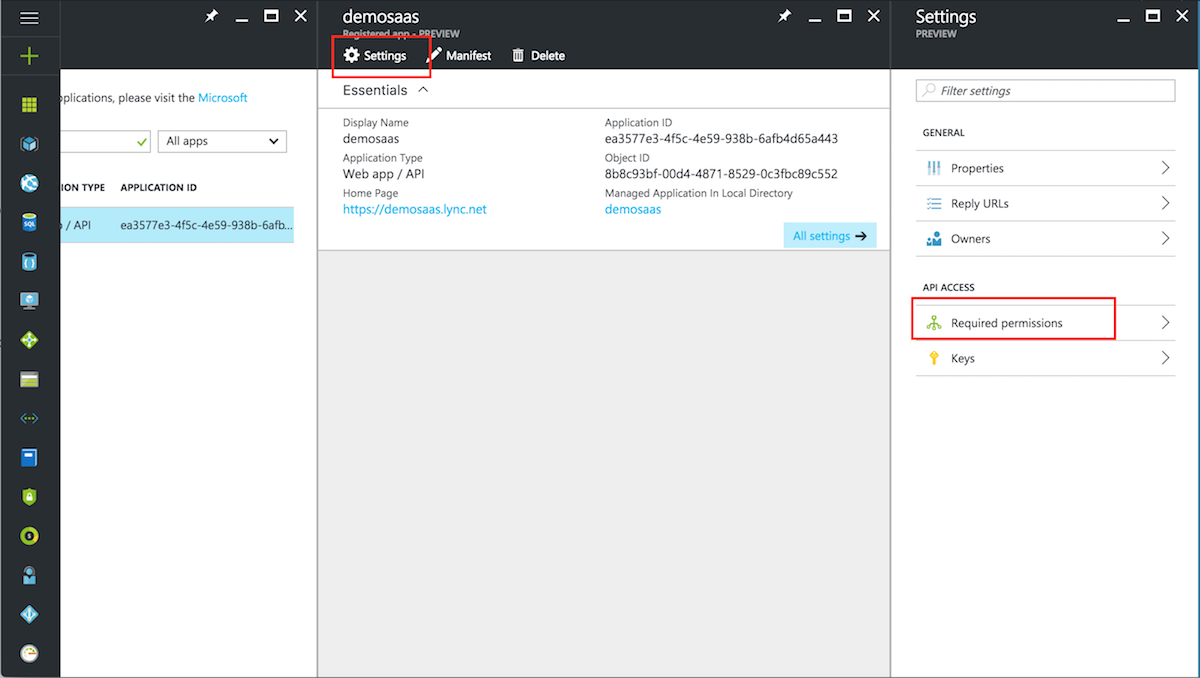
- Select API Access, Required Permissions -> Select an API

- Select Skype for Business Online(Microsoft.Lync) API.
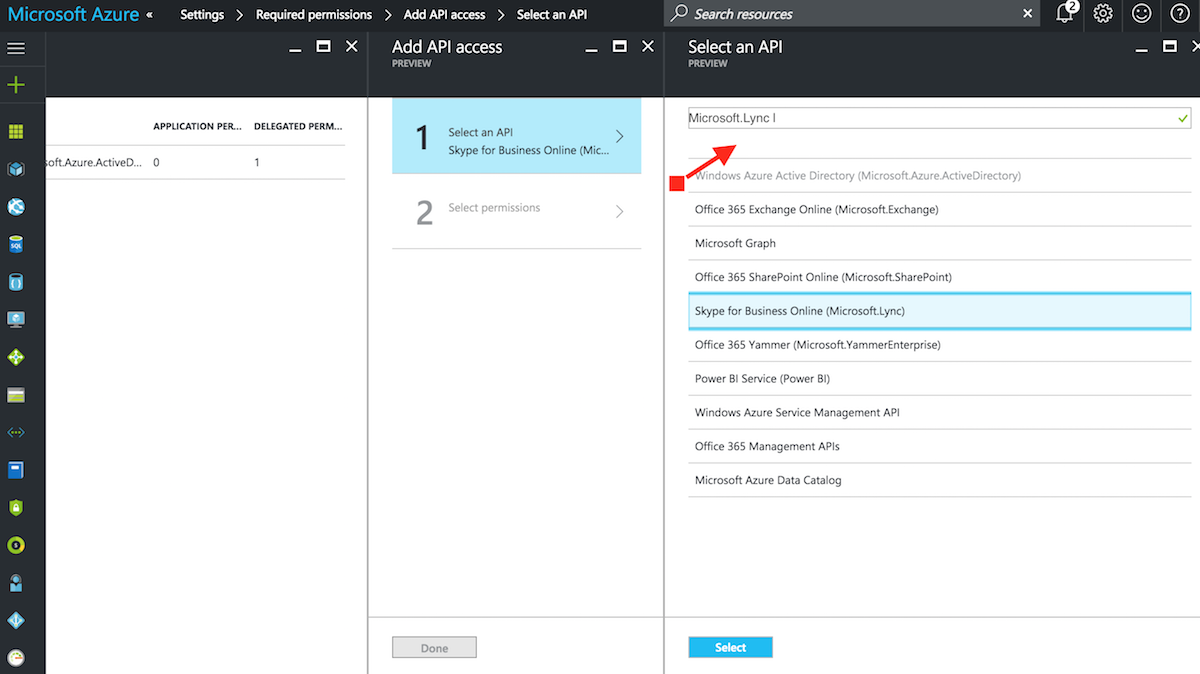
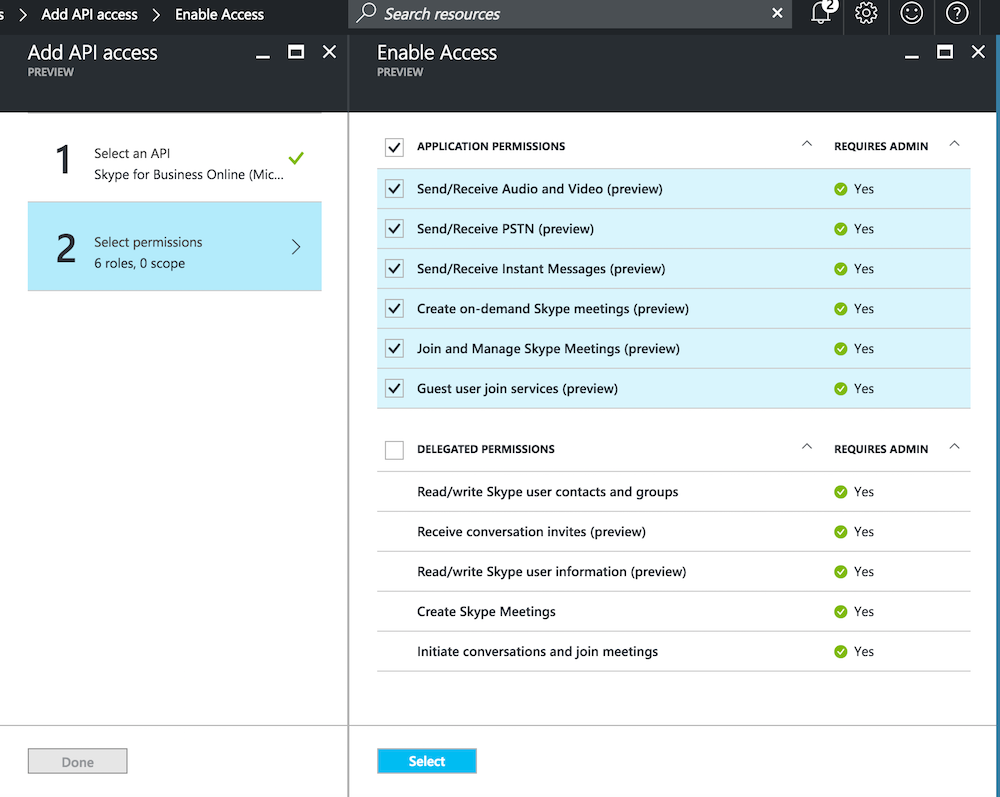
- Click Select permissions and select required permissions. Click Done to complete adding permissions.
- Application permissions: for accessing Skype for Business Online on behalf of an application.
- Delegated Permissions: User scopes: for accessing Skype for Business Online through this application as a user.
If the permissions for Skype for Business do not show in the Azure Management Portal, one likely cause is that the Office 365 account is not associated with the Azure AD.