Quickstart: Use Azure Data Studio to connect and query Managed Service for TimescaleDB on Azure
This article shows how to use Azure Data Studio to connect to Managed Service for TimescaleDB on Azure and then use SQL statements to create a hyper table and query it.
Prerequisites
To complete this quickstart, you need Azure Data Studio, the PostgreSQL extension for Azure Data Studio, and access to a Managed Service for TimescaleDB on the Azure server.
- Install Azure Data Studio.
- Install the PostgreSQL extension for Azure Data Studio.
- Create a Managed Service for TimescaleDB on Azure.
- Make a note of the Host, Port, Database Name, User, and Password for Managed Service for TimescaleDB service on Azure.
Connect to Managed Service for TimescaleDB on Azure
Start Azure Data Studio.
The first time you start Azure Data Studio, the Connection dialog opens. If the Connection dialog doesn't open, select the New Connection icon in the SERVERS page:
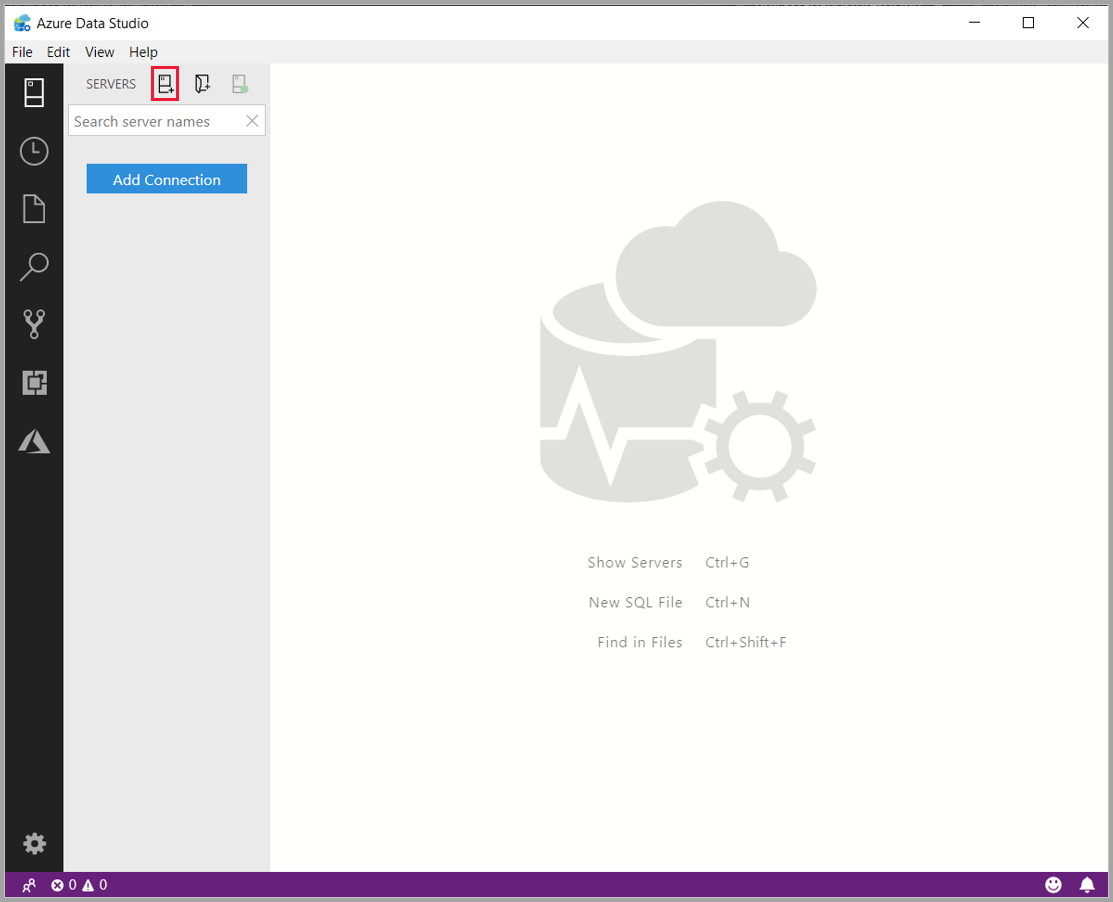
D:\GitHub\sql-docs-pr\docs\azure-data-studio\media\quicstart-timescaledb\new-connection-icon.png
In the form that pops up, go to Connection type and select PostgreSQL from the drop-down.
Fill in the remaining fields using the host, port, user, database name, and password for your Managed Service for TimescaleDB on Azure.
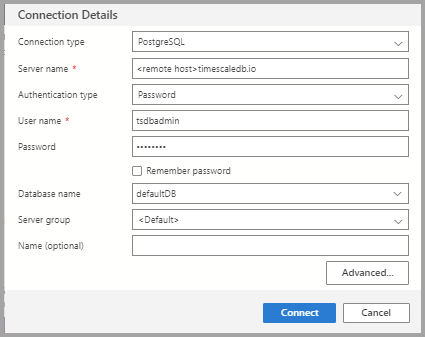
Setting Example value Description Server name <REMOTE_HOST>.timescaledb.io The hostname of your Managed Service for TimescaleDB service. Authentication type Password The authentication type. User name tsdbadmin Your username. Password (SQL Login) P@ssw0rd Your password. Password Check Check this box to avoid entering the password each time you connect. Database name defaultdb The default database for Managed Service for TimescaleDB service is defaultdb. You can also specify the name of the database. Server group Default This option lets you assign this connection to a specific server group you create. Name (optional) leave blank This option lets you specify a friendly name for your server. Select Advanced.
In the Port field, type the port number, and select OK.
Select Connect.
After successfully connecting, your server opens in the SERVERS sidebar.
Create a hyper table
The following steps create a hyper table in the default defaultdb database:
In the SERVERS sidebar, right-click the server and select New Query.
Paste the following SQL statement into the query editor and select Run.
Note
You can either append this or overwrite the existing query in the editor. Selecting Run executes only the query that is highlighted. If nothing is highlighted, select Run to execute all queries in the editor.
CREATE TABLE conditions ( -- create a regular table
time         TIMESTAMPTZ       NOT NULL,
location     TEXT              NOT NULL,
temperature  DOUBLE PRECISION  NULL);
SELECT create_hypertable('conditions', 'time'); -- turn it into a hypertable
Insert rows
Paste the following snippet into the query window and select Run:
INSERT INTO conditions
VALUES
  (NOW(), 'office', 70.0),
  (NOW(), 'basement', 66.5),
  (NOW(), 'garage', 77.0);
Query the data
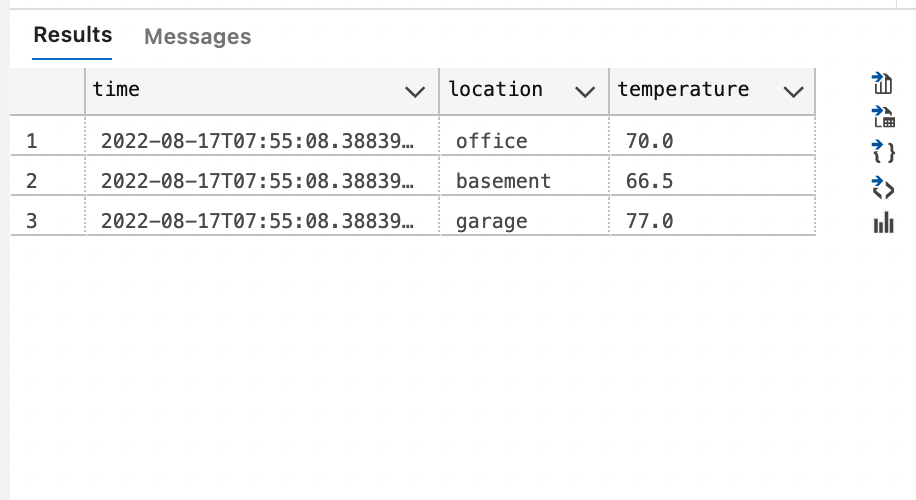
Paste the following snippet into the query editor and select Run:
-- Select rows from hyper table 'conditions'
SELECT * FROM conditions;
The results of the query are displayed:
Next steps
Feedback
Coming soon: Throughout 2024 we will be phasing out GitHub Issues as the feedback mechanism for content and replacing it with a new feedback system. For more information see: https://aka.ms/ContentUserFeedback.
Submit and view feedback for