Submit Spark jobs on SQL Server big data cluster in Visual Studio Code
Important
The Microsoft SQL Server 2019 Big Data Clusters add-on will be retired. Support for SQL Server 2019 Big Data Clusters will end on February 28, 2025. All existing users of SQL Server 2019 with Software Assurance will be fully supported on the platform and the software will continue to be maintained through SQL Server cumulative updates until that time. For more information, see the announcement blog post and Big data options on the Microsoft SQL Server platform.
Learn how to use Spark & Hive Tools for Visual Studio Code to create and submit PySpark scripts for Apache Spark, first we'll describe how to install the Spark & Hive tools in Visual Studio Code and then we'll walk through how to submit jobs to Spark.
Spark & Hive Tools can be installed on platforms that are supported by Visual Studio Code, which include Windows, Linux, and macOS. Below you'll find the prerequisites for different platforms.
Prerequisites
The following items are required for completing the steps in this article:
- A SQL Server big data cluster. See SQL Server Big Data Clusters.
- Visual Studio Code.
- Python and the Python extension on Visual Studio Code.
- Mono. Mono is only required for Linux and macOS.
- Set up PySpark interactive environment for Visual Studio Code.
- A local directory named SQLBDCexample. This article uses C:\SQLBDC\SQLBDCexample.
Install Spark & Hive Tools
After you have completed the prerequisites, you can install Spark & Hive Tools for Visual Studio Code. Complete the following steps to install Spark & Hive Tools:
Open Visual Studio Code.
From the menu bar, navigate to View > Extensions.
In the search box, enter Spark & Hive.
Select Spark & Hive Tools, published by Microsoft, from the search results, and then select Install.

Reload when needed.
Open work folder
Complete the following steps to open a work folder, and create a file in Visual Studio Code:
From the menu bar, navigate to File > Open Folder... > C:\SQLBDC\SQLBDCexample, then select the Select Folder button. The folder appears in the Explorer view on the left.
From the Explorer view, select the folder, SQLBDCexample, and then the New File icon next to the work folder.
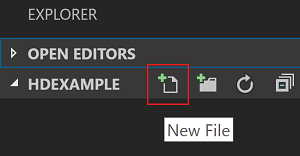
Name the new file with the
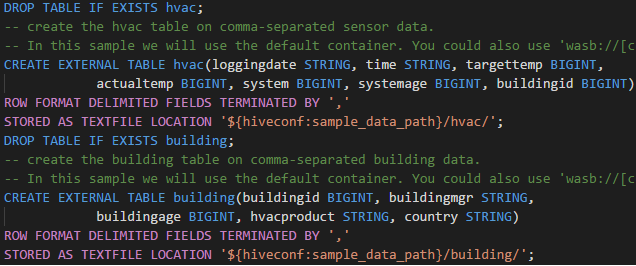
.py(Spark script) file extension. This example uses HelloWorld.py.Copy and paste the following code into the script file:
import sys
from operator import add
from pyspark.sql import SparkSession, Row

spark = SparkSession\
   .builder\
   .appName("PythonWordCount")\
   .getOrCreate()

data = [Row(col1='pyspark and spark', col2=1), Row(col1='pyspark', col2=2), Row(col1='spark vs hadoop', col2=2), Row(col1='spark', col2=2), Row(col1='hadoop', col2=2)]
df = spark.createDataFrame(data)
lines = df.rdd.map(lambda r: r[0])

counters = lines.flatMap(lambda x: x.split(' ')) \
   .map(lambda x: (x, 1)) \
   .reduceByKey(add)

output = counters.collect()
sortedCollection = sorted(output, key = lambda r: r[1], reverse = True)

for (word, count) in sortedCollection:
   print("%s: %i" % (word, count))
Link a SQL Server big data cluster
Before you can submit scripts to your clusters from Visual Studio Code, you need to link a SQL Server big data cluster.
From the menu bar navigate to View > Command Palette..., and enter Spark / Hive: Link a Cluster.

Select linked cluster type SQL Server Big Data.
Enter SQL Server Big Data endpoint.
Enter SQL Server big data cluster user name.
Enter password for user admin.
Set the display name of the big data cluster (optional).
List clusters, review OUTPUT view for verification.
List clusters
From the menu bar navigate to View > Command Palette..., and enter Spark / Hive: List Cluster.
Review the OUTPUT view. The view will show your linked cluster(s).

Set default cluster
Re-Open the folder SQLBDCexample created earlier if closed.
Select the file HelloWorld.py created earlier and it will open in the script editor.
Link a cluster if you haven't yet done so.
Right-click the script editor, and select Spark / Hive: Set Default Cluster.
Select a cluster as the default cluster for the current script file. The tools automatically update the configuration file .VSCode\settings.json.

Submit interactive PySpark queries
You can submit interactive PySpark queries by following the steps below:
Reopen the folder SQLBDCexample created earlier if closed.
Select the file HelloWorld.py created earlier and it will open in the script editor.
Link a cluster if you haven't yet done so.
Choose all the code and right-click the script editor, select Spark: PySpark Interactive to submit the query, or use shortcut Ctrl + Alt + I.
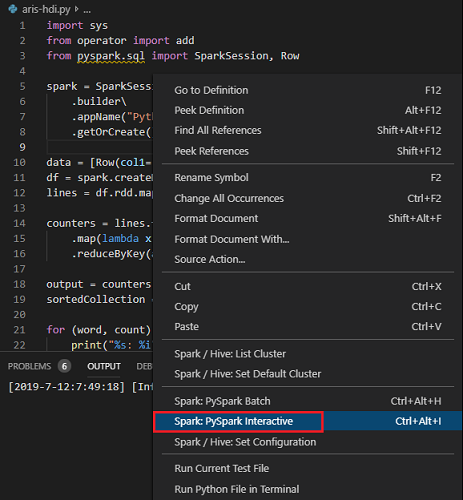
Select the cluster if you haven't specified a default cluster. After a few moments, the Python Interactive results appear in a new tab. The tools also allow you to submit a block of code instead of the whole script file using the context menu.

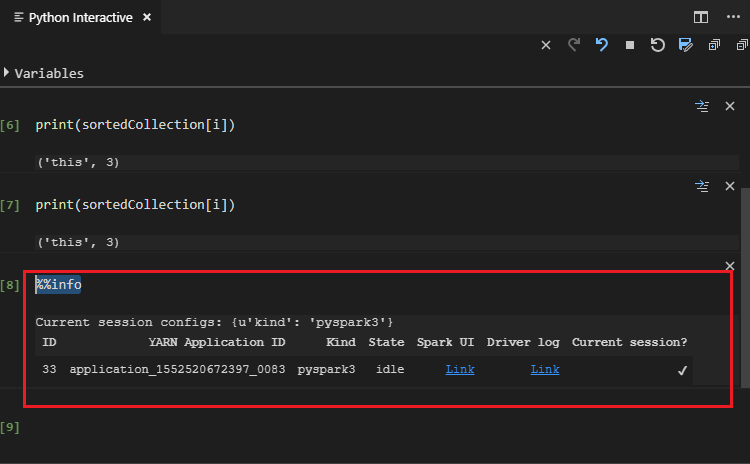
Enter "%%info", and then press Shift + Enter to view job information. (Optional)
Note
When Python Extension Enabled is unchecked in the settings (The default setting is checked), the submitted pyspark interaction results will use the old window.

Submit PySpark batch job
Reopen the folder SQLBDCexample created earlier if closed.
Select the file HelloWorld.py created earlier and it will open in the script editor.
Link a cluster if you haven't yet done so.
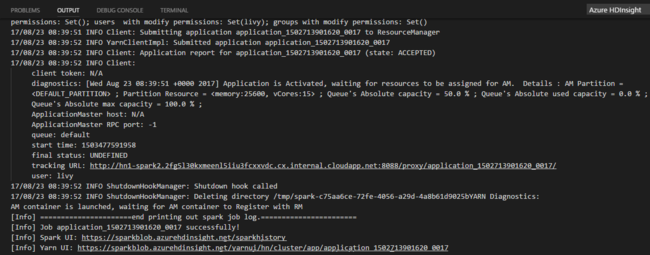
Right-click the script editor, and then select Spark: PySpark Batch, or use shortcut Ctrl + Alt + H.
Select the cluster if you haven't specified a default cluster. After you submit a Python job, submission logs appear in the OUTPUT window in Visual Studio Code. The Spark UI URL and Yarn UI URL are shown as well. You can open the URL in a web browser to track the job status.
Apache Livy configuration
Apache Livy configuration is supported, it can be set at the .VSCode\settings.json in the work space folder. Currently, Livy configuration only supports Python script. More details, see Livy README.
How to trigger Livy configuration
Method 1
- From the menu bar, navigate to File > Preferences > Settings.
- In the Search settings text box enter HDInsight Job Submission: Livy Conf.
- Select Edit in settings.json for the relevant search result.
Method 2
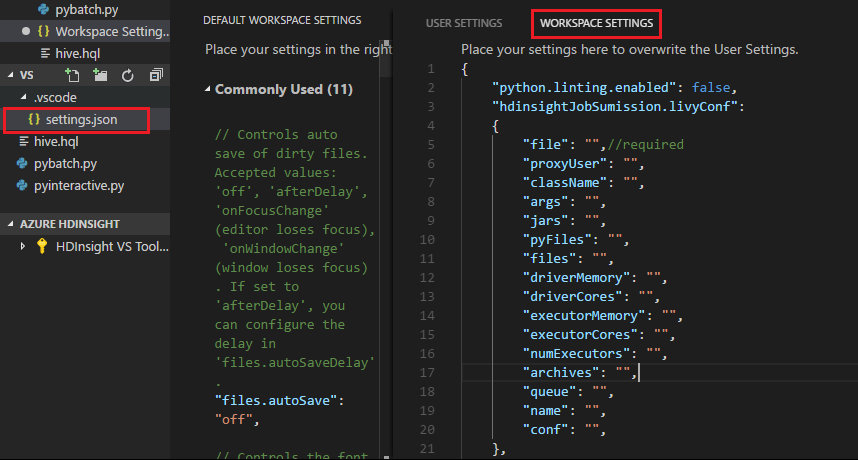
Submit a file, notice the .vscode folder is added automatically to the work folder. You can find the Livy configuration by selecting settings.json under .vscode.
The project settings:
Note
For settings driverMemory and executorMemory, set the value with unit, for example 1gb or 1024mb.
Supported Livy configurations
POST /batches
Request body
| name | description | type |
|---|---|---|
| file | File containing the application to execute | path (required) |
| proxyUser | User to impersonate when running the job | string |
| className | Application Java/Spark main class | string |
| args | Command line arguments for the application | list of strings |
| jars | jars to be used in this session | List of string |
| pyFiles | Python files to be used in this session | List of string |
| files | files to be used in this session | List of string |
| driverMemory | Amount of memory to use for the driver process | string |
| driverCores | Number of cores to use for the driver process | int |
| executorMemory | Amount of memory to use per executor process | string |
| executorCores | Number of cores to use for each executor | int |
| numExecutors | Number of executors to launch for this session | int |
| archives | Archives to be used in this session | List of string |
| queue | The name of the YARN queue to which submitted | string |
| name | The name of this session | string |
| conf | Spark configuration properties | Map of key=val |
| :- | :- | :- |
Response Body
The created batch object.
| name | description | type |
|---|---|---|
| id | The session id | int |
| appId | The application id of this session | String |
| appInfo | The detailed application info | Map of key=val |
| log | The log lines | list of strings |
| state | The batch state | string |
| :- | :- | :- |
Note
The assigned Livy config will display in output pane when submit script.
Additional features
Spark & Hive for Visual Studio Code supports the following features:
IntelliSense autocomplete. Suggestions pop up for keyword, methods, variables, and more. Different icons represent different types of objects.

IntelliSense error marker. The language service underlines the editing errors for the Hive script.
Syntax highlights. The language service uses different colors to differentiate variables, keywords, data type, functions, and more.
Unlink cluster
From the menu bar navigate to View > Command Palette..., and then enter Spark / Hive: Unlink a Cluster.
Select cluster to unlink.
Review OUTPUT view for verification.
Next steps
For more information on SQL Server big data cluster and related scenarios, See SQL Server Big Data Clusters.
Feedback
Coming soon: Throughout 2024 we will be phasing out GitHub Issues as the feedback mechanism for content and replacing it with a new feedback system. For more information see: https://aka.ms/ContentUserFeedback.
Submit and view feedback for