Events
Mar 31, 11 PM - Apr 2, 11 PM
The biggest SQL, Fabric and Power BI learning event. March 31 – April 2. Use code FABINSIDER to save $400.
Register todayThis browser is no longer supported.
Upgrade to Microsoft Edge to take advantage of the latest features, security updates, and technical support.
Applies to: ![]() SQL Server
SQL Server
Data Discovery & Classification adds capabilities for discovering, classifying, labeling & reporting the sensitive data in your databases. This can be done via T-SQL or using SQL Server Management Studio (SSMS). Discovering and classifying your most sensitive data (business, financial, healthcare, etc.) can play a pivotal role in your organizational information protection stature. It can serve as infrastructure for:
Note
Data Discovery & Classification is supported for SQL Server 2012 and later, and can be used with SSMS 17.5 or later. For Azure SQL Database, see Azure SQL Database Data Discovery & Classification.
Data Discovery & Classification forms a new information-protection paradigm for SQL Database, SQL Managed Instance, and Azure Synapse, aimed at protecting the data and not just the database. Currently it supports the following capabilities:
The following section describes the steps for discovering, classifying, and labeling columns containing sensitive data in your database, as well as viewing the current classification state of your database and exporting reports.
The classification includes two metadata attributes:
To classify your SQL Server database:
In SQL Server Management Studio (SSMS), connect to the SQL Server.
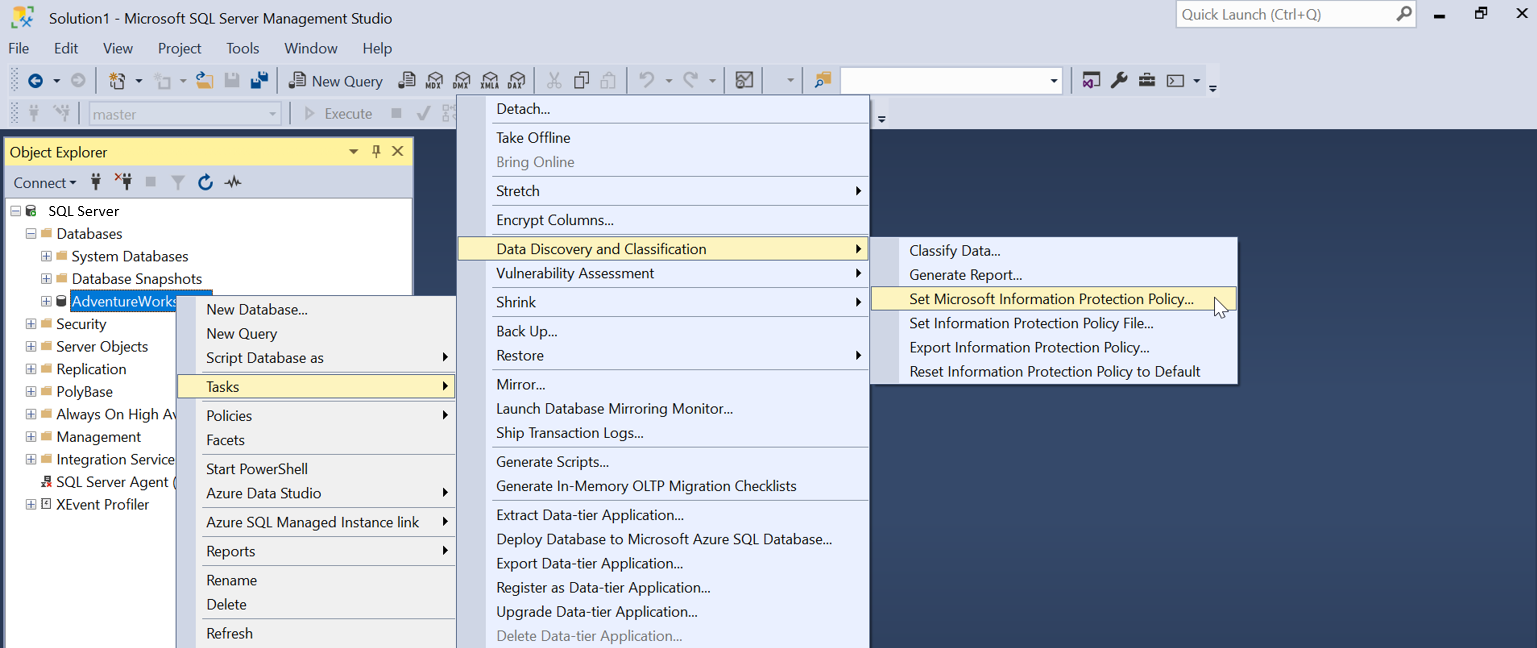
In the SSMS Object Explorer, select the database that you would like to classify and choose Tasks > Data Discovery and Classification > Classify Data....

The classification engine scans your database for columns (based on column names only) containing potentially sensitive data and provides a list of recommended column classifications:
To view the list of recommended column classifications, select the recommendations notification box at the top or the recommendations panel at the bottom of the window:


Review the list of recommendations:
To accept a recommendation for a specific column, check the checkbox in the left column of the relevant row. You can also mark all recommendations as accepted by checking the checkbox in the recommendations table header.
You can also change the recommended Information Type and Sensitivity Label using the drop-down boxes.
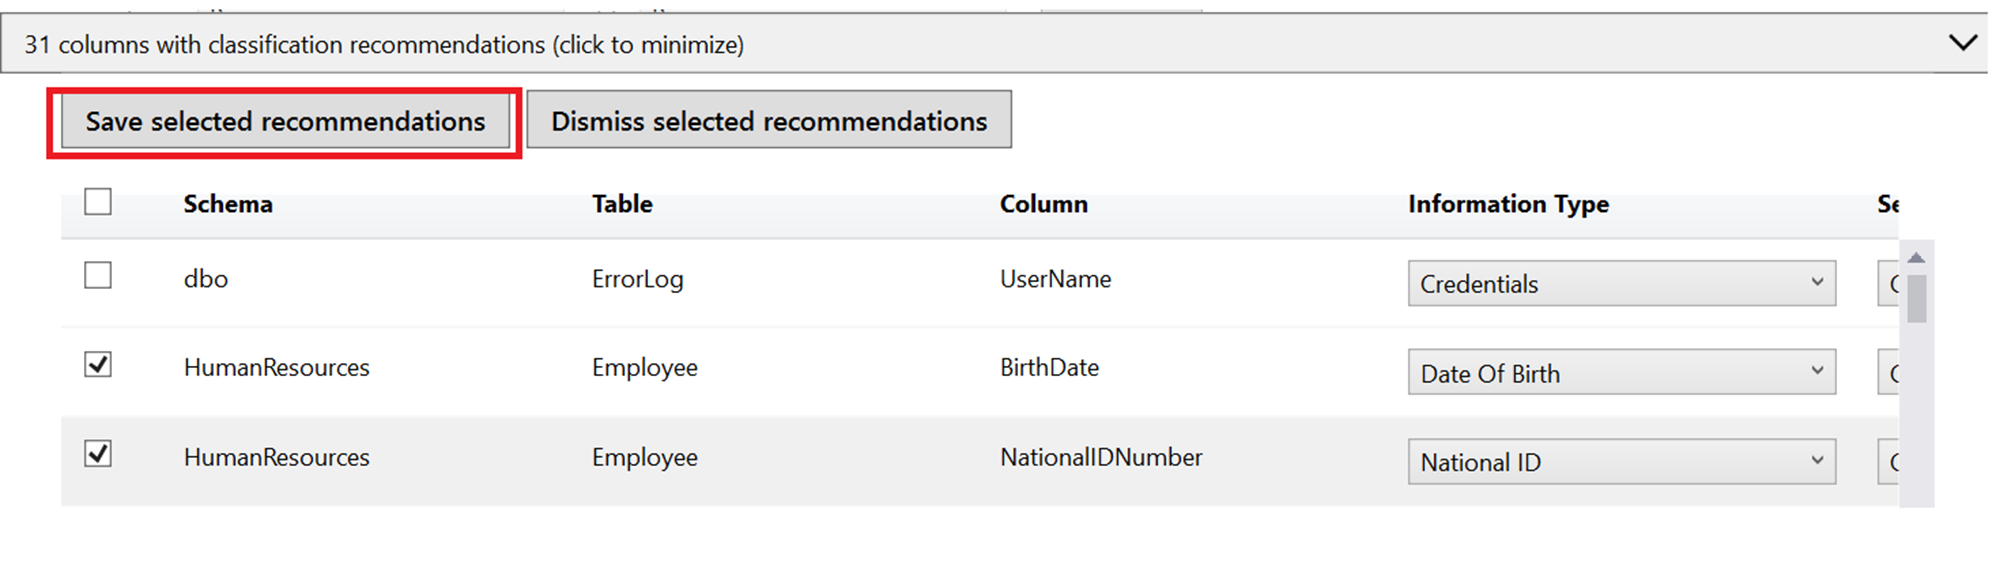
To apply the selected recommendations, select the Save selected recommendations button.

Note
Recommendation engine which does automatic data discovery and provides sensitive column recommendations is disabled when Microsoft Purview Information Protection policy mode is used.
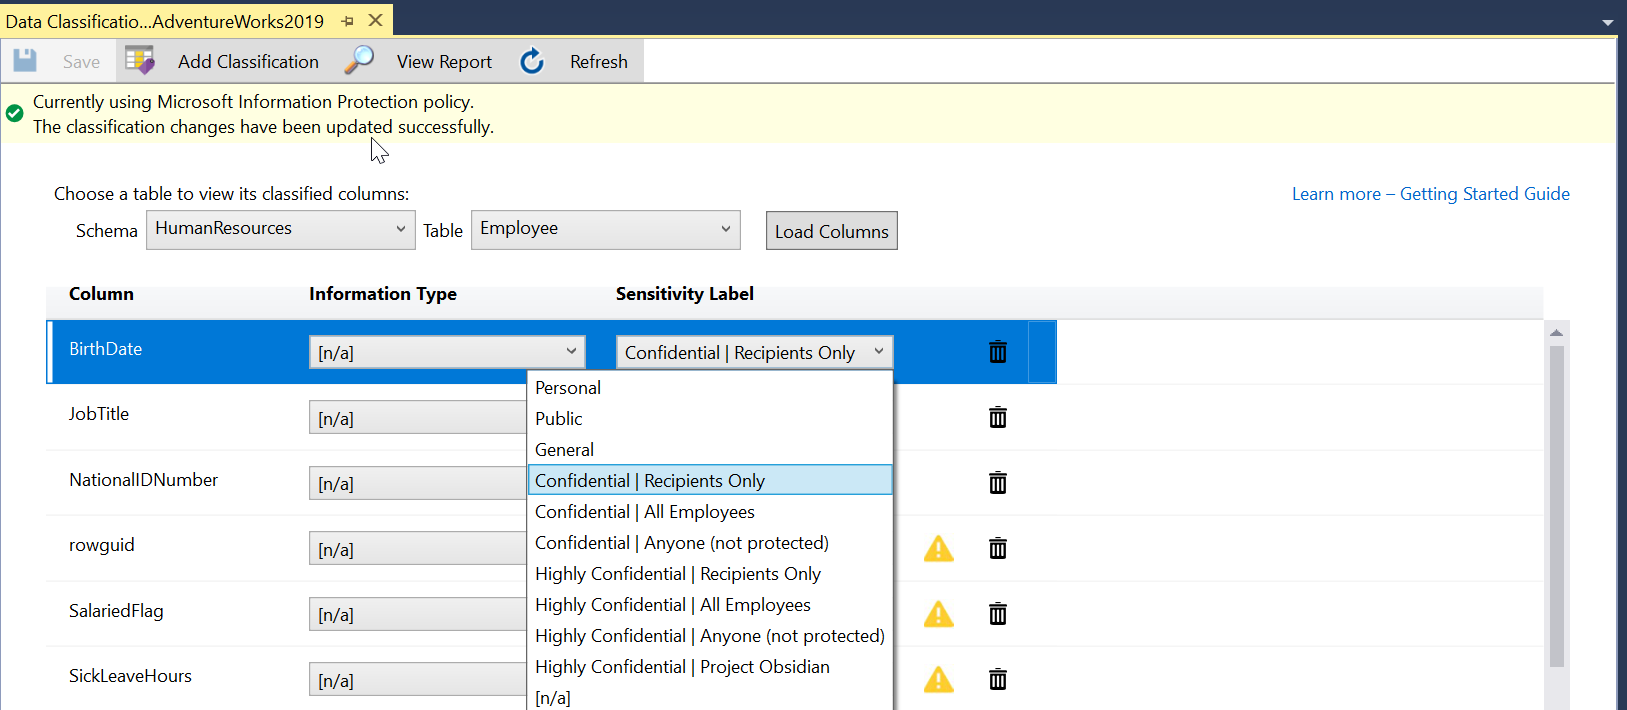
To display the classified columns, select appropriate schema and corresponding table from the drop-down, then select Load Columns.

You can also manually classify columns as an alternative, or in addition, to the recommendation-based classification:
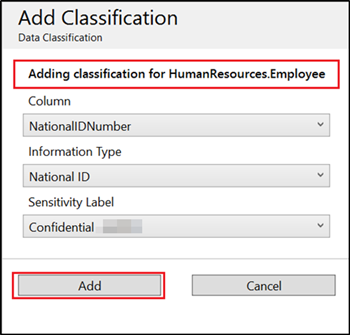
Select Add classification in the top menu of the window.

In the context window that opens, enter the column name that you want to classify, information type and the sensitivity label. Schema and table are selected based on the entries in the main page.
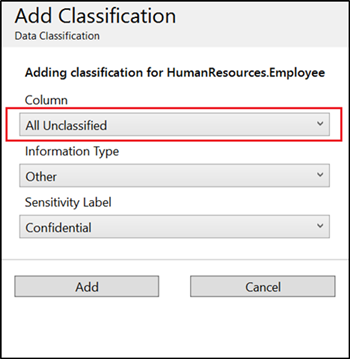
If you want to add classification for all the unclassified columns for a specific table in a single attempt, then select All Unclassified in the Column drop down of Add Classification page.
To complete your classification and persistently label (tag) the database columns with the new classification metadata, select the Save button on the top menu of the window.

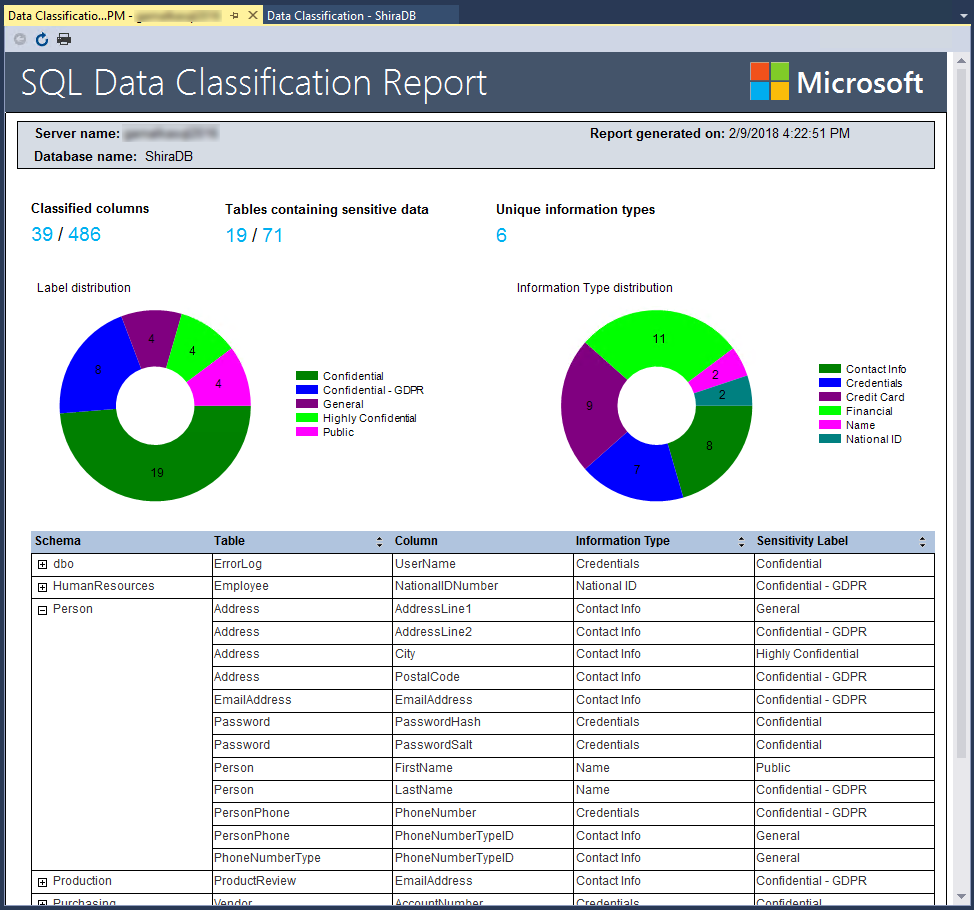
To generate a report with a full summary of the database classification state, select View Report in the top menu of the window. (You can also generate a report using SSMS. Select the database where you would like to generate the report, and choose Tasks > Data Discovery and Classification > Generate Report...)

Note
Microsoft Information Protection ( abbreviated as MIP) has been rebranded as Microsoft Purview Information Protection. Both the terms MIP and Microsoft Purview Information Protection are often used interchangeably in this document but both refer to the same concept.
Microsoft Purview Information Protection labels provide a simple and uniform way for your users to classify sensitive data in SQL Server. MIP sensitivity labels are created and managed in the Microsoft 365 compliance center [rebranded as Microsoft Purview compliance portal]. To learn how to create and publish MIP sensitive labels in Microsoft Purview Compliance Portal, see the article, Microsoft Information Protection sensitivity labels.
Now you can use SSMS to classify data at the source (SQL Server) using Microsoft Purview Information Protection labels, which are used in Power BI, Office, and other Microsoft products. These sensitivity labels are applied at the column level in a database, same as the SQL Information Protection policy.
Power BI datasets or reports that connect to sensitivity-labeled data in supported data sources can inherit those labels automatically, so that the data remains classified when brought into Power BI and exported to downstream applications. Availability of MIP policy in SSMS enables you to achieve an end-to-end enterprise-wide classification solution.
In SQL Server Management Studio (SSMS), connect to the SQL Server.
In the SSMS Object Explorer, select the database that you would like to classify and select Tasks > Data Discovery and Classification > Set Microsoft Information Protection Policy
An authentication window for Microsoft 365 to set the Microsoft Information Protection Policy will show. Select Sign In and enter or select a valid user credential to authenticate to your Microsoft 365 tenant.

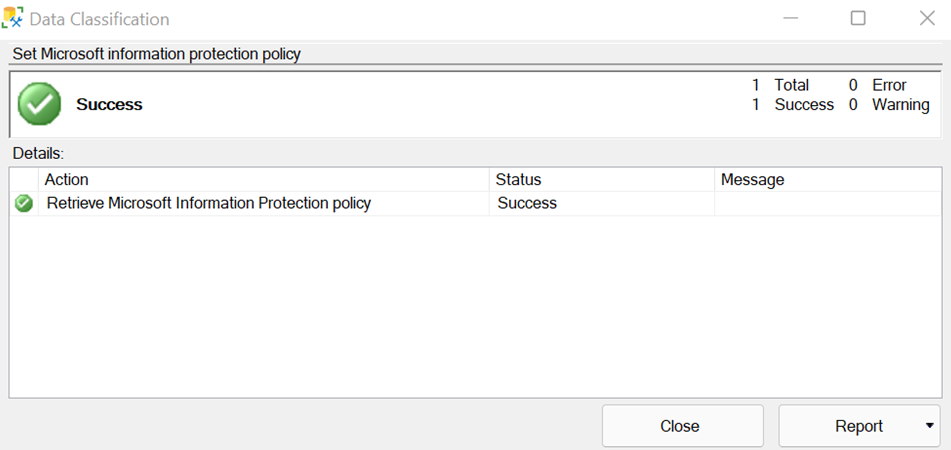
If the authentication is successful, you'll see a pop-up window with status as Success.
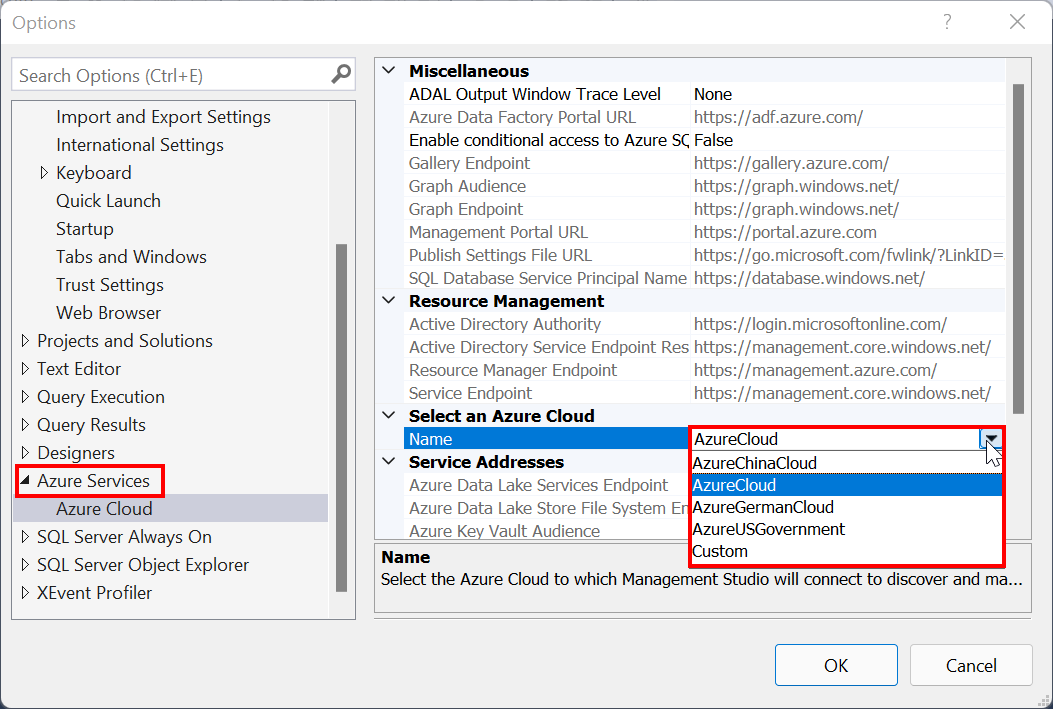
Optional - If you want to sign into any of the Microsoft sovereign cloud to authenticate to Microsoft 365, go to SSMS > Tools > Options > Azure Services > Azure Cloud, and change the Name to the relevant Microsoft sovereign cloud.
In the SSMS Object Explorer window, right-click on the database that you would like to classify and choose Tasks > Data Discovery and Classification > Classify Data. You can now add new classification using MIP sensitivity labels defined in your Microsoft 365 tenant and use those labels to classify columns in SQL Server.
Automatic data discovery and recommendation is disabled while in Microsoft Information Protection Policy mode. It's currently available only in SQL Information Protection Policy mode.
To reset the Information Protection Policy to default or SQL Information Protection, go to the SSMS Object Explorer, right-click on the database and choose Tasks > Data Discovery and Classification > Reset Information Protection Policy to Default. This will apply the default or SQL Information Protection policy and you can classify the data using SQL sensitivity labels instead of MIP labels.

To enable Information Protection Policy from a custom JSON file, go to the SSMS Object Explorer, right-click on the database and choose Tasks > Data Discovery and Classification > Set Information Protection Policy File.
Note
A warning icon indicates that the column was previously classified using a different Information Protection Policy than the currently selected policy mode. For example, if you are currently in the Microsoft Information Protection mode, and one of the columns was previously classified using SQL Information Protection Policy or Information Protection Policy from a custom policy file, you will see a warning icon against that column. You can decide whether you want to change the classification of the column to any of the sensitivity labels available in current policy mode or leave it as it is.
![]()
You can manage the Information Protection Policy using SSMS 18.4 or later:
In SQL Server Management Studio (SSMS), connect to the SQL Server.
In the SSMS Object Explorer, select one of your databases and choose Tasks > Data Discovery and Classification.
The following menu options allow you to manage the Information Protection Policy:
Set Microsoft Information Protection Policy: sets the Information Protection Policy to Microsoft Purview Information Protection Policy.
Set Information Protection Policy File: uses the SQL Information Protection Policy as defined in the selected JSON file. (See the default Information Protection Policy File)
Export Information Protection Policy: exports the Information Protection Policy to a JSON file.
Reset Information Protection Policy: resets the Information Protection Policy to the default SQL Information Protection Policy.
Important
Information protection policy file is not stored in the SQL Server. SSMS uses a default Information Protection Policy. If an Information Protection Policy customized fails, SSMS cannot use the default policy. Data classification fails. To resolve, click Reset Information Protection Policy to use the default policy and re-enable data classification.
SQL Server 2019 introduces sys.sensitivity_classifications system catalog view. This view returns information types and sensitivity labels.
On SQL Server 2019 instances, query sys.sensitivity_classifications to review all classified columns with their corresponding classifications. For example:
SELECT
    schema_name(O.schema_id) AS schema_name,
    O.NAME AS table_name,
    C.NAME AS column_name,
    information_type,
	label,
	rank,
	rank_desc
FROM sys.sensitivity_classifications sc
    JOIN sys.objects O
    ON  sc.major_id = O.object_id
	JOIN sys.columns C
    ON  sc.major_id = C.object_id  AND sc.minor_id = C.column_id
Prior to SQL Server 2019, the classification metadata for information types and sensitivity labels is in the following Extended Properties:
sys_information_type_namesys_sensitivity_label_nameFor instances of SQL Server 2017 and prior, the following example returns all classified columns with their corresponding classifications:
SELECT
    schema_name(O.schema_id) AS schema_name,
    O.NAME AS table_name,
    C.NAME AS column_name,
    information_type,
    sensitivity_label
FROM
    (
        SELECT
            IT.major_id,
            IT.minor_id,
            IT.information_type,
            L.sensitivity_label
        FROM
        (
            SELECT
                major_id,
                minor_id,
                value AS information_type
            FROM sys.extended_properties
            WHERE NAME = 'sys_information_type_name'
        ) IT
        FULL OUTER JOIN
        (
            SELECT
                major_id,
                minor_id,
                value AS sensitivity_label
            FROM sys.extended_properties
            WHERE NAME = 'sys_sensitivity_label_name'
        ) L
        ON IT.major_id = L.major_id AND IT.minor_id = L.minor_id
    ) EP
    JOIN sys.objects O
    ON  EP.major_id = O.object_id
    JOIN sys.columns C
    ON  EP.major_id = C.object_id AND EP.minor_id = C.column_id
On SQL Server 2019 instances, viewing classification requires VIEW ANY SENSITIVITY CLASSIFICATION permission. For more information, see Metadata Visibility Configuration.
Prior to SQL Server 2019, the metadata can be accessed using the Extended Properties catalog view sys.extended_properties.
Managing classification requires ALTER ANY SENSITIVITY CLASSIFICATION permission. The ALTER ANY SENSITIVITY CLASSIFICATION is implied by the database permission ALTER, or by the server permission CONTROL SERVER.
You can use T-SQL to add or remove column classifications, and also retrieve all classifications for the entire database.
For Azure SQL Database, see Azure SQL Database Data Discovery & Classification.
Consider protecting your sensitive columns by applying column level security mechanisms:
Events
Mar 31, 11 PM - Apr 2, 11 PM
The biggest SQL, Fabric and Power BI learning event. March 31 – April 2. Use code FABINSIDER to save $400.
Register today