Lesson 1: Create a report server project (Reporting Services)
In this lesson, you create a report server project and a report definition (.rdl) file using Report Designer.
Note
SQL Server Data Tools (SSDT) is a Microsoft Visual Studio environment for creating business intelligence solutions. SSDT features the Report Designer authoring environment, where you can open, modify, preview, save, and deploy Reporting Services paginated report definitions, shared data sources, shared datasets, and report parts.
Report parts are deprecated for all releases of SQL Server Reporting Services after SQL Server Reporting Services 2019, and discontinued starting in SQL Server Reporting Services 2022 and Power BI Report Server.
When you create reports with Report Designer, it creates a report server project that contains the report files and other resource files used by the report or reports.
Create a report server project
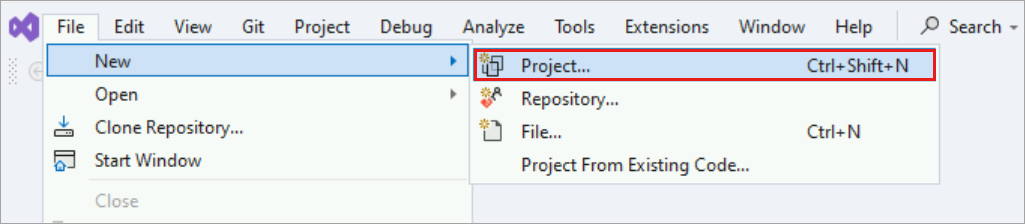
From the File menu, select New > Project.
In the left-most column under Installed, select Reporting Services. In some cases, it might be under the group Business Intelligence.
Important
For Visual Studio (VS), if you don't see Reporting Services in the left column, add the Report Designer by installing the SSDT workload. From the Tools menu, select Get Tools and Features... and select the SQL Server Data Tools from the workloads displayed. If you don't see the Report Services objects in the center column, add the Reporting Services extensions. From the Tools menu, select Extensions and Updates > Online. In the center column, select Microsoft Reporting Services Projects > Download from the displayed extensions. For SSDT, See Download SQL Server Data Tools (SSDT). In Visual Studio 2019, if previous steps didn't work, try installing Microsoft Reporting Service Projects extension.
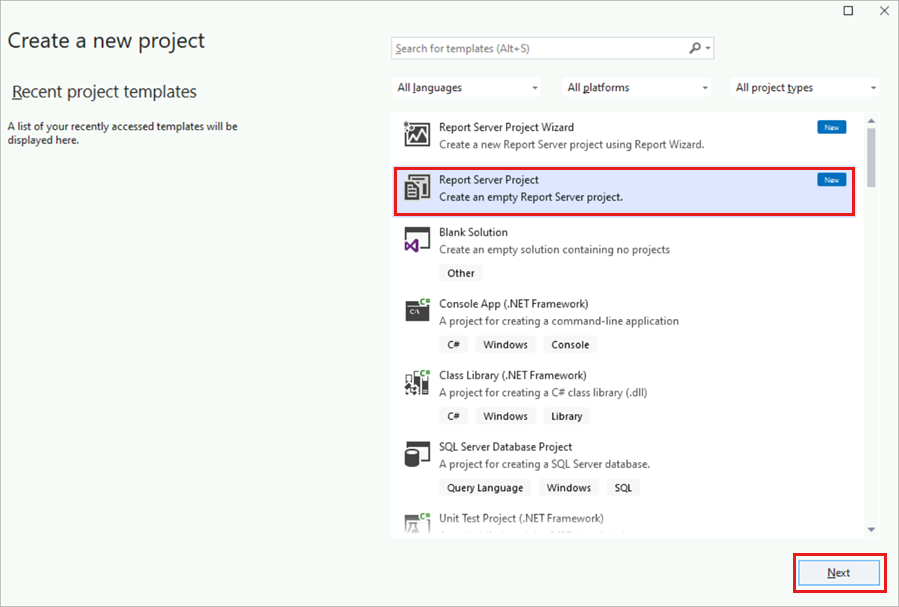
Select the Report Server Project icon
 in the center column of the New Project dialog box.
In the Name text box, type "Tutorial" for the project name. By default, the Location text box displays the path to your "Documents\Visual Studio 20xx\Projects" folder. Report Designer creates a folder named Tutorial below this path, and creates the Tutorial project in this folder. If the project doesn't belong to a VS solution, then VS also creates a solution file (.sln).
Select OK to create the project. The Tutorial project is displayed in the Solution Explorer pane on the right.
Create a report definition file (RDL)
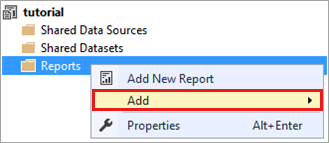
In the Solution Explorer pane, right-click on the Reports folder. If you don't see the Solution Explorer pane, select View menu > Solution Explorer.
Select Add > New Item.
In the Add New Item window, select the Report icon.
Type "Sales Orders.rdl" into the Name text box.
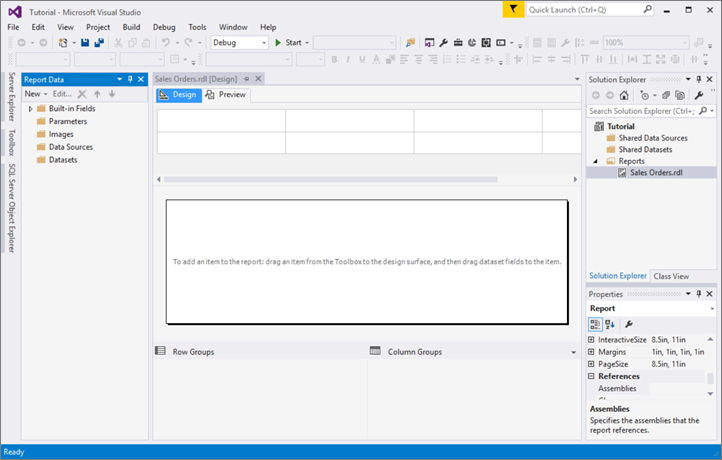
Select the Add button on the lower right side of the Add New Item dialog box to complete the process. Report Designer opens and displays the Sales Orders report file in Design view.

Next step
In this lesson, you created the Tutorial report project and the Sales Orders report. In the remaining lessons, you're going to learn how to:
- Configure a data source for the report.
- Create a dataset from the data source.
- Design and format the report layout.
Continue with Lesson 2: Specify connection information (Reporting Services).
Feedback
Coming soon: Throughout 2024 we will be phasing out GitHub Issues as the feedback mechanism for content and replacing it with a new feedback system. For more information see: https://aka.ms/ContentUserFeedback.
Submit and view feedback for