Create reports on Power BI
This article describes how to create reports on Power BI for Azure Monitor SCOM Managed Instance.
Prerequisites
Azure Active Directory based authentication:
Create an Azure Active Directory group for the users to whom you want to provide permissions to read data from the SQL Managed Instance through this Power BI report.
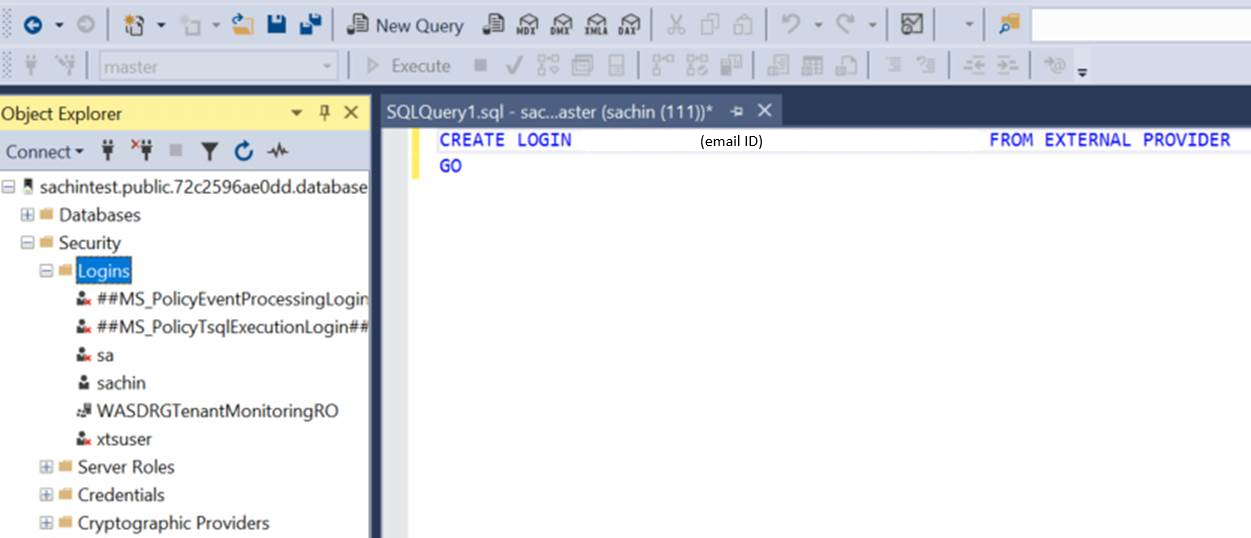
Create login credentials for the Azure Active Directory group in the SQL Managed Instance, which adds the user principal of the group in the SQL Managed Instance. To create a login, see Create Login (Transact-SQL).
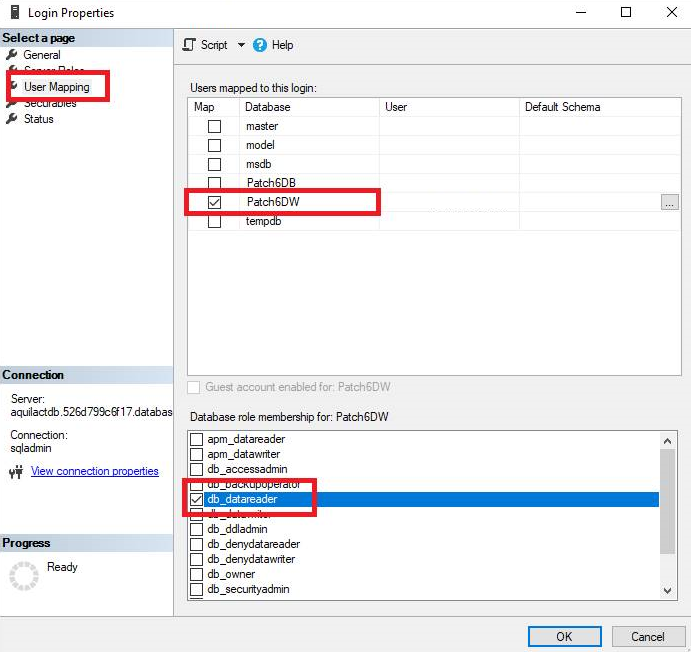
Provide db_datareader permission to the Login on Data warehouse database.
Download the supported SSMS and add login to SSMS.
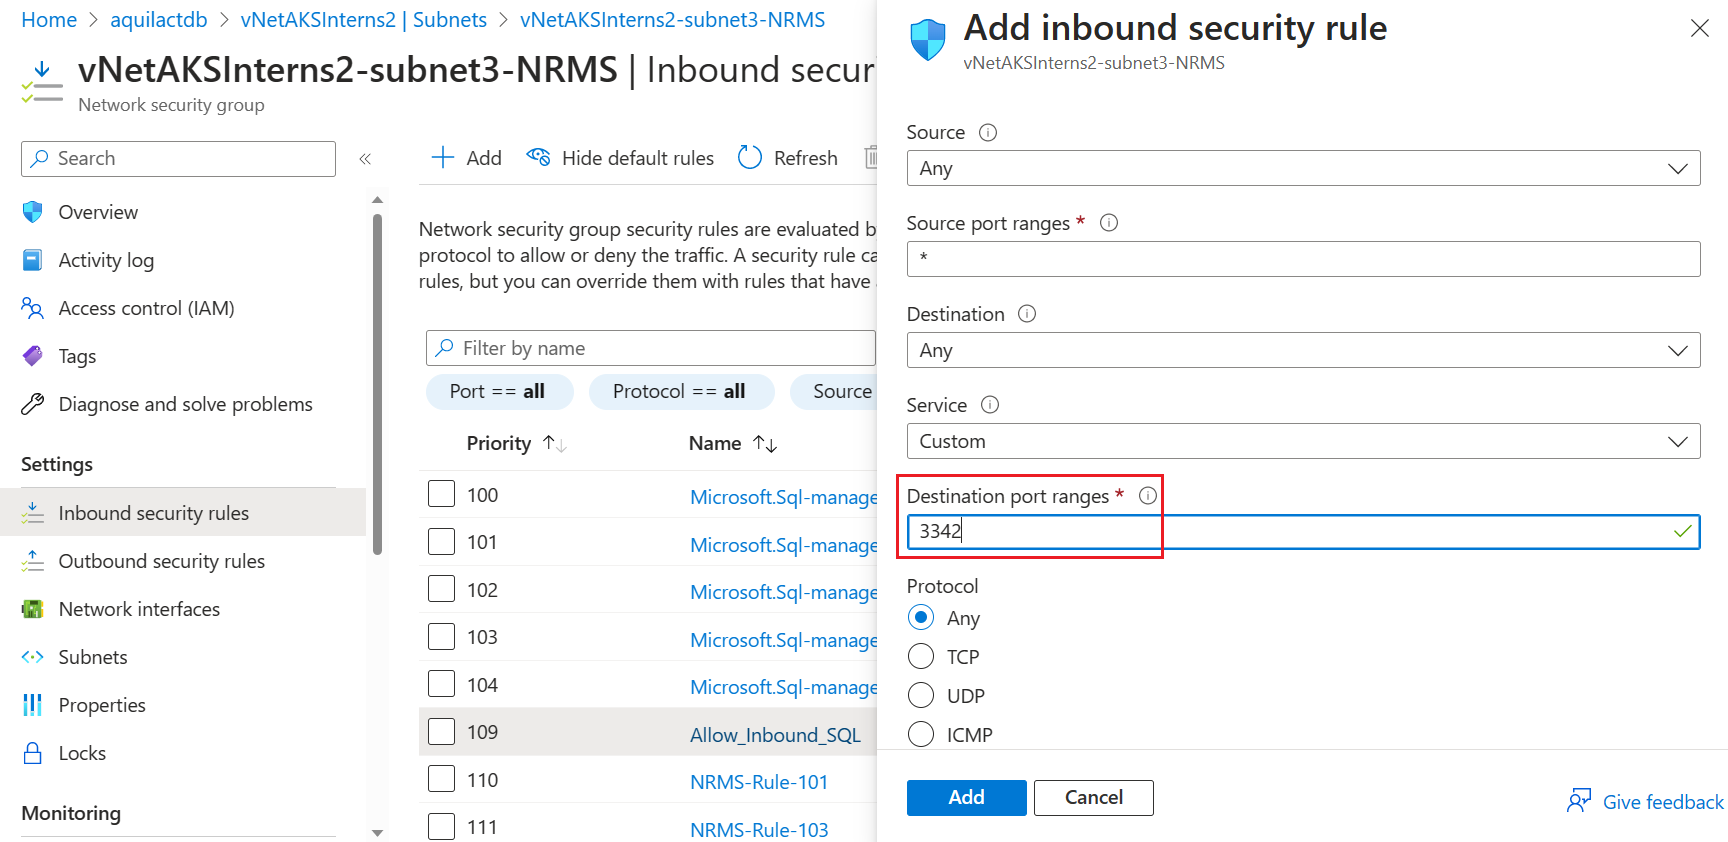
In the network security group of the subnet where the Azure SQL Managed Instance is hosted, create an NSG rule to allow public endpoint traffic on port number 3342. For more information about how to configure public endpoint, see Configure public endpoint.
SQL based authentication:
- You need the username and password of the SQL Managed Instance.
Create reports through public endpoint of SQL MI
Sign in to the Azure portal and search for SCOM Managed Instance.
On the Overview page, under Reports, select Power BI. You have three options on the Power BI page.
- Prerequisite: Allows you to manage endpoints.
- Configure and install Power BI: Allows you to install and configure the SCOM Managed Instance dashboard in Power BI.
- View Power BI dashboard: Allows you to visualize the SCOM Managed Instance dashboard in Power BI after the configuration.
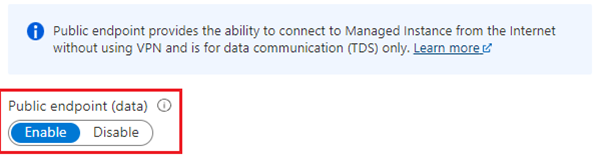
Review the Prerequisites to ensure Public endpoint of SQL MI is enabled. You'll notice the Database Host URL and Database name are displayed.
Select Configure Dashboard, Powerbi.com opens in a new browser. Select Get it now to install Microsoft SCOM managed instance reports Power BI app in your workspace.

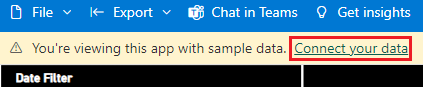
The app displays sample data. You can edit the parameter values Data-Warehouse DB host URL and Data-Warehouse Name.
Note
To update the parameters, go to Settings of the dataset, and edit the parameters or select Connect your data in the banner.
After you enter the parameters, select any one of the following authentication methods:
- SQL username and password-based method
- Azure Active Directory-based method
The dataset and reports will be refreshed.
Note
To view Power BI reports of multiple SCOM Managed Instances, Microsoft SCOM managed instance reports app must be installed individually in a different Power BI workspace.
Next steps
Connect the Azure Monitor SCOM Managed Instance to Ops console.
Feedback
Coming soon: Throughout 2024 we will be phasing out GitHub Issues as the feedback mechanism for content and replacing it with a new feedback system. For more information see: https://aka.ms/ContentUserFeedback.
Submit and view feedback for