Patch Azure Monitor SCOM Managed Instance
Azure Monitor SCOM Managed Instance offers a convenient patching experience compared to on-premises System Center Operations Manager.
Following are the key highlights:
- No update rollup in SCOM Managed Instance. A patch is released as and when there are significant fixes and updates made to the product. They're released at a frequency of as often as two weeks or two months.
- Patching is quick and convenient and happens at the click of a button.
- All newer patches are backward compatible with the older versions.
This article provides information on how to patch your SCOM Managed Instance.
Pre-Patching checklist
Before you proceed with the patching process, complete the following prechecks to ensure a successful patching operation:
SQL managed instance status: Verify that the SQL managed instance is operational and running, and not in a shutdown state.
Management server health: Confirm the health of existing Management Servers.
Domain credentials verification: Validate the status of the domain credentials used in the key vault. If the credentials have expired, update the password to ensure they're active and functional.
NAT Gateway association: Ensure that the NAT Gateway is still associated with the subnet and hasn't been removed.
VNET connectivity requirements: Ensure that VNet to VNet communication is allowed to enable communication between the newly added managed servers and the existing ones. Additionally, verify that the connectivity from the VNet to the SQL managed instance and Domain Controller is operational.
Patch SCOM Managed Instance
To patch SCOM Managed Instance, follow these steps:
Sign in to the Azure portal and search for SCOM Managed Instance.
On the Overview page, under Configuration, select Patching.
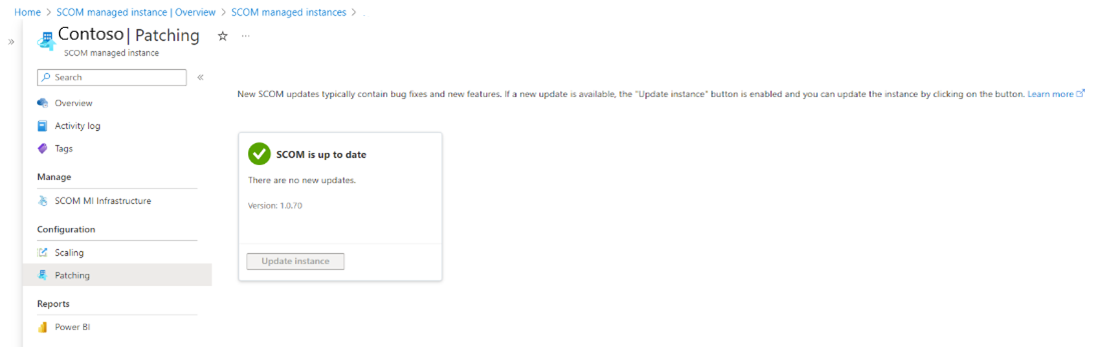
On the Patching page, you see the status of the updates available for your instance.
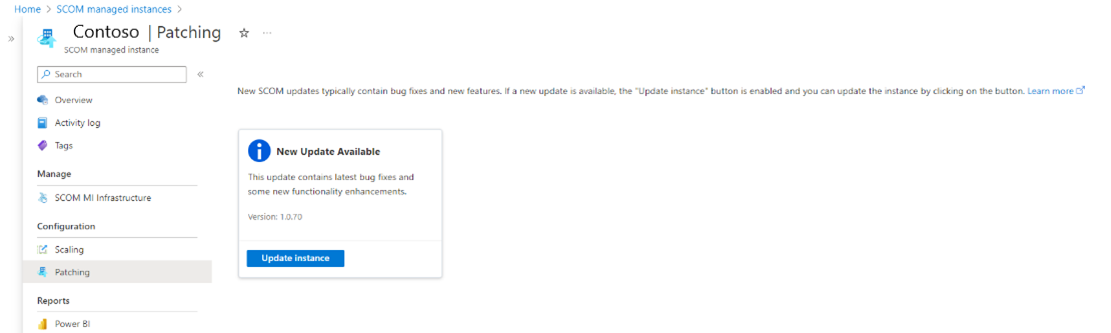
Select Update instance to update your instance.
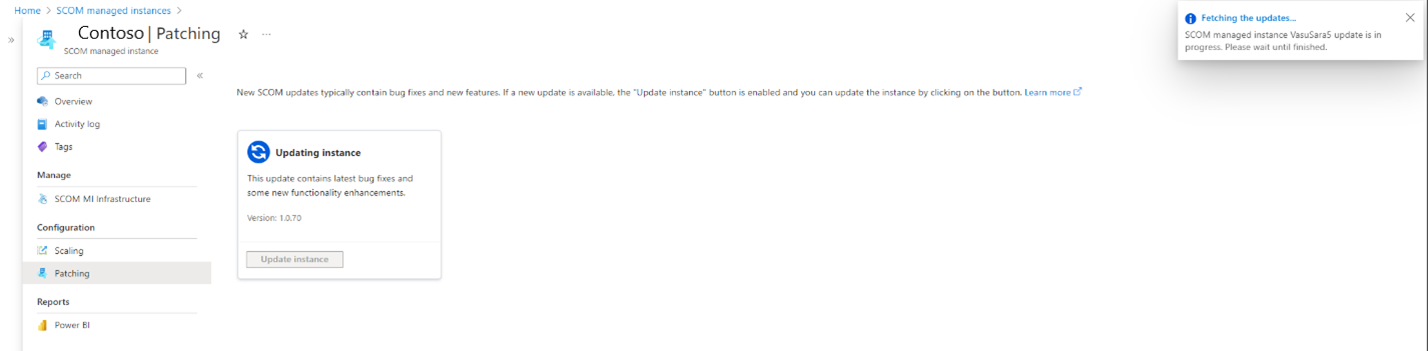
It takes 30 mins to 1 hour to successfully update the instance.
Note
To run custom configurations in your SCOM Managed Instance management servers, see Customizations on Azure Monitor SCOM managed instance management servers.
Troubleshoot patching issues
Issue: In rare cases, after patching, stale Management Servers are visible on console
Cause: Occurs if a patching operation has left an inconsistent state after completion.
Resolution: Microsoft Azure Virtual Machine Scale Sets is used to provision the management servers for SCOM Managed Instances. To remove the stale management server from the system, follow these steps:
Access the Azure Virtual Machine Scale Sets and log in to one of the management servers for the SCOM Managed Instance.
Launch PowerShell in administrative mode and navigate to the following directory.
C:\Packages\Plugins\Microsoft.Azure.SCOMMIServer.ScomServerForWindows\<version>\bin\troubleshooterNote
To find the version, go to
C:\Packages\Plugins\Microsoft.Azure.SCOMMIServer.ScomServerForWindowsand review all available versions and then select the latest one.Execute the following script:
.\RemoveStaleManagementServers.ps1The script is interactive and prompts you for the FQDN of the stale server.
Provide the accurate FQDN of the stale management server you wish to remove.
For example, FQDN: SCOMMI2000001.contoso.com.
Next steps
Connect the Azure Monitor SCOM Managed Instance to Ops console
Feedback
Coming soon: Throughout 2024 we will be phasing out GitHub Issues as the feedback mechanism for content and replacing it with a new feedback system. For more information see: https://aka.ms/ContentUserFeedback.
Submit and view feedback for