Control SDN virtual network bandwidth with QoS
Important
This version of Virtual Machine Manager (VMM) has reached the end of support. We recommend you to upgrade to VMM 2022.
This article provides information about how to configure the Quality of Service (QoS) settings for SDN virtual networks in System Center - Virtual Machine Manager (VMM). Through this configuration, you can limit the bandwidth of the traffic flowing in or out of a virtual network adapter (vNIC) by specifying the minimum reserved bandwidth or maximum bandwidth for the adapter.
- Service providers can prevent a high-traffic VM from blocking other VMs.
- Tenants can get the minimum reserved bandwidth regardless of the network traffic.
For detailed information on the SDN QoS settings available in Network Controller, see Configure Quality of Service (QoS) for a Tenant VM Network Adapter.
QoS settings are managed in VMM through virtual network adapter port profiles associated with a port classification. Port profile settings enable uniformity and ease of application across multiple adapters.
Before you start
Ensure that you have the network controller deployed in the SDN fabric. Learn more.
Create virtual network adapter port profiles
To create virtual network adapter port profile, use the following procedure:
Go to Fabric > Port Profiles.
Right-click Port Profile and select Create Hyper -V Port Profile. Provide a name and optional description. For example, name can be TenantA.
In General, select Virtual Network Adapter Port Profile.
Go to Bandwidth Settings.
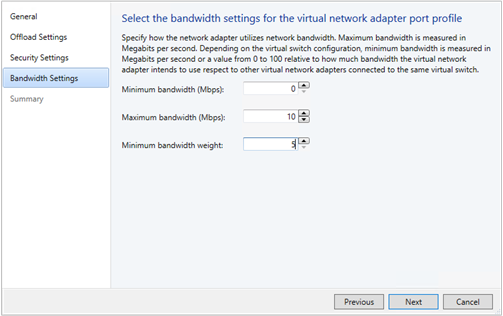 .
.In Bandwidth Settings, enter the minimum and maximum bandwidth values that you want to apply to the selected vNIC. Maximum bandwidth (Mbps) and Minimum bandwidth (Weight) are used to reserve a portion of the outbound bandwidth for the vNICs.
Maximum bandwidth (Mbps): Specify the maximum outbound bandwidth that can be used by this vNIC. This is irrespective of the bandwidth mode configured on the switch. A value of 0 implies that the maximum isn't configured.
Minimum bandwidth (Weight): Specify a weighted portion of the outbound bandwidth that you want to reserve for this vNIC. This will reserve a weighted portion of the total physical NIC(s) bandwidth based on the total weights reserved by all other vNICs for a particular switch.
In Summary, view the settings and select Finish.
Note
- Minimum bandwidth (Mbps) is not supported by VMM for SDN.
- Limiting the inbound bandwidth of the vNIC is not supported by VMM.
- Minimum bandwidth (Weight) sets the outboundReservedValue setting on the network controller, and maximum bandwidth (Mbps) sets the outboundMaximumMbps setting.
- Ensure that the minimum and maximum values for bandwidth are within the bandwidth range of the physical NIC(s) that the logical switch is deployed on. Otherwise, the bandwidth allocation request will be rejected.
Create port classification
To create a port classification:
- Go to Fabric > Networking.
- Right-click Port Classifications > Create Port Classification.
- In the Create Port Classification wizard, in General, give a name to the classification and select Finish.
As an example, we created a port classification with the name TenantA workload, which we use later.
Associate port classifications to logical switch
To associate a port classification to the logical switch, use the following procedure:
Go to Fabric > Networking > Logical Switches.
Right-click the selected logical switch to view its Properties.
Select Virtual Ports, select Add to open the Add Virtual Port page.
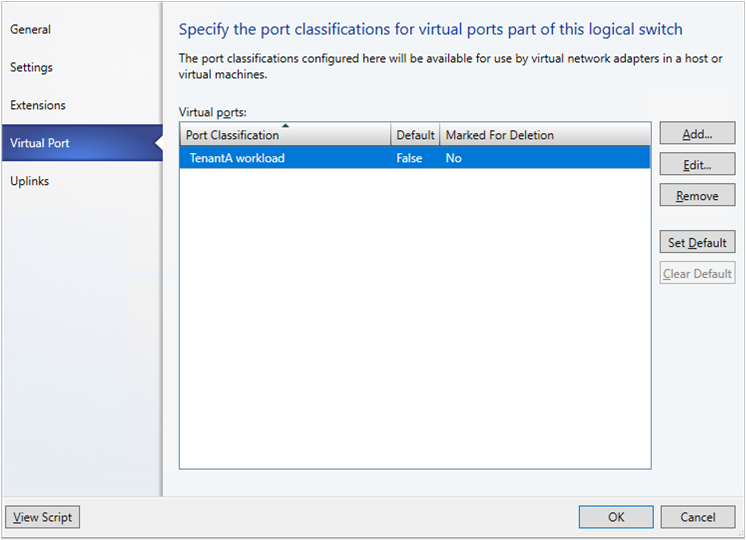
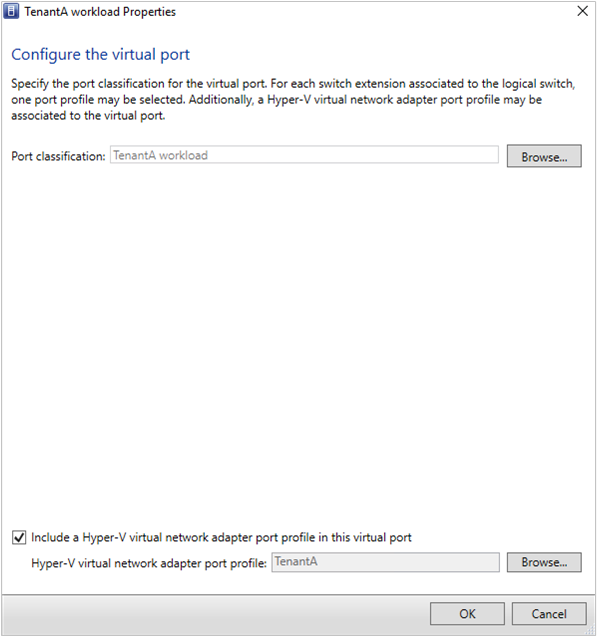
Browse to select the port classification (as an example, TenantA Workload) and select OK.
Select the Include the Hyper-V virtual network adapter port profile option and select Browse. Select the vNIC port profile (as an example, TenantA that you created in the previous procedure). Select OK.
Repeat the above steps to add the port classifications required for this logical switch.
Apply port classification to virtual network adapter
To apply a port classification (and hence the QoS settings) to a virtual network adapter, use the following procedure:
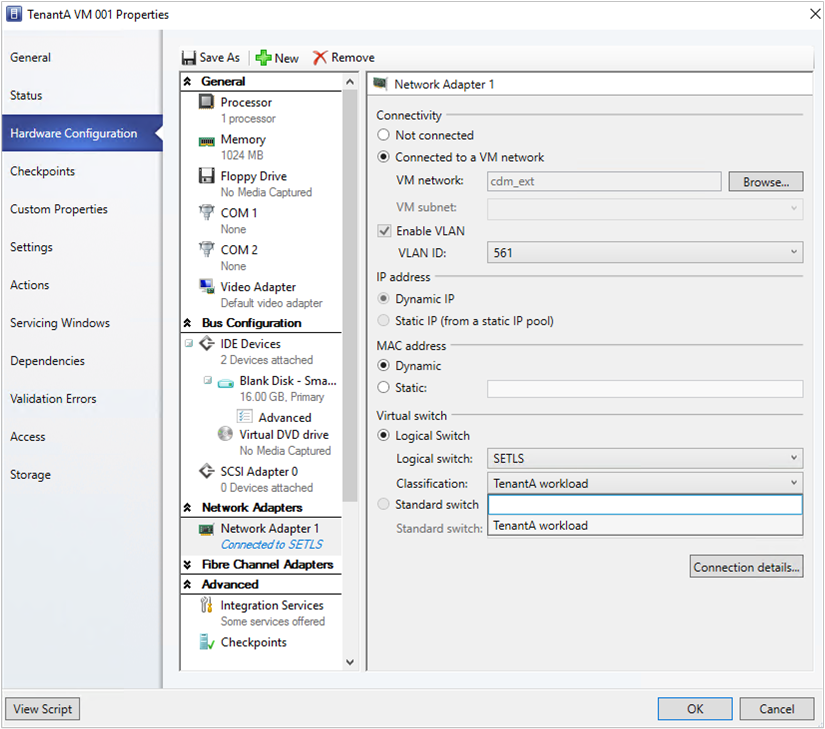
- Go to VMs and Services, right-click the selected VM and open its Properties.
- Go to the Hardware Configuration page and select the virtual network adapter.
- Select the desired port classification from the Classification dropdown list.
Note
- Only the classifications available for the logical switch are displayed here. You can also apply a port classification while creating a VM.
- You can also apply a port classification to the host virtual network adapter via the host properties Virtual Switches page.
Feedback
Coming soon: Throughout 2024 we will be phasing out GitHub Issues as the feedback mechanism for content and replacing it with a new feedback system. For more information see: https://aka.ms/ContentUserFeedback.
Submit and view feedback for