Walkthrough: Create an Extension Pack
Applies to: ![]() Visual Studio
Visual Studio ![]() Visual Studio for Mac
Visual Studio for Mac
Note
This article applies to Visual Studio 2017. If you're looking for the latest Visual Studio documentation, see Visual Studio documentation. We recommend upgrading to the latest version of Visual Studio. Download it here
An Extension Pack is a set of extensions that can be installed together. Extension Packs enable you to easily share your favorite extensions with other users or bundle a set of extensions together for a particular scenario.
Prerequisites
Starting in Visual Studio 2015, the Visual Studio SDK is included as an optional feature in Visual Studio setup. You can also install the VS SDK later on. For more information, see Installing the Visual Studio SDK.
The Extension Pack feature is available starting with Visual Studio 15.8 Preview 2.
Create an extension with an Extension Pack item template
The Extension Pack item template creates an Extension Pack with set of extensions that can be installed together.
In the New Project dialog, search for "vsix" and select VSIX Project. For Project name, type "Test Extension Pack". Select Create.
In the Solution Explorer, right-click the project node and select Add > New Item. Go to the Visual C# Extensibility node and select Extension Pack. Leave the default file name (ExtensionPack1.cs).
ExtensionPack1.vsext file is added which contains the following code
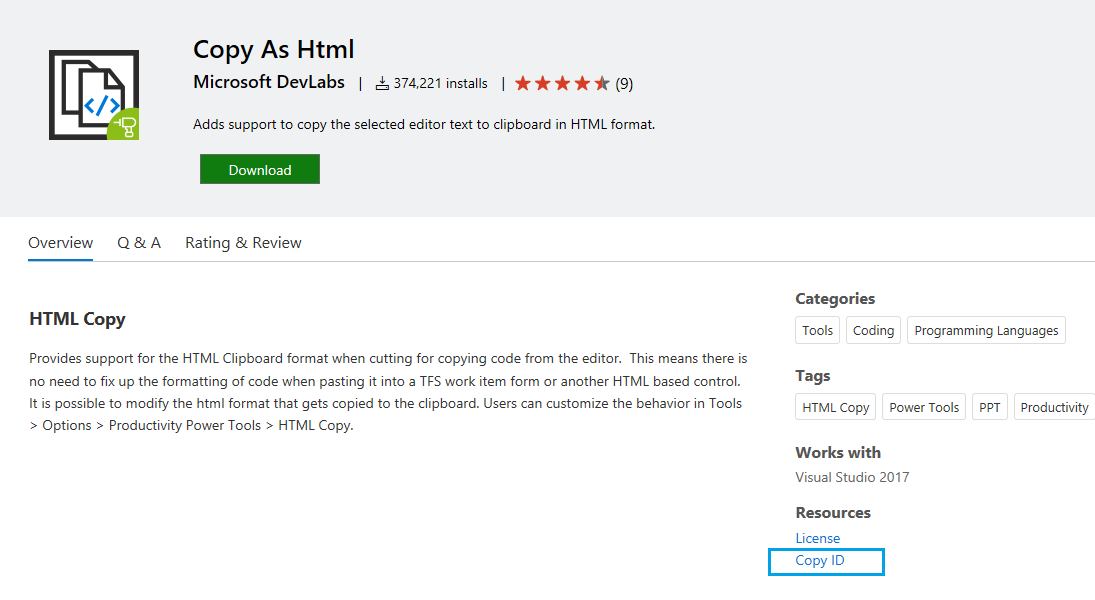
{
 "id": "ExtensionPack1",
 "name": "ExtensionPack1",
 "description": "Read about creating extension packs at https://aka.ms/vsextpack",
 "version": "1.0.0.0",
 "extensions": [  // List of extensions that are included in the Extension Pack.
   {
     "vsixId": "41858b2d-ff0b-4a43-80b0-f1b2d6084935", // The vsix id of the extension you want to   include.
     "name": "AlignAssignments"
   },
   {
       "vsixId": "42374550-426a-400e-96f9-237682e8dea6",
     "name": "CopyAsHtml"
   }
 ]
}
The vsixid of the extension to include in the Extension Pack can be found on the Visual Studio Marketplace. Find the extension you want to include and click on Copy ID. You can update the existing vsixId in the above file or add another extension to the list.
Build the project and upload your extension to the Marketplace. See Publishing a Visual Studio extension.
Note
An Extension pack can only install extensions that are available on the Visual Studio Marketplace or Private gallery.
Install the Extension Pack from the Visual Studio Marketplace
Now that the extension is published, install it in Visual Studio and test it there.
- In Visual Studio, on the Tools menu, click Extensions and Updates.
Click Online and then search for "Test Extension Pack".
Click Download. The extension and its list of extensions included in the Extension Pack will then be scheduled for install.
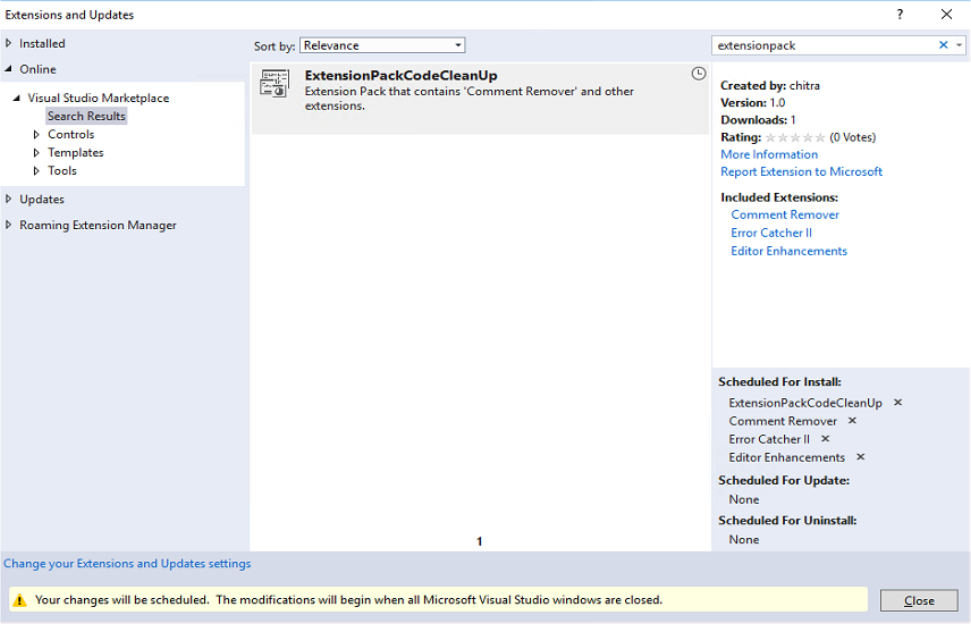
Below is a sample Extension Pack download view of the Manage Extensions dialog. If you prefer to install only some of the included extensions in the Extension pack, you can modify the extension list in Scheduled For Install.
To complete the installation, close all instances of Visual Studio.
Remove the extension
To remove the extension from your computer:
- In Visual Studio, on the Tools menu, click Extensions and Updates.
Select Test Extension Pack and then click Uninstall. The extension and its list of extensions included in the Extension Pack will then be scheduled for uninstall.
To complete the uninstallation, close all instances of Visual Studio.