Walkthrough: Publishing a Visual Studio extension via command line
This walkthrough shows you how to publish a Visual Studio extension to the Visual Studio Marketplace using the command line. When you add your extension to the Marketplace, developers can use the Extensions and Updates dialog to browse there for new and updated extensions.
VsixPublisher.exe is the command line tool for publishing Visual Studio extensions to the Marketplace. It can be accessed from ${VSInstallDir}\VSSDK\VisualStudioIntegration\Tools\Bin\VsixPublisher.exe. Commands available on this tool are: publish, deletePublisher, deleteExtension, login, logout.
Commands
publish
Publishes an extension to the Marketplace. The extension can be a vsix, an exe/msi file, or a link. If the extension already exists with the same version, it will overwrite the extension. If the extension does not already exist, it will create a new extension.
| Command Options | Description |
|---|---|
| payload (required) | Either a path to the payload to publish or a link to use as the "more info URL". |
| publishManifest (required) | Path to the publish manifest file to use. |
| ignoreWarnings | List of warnings to ignore when publishing an extension. These warnings are shown as command line messages when publishing an extension. (for example, "VSIXValidatorWarning01, VSIXValidatorWarning02") |
| personalAccessToken | Personal Access Token (PAT) that's used to authenticate the publisher. If not provided, the PAT is acquired from the logged-in users. |
VsixPublisher.exe publish -payload "{path to vsix}" -publishManifest "{path to vs-publish.json}" -ignoreWarnings "VSIXValidatorWarning01,VSIXValidatorWarning02"
deletePublisher
Deletes a publisher on the Marketplace.
| Command Options | Description |
|---|---|
| publisherName (required) | The name of the publisher (for example, the identifier). |
| personalAccessToken (required) | Personal Access Token that is used to authenticate the publisher. |
VsixPublisher.exe deletePublisher -publisherName "{Publisher Name}" -personalAccessToken "{Personal Access Token}"
deleteExtension
Deletes an extension from the Marketplace.
| Command Options | Description |
|---|---|
| extensionName (required) | The name of the extension to delete. |
| publisherName (required) | The name of the publisher (for example, the identifier). |
| personalAccessToken | Personal Access Token that is used to authenticate the publisher. If not provided, the pat is acquired from the logged-in users. |
VsixPublisher.exe deleteExtension -extensionName "{Extension Name}" -publisherName "{Publisher Name}"
login
Logs a publisher into the machine.
| Command Options | Description |
|---|---|
| personalAccessToken (required | Personal Access Token that is used to authenticate the publisher. |
| publisherName (required) | The name of the publisher (for example, the identifier). |
| overwrite | Specifies that any existing publisher should be overwritten with the new personal access token. |
VsixPublisher.exe login -personalAccessToken "{Personal Access Token}" -publisherName "{Publisher Name}"
logout
Logs a publisher out of the machine.
| Command Options | Description |
|---|---|
| publisherName (required) | The name of the publisher (for example, the identifier). |
| ignoreMissingPublisher | Specifies that the tool should not error if the specified publisher is not already logged-in. |
VsixPublisher.exe logout -publisherName "{Publisher Name}"
createPublisher
Caution
This command is no longer available. You can create a new publisher by navigating to Visual Studio Marketplace.
publishManifest file
A publishManifest file is used by the publish command. It represents all the metadata about the extension that the Marketplace needs to know. If the extension being uploaded is from a VSIX extension, the "identity" property must only have the "internalName" set. This is because the rest of the "identity" properties can be generated from the vsixmanifest file. If the extension is a msi/exe or a link extension, the user must provide the required fields in the "identity" property. The rest of the manifest contains information specific to the Marketplace (for example, categories, whether Q&A is enabled, etc.).
VSIX extension publishManifest file sample:
{
    "$schema": "http://json.schemastore.org/vsix-publish",
    "categories": [ "build", "coding" ],  // The categories of the extension. Between 1 and 3 categories are required.
    "identity": {
        "internalName": "MyVsixExtension" // If not specified, we try to generate the name from the display name of the extension in the vsixmanifest file.
                                            // Required if the display name is not the actual name of the extension.
    },
    "overview": "overview.md",            // Path to the "readme" file that gets uploaded to the Marketplace. Required.
    "priceCategory": "free",              // Either "free", "trial", or "paid". Defaults to "free".
    "publisher": "MyPublisherName",       // The name of the publisher. Required.
    "private": false,                     // Specifies whether or not the extension should be public when uploaded. Defaults to false.
    "qna": true,                          // Specifies whether or not the extension should have a Q&A section. Defaults to true.
    "repo": "https://github.com/MyPublisherName/MyVsixExtension" // Not required.
}
MSI/EXE or LINK publishManifest file sample:
{
    "$schema": "http://json.schemastore.org/vsix-publish",
    "categories": [ "build", "coding" ],
    "identity": {
        "description": "My extension.", // The description of the extension. Required for non-vsix extensions.
        "displayName": "My Extension",  // The display name of the extension. Required for non-vsix extensions.
        "icon": "\\path\\to\\icon.ico", // The path to an icon file (can be relative to the json file location). Required for non-vsix extensions.
        "installTargets": [             // The installation targets for the extension. Required for non-vsix extensions.
            {
                "sku": "Microsoft.VisualStudio.Community",
                "version": "[10.0, 16.0)"
            }
        ],
        "internalName": "MyExtension",
        "language": "en-US",            // The default language id of the extension. Can be in the "1033" or "en-US" format. Required for non-vsix extensions.
        "tags": [ "tag1", "tag2" ],     // The tags for the extension. Not required.
        "version": "3.7.0",             // The version of the extension. Required for non-vsix extensions.
        "vsixId": "MyExtension",        // The vsix id of the extension. Not required but useful for showing updates to installed extensions.
    },
    "overview": "overview.md",
    "priceCategory": "free",
    "publisher": "MyPublisherName",
    "private": false,
    "qna": true,
    "repo": "https://github.com/MyPublisherName/MyVsixExtension"
}
Asset files
Asset files can be provided for embedding things like images in the readme file. For example, if an extension has the following "overview" Markdown document:
TestExtension
...
This is test extension.

In order to resolve "images/testlogo.png" in the previous example, a user can provide "assetFiles" in their publish manifest like below:
{
    "assetFiles": [
        {
            "pathOnDisk": "\\path\\to\\logo.png",
            "targetPath": "images/logo.png"
        }
    ],
    // other required fields
}
Publishing walkthrough
Prerequisites
To follow this walkthrough, you must install the Visual Studio SDK. For more information, see Installing the Visual Studio SDK.
Create a Visual Studio extension
In this case, we will use a default VSPackage extension, but the same steps are valid for every kind of extension.
- Create a VSPackage in C# named "TestPublish" that has a menu command. For more information, see Creating your First Extension: Hello World.
Package your extension
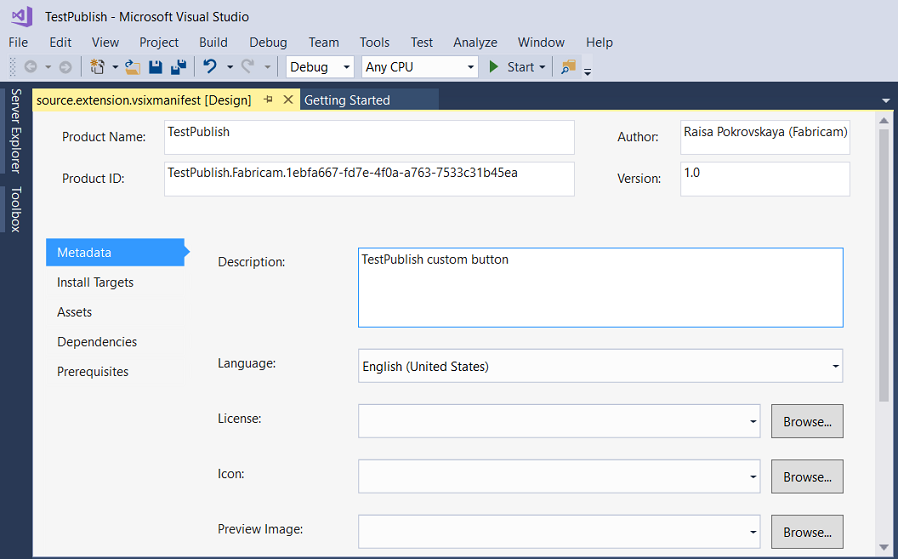
Update the extension vsixmanifest with the correct information about product name, author, and version.
Build your extension in Release mode. Now your extension will be packaged as a VSIX in the \bin\Release folder.
You can double-click the VSIX to verify the installation.
Test the extension
Before you distribute the extension, build, and test it to make sure it is installed correctly in the experimental instance of Visual Studio.
In Visual Studio, start debugging. to open an experimental instance of Visual Studio.
In the experimental instance, go to the Tools menu and click Extensions and Updates.... The TestPublish extension should appear in the center pane and be enabled.
On the Tools menu, make sure you see the test command.
Publish the extension to the Marketplace via command line
Make sure that you have built the Release version of your extension and that it is up-to-date.
Make sure you have created publishmanifest.json and overview.md files.
Open command line and navigate to ${VSInstallDir}\VSSDK\VisualStudioIntegration\Tools\Bin\ directory.
To publish a new extension, use the following command:
VsixPublisher.exe publish -payload "{Path to vsix file}" -publishManifest "{path to publishManifest file}" -personalAccessToken "{Personal Access Token that is used to authenticate the publisher. If not provided, the pat is acquired from the logged-in users.}"On successful publishing of extension, you will see the following command line message:
Uploaded 'MyVsixExtension' to the Marketplace.You can verify the new extension you published by navigating to Visual Studio Marketplace
Install the extension from the Visual Studio Marketplace
Now that the extension is published, install it in Visual Studio and test it there.
In Visual Studio, on the Tools menu, click Extensions and Updates....
Click Online and then search for TestPublish.
Click Download. The extension will then be scheduled for install.
To complete the installation, close all instances of Visual Studio.
Remove the extension
You can remove the extension from the Visual Studio Marketplace and from your computer.
To remove the extension from the Marketplace via command line
If you want to remove an extension, use the following command:
VsixPublisher.exe deleteExtension -publisherName "TestVSIXPublisher" -extensionName "MyVsixExtension"On successful deletion of extension, you will see the following command line message:
Removed 'MyVsixExtension' from the Marketplace.
To remove the extension from your computer
In Visual Studio, on the Tools menu, click Extensions and Updates.
Select "MyVsixExtension" and then click Uninstall. The extension will then be scheduled for uninstall.
To complete the uninstallation, close all instances of Visual Studio.