Tutorial: Create your first Windows App SDK application in Visual Studio with XAML and C#
In this introduction to the Visual Studio integrated development environment (IDE), you'll create a "Hello World" app that runs on any Windows 10 or later device. To do so, you'll use a Windows App SDK (WinUI 3) project template, Extensible Application Markup Language (XAML), and the C# programming language.
Note
WinUI 3 is the native UI platform component that ships with the Windows App SDK (completely decoupled from Windows SDKs). For more information, see WinUI 3.
If you haven't already installed Visual Studio, go to the Visual Studio downloads page to install it for free.
Create a project
First, create a WinUI 3 project. The project type comes with all the template files you need, before you've even added anything!
Important
Visual Studio 2019 only supports Windows App SDK 1.1 and earlier. Visual Studio 2022 is recommended for developing apps with all versions of the Windows App SDK.
The Windows App SDK 1.1.x templates are available by installing a Visual Studio extension (VSIX).
Note
If you have a Windows App SDK Visual Studio extension (VSIX) already installed, then uninstall it before installing another version. For directions, see Manage extensions for Visual Studio.
- You can install the latest stable 1.1.x release VSIX from Visual Studio. Select Extensions > Manage Extensions, search for Windows App SDK, and download the Windows App SDK extension. Close and reopen Visual Studio, and follow the prompts to install the extension. Make sure to install the templates for Windows App SDK 1.1.
- Alternatively, you can download the extension directly from Visual Studio Marketplace, and install it:
After the templates extension has been installed, you can create your first project. For more information about Visual Studio 2019 support, see Install tools for the Windows App SDK. The rest of this tutorial will assume you're using Visual Studio 2022.
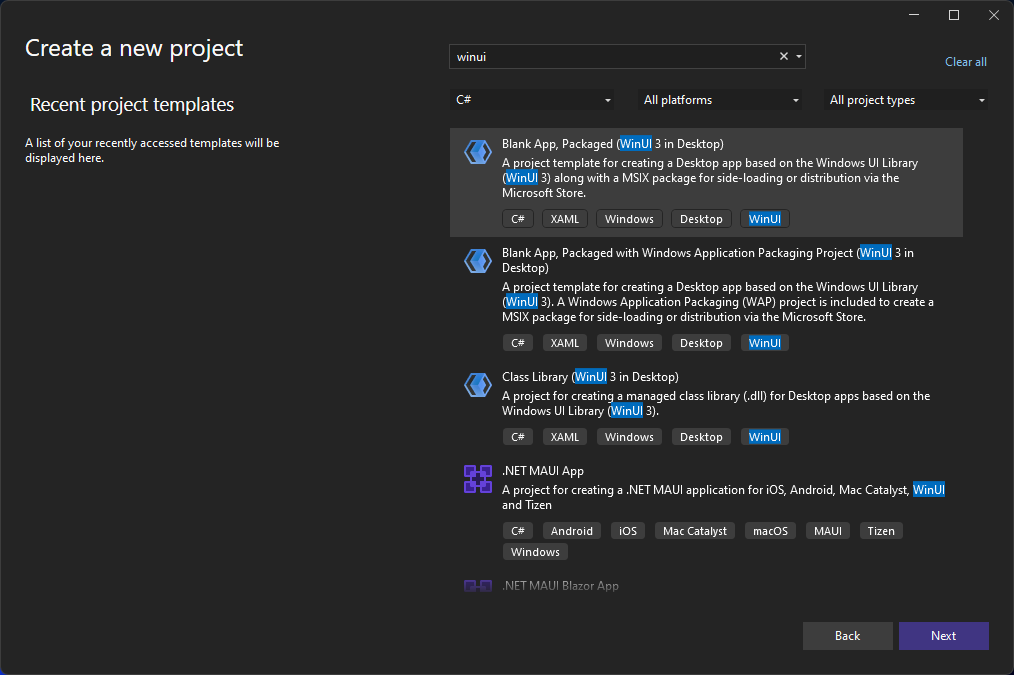
Open Visual Studio, and on the start window, choose Create a new project.
On the Create a new project screen, enter WinUI in the search box, choose the C# template for Blank App, Packaged (WinUI 3 in Desktop), and then choose Next.
Note
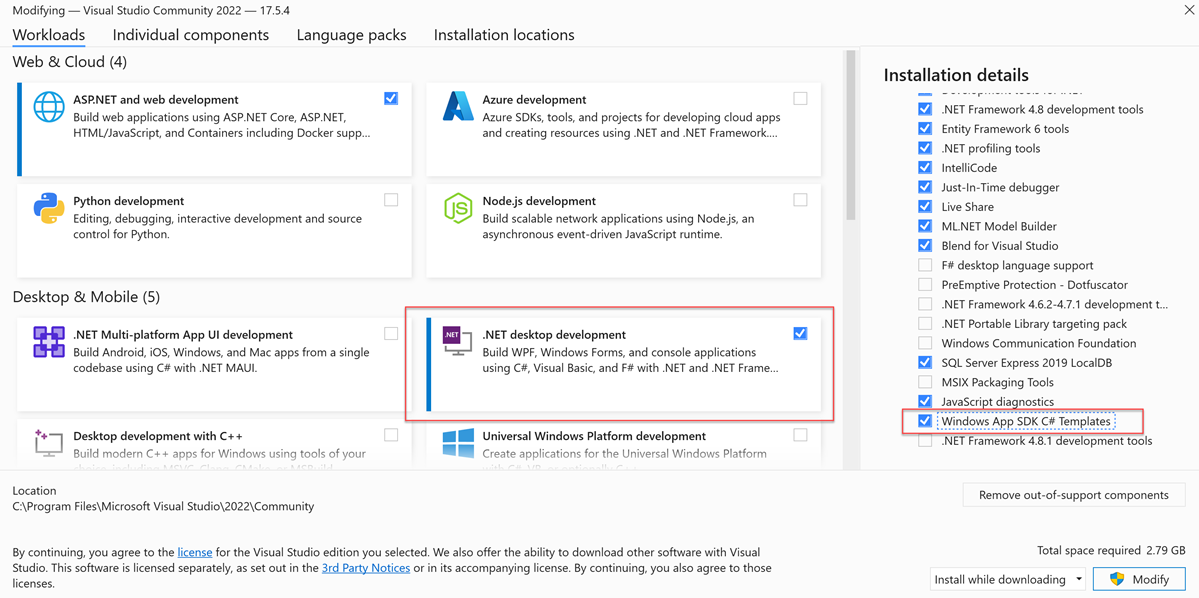
If you don't see the Blank App, Packaged (WinUI 3 in Desktop) project template, click the Install more tools and features link.

The Visual Studio Installer launches. Choose the .NET Desktop Development workload, then in the Installation details pane of the installation dialog box, select Windows App SDK C# Templates (at the bottom of the list). Now select Modify.
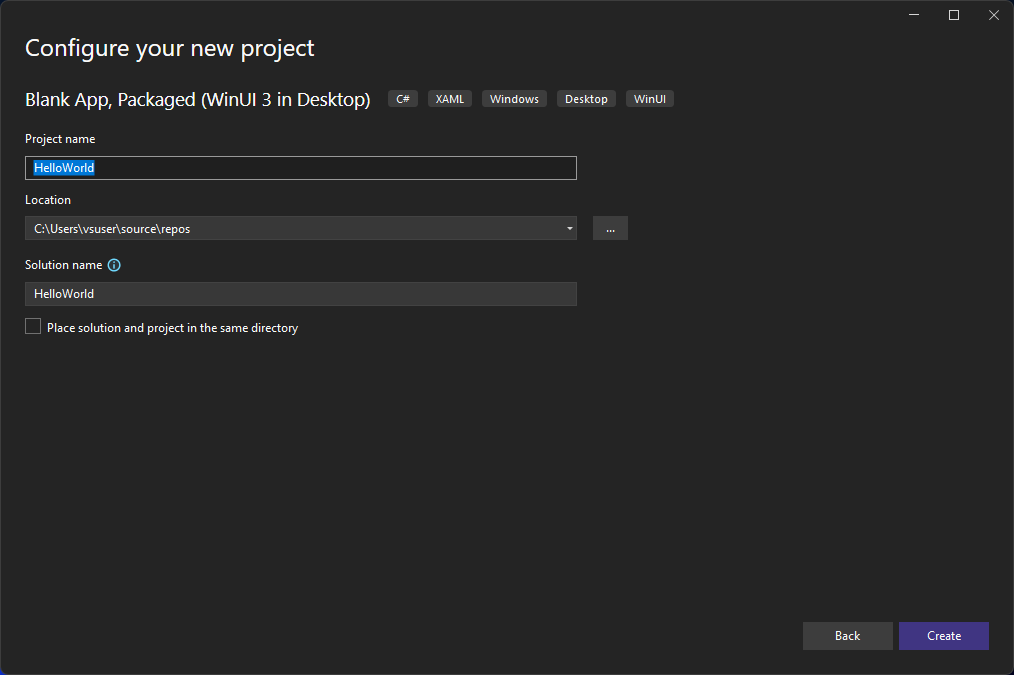
Give the project a name, HelloWorld, and choose Create.
Note
If this is the first time you have used Visual Studio to create a Windows App SDK app, a Settings dialog box might appear. Choose Developer mode, and then choose Yes.
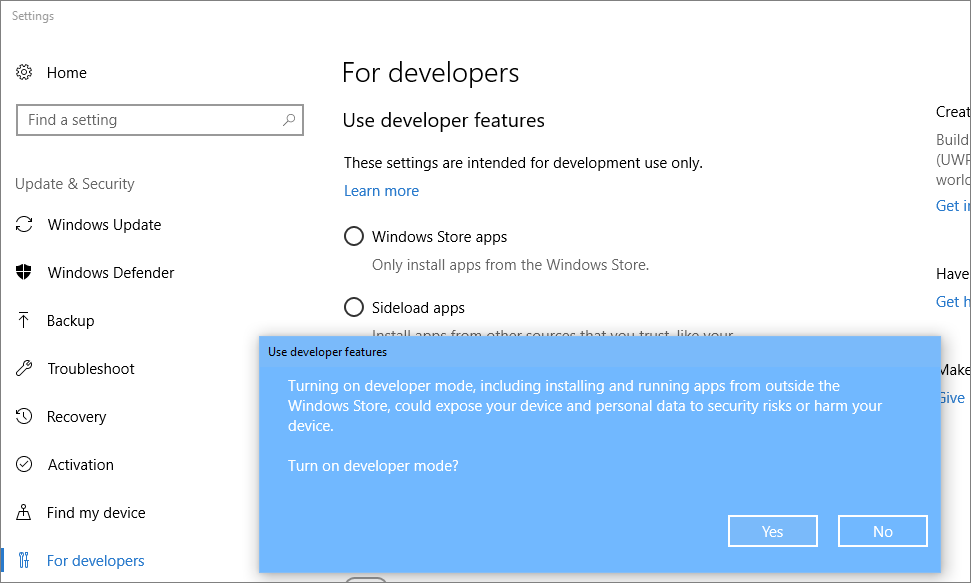
Visual Studio installs an additional Developer Mode package for you. When the package installation is complete, close the Settings dialog box.
Create the application
It's time to start developing. You'll add a button control, add an action to the button, and then run the "Hello World" app to see what it looks like.
Add a button to the Design canvas
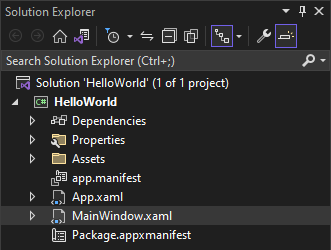
In the Solution Explorer, double-click MainWindow.xaml to open the XAML markup editor.
The XAML Editor is where you can add or change markup. Unlike UWP projects, WinUI 3 doesn't have a Design view.
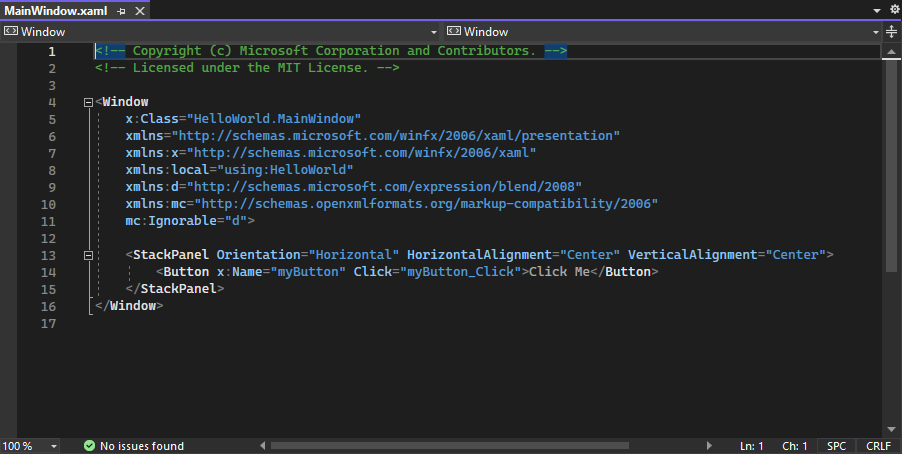
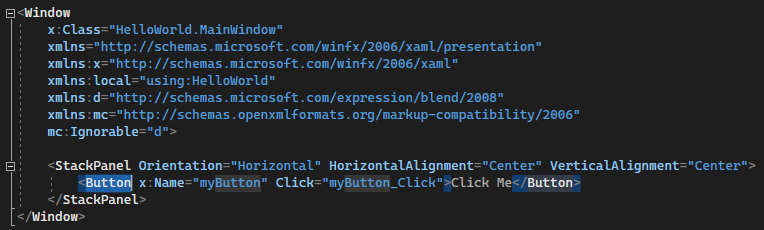
Review the Button control nested within the StackPanel at the root of the Window.
Change the label on the button
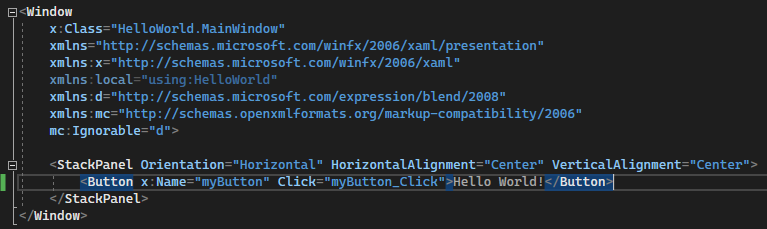
In the XAML Editor, change Button Content value from "Click me" to "Hello World!".
Notice that the button has a Click event handler named myButton_Click specified, too. We'll get to that in the next step.

Modify the event handler
An "event handler" sounds complicated, but it's just another name for code that is called when an event happens. In this case, it adds an action triggered by the "Hello World!" button.
In Solution Explorer, double-click MainWindow.xaml.cs, the code-behind page.
Edit the event handler code in the C# editor window that opens.
Here is where things get interesting. The default event handler looks like this:

Let's change it, so it looks like this:
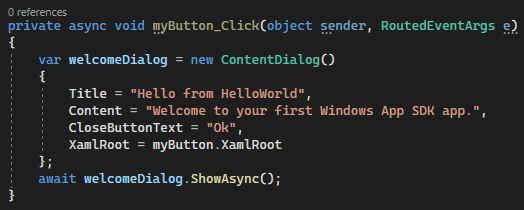
Here's the code to copy and paste:
private async void myButton_Click(object sender, RoutedEventArgs e)
{
    var welcomeDialog = new ContentDialog()
    {
        Title = "Hello from HelloWorld",
        Content = "Welcome to your first Windows App SDK app.",
        CloseButtonText = "Ok",
        XamlRoot = myButton.XamlRoot
    };
    await welcomeDialog.ShowAsync();
}
What did we just do?
The code uses the ContentDialog control to display a welcome message in a modal popup control within the current window. (For more information on using Microsoft.UI.Xaml.Controls.ContentDialog, see ContentDialog Class.)
Run the application
It's time to build, deploy, and launch the "Hello World" Windows App SDK app to see what it looks like. Here's how.
Use the Play button (it has the text HelloWorld (Package)) to start the application on the local machine.

(Alternatively, you can choose Debug > Start Debugging from the menu bar or press F5 to start your app.)
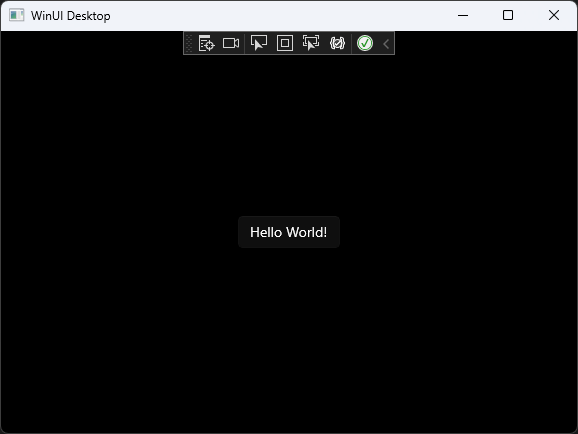
View your app, which appears soon after a splash screen disappears. The app should look similar to this image:
Select the Hello World button.
Your Windows 10 or later device will display a message that says "Welcome to your first Windows App SDK app" with the title "Hello from HelloWorld." Click Ok to dismiss the message.

To close the app, select the Stop Debugging button in the toolbar. (Alternatively, choose Debug > Stop debugging from the menu bar, or press Shift+F5.)
Next steps
Congratulations on completing this tutorial! We hope you learned some basics about Windows App SDK, WinUI 3, and the Visual Studio IDE. To learn more, continue with the following tutorial:
See also
Feedback
Coming soon: Throughout 2024 we will be phasing out GitHub Issues as the feedback mechanism for content and replacing it with a new feedback system. For more information see: https://aka.ms/ContentUserFeedback.
Submit and view feedback for