Test a C++ DLL
This topic describes one way to create unit tests for a C++ DLL for Universal Windows Platform (UWP) apps with the Microsoft Test Framework for C++. The RooterLib DLL demonstrates vague memories of limit theory from the calculus by implementing a function that calculates an estimate of the square root of a given number. The DLL might then be included in a UWP app that shows a user the fun things that can be done with math.
This topic shows you how to use unit testing as the first step in development. In this approach, you first write a test method that verifies a specific behavior in the system that you are testing and then you write the code that passes the test. By making changes in the order of the following procedures, you can reverse this strategy to first write the code that you want to test and then write the unit tests.
This topic also creates a single Visual Studio solution and separate projects for the unit tests and the DLL that you want to test. You can also include the unit tests directly in the DLL project, or you can create separate solutions for the unit tests and the .DLL. See Adding unit tests to existing C++ applications for tips on which structure to use.
Create the solution and the unit test project
Start by creating a new test project. On the File menu, choose New > Project. In the Create a New Project dialog, type "test" into the search box and then set Language to C++. Then choose Unit Test App (Universal Windows) from the list of project templates.
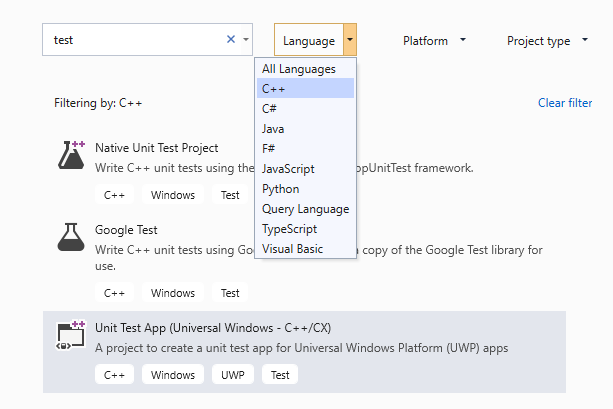
In the New Project dialog, expand Installed > Visual C++ and choose Windows Universal. Then choose Unit Test App (Universal Windows) from the list of project templates.
Name the project
RooterLibTests; specify the location; name the solutionRooterLib; and make sure Create directory for solution is checked.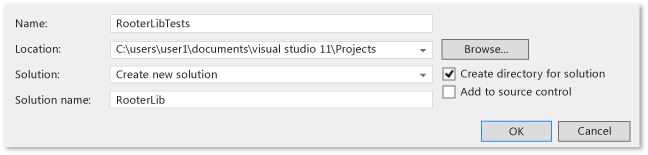
In the new project, open unittest1.cpp.
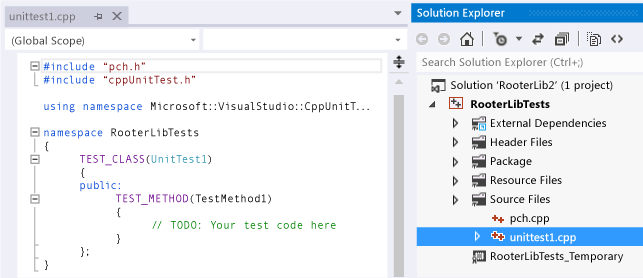
Note that:
Each test is defined by using
TEST_METHOD(YourTestName){...}.You do not have to write a conventional function signature. The signature is created by the macro TEST_METHOD. The macro generates an instance function that returns void. It also generates a static function that returns information about the test method. This information allows the test explorer to find the method.
Test methods are grouped into classes by using
TEST_CLASS(YourClassName){...}.When the tests are run, an instance of each test class is created. The test methods are called in an unspecified order. You can define special methods that are invoked before and after each module, class, or method. For more information, see Using Microsoft.VisualStudio.TestTools.CppUnitTestFramework.
Verify that the tests run in Test Explorer
Insert some test code:
TEST_METHOD(TestMethod1)
{
    Assert::AreEqual(1,1);
}
Notice that the
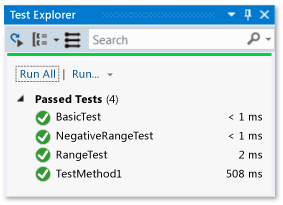
Assertclass provides several static methods that you can use to verify results in test methods.On the Test menu, choose Run and then choose Run All.
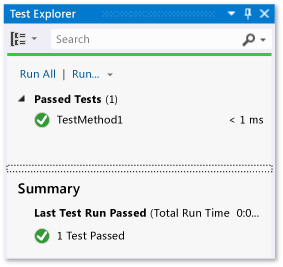
The test project builds and runs. The Test Explorer window appears, and the test is listed under Passed Tests. The Summary pane at the bottom of the window provides additional details about the selected test.
Add the DLL project to the solution
In Solution Explorer, choose the solution name. From the shortcut menu, choose Add, and then New Project. In the Add a New Project dialog, set Language to C++ and type "DLL" into the search box. From the results list, choose Unit Test App (Universal Windows - C++/CX).
In the Add New Project dialog box, choose DLL (UWP apps).
Add the following code to the RooterLib.h file:
// The following ifdef block is the standard way of creating macros which make exporting
// from a DLL simpler. All files within this DLL are compiled with the ROOTERLIB_EXPORTS
// symbol defined on the command line. This symbol should not be defined on any project
// that uses this DLL. This way any other project whose source files include this file see
// ROOTERLIB_API functions as being imported from a DLL, whereas this DLL sees symbols
// defined with this macro as being exported.
#ifdef ROOTERLIB_EXPORTS
#define ROOTERLIB_API  __declspec(dllexport)
#else
#define ROOTERLIB_API __declspec(dllimport)
#endif //ROOTERLIB_EXPORTS

class ROOTERLIB_API CRooterLib {
public:
    CRooterLib(void);
    double SquareRoot(double v);
};
The comments explain the ifdef block not only to the developer of the dll, but to anyone who references the DLL in their project. You can add the ROOTERLIB_EXPORTS symbol to the command line by using the project properties of the DLL.
The
CRooterLibclass declares a constructor and theSqareRootestimator method.Add the ROOTERLIB_EXPORTS symbol to the command line.
In Solution Explorer, choose the RooterLib project, and then choose Properties from the shortcut menu.
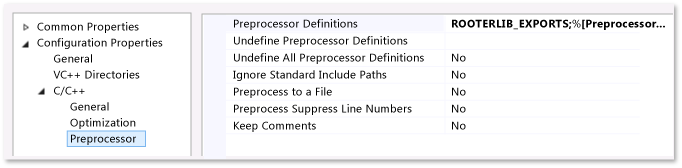
In the RooterLib Property Page dialog box, expand Configuration Properties, expand C++ and choose Preprocessor.
Choose <Edit...> from the Preprocessor Definitions list, and then add
ROOTERLIB_EXPORTSin the Preprocessor Definitions dialog box.
Add minimal implementations of the declared functions. Open RooterLib.cpp and add the following code:
// constructor
CRooterLib::CRooterLib()
{
}

// Find the square root of a number.
double CRooterLib::SquareRoot(double v)
{
    return 0.0;
}
Make the dll functions visible to the test code
Add RooterLib to the RooterLibTests project.
In Solution Explorer, choose the RooterLibTests project and then choose Add > Reference on the shortcut menu.
In the Add Reference dialog box, choose Projects. Then select the RouterLib item.
Include the RooterLib header file in unittest1.cpp.
Open unittest1.cpp.
Add this code to below the
#include "CppUnitTest.h"line:#include "..\RooterLib\RooterLib.h"
Add a test that uses the imported function. Add the following code to unittest1.cpp:
TEST_METHOD(BasicTest)
{
    CRooterLib rooter;
    Assert::AreEqual(
        // Expected value:
        0.0,
        // Actual value:
        rooter.SquareRoot(0.0),
        // Tolerance:
        0.01,
        // Message:
        L"Basic test failed",
        // Line number - used if there is no PDB file:
        LINE_INFO());
}
Build the solution.
The new test appears in Test Explorer in the Not Run Tests node.
In Test Explorer, choose Run All.
You have set up the test and the code projects, and verified that you can run tests that run functions in the code project. Now you can begin to write real tests and code.
Iteratively augment the tests and make them pass
Add a new test:
TEST_METHOD(RangeTest)
{
    CRooterLib rooter;
    for (double v = 1e-6; v < 1e6; v = v * 3.2)
    {
        double expected = v;
        double actual = rooter.SquareRoot(v*v);
        double tolerance = expected/1000;
        Assert::AreEqual(expected, actual, tolerance);
    }
};
Tip
We recommend that you do not change tests that have passed. Instead, add a new test, update the code so that the test passes, and then add another test, and so on.
When your users change their requirements, disable the tests that are no longer correct. Write new tests and make them work one at a time, in the same incremental manner.
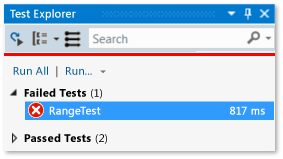
In Test Explorer, choose Run All.
The test fails.
Tip
Verify that each test fails immediately after you have written it. This helps you avoid the easy mistake of writing a test that never fails.
Enhance the code under test so that the new test passes. Add the following to RooterLib.cpp:
#include <math.h>
...
// Find the square root of a number.
double CRooterLib::SquareRoot(double v)
{
    double result = v;
    double diff = v;
    while (diff > result/1000)
    {
        double oldResult = result;
        result = result - (result*result - v)/(2*result);
        diff = abs (oldResult - result);
    }
    return result;
}
Build the solution and then in Test Explorer, choose Run All.
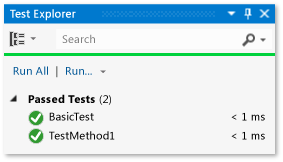
Both tests pass.
Tip
Develop code by adding tests one at a time. Make sure that all the tests pass after each iteration.
Debug a failing test
Add another test to unittest1.cpp:
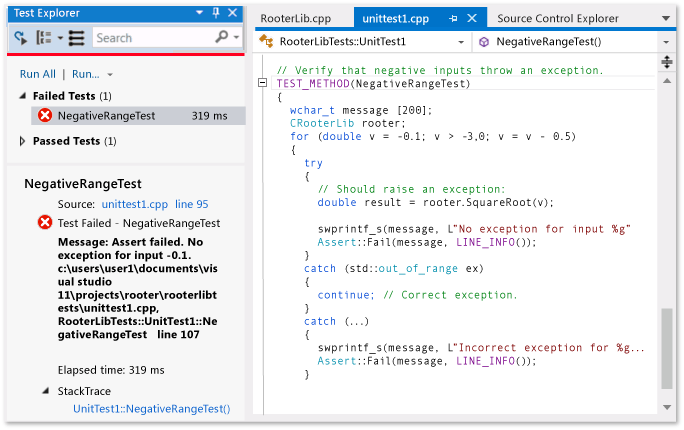
// Verify that negative inputs throw an exception.
 TEST_METHOD(NegativeRangeTest)
 {
   wchar_t message[200];
   CRooterLib rooter;
   for (double v = -0.1; v > -3.0; v = v - 0.5)
   {
     try
     {
       // Should raise an exception:
       double result = rooter.SquareRoot(v);

       swprintf_s(message, L"No exception for input %g", v);
       Assert::Fail(message, LINE_INFO());
     }
     catch (std::out_of_range ex)
     {
       continue; // Correct exception.
     }
     catch (...)
     {
       swprintf_s(message, L"Incorrect exception for %g", v);
       Assert::Fail(message, LINE_INFO());
     }
   }
};
In Test Explorer, choose Run All.
The test fails. Choose the test name in Test Explorer. The failed assertion is highlighted. The failure message is visible in the detail pane of Test Explorer.
To see why the test fails, step through the function:
Set a breakpoint at the start of the
SquareRootfunction.On the shortcut menu of the failed test, choose Debug Selected Tests.
When the run stops at the breakpoint, step through the code.
Add code to RooterLib.cpp to catch the exception:
#include <stdexcept>
...
double CRooterLib::SquareRoot(double v)
{
    //Validate the input parameter:
    if (v < 0.0)
    {
      throw std::out_of_range("Can't do square roots of negatives");
    }
...
In Test Explorer, choose Run All to test the corrected method and make sure that you haven't introduced a regression.
All tests now pass.
Refactor the code without changing tests
Simplify the central calculation in the
SquareRootfunction:// old code //result = result - (result*result - v)/(2*result); // new code result = (result + v/result) / 2.0;Choose Run All to test the refactored method and make sure that you haven't introduced a regression.
Tip
A stable set of good unit tests gives confidence that you have not introduced bugs when you change the code.
Keep refactoring separate from other changes.
Feedback
Coming soon: Throughout 2024 we will be phasing out GitHub Issues as the feedback mechanism for content and replacing it with a new feedback system. For more information see: https://aka.ms/ContentUserFeedback.
Submit and view feedback for