Package and publish an integration to the Marketplace
Azure DevOps Services | Azure DevOps Server 2022 - Azure DevOps Server 2019
Do you have a tool, service, or product that integrates with Azure DevOps or Team Foundation Server (TFS)? If so, help users find it by publishing it on the Visual Studio Marketplace. The Marketplace is a one-stop-shop for individuals and teams to find tools that extend and enhance the experience.
Browse the Marketplace to see examples of other integrations and extensions.
Note
If you're looking for packaging and publishing information for extensions, check out Package & Publish Extensions.
Publishing requirements
The following list of requirements must be met before you publish to the Marketplace.
- Install the extension packaging tool (TFX). Run
npm install -g tfx-clifrom a command prompt. - Ensure the proper permissions are granted to use any images, for example, icons, logos, screenshots, and so on.
- Include a thorough
overview.mdfile to describe your listing in the Marketplace. - Include an icon for your extension, which is at least 128x128 pixels in size.
- When you refer to Microsoft products, use full names in place of abbreviations, for example, Azure DevOps vs. AzDO or - any other abbreviation.
- Refrain from using brand names in the name of your extension.
What you need
- 128x128 pixel logo (PNG or JPEG format) representing your integration, yourself, or your company/organization
- Minimum of one screenshot showing your integration
- Call to action / get started URL (where users should go to get started with your integration)
Steps
Publishing to the Marketplace is an iterative process that starts with creating a manifest file that defines your integration and key discovery characteristics (like screenshots, logos, and overview content). This information is used to present your integration to users on the Marketplace, for example:
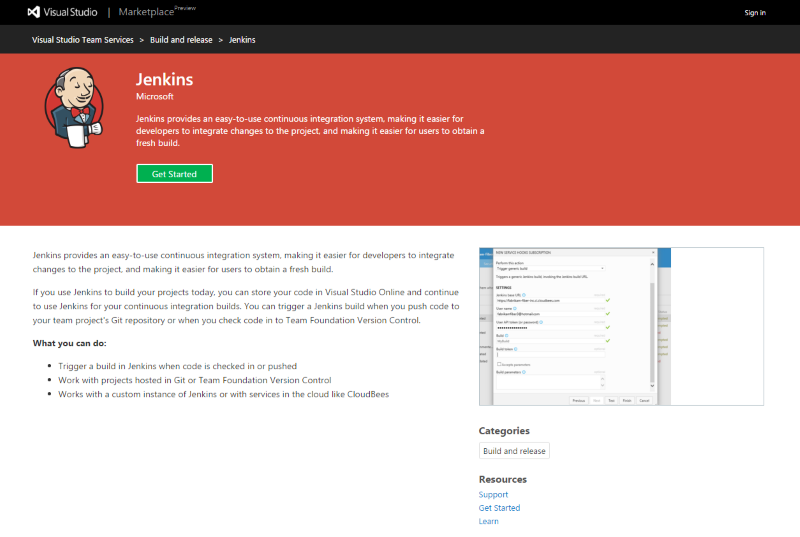
Note: The term, extension, is used in documentations referenced below. Extensions are another type of Marketplace item and share many similarities from a discovery standpoint as integrations.
Create a publisher
All extensions and integrations, including extensions from Microsoft, have a publisher. Anyone can create a publisher and publish extensions under it. You can also give other people access to your publisher if a team is developing the extension.
A user owns the publisher, typically the user who created it. You can also share the publisher with other users.
Sign in to the Visual Studio Marketplace Publishing Portal.
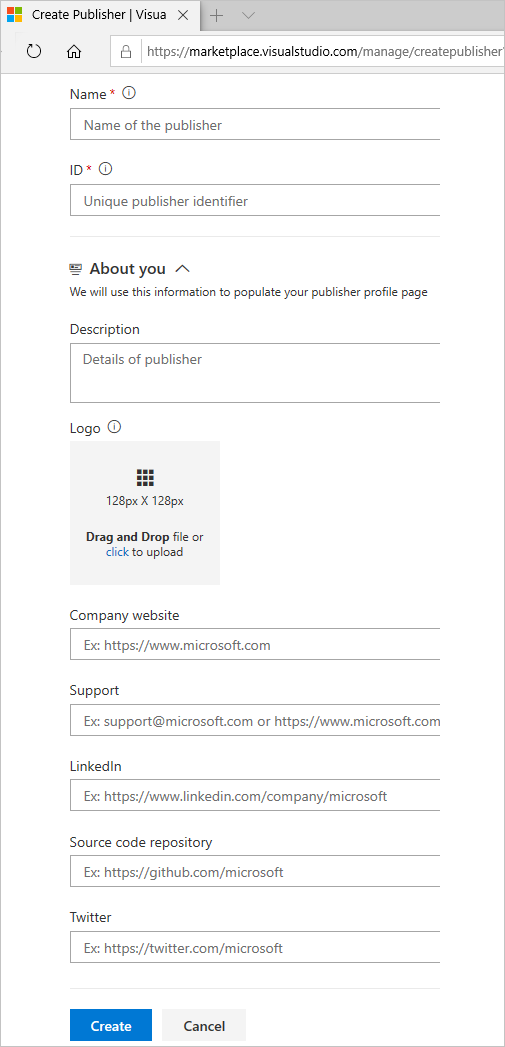
If you're not already a member of an existing publisher, + Create a publisher. Enter a name in the publisher name field. The ID field should automatically get set based on the name you entered.
Note
Make note of the ID, as you need to set it in the manifest file of your extension.
If you're not prompted to create a publisher, scroll down to the bottom of the page and select Publish extensions below Related sites.
- Specify an identifier for your publisher, for example:
mycompany-myteam. This identifier is used as the value for thepublisherattribute in your extension manifest file. - Specify a display name for your publisher, for example:
My Team
- Specify an identifier for your publisher, for example:
Review the Marketplace Publisher Agreement, and then select Create.
Once the publisher's created, you're directed to manage items, but there aren't any items.
Create a folder to contain your item manifest and other assets
Before you package your integration as an extension, you'll need to create a home folder to contain some required assets, within this folder:
- Create a folder called
imagesto contain:- Logo for your integration (128x128 pixels)
- Screenshots (1366x768 pixels)
- Create a file called
overview.md- Describe your integration here
- To learn more about Markdown, see GitHub Flavored Markdown
- Create a file called
vss-integration.json- This file is your Marketplace listing's manifest file, it contains many properties to describe your extension in your Marketplace listing. You can browse the extension manifest reference here
Extension Manifest
Fill your
vss-integration.jsonfile with the following JSON:{ "manifestVersion": 1, "id": "myservice", "version": "1.0.0", "name": "My Service", "publisher": "mycompany", "description": "Awesome tools to help you and your team do great things everyday.", "targets": [ { "id": "Microsoft.VisualStudio.Services.Integration" } ], "icons": { "default": "images/service-logo.png" }, "categories": [ "Plan and track" ], "tags": [ "working", "people person", "search" ], "screenshots": [ { "path": "images/screen1.png" }, { "path": "images/screen2.png" } ], "content": { "details": { "path": "overview.md" }, "license": { "path": "fabrikam-license-terms.md" } }, "links": { "getstarted": { "uri": "https://www.mycompany.com/help/getstarted" }, "learn": { "uri": "https://www.mycompany.com/features" }, "support": { "uri": "https://www.mycompany.com/support" } }, "branding": { "color": "rgb(34, 34, 34)", "theme": "dark" } }Update the JSON using the following reference:
These properties are required:
| Property | Description | Notes |
|---|---|---|
| manifestVersion | A number corresponding to the version of the manifest format. | Should be 1. |
| ID | The extension's identifier. | Th ID is a string that must be unique among extensions from the same publisher. It must start with an alphabetic or numeric character and contain 'A' through 'Z', 'a' through 'z', '0' through '9', and '-' (hyphen). Example: sample-extension. |
| version | A string specifying the version of an extension. | Should be in the format major.minor.patch, for example 0.1.2 or 1.0.0. You can also add a fourth number for the following format: 0.1.2.3 |
| name | A short, human-readable name of the extension. Limited to 200 characters. | Example: "Fabrikam Agile Board Extension". |
| publisher | The identifier of the publisher. | This identifier must match the identifier the extension is published under. See Create and manage a publisher. |
| categories | Array of strings representing the categories your extension belongs to. At least one category must be provided and there's no limit to how many categories you may include. | Valid values: Azure Repos, Azure Boards, Azure Pipelines, Azure Test Plans, and Azure Artifacts.Notes:
- If you're using Azure DevOps Extension Tasks extension to publish, ensure that its version is >= 1.2.8. You might have to approve the extension update because of recent scope changes. - The categories previously mentioned are natively present in Visual Studio Marketplace and Azure DevOps Server 2019 & above. For extensions targeting earlier versions of TFS:
- If you are going to share the extension directly (that is, not via the Visual Studio Marketplace) with a customer using TFS <=2018 then use the following categories instead: Code, Plan and track, Build and release, Test, Collaborate, and Integrate. If you need to share both via Visual Studio Marketplace and directly with a TFS <= 2018 customer then you would need to have 2 extension packages. |
| targets | The products and services supported by your integration or extension. For more information, see installation targets. | An array of objects, where each object has an id field indicating one of the following:
Microsoft.VisualStudio.Services (extensions that works with Azure DevOps or TFS),- Microsoft.TeamFoundation.Server (extension that works with TFS),- Microsoft.VisualStudio.Services.Integration (integrations that works with Azure DevOps or TFS), - Microsoft.TeamFoundation.Server.Integration (integrations that work with TFS) |
These optional properties help users discover and learn about your extension:
| Property | Description | Notes |
|---|---|---|
| description | A few sentences describing the extensions. Limited to 200 characters. | The description should be your extension's "elevator pitch" - a couple of lines to describe your extension in the Marketplace and make people want to install it. See the example below |
| icons | Dictionary of icons representing the extension. | Valid keys: default (128x128 pixels) of type BMP, GIF, EXIF, JPG, PNG and TIFF). Other keys such as large (512x512 pixels) may be supported in the future. The value of each key is the path to the icon file in the extension |
| tags | Array of string tags to help users find your extension. | Examples: agile, project management, task timer, and so on. |
| screenshots | Array of images that couldn't be included in your content. | Screenshots are more valuable when featured in your content, and should be used there to help make a quality market details page for your extension. Use screenshots for less important images not featured in your content. Each image should be 1366x768 pixels. The path of each item is the path to the file in the extension. |
| content | Dictionary of content files that describe your extension to users. | Every extension should include solid content. This is how you'll show users what your extension can do. Make it rich, consumable, and include screenshots where necessary. Include an overview.md file as your base content piece. Each file is assumed to be in GitHub Flavored Markdown format. The path of each item is the path to the Markdown file in the extension. Valid keys: details. Other keys may be supported in the future. |
| links | Dictionary of links that help users learn more about your extension, get support, and move. | Valid keys: getstarted - first steps, how to setup or use. learn - deeper content to help users better understand your extension or service. license - end-user license agreement. privacypolicy - privacy policy for an extension. support - get help and support for an extension. The value of each key is an object with a uri field, which is the absolute URL of the link |
| repository | Dictionary of properties describing the source code repository for the extension | Valid Keys: type - Type of repository. Example: git. uri - Absolute URL of the repository. |
| badges | Array of links to external metadata badges like TravisCI, Appveyor, and so on, from the approved badges sites | Valid keys: href - Link the user navigates to when selecting the badge. uri - The absolute URL of the badge image to be displayed. description - Description of the badge, to be displayed on hover. |
| branding | Dictionary of brand-related properties. | Valid keys: color - primary color of the extension or publisher; can be a hex (#ff00ff), RGB (rgb(100,200,50)), or supported HTML color names (blue). theme - complements the color; use dark for dark branding colors, or light for lighter branding colors. |
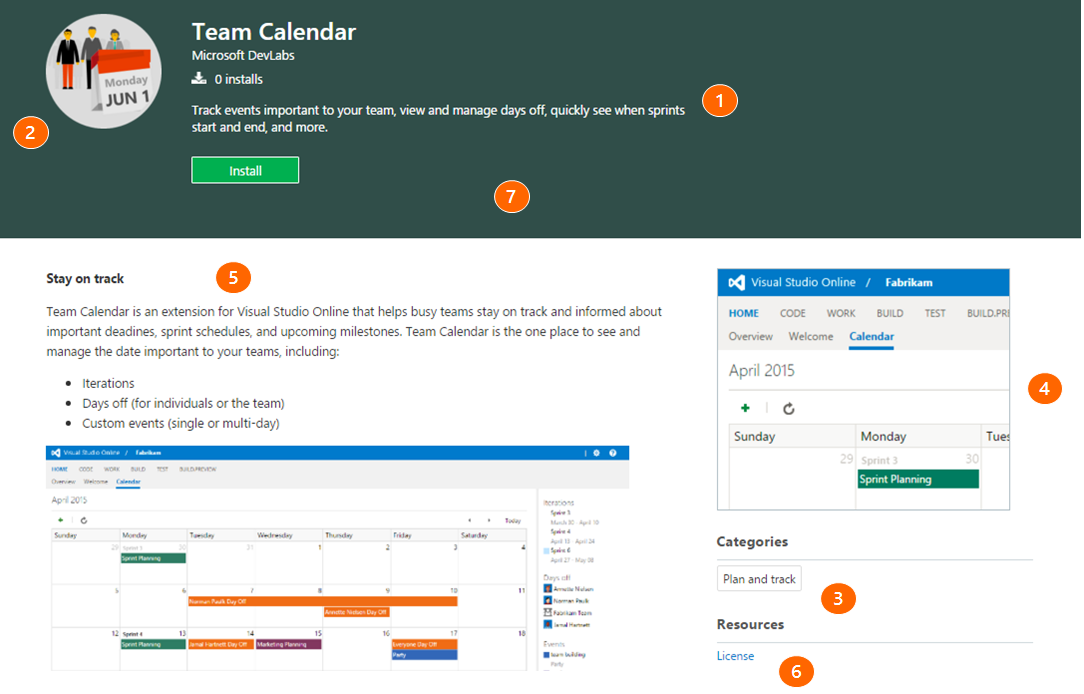
Details page
- 1 - description
- 2 - icon
- 3 - categories
- 4 - screenshots
- 5 - content (details)
- 6 - links
- 7 - branding
Package your manifest and assets
Get the package tool (tfx-cli)
You can install or update the Cross-platform CLI for Azure DevOps (tfx-cli) using npm, a component of Node.js, from your command line.
npm i -g tfx-cli
Package your integration in a .vsix file
tfx extension create --manifest-globs vss-extension.json
Note
An extension/integration's version must be incremented on every update.
If you haven't incremented your extension/integration in the manifest, you should pass the --rev-version command line switch. This increments the patch version number of your extension and saves the new version to your manifest.
Publish your integration to the Marketplace
Once your extension is packaged, you can upload it to the Marketplace under a publisher. The publisher identifier specified in your extension's manifest file must match the identifier of the publisher the extension is uploaded under.
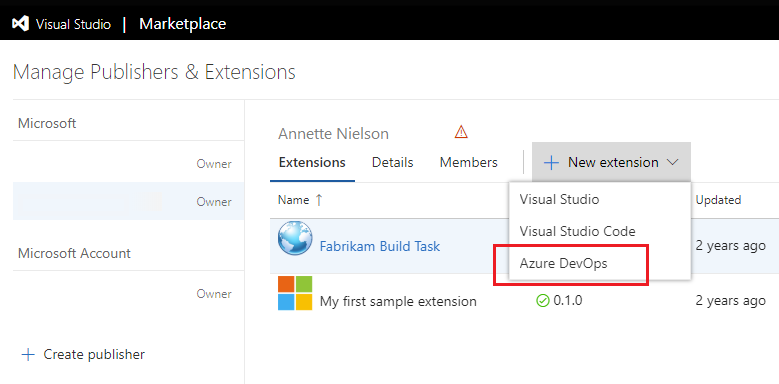
From the management portal, select your publisher from the drop-down menu at the top of the page.
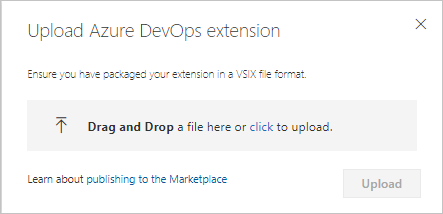
Select New extension > Azure DevOps.
Drag and drop your file or select it to find your VSIX file, which you created in the previous packaging step, and then choose Upload.
After quick validation, your extension appears in the list of published extensions. Don't worry, the extension is only visible to you.
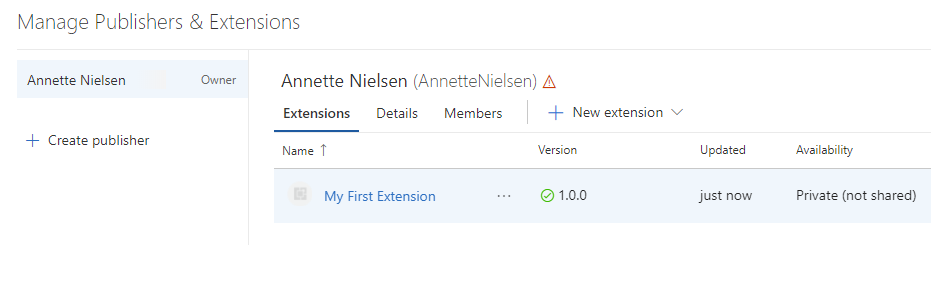
At this point, your extension isn't visible to any accounts and can't be installed until you share it.
Note
Microsoft runs a virus scan on each new and updated extension package published. Until the scan is all clear, we don't publish the extension in the Marketplace for public usage. This way we also avoid surfacing inappropriate or offensive content on the Marketplace pages.
Share your integration
Before you can install an integration into an organization in Azure DevOps or TFS, you must share it with that organization. Sharing is a requirement during development and testing of an integration, as it's the only way to run an integration.
To share an integration do the following tasks:
- Select an integration from the list of displayed items
- Select the Share button
- Specify the name of the organization to make this integration visible to.
- For example, to make an integration visible to the dev.azure.com/fabrikam-fiber-inc organization, specify
fabrikam-fiber-inc.
- For example, to make an integration visible to the dev.azure.com/fabrikam-fiber-inc organization, specify
Update an item
To change an extension that's already published, update it.
Tip
We recommend updating the extension over removing and re-uploading. We also recommend having two extensions, for example, publisher.extension and publisher.extension-dev.
Publisher.extension is public in the Marketplace, where customers can install it in their Azure DevOps organizations. Publisher.extension-dev is kept private in the Marketplace and can be shared with an organization that you own and control.
You don't need to maintain two copies of source code of the extension. You can maintain two manifest files - one for each extension and during packaging of the extension you can provide the respective manifest file to the tfx-cli tool. For more information on arguments required for the tool, see TFX extension commands.
- Select an extension from the list of displayed items.
- Right-click and select Update for the
publisher.extension-dev, for example. - Validate your extension.
- Make the same updates to the production version,
publisher.extension, for example. - Browse to the .vsix for your extension and upload it.
The updated version of your extension automatically gets installed to accounts that have it already installed. New accounts where the extension is installed in the future also receive the latest version.
Make your integration public (visible to everyone)
For information on making your integration public, visit Make your listing public.
Feedback
Coming soon: Throughout 2024 we will be phasing out GitHub Issues as the feedback mechanism for content and replacing it with a new feedback system. For more information see: https://aka.ms/ContentUserFeedback.
Submit and view feedback for