Clone and update wiki content offline
Azure DevOps Services | Azure DevOps Server 2022 - Azure DevOps Server 2019
You can update your wiki pages offline the same way you develop code in a Git repo.
You can use any client you want or git command-line tools to update your wiki offline. For details on working with Git repositories and supported tools, see Git Repositories.
The basic steps to update wiki content offline are as follows:
- Clone your wiki Git repo to your local IDE or workspace.
- Add files or folders to your local git branch.
- Update the .order files to reflect your pages and subpages.
- Commit and push the updates you made to your local git branch.
Prerequisites
Do the following steps to migrate Markdown pages from another wiki to your team project wiki or to content that you publish as code to a wiki.
Clone your wiki
Your wiki repository stores pages, images, attachments, and the sequence of pages and subpages. Clone your wiki to begin.
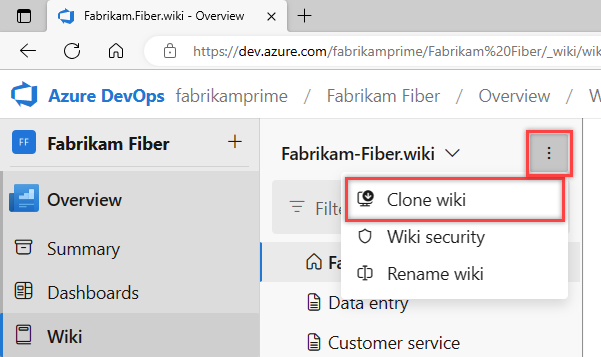
Sign in to your project (
https://dev.azure.com/{Your_Organization/Your_Project}) and then select your wiki.Open the More actions context menu and select Clone wiki.
From the Clone repo dialog, select
 Copy clone URL to clipboard.
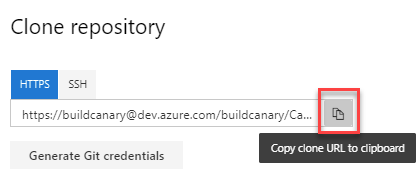
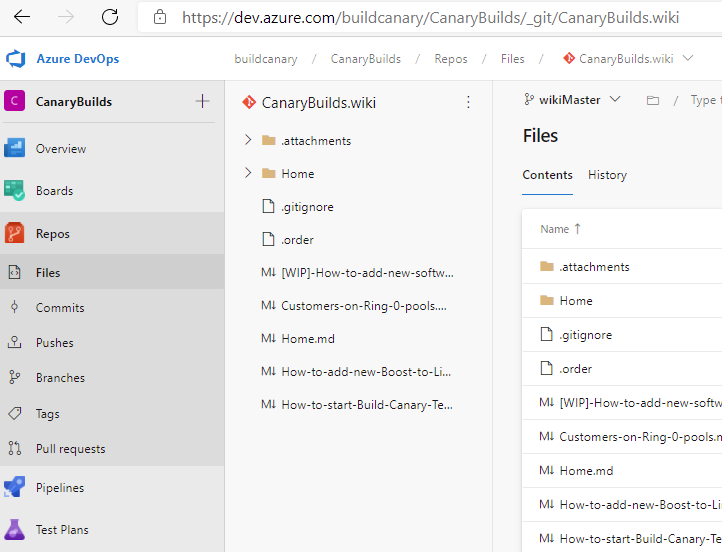
Enter it in your browser to view the files defined under the wikiMaster branch.
Use the URL that you copied to clone the repo in the IDE that you use. To learn more, see one of the following articles:
Add pages to your local Git repository
We author pages using Markdown format. Add a Markdown file to your local branch for each page and subpage that you want to add to your wiki.
Add pages
To add pages at the root of the wiki tree, add a Markdown file at the root of the Git repository.
For each page you want to add, create a Markdown file with the page contents, and then add it under the root folder for your repo.
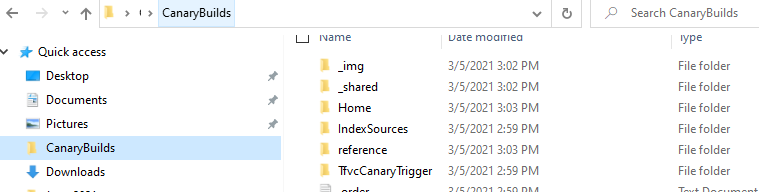
For the CanaryBuilds team project, it's in the following folder:
C:\Users\UserName\Source\Repos\CanaryBuilds.wikiTo add pages at the root of the wiki tree, add a Markdown file for each page at the root of the Git repository.
After you added all the pages you want to add at the root, update the .order file at the root. It should have one entry for each Markdown file that is defined at the root. Each entry should match the file title with spaces replaced with a dash.
For example:
 Welcome
 Roadmap
 How-to-contribute
 Home
 Reference
Add subpages
Create a folder for the parent page, and then add Markdown files for each subpage in the folder.
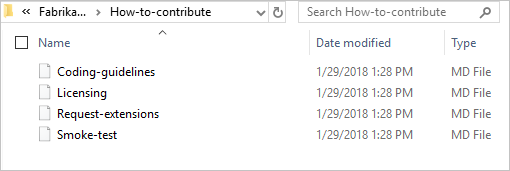
For example, we added the following files to the How-to-contribute folder. These subpages appear under the How to contribute page in the wiki.
Add a .order file in the folder with the order of the subpages as they should appear in the wiki. To understand the use of the .order file to sequence pages, see Wiki Git repository files and file structure.
For example, the file has the following subpages:
 Request-extensions
 Licensing
 Smoke-test
 Coding-guidelines
Push your changes
When you're done with all your updates, push the files to the Git repository.
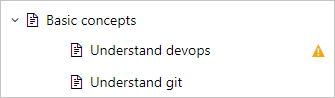
The added pages and subpages appear immediately in your wiki.

If there are any errors in the process, the pages appear in your wiki with a warning sign.
Related articles
Feedback
Coming soon: Throughout 2024 we will be phasing out GitHub Issues as the feedback mechanism for content and replacing it with a new feedback system. For more information see: https://aka.ms/ContentUserFeedback.
Submit and view feedback for