Adding the Windows Community Toolkit to your Visual Studio Toolbox (for version 2.0 or below)
Note
Starting with version 2.1, the Windows Community Toolkit controls will be automatically available in the Visual Studio Toolbox as soon as the NuGet package is installed.
Add the Windows Community Toolkit controls into the Visual Studio toolbox by following these steps:
Add the Microsoft.Toolkit.Uwp.UI.Controls NuGet package to your application.
Open any XAML page and select the Toolbox on the left side of Visual Studio.
Right click in a blank area and select Add Tab. Name the tab Windows Community Toolkit Controls.
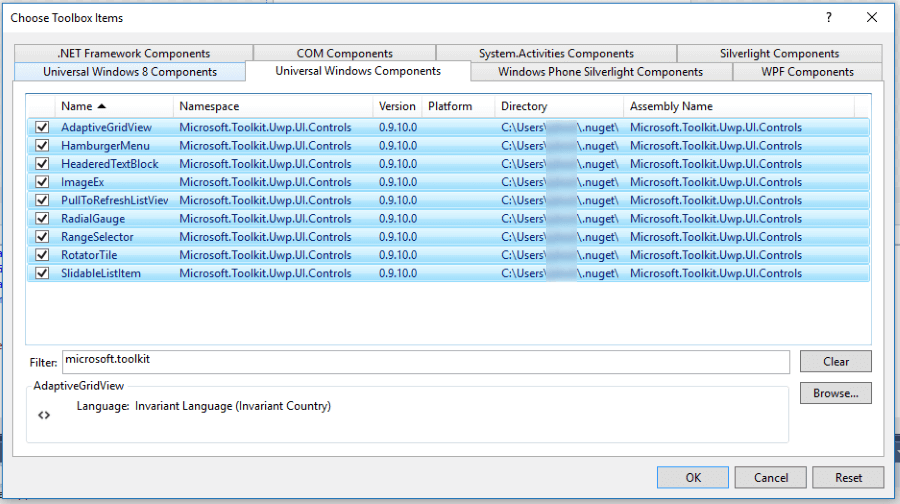
Right click in the tab you just created and select Choose Items.... Then select Browse from the Choose Toolbox Items dialog and navigate to the folder on your machine:
c:\Users\%USERNAME%\.nuget\packages\Microsoft.Toolkit.Uwp.UI.Controls\a. Choose the folder name matching the version you have installed, then continue to the lib\uap10.0 folder and select the Microsoft.Toolkit.Uwp.UI.Controls.dll file. You should end up with a dialog similar to the one shown below.

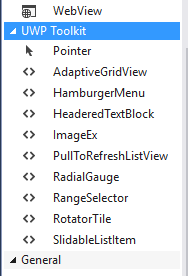
Your toolbox should now have a list of UI Controls from the toolkit that you can drag and drop onto your XAML surfaces.

Feedback
Coming soon: Throughout 2024 we will be phasing out GitHub Issues as the feedback mechanism for content and replacing it with a new feedback system. For more information see: https://aka.ms/ContentUserFeedback.
Submit and view feedback for