Pin secondary tiles to Start
This topic walks you through the steps to create a secondary tile for your Windows app and pin it to the Start menu.
To learn more about secondary tiles, please see the Secondary tiles overview.
Add namespace
The Windows.UI.StartScreen namespace includes the SecondaryTile class.
using Windows.UI.StartScreen;
Initialize the secondary tile
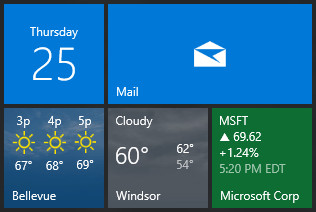
Secondary tiles are composed of a few key components...
- TileId: A unique identifier that lets you identify the tile among your other secondary tiles.
- DisplayName: The name you want shown on the tile.
- Arguments: The arguments you want passed back to your app when the user clicks your tile.
- Square150x150Logo: The required logo, displayed on the medium size tile (and resized to small size tile if no small logo provided).
You MUST provide initialized values for all of the above properties, or else you will get an exception.
There are a variety of constructors you can use, but using the constructor that takes in the tileId, displayName, arguments, square150x150Logo, and desiredSize helps ensure you set all of the required properties.
// Construct a unique tile ID, which you will need to use later for updating the tile
string tileId = "City" + zipCode;

// Use a display name you like
string displayName = cityName;

// Provide all the required info in arguments so that when user
// clicks your tile, you can navigate them to the correct content
string arguments = "action=viewCity&zipCode=" + zipCode;

// Initialize the tile with required arguments
SecondaryTile tile = new SecondaryTile(
    tileId,
    displayName,
    arguments,
    new Uri("ms-appx:///Assets/CityTiles/Square150x150Logo.png"),
    TileSize.Default);
Optional: Add support for larger tile sizes
If you're going to be displaying rich tile notifications on your secondary tile, you'll likely want to allow the user to resize their tile to be wide or large, so that they can see even more of your content.
To enable wide and large tile sizes, you need to provide the Wide310x150Logo and Square310x310Logo. Also, if possible, you should provide the Square71x71Logo for the small tile size (otherwise we will downsize your required Square150x150Logo for the small tile).
You can also provide a unique Square44x44Logo, which is optionally displayed on the bottom right corner when a notification is present. If you don't provide one, the Square44x44Logo from your primary tile will be used instead.
// Enable wide and large tile sizes
tile.VisualElements.Wide310x150Logo = new Uri("ms-appx:///Assets/CityTiles/Wide310x150Logo.png");
tile.VisualElements.Square310x310Logo = new Uri("ms-appx:///Assets/CityTiles/Square310x310Logo.png");

// Add a small size logo for better looking small tile
tile.VisualElements.Square71x71Logo = new Uri("ms-appx:///Assets/CityTiles/Square71x71Logo.png");

// Add a unique corner logo for the secondary tile
tile.VisualElements.Square44x44Logo = new Uri("ms-appx:///Assets/CityTiles/Square44x44Logo.png");
Optional: Enable showing the display name
By default the display name will NOT be shown. To show the display name on medium/wide/large, add the following code.
// Show the display name on all sizes
tile.VisualElements.ShowNameOnSquare150x150Logo = true;
tile.VisualElements.ShowNameOnWide310x150Logo = true;
tile.VisualElements.ShowNameOnSquare310x310Logo = true;
Optional: 3D secondary tiles
You can enhance your secondary tile for Windows Mixed Reality by adding 3D assets. Users can place 3D tiles directly in their Windows Mixed Reality home instead of the Start menu when using your app in a Mixed Reality environment. For example, you can create 360° photospheres that link directly into a 360° photo viewer app, or let users place a 3D model of a chair from a furniture catalog that opens a details page about the pricing and color options for that object when selected. To get started, refer to the Mixed Reality developer documentation.
Pin the secondary tile
Finally, request to pin the tile. Note that this must be called from a UI thread. On Desktop, a dialog will appear asking the user to confirm whether they would like to pin the tile.
Important
If you are a desktop application using the Desktop Bridge, you must first perform an extra step as described in Pin from desktop apps
// Pin the tile
bool isPinned = await tile.RequestCreateAsync();

// TODO: Update UI to reflect whether user can now either unpin or pin
Check if a secondary tile exists
If your user visits a page in your app that they have already pinned to Start, you will want to instead display an "Unpin" button.
Therefore, when choosing what button to display, you need to first check whether the secondary tile is currently pinned.
// Check if the secondary tile is pinned
bool isPinned = SecondaryTile.Exists(tileId);

// TODO: Update UI to reflect whether user can either unpin or pin
Unpinning a secondary tile
If the tile is currently pinned, and the user clicks your unpin button, you'll want to unpin (delete) the tile.
// Initialize a secondary tile with the same tile ID you want removed
SecondaryTile toBeDeleted = new SecondaryTile(tileId);

// And then unpin the tile
await toBeDeleted.RequestDeleteAsync();
Updating a secondary tile
If you need to update the logos, display name, or anything else on the secondary tile, you can use RequestUpdateAsync.
// Initialize a secondary tile with the same tile ID you want to update
SecondaryTile tile = new SecondaryTile(tileId);

// Assign ALL properties, including ones you aren't changing

// And then update it
await tile.UpdateAsync();
Enumerating all pinned secondary tiles
If you need to discover all the tiles your user has pinned, instead of using SecondaryTile.Exists, you can alternatively use SecondaryTile.FindAllAsync().
// Get all secondary tiles
var tiles = await SecondaryTile.FindAllAsync();
Send a tile notification
To learn how to display rich content on your tile via tile notifications, please see Send a local tile notification.
Related

Windows developer
Feedback
Coming soon: Throughout 2024 we will be phasing out GitHub Issues as the feedback mechanism for content and replacing it with a new feedback system. For more information see: https://aka.ms/ContentUserFeedback.
Submit and view feedback for