Setup Sign In with Apple for Xamarin.Forms
This guide covers the series of steps needed to setup your cross-platform applications to take advanced of Sign In with Apple. While the Apple setup is straight forward in the Apple Developer Portal, additional steps are necessary to create a secure relationship between your Android and Apple.
Apple developer setup
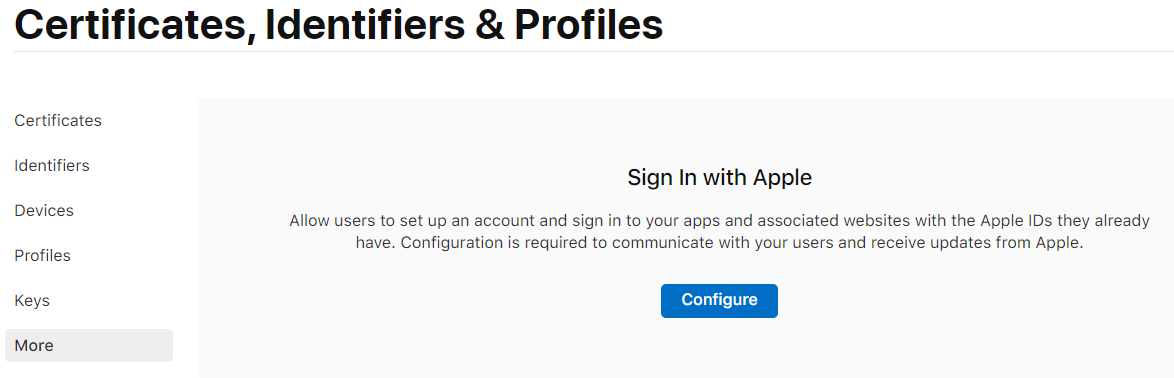
Before you can use Sign In with Apple in your applications, you'll need to address some setup steps in the Certificates, Identifiers & Profiles section of Apple's Developer Portal.
Apple sign in domain
Register your domain name and verify it with Apple in the More section of the Certificates, Identifiers & Profiles section.
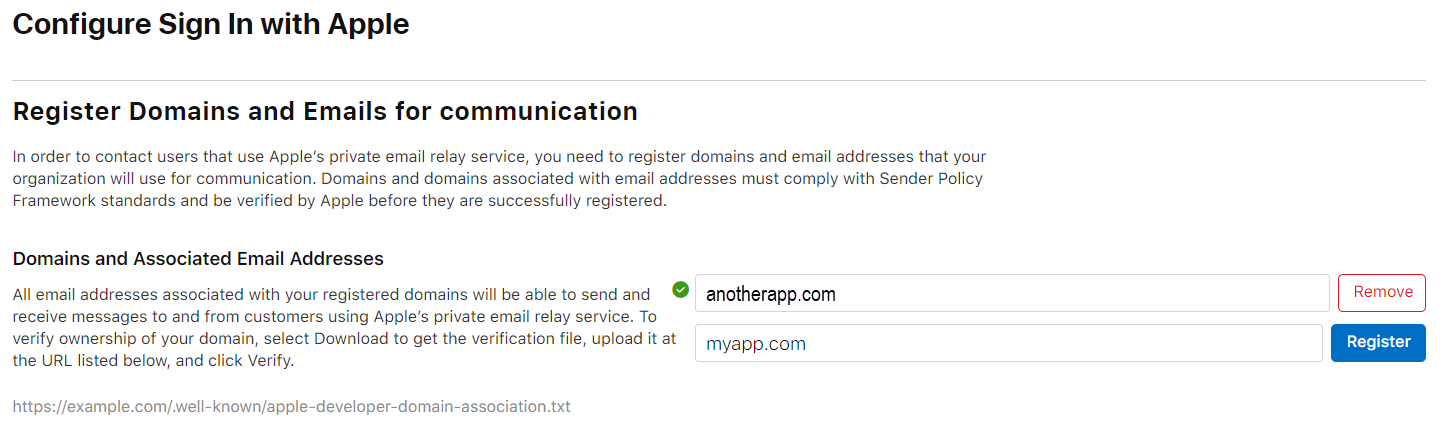
Add your domain and click Register.
Note
If you see an error about your domain not being SPF Compliant, you will need to add a SPF DNS TXT Record to your domain and wait for it to propagate before continuing:
The SPF TXT may look something like this:
v=spf1 a a:myapp.com -all
Next you will need to verify ownership of the domain by clicking Download to retrieve the apple-developer-domain-association.txt file, and upload it to the .well-known folder of your domain's website.
Once the .well-known/apple-developer-domain-association.txt file is uploaded, and reachable, you can click Verify to have Apple verify your domain ownership.
Note
Apple will verify ownership with https://. Ensure you have SSL setup and the file is accessible through a secure URL.
Successfully complete this process before continuing.
Setup your App ID
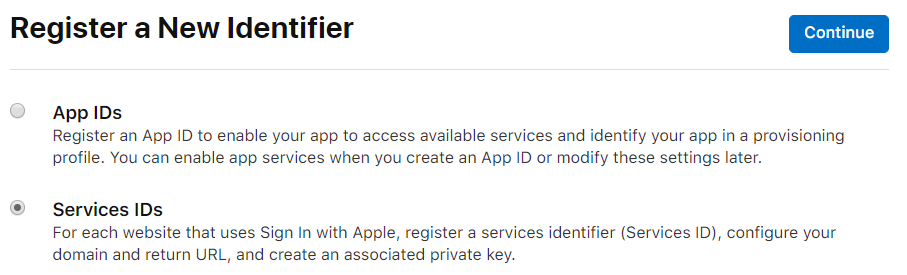
In the Identifiers section, create a new identifier, and choose App IDs. If you already have an App ID, choose to edit it instead.

Enable Sign In with Apple. You will most likely want to use the Enable as primary App ID option.

Save your App ID changes.
Create a Service ID
In the Identifiers section, create a new identifier, and choose Service IDs.
Give your Services ID a description, and an identifier. This identifier will be your ServerId. Make sure to enable Sign In with Apple.
Before continuing, click Configure next to the Sign In with Apple option you enabled.
In the configuration panel, ensure the correct Primary App ID is selected.
Next, choose the Web Domain you configured previously.
Finally, add one or more Return URLs. Any redirect_uri you use later must be registered here exactly as you use it. Make sure you include the http:// or https:// in the URL when you enter it.
Note
For testing purposes, you cannot use 127.0.0.1 or localhost, but you can use other domains such as local.test. If you choose to do this, you can edit your machine's hosts file to resolve this fictitious domain to your local IP address.
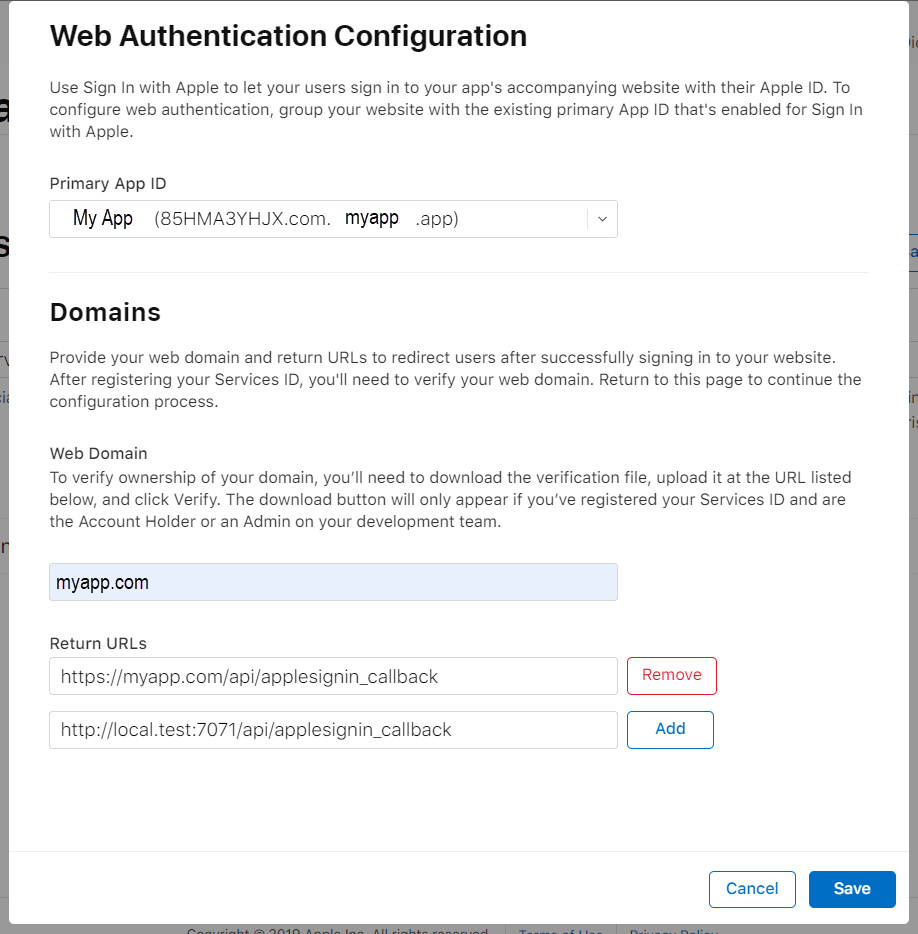
Save your changes when finished.
Create a key for your Services ID
In the Keys section, create a new Key.
Give your key a name, and enable Sign In with Apple.
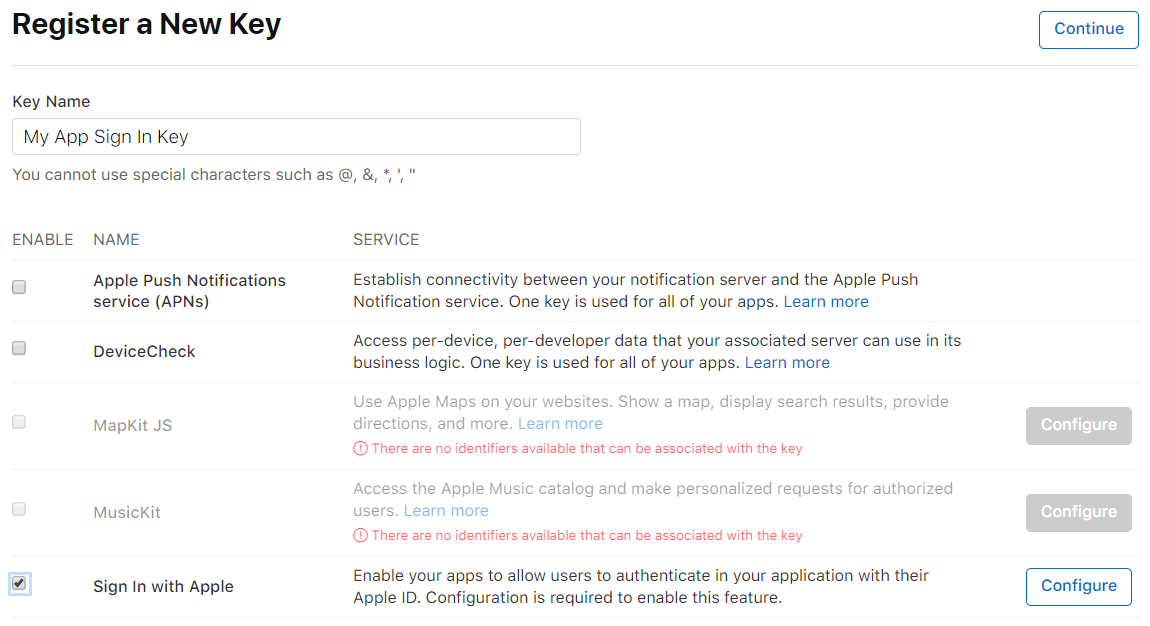
Click Configure beside Sign In with Apple.
Ensure the correct Primary App ID is selected and click Save.
Click Continue and then Register to create your new key.
Next, you will only have one chance to download the key you just generated. Click Download.

Also, take note of your Key ID at this step. This will be used for your KeyId later on.
You will have downloaded a .p8 key file. You can open this file in Notepad, or VSCode to see the text contents. They should look something like:
-----BEGIN PRIVATE KEY-----
MIGTAgEAMBMGBasGSM49AgGFCCqGSM49AwEHBHkwdwIBAQQg3MX8n6VnQ2WzgEy0
Skoz9uOvatLMKTUIPyPCAejzzUCgCgYIKoZIzj0DAQehRANCAARZ0DoM6QPqpJxP
JKSlWz0AohFhYre10EXPkjrih4jTm+b0AeG2BGuoIWd18i8FimGDgK6IzHHPsEqj
DHF5Svq0
-----END PRIVATE KEY-----
Name this key P8FileContents and keep it in a safe place. You will use it when integrating this service into your mobile application.
Summary
This article described the steps necessary to setup Sign In with Apple for use in your Xamarin.Forms applications.