Démarrage rapide : ajouter un appel vidéo 1:1 à votre application en tant qu’utilisateur Teams
Démarrage avec Azure Communication Services à l’aide du Kit de développement logiciel (SDK) d’appel Communication Services pour ajouter des appels vocaux et vidéo individuels à votre application. Vous allez découvrir comment démarrer un appel et y répondre à l’aide du SDK d’appel Azure Communication Services pour JavaScript.
Exemple de code
Si vous souhaitez passer à la fin, vous pouvez télécharger ce guide de démarrage rapide en guise d’exemple sur GitHub.
Prérequis
- Obtenez un compte Azure avec un abonnement actif. Créez un compte gratuitement.
- Vous avez besoin de Node.js 18. Vous pouvez utiliser le programme d’installation msi pour l’installer.
- Créez une ressource Communication Services active. Créez une ressource Communication Services.
- Créez un jeton d’accès utilisateur pour instancier le client d’appel. Découvrez comment créer et gérer des jetons d’accès utilisateur.
- Obtenez l’ID de thread Teams pour les opérations d’appel à l’aide de l’Afficheur Graph. En savoir plus sur la création d’un ID de thread de conversation.
Configuration
Création d’une application Node.js
Ouvrez votre fenêtre de terminal ou de commande, créez un répertoire pour votre application, puis accédez-y.
mkdir calling-quickstart && cd calling-quickstart
Exécutez npm init -y pour créer un fichier package.json avec les paramètres par défaut.
npm init -y
Installer le package
Utilisez la commande npm install pour installer le SDK Azure Communication Services Calling pour JavaScript.
Important
Ce guide de démarrage rapide utilise la dernière version du Kit de développement logiciel (SDK) Azure Communication Services Calling.
npm install @azure/communication-common --save
npm install @azure/communication-calling --save
Configurer le framework d’application
Ce guide de démarrage rapide utilise webpack pour regrouper les ressources de l’application. Exécutez la commande suivante pour installer les packages npm webpack, webpack-cli et webpack-dev-server, puis listez-les comme dépendances de développement dans votre fichier package.json :
npm install copy-webpack-plugin@^11.0.0 webpack@^5.88.2 webpack-cli@^5.1.4 webpack-dev-server@^4.15.1 --save-dev
Créez un fichier index.html dans le répertoire racine de votre projet. Nous utiliserons ce fichier pour configurer une disposition de base qui permettra à l’utilisateur d’effectuer un appel vidéo 1 à 1.
Voici le code :
<!-- index.html -->
<!DOCTYPE html>
<html>
    <head>
        <title>Azure Communication Services - Teams Calling Web Application</title>
    </head>
    <body>
        <h4>Azure Communication Services - Teams Calling Web Application</h4>
        <input id="user-access-token"
            type="text"
            placeholder="User access token"
            style="margin-bottom:1em; width: 500px;"/>
        <button id="initialize-teams-call-agent" type="button">Login</button>
        <br>
        <br>
        <input id="callee-teams-user-id"
            type="text"
            placeholder="Microsoft Teams callee's id (xxxxxxxx-xxxx-xxxx-xxxx-xxxxxxxxxxxx)"
            style="margin-bottom:1em; width: 500px; display: block;"/>
        <button id="start-call-button" type="button" disabled="true">Start Call</button>
        <button id="hangup-call-button" type="button" disabled="true">Hang up Call</button>
        <button id="accept-call-button" type="button" disabled="true">Accept Call</button>
        <button id="start-video-button" type="button" disabled="true">Start Video</button>
        <button id="stop-video-button" type="button" disabled="true">Stop Video</button>
        <br>
        <br>
        <div id="connectedLabel" style="color: #13bb13;" hidden>Call is connected!</div>
        <br>
        <div id="remoteVideoContainer" style="width: 40%;" hidden>Remote participants' video streams:</div>
        <br>
        <div id="localVideoContainer" style="width: 30%;" hidden>Local video stream:</div>
        <!-- points to the bundle generated from client.js -->
        <script src="./main.js"></script>
    </body>
</html>
Modèle d’objet Azure Communication Services Calling Web SDK
Les classes et les interfaces suivantes gèrent certaines des principales fonctionnalités du SDK Appel Azure Communication Services :
| Nom | Description |
|---|---|
CallClient |
Point d’entrée principal du SDK Appel. |
AzureCommunicationTokenCredential |
Implémente l’interface CommunicationTokenCredential, qui est utilisée pour instancier teamsCallAgent. |
TeamsCallAgent |
Sert à démarrer et à gérer les appels Teams. |
DeviceManager |
Utilisé pour gérer les appareils multimédias. |
TeamsCall |
Utilisé pour représenter un appel Teams |
LocalVideoStream |
Utilisé pour créer un flux vidéo local pour un appareil photo sur le système local. |
RemoteParticipant |
Utilisé pour représenter un participant distant dans l’appel |
RemoteVideoStream |
Utilisé pour représenter un flux vidéo distant d’un participant distant. |
Créez un fichier dans le répertoire racine de votre projet sous le nom index.js qui contiendra la logique d’application pour ce guide de démarrage rapide. Ajoutez le code suivant à index.js :
// Make sure to install the necessary dependencies
const { CallClient, VideoStreamRenderer, LocalVideoStream } = require('@azure/communication-calling');
const { AzureCommunicationTokenCredential } = require('@azure/communication-common');
const { AzureLogger, setLogLevel } = require("@azure/logger");
// Set the log level and output
setLogLevel('verbose');
AzureLogger.log = (...args) => {
    console.log(...args);
};
// Calling web sdk objects
let teamsCallAgent;
let deviceManager;
let call;
let incomingCall;
let localVideoStream;
let localVideoStreamRenderer;
// UI widgets
let userAccessToken = document.getElementById('user-access-token');
let calleeTeamsUserId = document.getElementById('callee-teams-user-id');
let initializeCallAgentButton = document.getElementById('initialize-teams-call-agent');
let startCallButton = document.getElementById('start-call-button');
let hangUpCallButton = document.getElementById('hangup-call-button');
let acceptCallButton = document.getElementById('accept-call-button');
let startVideoButton = document.getElementById('start-video-button');
let stopVideoButton = document.getElementById('stop-video-button');
let connectedLabel = document.getElementById('connectedLabel');
let remoteVideoContainer = document.getElementById('remoteVideoContainer');
let localVideoContainer = document.getElementById('localVideoContainer');
/**
 * Create an instance of CallClient. Initialize a TeamsCallAgent instance with a CommunicationUserCredential via created CallClient. TeamsCallAgent enables us to make outgoing calls and receive incoming calls.
 * You can then use the CallClient.getDeviceManager() API instance to get the DeviceManager.
 */
initializeCallAgentButton.onclick = async () => {
    try {
        const callClient = new CallClient();
        tokenCredential = new AzureCommunicationTokenCredential(userAccessToken.value.trim());
        teamsCallAgent = await callClient.createTeamsCallAgent(tokenCredential)
        // Set up a camera device to use.
        deviceManager = await callClient.getDeviceManager();
        await deviceManager.askDevicePermission({ video: true });
        await deviceManager.askDevicePermission({ audio: true });
        // Listen for an incoming call to accept.
        teamsCallAgent.on('incomingCall', async (args) => {
            try {
                incomingCall = args.incomingCall;
                acceptCallButton.disabled = false;
                startCallButton.disabled = true;
            } catch (error) {
                console.error(error);
            }
        });
        startCallButton.disabled = false;
        initializeCallAgentButton.disabled = true;
    } catch(error) {
        console.error(error);
    }
}
/**
 * Place a 1:1 outgoing video call to a user
 * Add an event listener to initiate a call when the `startCallButton` is selected.
 * Enumerate local cameras using the deviceManager `getCameraList` API.
 * In this quickstart, we're using the first camera in the collection. Once the desired camera is selected, a
 * LocalVideoStream instance will be constructed and passed within `videoOptions` as an item within the
 * localVideoStream array to the call method. When the call connects, your application will be sending a video stream to the other participant.
 */
startCallButton.onclick = async () => {
    try {
        const localVideoStream = await createLocalVideoStream();
        const videoOptions = localVideoStream ? { localVideoStreams: [localVideoStream] } : undefined;
        call = teamsCallAgent.startCall({ microsoftTeamsUserId: calleeTeamsUserId.value.trim() }, { videoOptions: videoOptions });
        // Subscribe to the call's properties and events.
        subscribeToCall(call);
    } catch (error) {
        console.error(error);
    }
}
/**
 * Accepting an incoming call with a video
 * Add an event listener to accept a call when the `acceptCallButton` is selected.
 * You can accept incoming calls after subscribing to the `TeamsCallAgent.on('incomingCall')` event.
 * You can pass the local video stream to accept the call with the following code.
 */
acceptCallButton.onclick = async () => {
    try {
        const localVideoStream = await createLocalVideoStream();
        const videoOptions = localVideoStream ? { localVideoStreams: [localVideoStream] } : undefined;
        call = await incomingCall.accept({ videoOptions });
        // Subscribe to the call's properties and events.
        subscribeToCall(call);
    } catch (error) {
        console.error(error);
    }
}
// Subscribe to a call obj.
// Listen for property changes and collection udpates.
subscribeToCall = (call) => {
    try {
        // Inspect the initial call.id value.
        console.log(`Call Id: ${call.id}`);
        //Subsribe to call's 'idChanged' event for value changes.
        call.on('idChanged', () => {
            console.log(`Call ID changed: ${call.id}`);
        });
        // Inspect the initial call.state value.
        console.log(`Call state: ${call.state}`);
        // Subscribe to call's 'stateChanged' event for value changes.
        call.on('stateChanged', async () => {
            console.log(`Call state changed: ${call.state}`);
            if(call.state === 'Connected') {
                connectedLabel.hidden = false;
                acceptCallButton.disabled = true;
                startCallButton.disabled = true;
                hangUpCallButton.disabled = false;
                startVideoButton.disabled = false;
                stopVideoButton.disabled = false;
            } else if (call.state === 'Disconnected') {
                connectedLabel.hidden = true;
                startCallButton.disabled = false;
                hangUpCallButton.disabled = true;
                startVideoButton.disabled = true;
                stopVideoButton.disabled = true;
                console.log(`Call ended, call end reason={code=${call.callEndReason.code}, subCode=${call.callEndReason.subCode}}`);
            }
        });
        call.on('isLocalVideoStartedChanged', () => {
            console.log(`isLocalVideoStarted changed: ${call.isLocalVideoStarted}`);
        });
        console.log(`isLocalVideoStarted: ${call.isLocalVideoStarted}`);
        call.localVideoStreams.forEach(async (lvs) => {
            localVideoStream = lvs;
            await displayLocalVideoStream();
        });
        call.on('localVideoStreamsUpdated', e => {
            e.added.forEach(async (lvs) => {
                localVideoStream = lvs;
                await displayLocalVideoStream();
            });
            e.removed.forEach(lvs => {
               removeLocalVideoStream();
            });
        });

        // Inspect the call's current remote participants and subscribe to them.
        call.remoteParticipants.forEach(remoteParticipant => {
            subscribeToRemoteParticipant(remoteParticipant);
        });
        // Subscribe to the call's 'remoteParticipantsUpdated' event to be
        // notified when new participants are added to the call or removed from the call.
        call.on('remoteParticipantsUpdated', e => {
            // Subscribe to new remote participants that are added to the call.
            e.added.forEach(remoteParticipant => {
                subscribeToRemoteParticipant(remoteParticipant)
            });
            // Unsubscribe from participants that are removed from the call
            e.removed.forEach(remoteParticipant => {
                console.log('Remote participant removed from the call.');
            });
        });
    } catch (error) {
        console.error(error);
    }
}
// Subscribe to a remote participant obj.
// Listen for property changes and collection udpates.
subscribeToRemoteParticipant = (remoteParticipant) => {
    try {
        // Inspect the initial remoteParticipant.state value.
        console.log(`Remote participant state: ${remoteParticipant.state}`);
        // Subscribe to remoteParticipant's 'stateChanged' event for value changes.
        remoteParticipant.on('stateChanged', () => {
            console.log(`Remote participant state changed: ${remoteParticipant.state}`);
        });
        // Inspect the remoteParticipants's current videoStreams and subscribe to them.
        remoteParticipant.videoStreams.forEach(remoteVideoStream => {
            subscribeToRemoteVideoStream(remoteVideoStream)
        });
        // Subscribe to the remoteParticipant's 'videoStreamsUpdated' event to be
        // notified when the remoteParticiapant adds new videoStreams and removes video streams.
        remoteParticipant.on('videoStreamsUpdated', e => {
            // Subscribe to newly added remote participant's video streams.
            e.added.forEach(remoteVideoStream => {
                subscribeToRemoteVideoStream(remoteVideoStream)
            });
            // Unsubscribe from newly removed remote participants' video streams.
            e.removed.forEach(remoteVideoStream => {
                console.log('Remote participant video stream was removed.');
            })
        });
    } catch (error) {
        console.error(error);
    }
}
/**
 * Subscribe to a remote participant's remote video stream obj.
 * You have to subscribe to the 'isAvailableChanged' event to render the remoteVideoStream. If the 'isAvailable' property
 * changes to 'true' a remote participant is sending a stream. Whenever the availability of a remote stream changes
 * you can choose to destroy the whole 'Renderer' a specific 'RendererView' or keep them. Displaying RendererView without a video stream will result in a blank video frame.
 */
subscribeToRemoteVideoStream = async (remoteVideoStream) => {
    // Create a video stream renderer for the remote video stream.
    let videoStreamRenderer = new VideoStreamRenderer(remoteVideoStream);
    let view;
    const renderVideo = async () => {
        try {
            // Create a renderer view for the remote video stream.
            view = await videoStreamRenderer.createView();
            // Attach the renderer view to the UI.
            remoteVideoContainer.hidden = false;
            remoteVideoContainer.appendChild(view.target);
        } catch (e) {
            console.warn(`Failed to createView, reason=${e.message}, code=${e.code}`);
        }
    }

    remoteVideoStream.on('isAvailableChanged', async () => {
        // Participant has switched video on.
        if (remoteVideoStream.isAvailable) {
            await renderVideo();
        // Participant has switched video off.
        } else {
            if (view) {
                view.dispose();
                view = undefined;
            }
        }
    });
    // Participant has video on initially.
    if (remoteVideoStream.isAvailable) {
        await renderVideo();
    }
}
// Start your local video stream.
// This will send your local video stream to remote participants so they can view it.
startVideoButton.onclick = async () => {
    try {
        const localVideoStream = await createLocalVideoStream();
        await call.startVideo(localVideoStream);
    } catch (error) {
        console.error(error);
    }
}
// Stop your local video stream.
// This will stop your local video stream from being sent to remote participants.
stopVideoButton.onclick = async () => {
    try {
        await call.stopVideo(localVideoStream);
    } catch (error) {
        console.error(error);
    }
}
/**
 * To render a LocalVideoStream, you need to create a new instance of VideoStreamRenderer, and then
 * create a new VideoStreamRendererView instance using the asynchronous createView() method.
 * You may then attach view.target to any UI element.
 */
// Create a local video stream for your camera device
createLocalVideoStream = async () => {
    const camera = (await deviceManager.getCameras())[0];
    if (camera) {
        return new LocalVideoStream(camera);
    } else {
        console.error(`No camera device found on the system`);
    }
}
// Display your local video stream preview in your UI
displayLocalVideoStream = async () => {
    try {
        localVideoStreamRenderer = new VideoStreamRenderer(localVideoStream);
        const view = await localVideoStreamRenderer.createView();
        localVideoContainer.hidden = false;
        localVideoContainer.appendChild(view.target);
    } catch (error) {
        console.error(error);
    }
}
// Remove your local video stream preview from your UI
removeLocalVideoStream = async() => {
    try {
        localVideoStreamRenderer.dispose();
        localVideoContainer.hidden = true;
    } catch (error) {
        console.error(error);
    }
}
// End the current call
hangUpCallButton.addEventListener("click", async () => {
    // end the current call
    await call.hangUp();
});
Ajouter le code du serveur local webpack
Créez un fichier dans le répertoire racine de votre projet sous le nom webpack.config.js qui contiendra la logique de serveur local pour ce guide de démarrage rapide. Ajoutez le code suivant à webpack.config.js :
const path = require('path');
const CopyPlugin = require("copy-webpack-plugin");

module.exports = {
    mode: 'development',
    entry: './index.js',
    output: {
        filename: 'main.js',
        path: path.resolve(__dirname, 'dist'),
    },
    devServer: {
        static: {
            directory: path.join(__dirname, './')
        },
    },
    plugins: [
        new CopyPlugin({
            patterns: [
                './index.html'
            ]
        }),
    ]
};
Exécuter le code
Utilisez webpack-dev-server pour créer et exécuter votre application. Exécutez la commande suivante pour créer un bundle de l’application hôte sur un serveur web local :
`npx webpack serve --config webpack.config.js`
Ouvrez votre navigateur, puis accédez à http://localhost:8080/. sous deux onglets Les onglets devraient montrer un résultat similaire à l’image suivante : 
Dans le premier onglet, entrez un jeton d’accès utilisateur valide. Sous le deuxième onglet, entrez un jeton d’accès utilisateur valide différent. Consultez la documentation sur les jetons d’accès utilisateur si vous n’avez pas encore de jeton d’accès disponible.
Sous les deux onglets, cliquez sur le bouton « Initialiser l’agent d’appel ». Les onglets devraient montrer un résultat similaire à l’image suivante : 
Sous le premier onglet, entrez l’identité de l’utilisateur Azure Communication Services du deuxième onglet, puis sélectionnez le bouton « Démarrer l’appel ». Le premier onglet démarre l’appel sortant vers le deuxième onglet, et le bouton « Accepter l’appel » du deuxième onglet est activé : 
Dans le deuxième onglet, sélectionnez le bouton « Accepter l’appel ». L’appel est pris et connecté. Les onglets devraient montrer un résultat similaire à l’image suivante : 
Les deux onglets se trouvent maintenant dans un appel vidéo 1:1. Les deux utilisateurs peuvent entendre l’audio de l’autre et voir le flux vidéo de l’autre.
Démarrage avec Azure Communication Services à l’aide du Kit de développement logiciel (SDK) d’appel Communication Services pour ajouter des appels vocaux et vidéo individuels à votre application. Vous allez découvrir comment passer un appel et répondre à un appel à l’aide du kit de développement logiciel (SDK) d’appel Azure Communication Services pour Windows.
Exemple de code
Si vous souhaitez passer à la fin, vous pouvez télécharger ce guide de démarrage rapide en guise d’exemple sur GitHub.
Prérequis
Pour effectuer ce didacticiel, vous avez besoin de ce qui suit :
- Compte Azure avec un abonnement actif. Créez un compte gratuitement.
- Installez Visual Studio 2022 avec la charge de travail de développement pour la plateforme Windows universelle.
- Une ressource Communication Services déployée. Créez une ressource Communication Services. Vous devez enregistrer votre chaîne de connexion pour ce guide de démarrage rapide.
- Un jeton d’accès utilisateur pour votre service Azure Communication
- Obtenez l’ID de thread Teams pour les opérations d’appel à l’aide de l’Afficheur Graph. En savoir plus sur la création d’un ID de thread de conversation.
Configuration
Création du projet
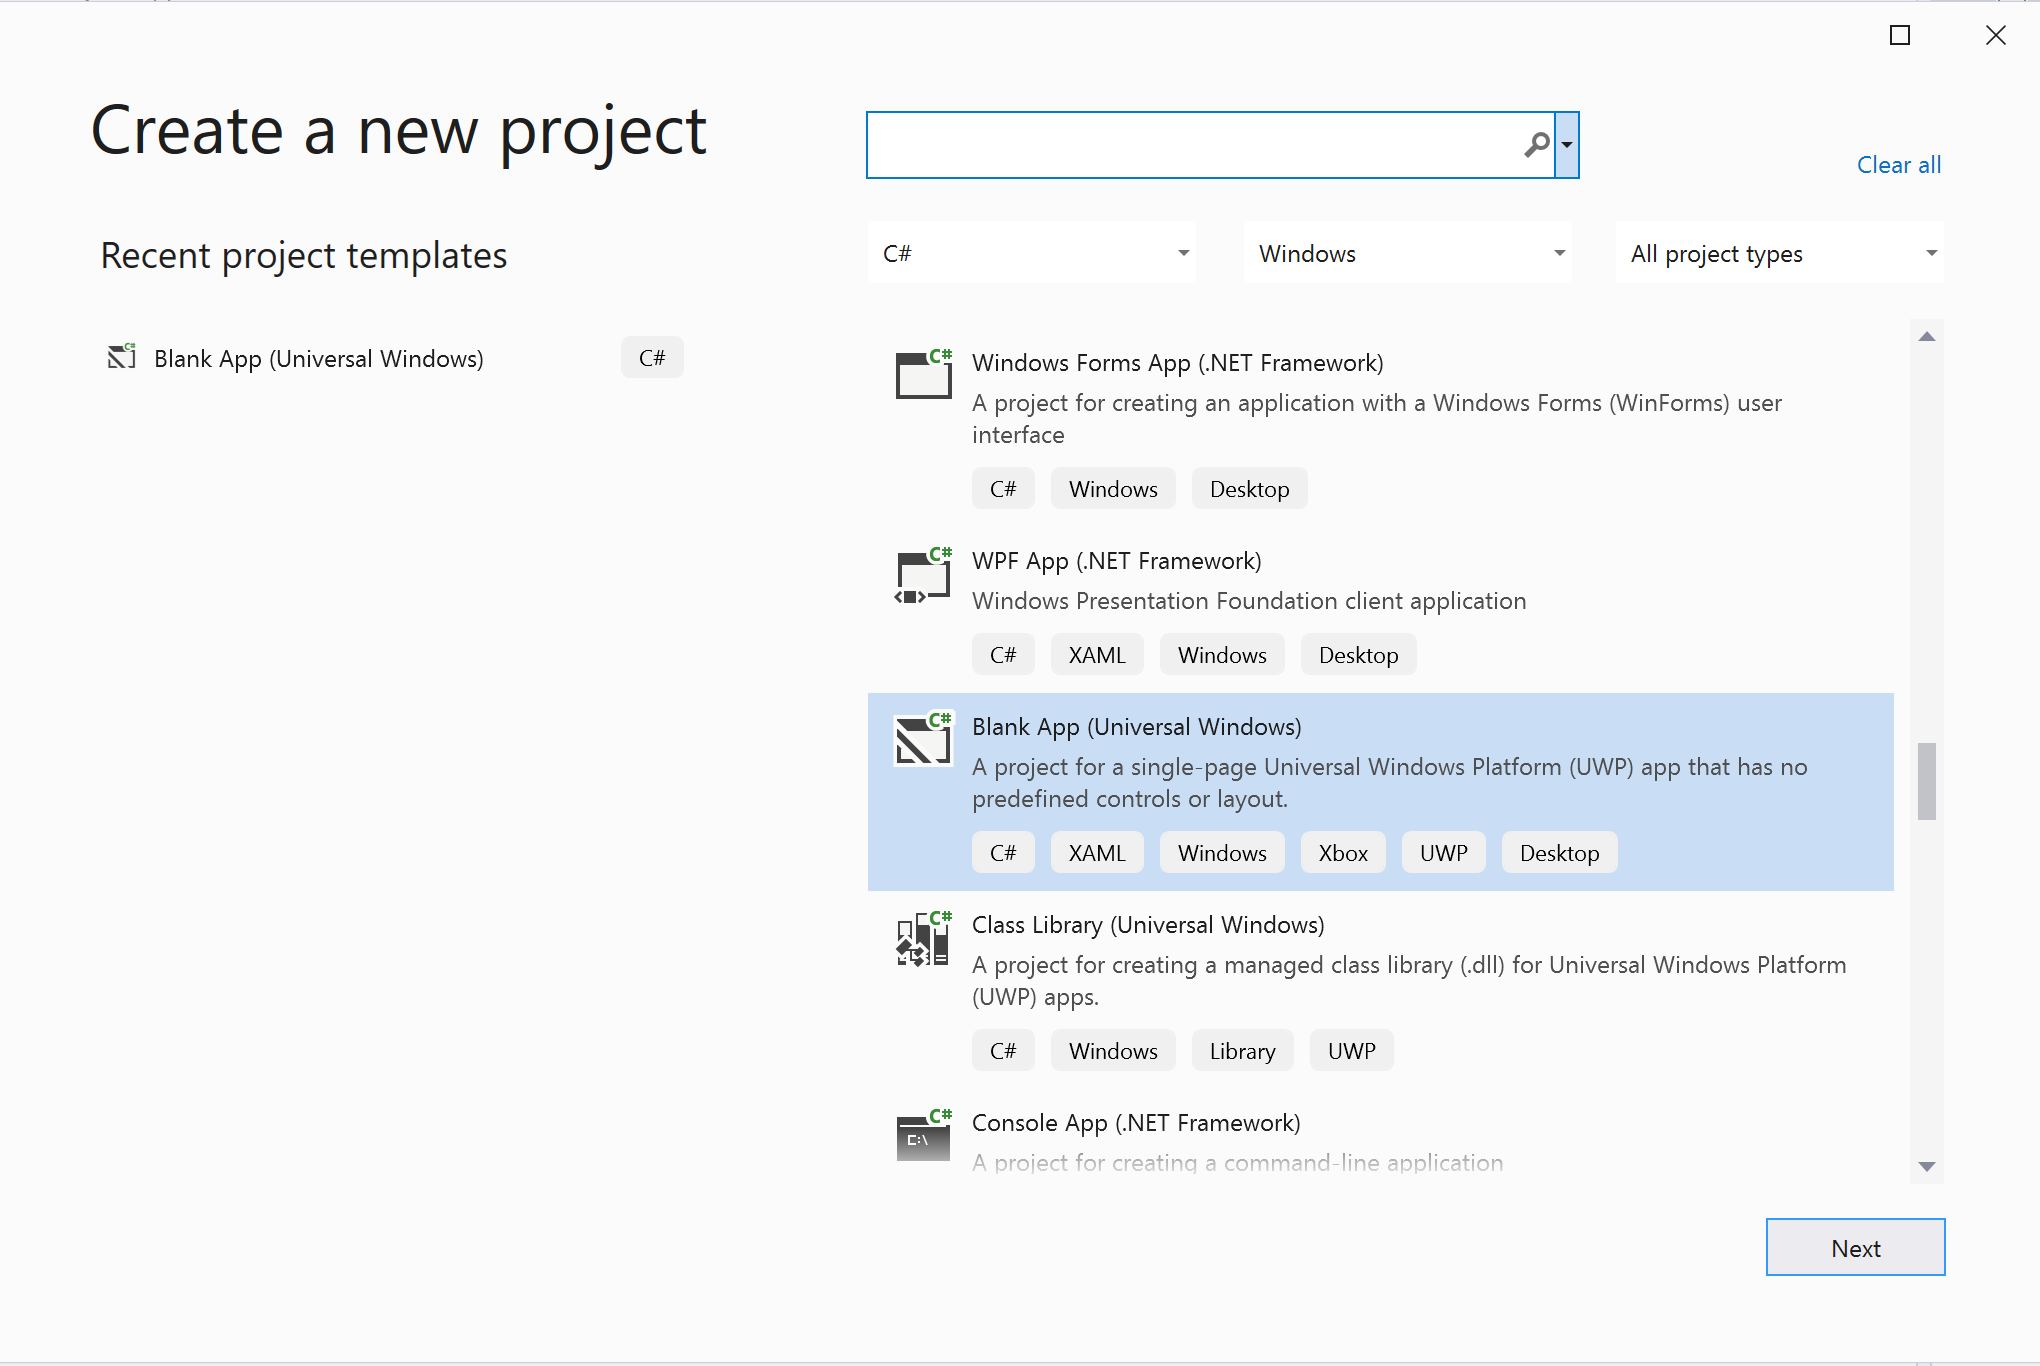
Dans Visual Studio, créez un projet avec le modèle Application vide (Windows universel) pour configurer une application de plateforme Windows universelle (UWP) monopage.
Installer le package
Sélectionnez votre projet à droite et accédez à Manage Nuget Packages pour installer la version Azure.Communication.Calling.WindowsClient1.2.0-beta.1 ou ultérieure. Vérifiez que l’option Inclure la préversion est activée.
Demander l'accès
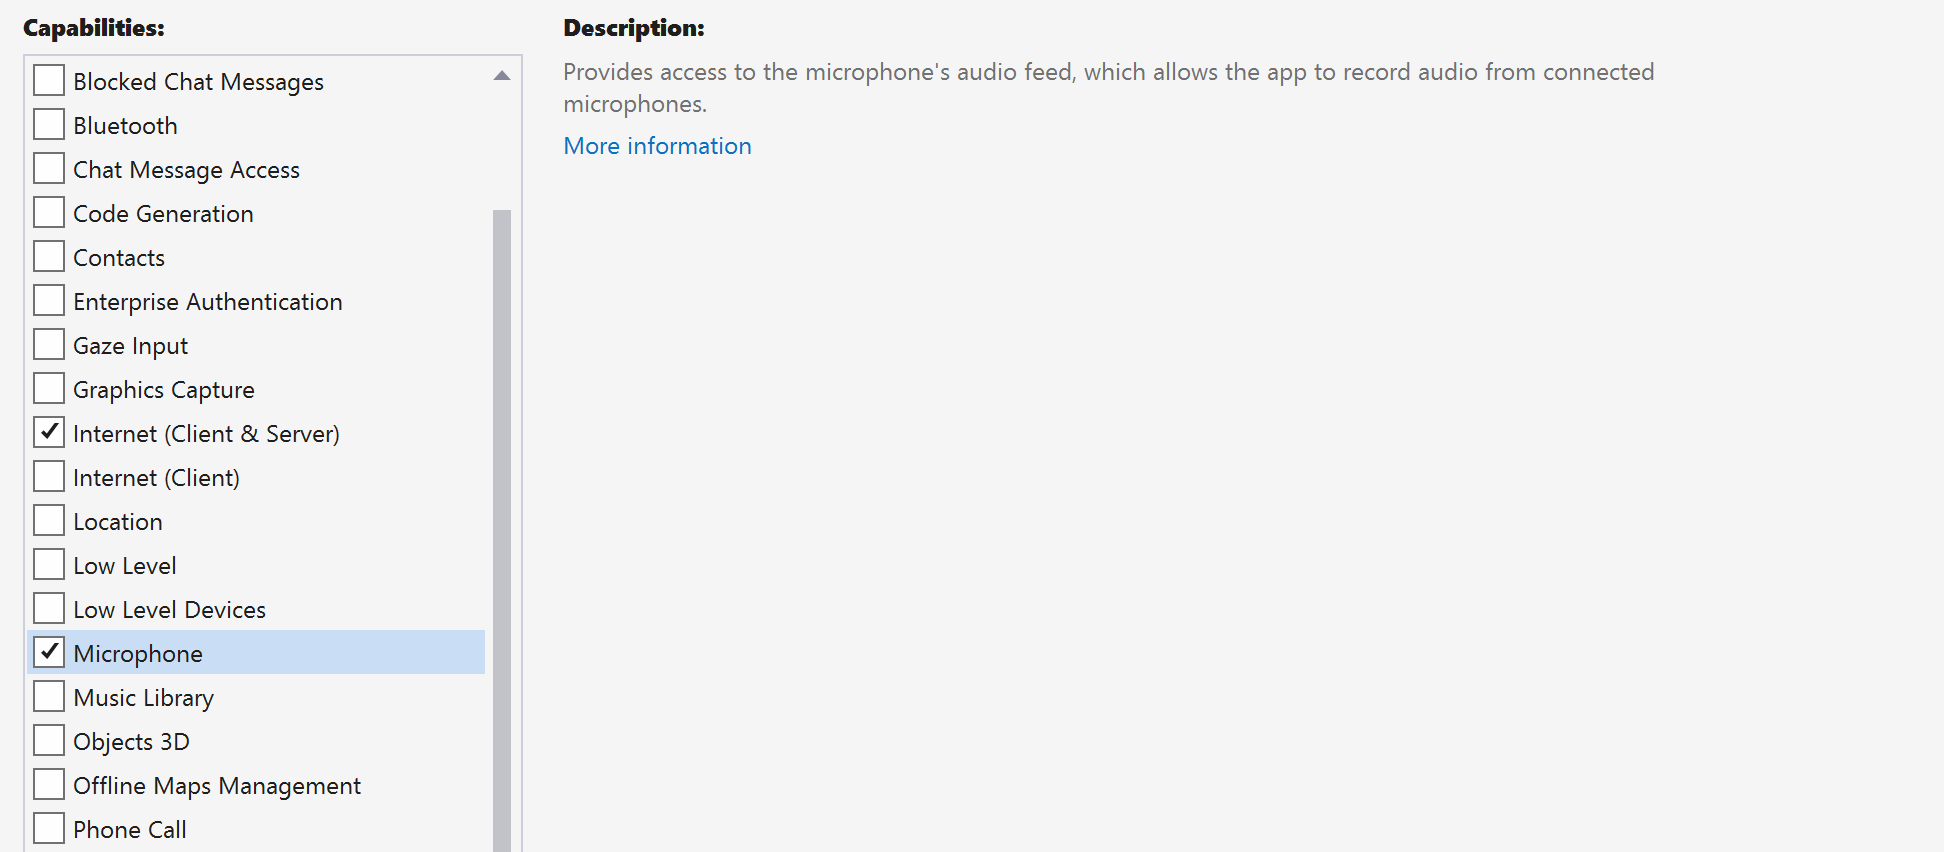
Accédez à Package.appxmanifest et sélectionnez Capabilities.
Cochez la case Internet (Client) et Internet (Client & Server) pour obtenir un accès entrant et sortant à Internet. Vérifiez Microphone pour accéder au flux audio du microphone et Webcam au flux vidéo de la caméra.
Configurer le framework d’application
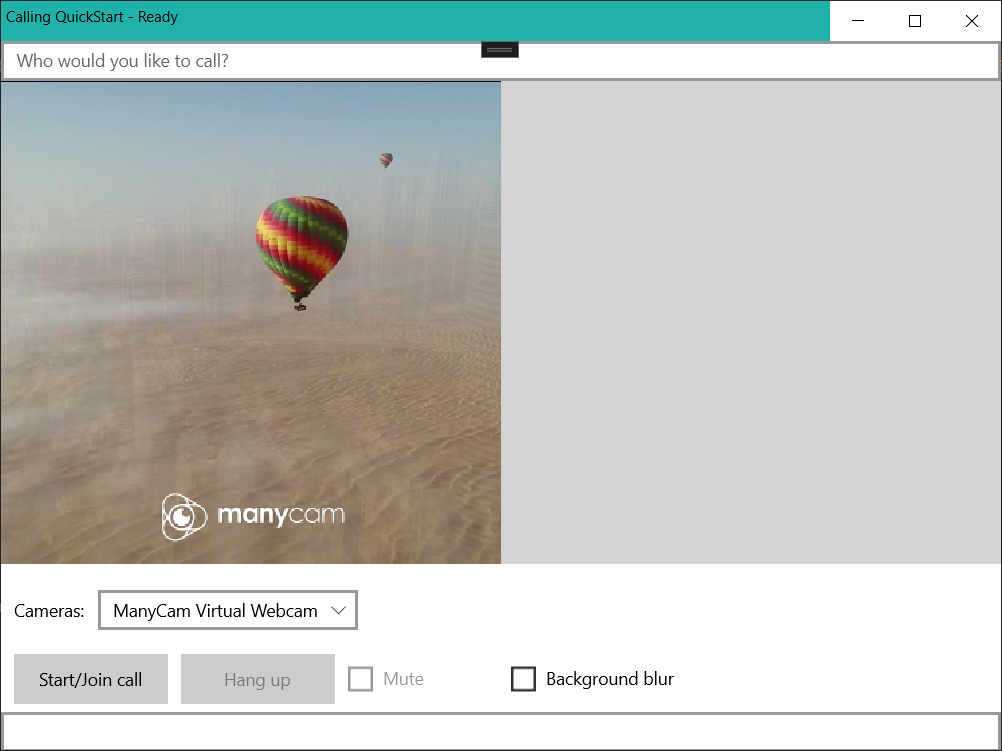
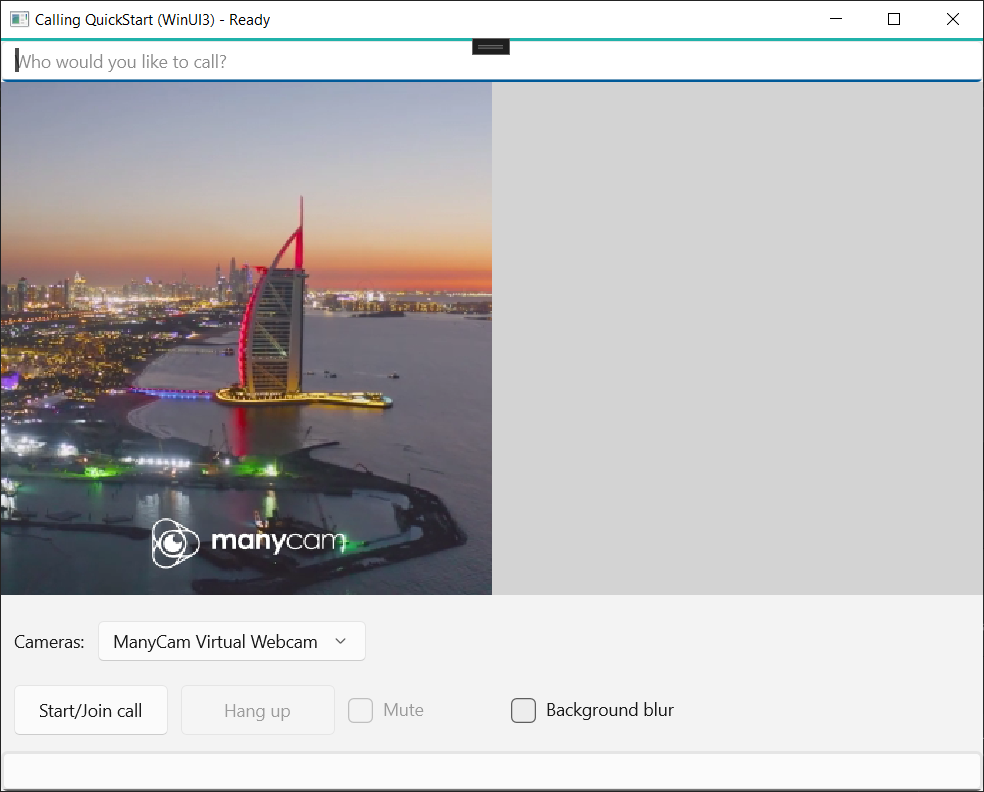
Nous devons configurer une disposition de base pour attacher notre logique. Afin de passer un appel sortant, nous avons besoin d’une TextBox pour fournir l’ID d’utilisateur de l’appelé. Nous avons également besoin d’un bouton Start/Join call et d’un bouton Hang up. Des Mute cases à cocher et un BackgroundBlur sont également inclus dans cet exemple pour illustrer les fonctionnalités de basculement des états audio et des effets vidéo.
Ouvrez le fichier MainPage.xaml de votre projet et ajoutez le nœud Grid à votre Page :
<Page
    x:Class="CallingQuickstart.MainPage"
    xmlns="http://schemas.microsoft.com/winfx/2006/xaml/presentation"
    xmlns:x="http://schemas.microsoft.com/winfx/2006/xaml"
    xmlns:local="using:CallingQuickstart"
    xmlns:d="http://schemas.microsoft.com/expression/blend/2008"
    xmlns:mc="http://schemas.openxmlformats.org/markup-compatibility/2006"
    mc:Ignorable="d"
    Background="{ThemeResource ApplicationPageBackgroundThemeBrush}" Width="800" Height="600">

    <Grid>
        <Grid.RowDefinitions>
            <RowDefinition Height="16*"/>
            <RowDefinition Height="30*"/>
            <RowDefinition Height="200*"/>
            <RowDefinition Height="60*"/>
            <RowDefinition Height="16*"/>
        </Grid.RowDefinitions>
        <TextBox Grid.Row="1" x:Name="CalleeTextBox" PlaceholderText="Who would you like to call?" TextWrapping="Wrap" VerticalAlignment="Center" Height="30" Margin="10,10,10,10" />

        <Grid x:Name="AppTitleBar" Background="LightSeaGreen">
            <TextBlock x:Name="QuickstartTitle" Text="Calling Quickstart sample title bar" Style="{StaticResource CaptionTextBlockStyle}" Padding="7,7,0,0"/>
        </Grid>

        <Grid Grid.Row="2">
            <Grid.RowDefinitions>
                <RowDefinition/>
            </Grid.RowDefinitions>
            <Grid.ColumnDefinitions>
                <ColumnDefinition Width="*"/>
                <ColumnDefinition Width="*"/>
            </Grid.ColumnDefinitions>
            <MediaPlayerElement x:Name="LocalVideo" HorizontalAlignment="Center" Stretch="UniformToFill" Grid.Column="0" VerticalAlignment="Center" AutoPlay="True" />
            <MediaPlayerElement x:Name="RemoteVideo" HorizontalAlignment="Center" Stretch="UniformToFill" Grid.Column="1" VerticalAlignment="Center" AutoPlay="True" />
        </Grid>
        <StackPanel Grid.Row="3" Orientation="Vertical" Grid.RowSpan="2">
            <StackPanel Orientation="Horizontal">
                <Button x:Name="CallButton" Content="Start/Join call" Click="CallButton_Click" VerticalAlignment="Center" Margin="10,0,0,0" Height="40" Width="123"/>
                <Button x:Name="HangupButton" Content="Hang up" Click="HangupButton_Click" VerticalAlignment="Center" Margin="10,0,0,0" Height="40" Width="123"/>
                <CheckBox x:Name="MuteLocal" Content="Mute" Margin="10,0,0,0" Click="MuteLocal_Click" Width="74"/>
            </StackPanel>
        </StackPanel>
        <TextBox Grid.Row="5" x:Name="Stats" Text="" TextWrapping="Wrap" VerticalAlignment="Center" Height="30" Margin="0,2,0,0" BorderThickness="2" IsReadOnly="True" Foreground="LightSlateGray" />
    </Grid>
</Page>
Ouvrez le fichier MainPage.xaml.cs et remplacez le contenu par l’implémentation suivante :
using Azure.Communication.Calling.WindowsClient;
using System;
using System.Collections.Generic;
using System.ComponentModel;
using System.Linq;
using System.Threading.Tasks;
using Windows.ApplicationModel;
using Windows.ApplicationModel.Core;
using Windows.Media.Core;
using Windows.Networking.PushNotifications;
using Windows.UI;
using Windows.UI.ViewManagement;
using Windows.UI.Xaml;
using Windows.UI.Xaml.Controls;
using Windows.UI.Xaml.Media;
using Windows.UI.Xaml.Navigation;

namespace CallingQuickstart
{
    public sealed partial class MainPage : Page
    {
        private const string authToken = "<AUTHENTICATION_TOKEN>";

        private CallClient callClient;
        private CallTokenRefreshOptions callTokenRefreshOptions = new CallTokenRefreshOptions(false);
        private TeamsCallAgent teamsCallAgent;
        private TeamsCommunicationCall teamsCall;

        private LocalOutgoingAudioStream micStream;
        private LocalOutgoingVideoStream cameraStream;

        #region Page initialization
        public MainPage()
        {
            this.InitializeComponent();
            // Additional UI customization code goes here
        }

        protected override async void OnNavigatedTo(NavigationEventArgs e)
        {
            base.OnNavigatedTo(e);
        }
        #endregion

        #region UI event handlers
        private async void CallButton_Click(object sender, RoutedEventArgs e)
        {
            // Start a call
        }

        private async void HangupButton_Click(object sender, RoutedEventArgs e)
        {
            // Hang up a call
        }

        private async void MuteLocal_Click(object sender, RoutedEventArgs e)
        {
            // Toggle mute/unmute audio state of a call
        }
        #endregion

        #region API event handlers
        private async void OnIncomingCallAsync(object sender, TeamsIncomingCallReceivedEventArgs args)
        {
            // Handle incoming call event
        }

        private async void OnStateChangedAsync(object sender, PropertyChangedEventArgs args)
        {
            // Handle connected and disconnected state change of a call
        }
        #endregion
    }
}
Modèle objet
Le tableau suivant a répertorié les classes et interfaces suivantes gèrent certaines des principales fonctionnalités du SDK Appel d’Azure Communication Services :
| Nom | Description |
|---|---|
CallClient |
CallClient est le point d’entrée principal du SDK Appel. |
TeamsCallAgent |
TeamsCallAgent sert à démarrer et à gérer les appels. |
TeamsCommunicationCall |
Le TeamsCommunicationCall est utilisé pour gérer un appel en cours. |
CallTokenCredential |
CallTokenCredential sert de jeton d’informations d'identification pour initier le TeamsCallAgent. |
CallIdentifier |
Le CallIdentifier est utilisé pour représenter l'identité de l'utilisateur, qui peut être l'une des options suivantes : MicrosoftTeamsUserCallIdentifier, UserCallIdentifier, PhoneNumberCallIdentifier, etc. |
Authentifier le client
Initialisez une instance TeamsCallAgent avec un jeton d’accès utilisateur qui permet de passer et de recevoir des appels, et éventuellement d’obtenir une instance DeviceManager pour rechercher des configurations d’appareil client.
Dans le code, remplacez <AUTHENTICATION_TOKEN> par un jeton d’accès utilisateur. Consultez la documentation sur les jetons d’accès utilisateur si vous n’avez pas encore de jeton disponible.
Ajouter InitCallAgentAndDeviceManagerAsync une fonction, qui démarre le KIT de développement logiciel (SDK). Cette assistance peut être personnalisée pour répondre aux exigences de votre application.
        private async Task InitCallAgentAndDeviceManagerAsync()
        {
            this.callClient = new CallClient(new CallClientOptions() {
                Diagnostics = new CallDiagnosticsOptions() {
                    AppName = "CallingQuickstart",
                    AppVersion="1.0",
                    Tags = new[] { "Calling", "CTE", "Windows" }
                    }
                });

            // Set up local video stream using the first camera enumerated
            var deviceManager = await this.callClient.GetDeviceManagerAsync();
            var camera = deviceManager?.Cameras?.FirstOrDefault();
            var mic = deviceManager?.Microphones?.FirstOrDefault();
            micStream = new LocalOutgoingAudioStream();

            var tokenCredential = new CallTokenCredential(authToken, callTokenRefreshOptions);

            this.teamsCallAgent = await this.callClient.CreateTeamsCallAgentAsync(tokenCredential);
            this.teamsCallAgent.IncomingCallReceived += OnIncomingCallAsync;
        }
Démarrer un appel
Ajoutez l’implémentation à pour CallButton_Click démarrer différents types d’appels avec l’objet teamsCallAgent que nous avons créé, et branchez RemoteParticipantsUpdated et StateChanged gestionnaires d’événements sur TeamsCommunicationCall l’objet.
        private async void CallButton_Click(object sender, RoutedEventArgs e)
        {
            var callString = CalleeTextBox.Text.Trim();

            teamsCall = await StartCteCallAsync(callString);
            if (teamsCall != null)
            {
                teamsCall.StateChanged += OnStateChangedAsync;
            }
        }
Terminer un appel
Terminez l’appel en cours quand l’utilisateur clique sur le bouton Hang up. Ajoutez l’implémentation à l’HangupButton_Click pour mettre fin à un appel et arrêter les flux d’aperçu et de vidéo.
        private async void HangupButton_Click(object sender, RoutedEventArgs e)
        {
            var teamsCall = this.teamsCallAgent?.Calls?.FirstOrDefault();
            if (teamsCall != null)
            {
                await teamsCall.HangUpAsync(new HangUpOptions() { ForEveryone = false });
            }
        }
Activer/désactiver le son
Désactivez le son sortant lorsque vous cliquez sur le Mute bouton. Ajoutez l’implémentation à la MuteLocal_Click pour désactiver l’appel.
        private async void MuteLocal_Click(object sender, RoutedEventArgs e)
        {
            var muteCheckbox = sender as CheckBox;

            if (muteCheckbox != null)
            {
                var teamsCall = this.teamsCallAgent?.Calls?.FirstOrDefault();
                if (teamsCall != null)
                {
                    if ((bool)muteCheckbox.IsChecked)
                    {
                        await teamsCall.MuteOutgoingAudioAsync();
                    }
                    else
                    {
                        await teamsCall.UnmuteOutgoingAudioAsync();
                    }
                }

                // Update the UI to reflect the state
            }
        }
Commencer l’appel
Une fois un objet StartTeamsCallOptions obtenu, TeamsCallAgent peut être utilisé pour passer l'appel Teams :
        private async Task<TeamsCommunicationCall> StartCteCallAsync(string cteCallee)
        {
            var options = new StartTeamsCallOptions();
            var teamsCall = await this.teamsCallAgent.StartCallAsync( new MicrosoftTeamsUserCallIdentifier(cteCallee), options);
            return call;
        }
Acceptation d’un appel entrant
TeamsIncomingCallReceived le récepteur d’événements est configuré dans l’assistance InitCallAgentAndDeviceManagerAsyncd’amorçage du KIT de développement logiciel (SDK).
this.teamsCallAgent.IncomingCallReceived += OnIncomingCallAsync;
L’application a la possibilité de configurer la façon dont l’appel entrant doit être accepté, comme les types de flux vidéo et audio.
        private async void OnIncomingCallAsync(object sender, TeamsIncomingCallReceivedEventArgs args)
        {
            var teamsIncomingCall = args.IncomingCall;

            var acceptteamsCallOptions = new AcceptTeamsCallOptions() { };

            teamsCall = await teamsIncomingCall.AcceptAsync(acceptteamsCallOptions);
            teamsCall.StateChanged += OnStateChangedAsync;
        }
Rejoindre un appel Teams
L’utilisateur peut également rejoindre un appel existant en transmettant un lien
TeamsMeetingLinkLocator link = new TeamsMeetingLinkLocator("meetingLink");
JoinTeamsCallOptions options = new JoinTeamsCallOptions();
TeamsCall call = await teamsCallAgent.JoinAsync(link, options);
analyser un événement de changement d'état d'appel et y répondre
L’événement StateChanged sur l’objet TeamsCommunicationCall est déclenché lorsqu’un appel en cours de transactions d’un état à un autre. L’application a la possibilité de refléter les changements d’état sur l’interface utilisateur ou d’insérer des logiques métier.
        private async void OnStateChangedAsync(object sender, PropertyChangedEventArgs args)
        {
            var teamsCall = sender as TeamsCommunicationCall;

            if (teamsCall != null)
            {
                var state = teamsCall.State;

                // Update the UI

                switch (state)
                {
                    case CallState.Connected:
                        {
                            await teamsCall.StartAudioAsync(micStream);

                            break;
                        }
                    case CallState.Disconnected:
                        {
                            teamsCall.StateChanged -= OnStateChangedAsync;

                            teamsCall.Dispose();

                            break;
                        }
                    default: break;
                }
            }
        }
Exécuter le code
Vous pouvez générer et exécuter le code sur Visual Studio. Les plateformes de solution que nous prenons en charge sont ARM64, x64 et x86.
Vous pouvez passer un appel sortant en entrant un ID d’utilisateur dans le champ de texte, puis en cliquant sur le bouton Start Call/Join. L’appel de 8:echo123 vous connecte à un bot d’écho, cette fonctionnalité est parfaite pour démarrer et vérifier que vos périphériques audio fonctionnent.
Démarrage avec Azure Communication Services à l’aide du Kit de développement logiciel (SDK) d’appel Communication Services pour ajouter des appels vocaux et vidéo individuels à votre application. Vous saurez comment passer un appel et à y répondre à l'aide du kit de développement logiciel (SDK) d'appel Azure Communication Services pour Java.
Exemple de code
Si vous souhaitez passer à la fin, vous pouvez télécharger ce guide de démarrage rapide en guise d’exemple sur GitHub.
Prérequis
- Compte Azure avec un abonnement actif. Créez un compte gratuitement.
- Android Studio, pour la création de votre application Android
- Une ressource Communication Services déployée. Créez une ressource Communication Services. Vous devez enregistrer votre chaîne de connexion pour ce guide de démarrage rapide.
- Un jeton d’accès utilisateur pour votre service Azure Communication
- Obtenez l’ID de thread Teams pour les opérations d’appel à l’aide de l’Afficheur Graph. En savoir plus sur la création d’un ID de thread de conversation.
Configuration
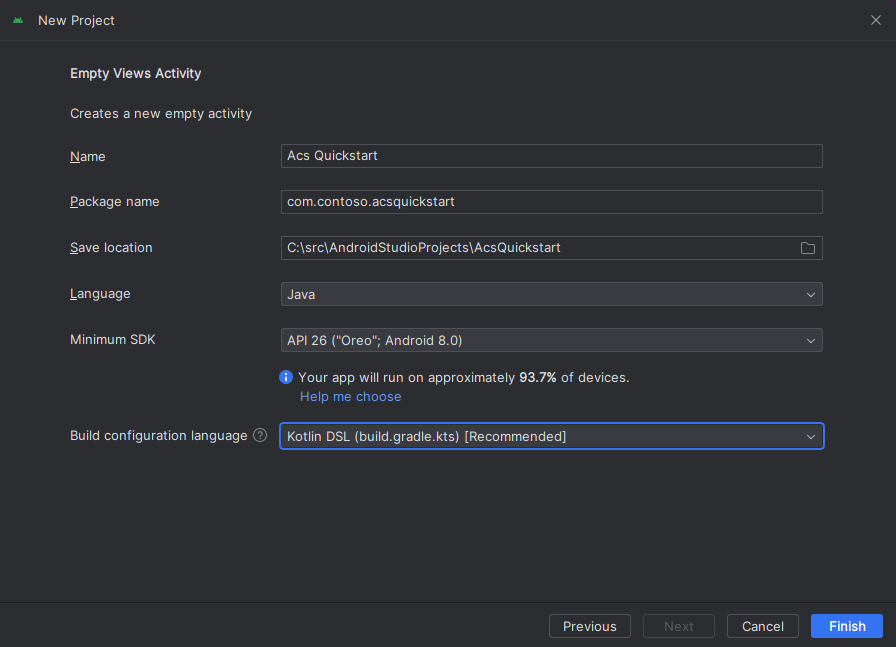
Créer une application Android avec une activité vide
Dans Android Studio, sélectionnez Start a new Android Studio project (Commencer un nouveau projet Android Studio).
Sélectionnez le modèle de projet « Empty Activity » sous « Phone and Tablet ».

Sélectionnez le kit de développement logiciel (SDK) minimal « API 26 : Android 8.0 (Oreo) » ou version ultérieure.
Installer le package
Recherchez votre projet build.gradle et veillez à ajouter mavenCentral() à la liste des référentiels sous buildscript et allprojects.
buildscript {
    repositories {
    ...
        mavenCentral()
    ...
    }
}
allprojects {
    repositories {
    ...
        mavenCentral()
    ...
    }
}
Ensuite, dans votre niveau de module build.gradle, ajoutez les lignes suivantes aux sections dependencies et android.
android {
    ...
    packagingOptions {
        pickFirst  'META-INF/*'
    }
    compileOptions {
        sourceCompatibility JavaVersion.VERSION_1_8
        targetCompatibility JavaVersion.VERSION_1_8
    }
}

dependencies {
    ...
    implementation 'com.azure.android:azure-communication-calling:1.0.0-beta.8'
    ...
}
Ajouter des autorisations au manifeste de l’application
Afin de pouvoir demander les autorisations nécessaires pour effectuer un appel, vous devez les déclarer dans le manifeste de l’application (app/src/main/AndroidManifest.xml). Remplacez le contenu du fichier par ce code :
    <?xml version="1.0" encoding="utf-8"?>
<manifest xmlns:android="http://schemas.android.com/apk/res/android"
    package="com.contoso.ctequickstart">

    <uses-permission android:name="android.permission.INTERNET" />
    <uses-permission android:name="android.permission.ACCESS_NETWORK_STATE" />
    <uses-permission android:name="android.permission.ACCESS_WIFI_STATE" />
    <uses-permission android:name="android.permission.RECORD_AUDIO" />
    <uses-permission android:name="android.permission.CAMERA" />
    <uses-permission android:name="android.permission.WRITE_EXTERNAL_STORAGE" />
    <uses-permission android:name="android.permission.READ_PHONE_STATE" />

    <application
        android:allowBackup="true"
        android:icon="@mipmap/ic_launcher"
        android:label="@string/app_name"
        android:roundIcon="@mipmap/ic_launcher_round"
        android:supportsRtl="true"
        android:theme="@style/AppTheme">
        <!--Our Calling SDK depends on the Apache HTTP SDK.
When targeting Android SDK 28+, this library needs to be explicitly referenced.
See https://developer.android.com/about/versions/pie/android-9.0-changes-28#apache-p-->
        <uses-library android:name="org.apache.http.legacy" android:required="false"/>
        <activity android:name=".MainActivity">
            <intent-filter>
                <action android:name="android.intent.action.MAIN" />

                <category android:name="android.intent.category.LAUNCHER" />
            </intent-filter>
        </activity>
    </application>

</manifest>
Configurer la disposition de l’application
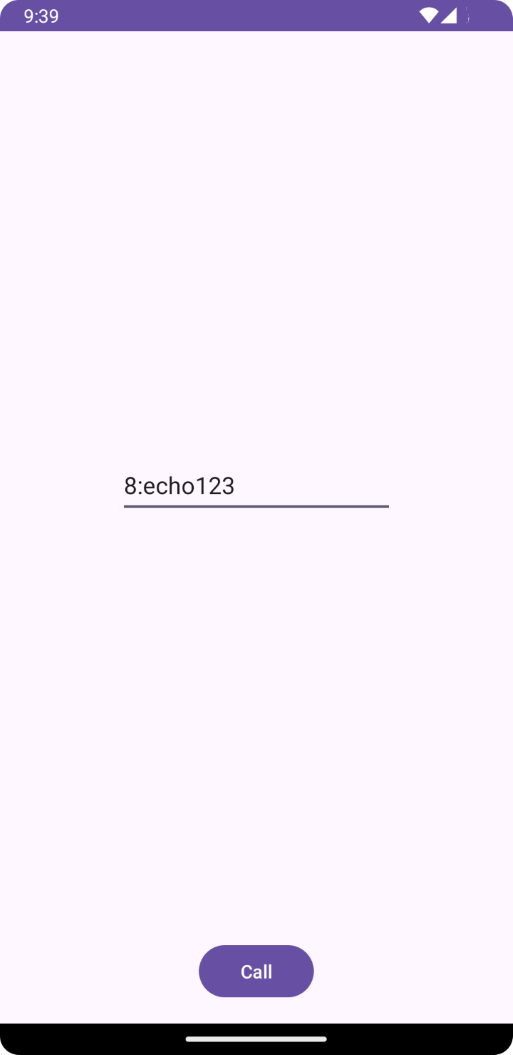
Deux entrées sont nécessaires : une entrée de texte pour l’ID de l’appelé et un bouton pour établir l’appel. Ces entrées peuvent être ajoutées par le biais du concepteur ou en modifiant le fichier XML de disposition. Créez un bouton avec call_button comme ID et callee_id comme entrée de texte. Accédez à (app/src/main/res/layout/activity_main.xml) et remplacez le contenu du fichier par ce code :
<?xml version="1.0" encoding="utf-8"?>
<androidx.constraintlayout.widget.ConstraintLayout xmlns:android="http://schemas.android.com/apk/res/android"
    xmlns:app="http://schemas.android.com/apk/res-auto"
    xmlns:tools="http://schemas.android.com/tools"
    android:layout_width="match_parent"
    android:layout_height="match_parent"
    tools:context=".MainActivity">

    <Button
        android:id="@+id/call_button"
        android:layout_width="wrap_content"
        android:layout_height="wrap_content"
        android:layout_marginBottom="16dp"
        android:text="Call"
        app:layout_constraintBottom_toBottomOf="parent"
        app:layout_constraintEnd_toEndOf="parent"
        app:layout_constraintStart_toStartOf="parent" />

    <EditText
        android:id="@+id/callee_id"
        android:layout_width="wrap_content"
        android:layout_height="wrap_content"
        android:ems="10"
        android:hint="Callee Id"
        android:inputType="textPersonName"
        app:layout_constraintBottom_toTopOf="@+id/call_button"
        app:layout_constraintEnd_toEndOf="parent"
        app:layout_constraintStart_toStartOf="parent"
        app:layout_constraintTop_toTopOf="parent" />
</androidx.constraintlayout.widget.ConstraintLayout>
Créer la génération de modèles automatique et les liaisons de l’activité principale
La mise en page étant créée, nous pouvons ajouter les liaisons ainsi que la génération de modèles automatique de base de l’activité. L'activité décrit la requête d'autorisations de runtime, la création de l'agent chargé de l'appel Teams, et l'émission de l'appel une fois le bouton appuyé. Chacune de ces opérations est traitée dans sa propre section. La méthode onCreate est remplacée pour appeler getAllPermissions et createTeamsAgent, et pour ajouter les liaisons pour le bouton d’appel. Cet événement ne se produit qu’une seule fois lors de la création de l’activité. Pour plus d’informations sur onCreate, consultez le guide Présentation du cycle de vie des activités.
Accédez à MainActivity.java et remplacez le contenu par le code suivant :
package com.contoso.ctequickstart;

import androidx.appcompat.app.AppCompatActivity;
import androidx.core.app.ActivityCompat;
import android.media.AudioManager;
import android.Manifest;
import android.content.pm.PackageManager;

import android.os.Bundle;
import android.widget.Button;
import android.widget.EditText;
import android.widget.Toast;

import com.azure.android.communication.common.CommunicationUserIdentifier;
import com.azure.android.communication.common.CommunicationTokenCredential;
import com.azure.android.communication.calling.TeamsCallAgent;
import com.azure.android.communication.calling.CallClient;
import com.azure.android.communication.calling.StartTeamsCallOptions;


import java.util.ArrayList;

public class MainActivity extends AppCompatActivity {

    private TeamsCallAgent teamsCallAgent;

    @Override
    protected void onCreate(Bundle savedInstanceState) {
        super.onCreate(savedInstanceState);
        setContentView(R.layout.activity_main);

        getAllPermissions();
        createTeamsAgent();

        // Bind call button to call `startCall`
        Button callButton = findViewById(R.id.call_button);
        callButton.setOnClickListener(l -> startCall());

        setVolumeControlStream(AudioManager.STREAM_VOICE_CALL);
    }

    /**
     * Request each required permission if the app doesn't already have it.
     */
    private void getAllPermissions() {
        // See section on requesting permissions
    }

    /**
      * Create the call agent for placing calls
      */
    private void createTeamsAgent() {
        // See section on creating the call agent
    }

    /**
     * Place a call to the callee id provided in `callee_id` text input.
     */
    private void startCall() {
        // See section on starting the call
    }
}
Demander des autorisations au moment de l’exécution
Pour Android 6.0 et ultérieur (niveau d’API 23) et targetSdkVersion 23 ou plus, les autorisations sont accordées au moment de l’exécution et non lors de l’installation de l’application. Pour le prendre en charge, vous pouvez implémenter getAllPermissions afin d’appeler ActivityCompat.checkSelfPermission et ActivityCompat.requestPermissions pour chaque autorisation requise.
/**
 * Request each required permission if the app doesn't already have it.
 */
private void getAllPermissions() {
    String[] requiredPermissions = new String[]{Manifest.permission.RECORD_AUDIO, Manifest.permission.CAMERA, Manifest.permission.WRITE_EXTERNAL_STORAGE, Manifest.permission.READ_PHONE_STATE};
    ArrayList<String> permissionsToAskFor = new ArrayList<>();
    for (String permission : requiredPermissions) {
        if (ActivityCompat.checkSelfPermission(this, permission) != PackageManager.PERMISSION_GRANTED) {
            permissionsToAskFor.add(permission);
        }
    }
    if (!permissionsToAskFor.isEmpty()) {
        ActivityCompat.requestPermissions(this, permissionsToAskFor.toArray(new String[0]), 1);
    }
}
Notes
Lorsque vous concevez votre application, tenez compte du moment où ces autorisations doivent être demandées. Les autorisations doivent être demandées lorsqu’elles sont nécessaires, et non à l’avance. Pour plus d’informations, consultez le guide des autorisations Android.
Modèle objet
Les classes et les interfaces suivantes gèrent certaines des principales fonctionnalités du SDK Azure Communication Services Calling :
| Nom | Description |
|---|---|
CallClient |
CallClient est le point d’entrée principal du SDK Appel. |
TeamsCallAgent |
TeamsCallAgent sert à démarrer et à gérer les appels. |
TeamsCall |
Le TeamsCall est utilisé pour représenter un appel Teams. |
CommunicationTokenCredential |
CommunicationTokenCredential sert de jeton d’informations d'identification pour initier le TeamsCallAgent. |
CommunicationIdentifier |
CommunicationIdentifier sert de type de participant différent susceptible de faire partie d’un appel. |
Créer un agent à partir du jeton d’accès utilisateur
Avec un jeton utilisateur, un agent d’appel authentifié peut être instancié. En règle général, ce jeton est généré à partir d’un service avec une authentification propre à l’application. Pour plus d’informations sur les jetons d’accès utilisateur, consultez le guide Jetons d’accès utilisateur.
Pour les besoins de ce guide de démarrage rapide, remplacez <User_Access_Token> par un jeton d’accès utilisateur généré pour votre ressource Azure Communication Services.
/**
 * Create the teams call agent for placing calls
 */
private void createAgent() {
    String userToken = "<User_Access_Token>";

    try {
        CommunicationTokenCredential credential = new CommunicationTokenCredential(userToken);
        teamsCallAgent = new CallClient().createTeamsCallAgent(getApplicationContext(), credential).get();
    } catch (Exception ex) {
        Toast.makeText(getApplicationContext(), "Failed to create teams call agent.", Toast.LENGTH_SHORT).show();
    }
}
Démarrer un appel à l’aide de l’agent d’appel
L'appel peut être passé par l'agent chargé de l'appel Teams, et il suffit de fournir une liste des ID d'appelés et les options d'appel. Pour les besoins de ce guide de démarrage rapide, nous utilisons les options d’appel par défaut sans vidéo et un ID d’appel unique tiré de l’entrée de texte.
/**
 * Place a call to the callee id provided in `callee_id` text input.
 */
private void startCall() {
    EditText calleeIdView = findViewById(R.id.callee_id);
    String calleeId = calleeIdView.getText().toString();

    StartTeamsCallOptions options = new StartTeamsCallOptions();

    teamsCallAgent.startCall(
        getApplicationContext(),
        new MicrosoftTeamsUserCallIdentifier(calleeId),
        options);
}
Répondre à un appel
L’acceptation d’un appel peut s’effectuer à l’aide de l’agent d’appel Teams en utilisant uniquement une référence au contexte actuel.
public void acceptACall(TeamsIncomingCall teamsIncomingCall){
	teamsIncomingCall.accept(this);
}
Rejoindre un appel Teams
Un utilisateur peut rejoindre un appel existant en transmettant un lien.
/**
 * Join a call using a teams meeting link.
 */
public TeamsCall joinTeamsCall(TeamsCallAgent teamsCallAgent){
	TeamsMeetingLinkLocator link = new TeamsMeetingLinkLocator("meetingLink");
	TeamsCall call = teamsCallAgent.join(this, link);
}
Rejoindre un appel Teams avec des options
Nous pouvons également rejoindre un appel existant avec des options prédéfinies, telles que la désactivation du micro.
/**
 * Join a call using a teams meeting link while muted.
 */
public TeamsCall joinTeamsCall(TeamsCallAgent teamsCallAgent){
	TeamsMeetingLinkLocator link = new TeamsMeetingLinkLocator("meetingLink");
	OutgoingAudioOptions audioOptions = new OutgoingAudioOptions().setMuted(true);
	JoinTeamsCallOptions options = new JoinTeamsCallOptions().setAudioOptions(audioOptions);
	TeamsCall call = teamsCallAgent.join(this, link, options);
}
Configurer l’écouteur d’appel entrant
Pour qu’il soit possible de détecter les appels entrants et d’autres actions non effectuées par cet utilisateur, des écouteurs doivent être configurés.
private TeamsIncomingCall teamsincomingCall;
teamsCallAgent.addOnIncomingCallListener(this::handleIncomingCall);

private void handleIncomingCall(TeamsIncomingCall incomingCall) {
	this.teamsincomingCall = incomingCall;
}
Lancer l’application et appeler le bot d’écho
L’application peut maintenant être lancée à l’aide du bouton « Run App » de la barre d’outils (Maj+F10). Vérifiez que vous êtes en mesure d’effectuer des appels en appelant 8:echo123. Un message pré-enregistré est lu, puis vous répète votre propre message.
Commencez à utiliser Azure Communication Services avec le kit de développement logiciel (SDK) d’appels Communication Services pour ajouter un des appels vidéo à votre application. Vous saurez comment passer un appel vidéo et à y répondre à l'aide du kit de développement logiciel (SDK) d'appel Azure Communication Services pour iOS en utilisant l'identité Teams.
Exemple de code
Si vous souhaitez passer à la fin, vous pouvez télécharger ce guide de démarrage rapide en guise d’exemple sur GitHub.
Prérequis
- Obtenez un compte Azure avec un abonnement actif. Créez un compte gratuitement.
- Un Mac exécutant Xcode, ainsi qu’un certificat de développeur valide installé dans votre trousseau
- Créez une ressource Communication Services active. Créez une ressource Communication Services. Vous devez enregistrer votre chaîne de connexion pour ce guide de démarrage rapide.
- Un jeton d’accès utilisateur pour votre service Azure Communication
- Obtenez l’ID de thread Teams pour les opérations d’appel à l’aide de l’Afficheur Graph. En savoir plus sur comment créer un ID de thread de conversation
Configuration
Création du projet Xcode
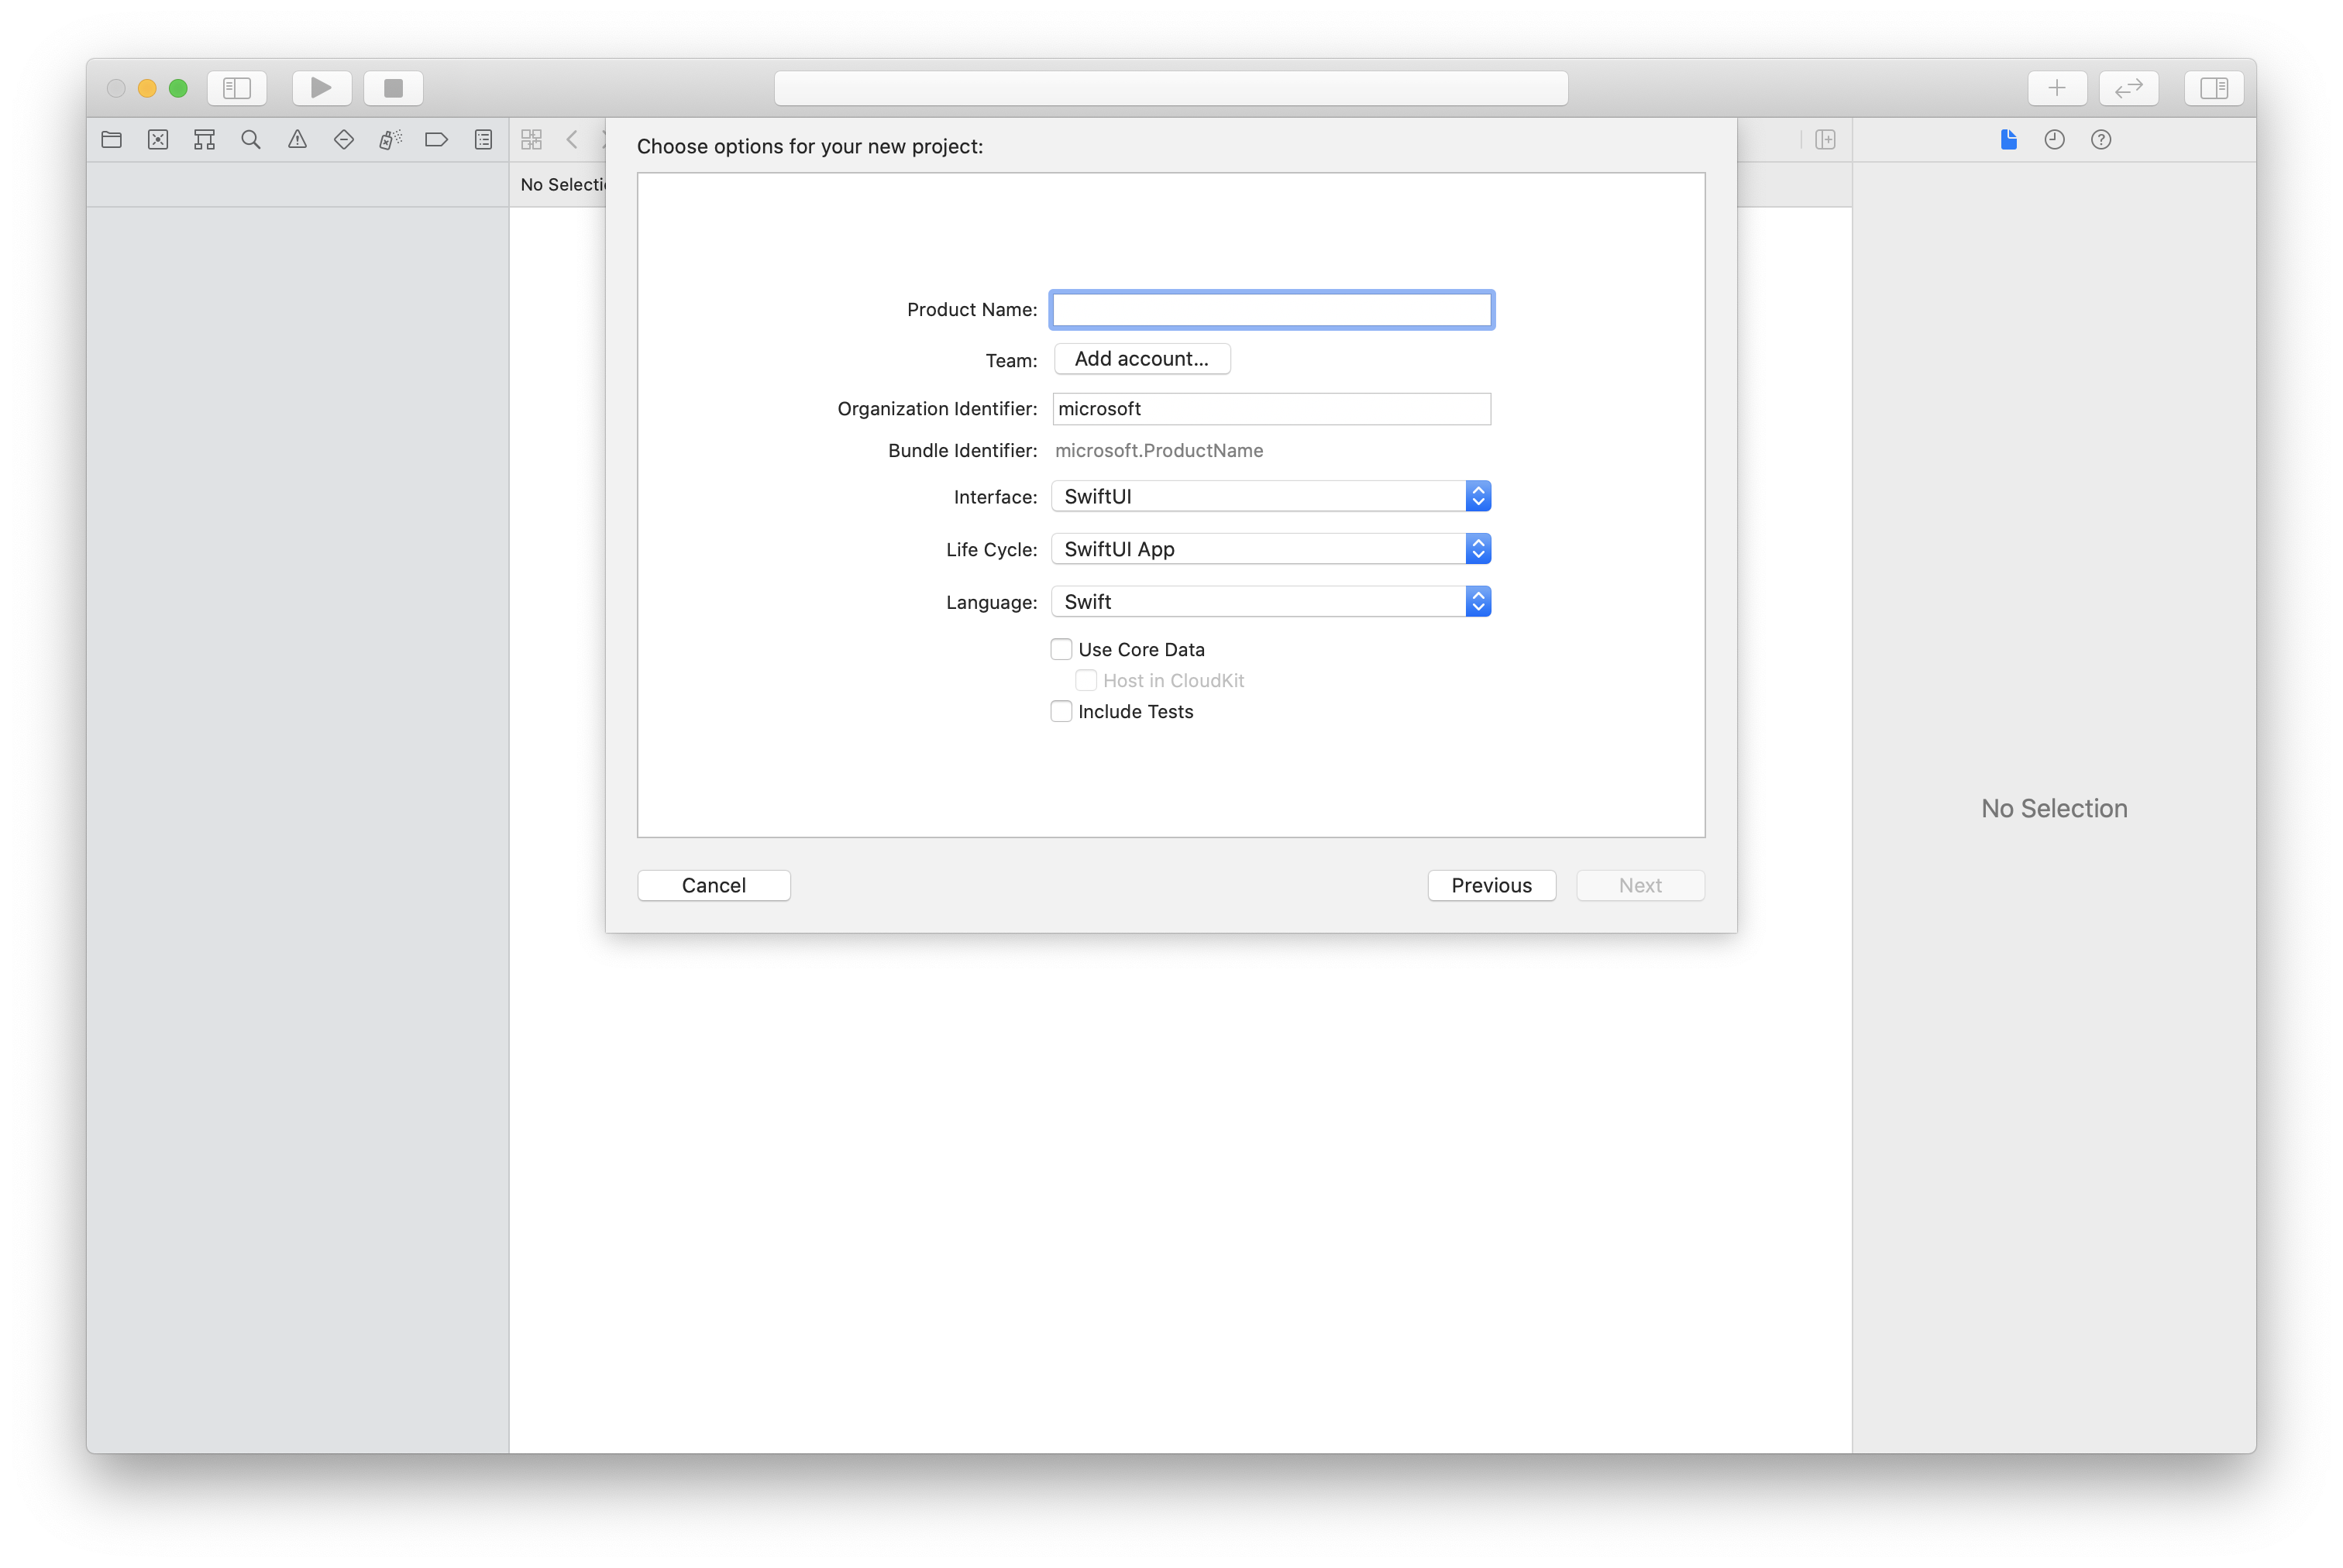
Dans Xcode, créez un projet iOS et sélectionnez le modèle Single View App. Ce tutoriel utilise le framework SwiftUI. Vous devez donc définir Swift comme langage et SwiftUI comme interface utilisateur. Vous n’allez pas créer de tests au cours de ce guide démarrage rapide. N’hésitez pas à décocher Inclure des tests.
Installation de CocoaPods
Utilisez ce guide pour installer CocoaPods sur votre Mac.
Installer le package et les dépendances avec CocoaPods
Pour créer un
Podfilepour votre application, ouvrez le terminal et accédez au dossier du projet, puis exécutez pod init.Ajoutez le code suivant à
Podfileet enregistrez. Consultez les versions de prise en charge du SDK.
platform :ios, '13.0'
use_frameworks!

target 'VideoCallingQuickstart' do
  pod 'AzureCommunicationCalling', '~> 2.10.0'
end
Exécutez pod install.
Ouvrez le
.xcworkspaceavec Xcode.
Demandez l’accès au microphone et à la caméra.
Pour accéder au microphone et à la caméra de l’appareil, vous devez mettre à jour la liste des propriétés d’informations de votre application avec des NSMicrophoneUsageDescription et NSCameraUsageDescription. Définissez la valeur associée à une chaîne qui inclue la boîte de dialogue affichée par le système pour demander l’accès à l’utilisateur.
Cliquez avec le bouton droit sur l’entrée Info.plist de l’arborescence du projet, puis sélectionnez Ouvrir comme > Code source. Ajoutez les lignes suivantes dans la section <dict> tout en haut, puis enregistrez le fichier.
<key>NSMicrophoneUsageDescription</key>
<string>Need microphone access for VOIP calling.</string>
<key>NSCameraUsageDescription</key>
<string>Need camera access for video calling</string>
Configurer le framework d’application
Ouvrez le fichier ContentView.swift de votre projet et ajoutez une déclaration d’importation en haut du fichier pour importer la bibliothèque AzureCommunicationCalling et AVFoundation. AVFoundation est utilisé pour capturer l’autorisation audio à partir du code.
import AzureCommunicationCalling
import AVFoundation
Modèle objet
Les classes et les interfaces suivantes gèrent certaines des principales fonctionnalités du kit de développement logiciel (SDK) Azure Communication Services Calling pour iOS.
| Nom | Description |
|---|---|
CallClient |
CallClient est le point d’entrée principal du SDK Appel. |
TeamsCallAgent |
TeamsCallAgent sert à démarrer et à gérer les appels. |
TeamsIncomingCall |
Le TeamsIncomingCall est utilisé pour accepter ou rejeter les appels Teams entrants. |
CommunicationTokenCredential |
CommunicationTokenCredential sert de jeton d’informations d'identification pour initier le TeamsCallAgent. |
CommunicationIdentifier |
CommunicationIdentifier sert à représenter l’identité de l’utilisateur, parmi l’une des options suivantes : CommunicationUserIdentifier, PhoneNumberIdentifier ou CallingApplication. |
Créer l'agent chargé de l'appel Teams
Remplacez l'implémentation du ContentView struct par des contrôles d'interface utilisateur simples qui permettent à un utilisateur de passer et de terminer un appel. Dans ce démarrage rapide, nous attacherons une logique métier à ces contrôles.
struct ContentView: View {
    @State var callee: String = ""
    @State var callClient: CallClient?
    @State var teamsCallAgent: TeamsCallAgent?
    @State var teamsCall: TeamsCall?
    @State var deviceManager: DeviceManager?
    @State var localVideoStream:[LocalVideoStream]?
    @State var teamsIncomingCall: TeamsIncomingCall?
    @State var sendingVideo:Bool = false
    @State var errorMessage:String = "Unknown"

    @State var remoteVideoStreamData:[Int32:RemoteVideoStreamData] = [:]
    @State var previewRenderer:VideoStreamRenderer? = nil
    @State var previewView:RendererView? = nil
    @State var remoteRenderer:VideoStreamRenderer? = nil
    @State var remoteViews:[RendererView] = []
    @State var remoteParticipant: RemoteParticipant?
    @State var remoteVideoSize:String = "Unknown"
    @State var isIncomingCall:Bool = false

    @State var callObserver:CallObserver?
    @State var remoteParticipantObserver:RemoteParticipantObserver?

    var body: some View {
        NavigationView {
            ZStack{
                Form {
                    Section {
                        TextField("Who would you like to call?", text: $callee)
                        Button(action: startCall) {
                            Text("Start Teams Call")
                        }.disabled(teamsCallAgent == nil)
                        Button(action: endCall) {
                            Text("End Teams Call")
                        }.disabled(teamsCall == nil)
                        Button(action: toggleLocalVideo) {
                            HStack {
                                Text(sendingVideo ? "Turn Off Video" : "Turn On Video")
                            }
                        }
                    }
                }
                // Show incoming call banner
                if (isIncomingCall) {
                    HStack() {
                        VStack {
                            Text("Incoming call")
                                .padding(10)
                                .frame(maxWidth: .infinity, alignment: .topLeading)
                        }
                        Button(action: answerIncomingCall) {
                            HStack {
                                Text("Answer")
                            }
                            .frame(width:80)
                            .padding(.vertical, 10)
                            .background(Color(.green))
                        }
                        Button(action: declineIncomingCall) {
                            HStack {
                                Text("Decline")
                            }
                            .frame(width:80)
                            .padding(.vertical, 10)
                            .background(Color(.red))
                        }
                    }
                    .frame(maxWidth: .infinity, alignment: .topLeading)
                    .padding(10)
                    .background(Color.gray)
                }
                ZStack{
                    VStack{
                        ForEach(remoteViews, id:\.self) { renderer in
                            ZStack{
                                VStack{
                                    RemoteVideoView(view: renderer)
                                        .frame(width: .infinity, height: .infinity)
                                        .background(Color(.lightGray))
                                }
                            }
                            Button(action: endCall) {
                                Text("End Call")
                            }.disabled(teamsCall == nil)
                            Button(action: toggleLocalVideo) {
                                HStack {
                                    Text(sendingVideo ? "Turn Off Video" : "Turn On Video")
                                }
                            }
                        }

                    }.frame(maxWidth: .infinity, maxHeight: .infinity, alignment: .topLeading)
                    VStack{
                        if(sendingVideo)
                        {
                            VStack{
                                PreviewVideoStream(view: previewView!)
                                    .frame(width: 135, height: 240)
                                    .background(Color(.lightGray))
                            }
                        }
                    }.frame(maxWidth:.infinity, maxHeight:.infinity,alignment: .bottomTrailing)
                }
            }
     .navigationBarTitle("Video Calling Quickstart")
        }.onAppear{
            // Authenticate the client

            // Initialize the TeamsCallAgent and access Device Manager

            // Ask for permissions
        }
    }
}

//Functions and Observers

struct PreviewVideoStream: UIViewRepresentable {
    let view:RendererView
    func makeUIView(context: Context) -> UIView {
        return view
    }
    func updateUIView(_ uiView: UIView, context: Context) {}
}

struct RemoteVideoView: UIViewRepresentable {
    let view:RendererView
    func makeUIView(context: Context) -> UIView {
        return view
    }
    func updateUIView(_ uiView: UIView, context: Context) {}
}

struct ContentView_Previews: PreviewProvider {
    static var previews: some View {
        ContentView()
    }
}
Authentifier le client
Pour initialiser une instance TeamsCallAgent, il vous faut un jeton d’accès utilisateur qui permet d’effectuer et de recevoir des appels. Consultez la documentation sur les jetons d’accès utilisateur si vous ne disposez pas encore de jeton disponible.
Une fois que vous avez le jeton, ajoutez le code suivant au rappel onAppear dans ContentView.swift. Vous devez remplacer <USER ACCESS TOKEN> par un jeton d’accès utilisateur valide pour votre ressource :
var userCredential: CommunicationTokenCredential?
do {
    userCredential = try CommunicationTokenCredential(token: "<USER ACCESS TOKEN>")
} catch {
    print("ERROR: It was not possible to create user credential.")
    return
}
Initialiser le Teams CallAgent et accéder au gestionnaire d'appareils
Pour créer une instance TeamsCallAgent à partir d'un CallClient, utilisez la méthode callClient.createTeamsCallAgent qui renvoie de manière asynchrone un objet TeamsCallAgent une fois qu'il a été initialisé. DeviceManager permet d’énumérer les périphériques locaux qui peuvent être utilisés dans un appel pour transmettre des flux audio/vidéo. Il vous permet également de demander l’autorisation à un utilisateur d’accéder au microphone/à la caméra.
self.callClient = CallClient()
let options = TeamsCallAgentOptions()
// Enable CallKit in the SDK
options.callKitOptions = CallKitOptions(with: createCXProvideConfiguration())
self.callClient?.createTeamsCallAgent(userCredential: userCredential, options: options) { (agent, error) in
    if error != nil {
        print("ERROR: It was not possible to create a Teams call agent.")
        return
    } else {
        self.teamsCallAgent = agent
        print("Teams Call agent successfully created.")
        self.teamsCallAgent!.delegate = teamsIncomingCallHandler
        self.callClient?.getDeviceManager { (deviceManager, error) in
            if (error == nil) {
                print("Got device manager instance")
                self.deviceManager = deviceManager
            } else {
                print("Failed to get device manager instance")
            }
        }
    }
}
Demander des autorisations
Nous avons besoin d’ajouter le code suivant au rappel onAppear pour demander des autorisations pour l’audio et la vidéo.
AVAudioSession.sharedInstance().requestRecordPermission { (granted) in
    if granted {
        AVCaptureDevice.requestAccess(for: .video) { (videoGranted) in
            /* NO OPERATION */
        }
    }
}
Passer un appel sortant
La méthode startCall est définie en tant qu’action qui sera exécutée lors d’un appui sur le bouton Démarrer l’appel. Dans ce guide de démarrage rapide, les appels sortants sont uniquement audio par défaut. Pour démarrer un appel avec la vidéo, vous avez besoin de définir VideoOptions avec LocalVideoStream et de le passer avec startCallOptions pour définir les options initiales de l’appel.
let startTeamsCallOptions = StartTeamsCallOptions()
if sendingVideo  {
    if self.localVideoStream == nil  {
        self.localVideoStream = [LocalVideoStream]()
    }
    let videoOptions = VideoOptions(localVideoStreams: localVideoStream!)
    startTeamsCallOptions.videoOptions = videoOptions
}
let callees: [CommunicationIdentifier] = [CommunicationUserIdentifier(self.callee)]
self.teamsCallAgent?.startCall(participants: callees, options: startTeamsCallOptions) { (call, error) in
    // Handle call object if successful or an error.
}
Rejoindre une réunion Teams
La méthode join permet à l’utilisateur de participer à une réunion Teams.
let joinTeamsCallOptions = JoinTeamsCallOptions()
if sendingVideo
{
    if self.localVideoStream == nil {
        self.localVideoStream = [LocalVideoStream]()
    }
    let videoOptions = VideoOptions(localVideoStreams: localVideoStream!)
    joinTeamsCallOptions.videoOptions = videoOptions
}

// Join the Teams meeting muted
if isMuted
{
    let outgoingAudioOptions = OutgoingAudioOptions()
    outgoingAudioOptions.muted = true
    joinTeamsCallOptions.outgoingAudioOptions = outgoingAudioOptions
}

let teamsMeetingLinkLocator = TeamsMeetingLinkLocator(meetingLink: "https://meeting_link")

self.teamsCallAgent?.join(with: teamsMeetingLinkLocator, options: joinTeamsCallOptions) { (call, error) in
    // Handle call object if successful or an error.
}
TeamsCallObserver et RemotePariticipantObserver sont utilisés pour gérer les événements durant l’appel et les participants distants. Nous définissons les observateurs dans la fonction setTeamsCallAndObserver.
func setTeamsCallAndObserver(call:TeamsCall, error:Error?) {
    if (error == nil) {
        self.teamsCall = call
        self.teamsCallObserver = TeamsCallObserver(self)
        self.teamsCall!.delegate = self.teamsCallObserver
        // Attach a RemoteParticipant observer
        self.remoteParticipantObserver = RemoteParticipantObserver(self)
    } else {
        print("Failed to get teams call object")
    }
}
Répondre à un appel entrant
Pour répondre à un appel entrant, implémentez un TeamsIncomingCallHandler pour afficher la bannière d’appel entrant afin de répondre à cet appel ou de le refuser. Placez l’implémentation suivante dans TeamsIncomingCallHandler.swift.
final class TeamsIncomingCallHandler: NSObject, TeamsCallAgentDelegate, TeamsIncomingCallDelegate {
    public var contentView: ContentView?
    private var teamsIncomingCall: TeamsIncomingCall?

    private static var instance: TeamsIncomingCallHandler?
    static func getOrCreateInstance() -> TeamsIncomingCallHandler {
        if let c = instance {
            return c
        }
        instance = TeamsIncomingCallHandler()
        return instance!
    }

    private override init() {}

    func teamsCallAgent(_ teamsCallAgent: TeamsCallAgent, didRecieveIncomingCall incomingCall: TeamsIncomingCall) {
        self.teamsIncomingCall = incomingCall
        self.teamsIncomingCall.delegate = self
        contentView?.showIncomingCallBanner(self.teamsIncomingCall!)
    }

    func teamsCallAgent(_ teamsCallAgent: TeamsCallAgent, didUpdateCalls args: TeamsCallsUpdatedEventArgs) {
        if let removedCall = args.removedCalls.first {
            contentView?.callRemoved(removedCall)
            self.teamsIncomingCall = nil
        }
    }
}
Nous avons besoin de créer une instance de TeamsIncomingCallHandler en ajoutant le code suivant au rappel onAppear dans ContentView.swift :
Définissez un délégué pour TeamsCallAgent à la suite de la création de TeamsCallAgent :
self.teamsCallAgent!.delegate = incomingCallHandler
Une fois qu’il y a un appel entrant, le TeamsIncomingCallHandler appelle la fonction showIncomingCallBanner pour afficher les boutons answer et decline.
func showIncomingCallBanner(_ incomingCall: TeamsIncomingCall) {
    self.teamsIncomingCall = incomingCall
}
Les actions attachées à answer et decline sont implémentées dans le code ci-dessous. Pour répondre à l’appel avec la vidéo, nous devons activer la vidéo locale et définir les options de AcceptCallOptions avec localVideoStream.
func answerIncomingCall() {
    let options = AcceptTeamsCallOptions()
    guard let teamsIncomingCall = self.teamsIncomingCall else {
      print("No active incoming call")
      return
    }

    guard let deviceManager = deviceManager else {
      print("No device manager instance")
      return
    }

    if self.localVideoStreams == nil {
        self.localVideoStreams = [LocalVideoStream]()
    }

    if sendingVideo
    {
        guard let camera = deviceManager.cameras.first else {
            // Handle failure
            return
        }
        self.localVideoStreams?.append( LocalVideoStream(camera: camera))
        let videoOptions = VideoOptions(localVideoStreams: localVideosStreams!)
        options.videoOptions = videoOptions
    }

    teamsIncomingCall.accept(options: options) { (call, error) in
        // Handle call object if successful or an error.
    }
}

func declineIncomingCall() {
    self.teamsIncomingCall?.reject { (error) in
        // Handle if rejection was successfully or not.
    }
}
S’abonner à des événements
Nous pouvons implémenter une classe TeamsCallObserver pour nous abonner à une collecte d’événements afin d’être avertis quand des valeurs changent pendant l’appel.
public class TeamsCallObserver: NSObject, TeamsCallDelegate, TeamsIncomingCallDelegate {
    private var owner: ContentView
    init(_ view:ContentView) {
            owner = view
    }

    public func teamsCall(_ teamsCall: TeamsCall, didChangeState args: PropertyChangedEventArgs) {
        if(teamsCall.state == CallState.connected) {
            initialCallParticipant()
        }
    }

    // render remote video streams when remote participant changes
    public func teamsCall(_ teamsCall: TeamsCall, didUpdateRemoteParticipant args: ParticipantsUpdatedEventArgs) {
        for participant in args.addedParticipants {
            participant.delegate = self.remoteParticipantObserver
        }
    }

    // Handle remote video streams when the call is connected
    public func initialCallParticipant() {
        for participant in owner.teamsCall.remoteParticipants {
            participant.delegate = self.remoteParticipantObserver
            for stream in participant.videoStreams {
                renderRemoteStream(stream)
            }
            owner.remoteParticipant = participant
        }
    }
}
Exécuter le code
Vous pouvez générer et exécuter votre application sur un simulateur iOS en sélectionnant Product > Run ou en utilisant le raccourci clavier (⌘-R).
Nettoyer les ressources
Si vous voulez nettoyer et supprimer un abonnement Communication Services, vous pouvez supprimer la ressource ou le groupe de ressources. La suppression du groupe de ressources efface également les autres ressources qui y sont associées. Apprenez-en davantage sur le nettoyage des ressources.
Étapes suivantes
Pour plus d’informations, consultez les articles suivants :
- Consultez notre exemple d’appel web.
- Apprenez-en davantage sur les fonctionnalités du SDK Calling
- Apprenez-en davantage sur le fonctionnement des appels