Tutoriel : Intégration de Microsoft Entra SSO avec Akamai
Dans ce didacticiel, vous apprendrez comment intégrer Akamai à Microsoft Entra ID. Lorsque vous intégrez Akamai à Microsoft Entra ID, vous pouvez :
- Contrôlez dans Microsoft Entra ID qui a accès à Akamai.
- Permettez à vos utilisateurs d’être automatiquement connectés à Akamai avec leurs comptes Microsoft Entra.
- Gérer vos comptes à partir d’un emplacement central.
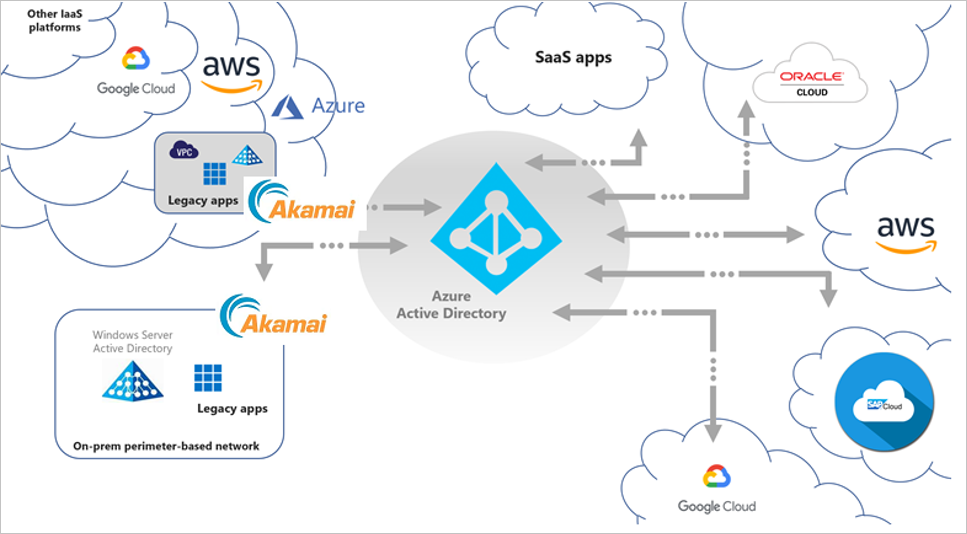
L’intégration de Microsoft Entra ID et d’Akamai Enterprise Application Access permet un accès transparent aux applications héritées hébergées dans le cloud ou localement. La solution intégrée tire parti de toutes les fonctionnalités modernes de Microsoft Entra ID comme Microsoft Entra l’accès conditionnel, Protection de Microsoft Entra ID et Gouvernance de Microsoft Entra ID pour l’accès aux applications héritées sans modifications d’application ni installation d’agents.
L’image ci-dessous décrit la façon dont Akamai EAA s’intègre au scénario d’accès sécurisé hybride plus large.
Scénarios d’authentification par clé
En plus de la prise en charge de l’intégration native de Microsoft Entra pour les protocoles d’authentification modernes que sont notamment Open ID Connect, SAML et WS-Fed, Akamai EAA étend l’accès sécurisé aux applications d’authentification héritées pour l’accès interne et externe avec Microsoft Entra ID, ce qui autorise des scénarios modernes (par exemple, accès sans mot de passe) pour ces applications. notamment :
- Les applications à authentification basée sur l’en-tête
- Bureau à distance
- SSH (Secure Shell)
- Les applications à authentification Kerberos
- VNC (Virtual Network Computing)
- Les applications à authentification anonyme ou sans authentification intégrée
- Les applications à authentification NTLM (protection avec deux invites pour l’utilisateur)
- Les applications à base de formulaire (protection avec deux invites pour l’utilisateur)
Scénarios d’intégration
Le partenariat entre Microsoft et Akamai EAA offre la flexibilité nécessaire pour répondre aux besoins de votre entreprise en prenant en charge plusieurs scénarios d’intégration en fonction des besoins de votre entreprise. Ces scénarios peuvent être utilisés pour fournir une couverture immédiate de toutes les applications, et pour configurer progressivement les classifications de stratégie appropriées.
Scénario d’intégration 1
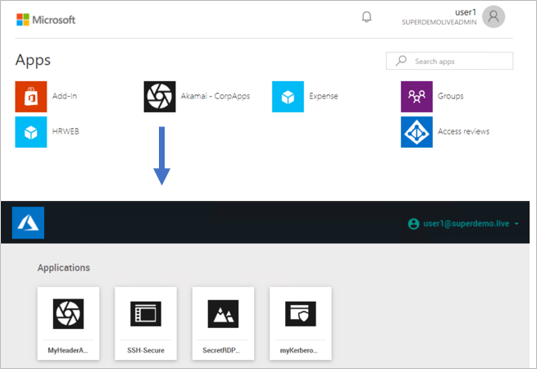
Akamai EAA est configuré en tant qu’application unique sur Microsoft Entra ID. L’administrateur peut configurer la stratégie d’accès conditionnel sur l’application, et une fois les conditions remplies les utilisateurs peuvent accéder au portail Akamai EAA.
Avantages :
- Vous ne devez configurer le fournisseur d’identité qu’une seule fois.
Inconvénients :
Les utilisateurs se retrouvent avec deux portails d’applications.
Couverture unique de la stratégie d’accès conditionnel commune pour toutes les applications.
Scénario d’intégration 2
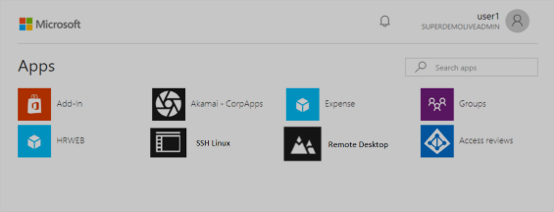
L’application Akamai EAA est configurée individuellement dans le portail Azure. L’administrateur peut configurer une stratégie d’accès conditionnel individuelle sur les applications, et une fois les conditions remplies, les utilisateurs peuvent être redirigés directement vers l’application spécifique.
Avantages :
Vous pouvez définir des stratégies d’accès conditionnel individuelles.
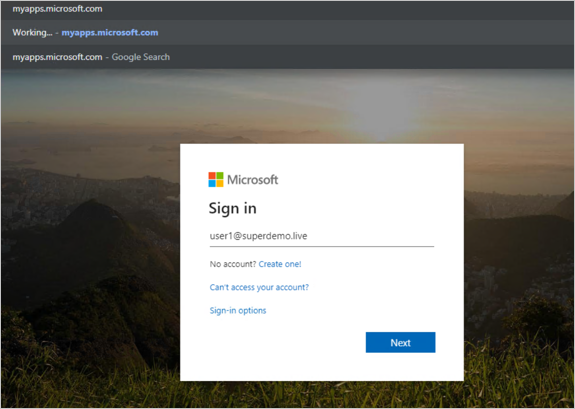
Toutes les applications sont représentées dans la gaufre Office 365 et le panneau myApps.microsoft.com.
Inconvénients :
- Vous devez configurer plusieurs fournisseurs d’identité.
Prérequis
Pour commencer, vous devez disposer de ce qui suit :
- Un abonnement Microsoft Entra. Si vous ne disposez d’aucun abonnement, vous pouvez obtenir un compte gratuit.
- Un abonnement Akamai pour lequel l’authentification unique est activée
Description du scénario
Dans ce tutoriel, vous configurez et testez Microsoft Entra SSO dans un environnement de test.
- Akamai prend en charge l’authentification unique initiée par un fournisseur d’identité.
Important
Toutes les configurations listées ci-dessous sont identiques pour le scénario d’intégration 1 et le scénario 2. Pour le scénario d’intégration 2, vous devez configurer un fournisseur d’identité individuel dans Akamai EAA, et la propriété URL doit être modifiée pour pointer vers l’URL de l’application.
Ajouter Akamai à partir de la galerie
Pour configurer l'intégration d'Akamai dans Microsoft Entra ID, vous devez ajouter Akamai depuis la galerie à votre liste d'applications SaaS gérées.
- Connectez-vous au Centre d’administration de Microsoft Entra au minimum en tant qu’Administrateur d’application cloud.
- Accédez à Identité>Applications>Applications d’entreprise>Nouvelle application.
- Dans la section Ajouter à partir de la galerie, tapez Akamai dans la zone de recherche.
- Sélectionnez Akamai dans le volet de résultats, puis ajoutez l’application. Patientez quelques secondes pendant que l’application est ajoutée à votre locataire.
Vous pouvez également utiliser l’assistant Entreprise App Configuration. Dans cet assistant, vous pouvez ajouter une application à votre locataire, ajouter des utilisateurs/groupes à l’application, attribuer des rôles, mais également parcourir la configuration de l’authentification unique. En savoir plus sur les assistants Microsoft 365.
Configurer et tester Microsoft Entra SSO pour Akamai
Configurez et testez Microsoft Entra SSO avec Akamai à l'aide d'un utilisateur test appelé B.Simon. Pour que SSO fonctionne, vous devez établir une relation de lien entre un utilisateur Microsoft Entra et l'utilisateur associé dans Akamai.
Pour configurer et tester Microsoft Entra SSO avec Akamai, effectuez les étapes suivantes :
- Configurer Microsoft Entra SSO – pour permettre à vos utilisateurs d’utiliser cette fonctionnalité.
- Créez un utilisateur de test Microsoft Entra pour tester l’authentification unique Microsoft Entra avec B.Simon.
- Attribuer l’utilisateur test Microsoft Entra – pour permettre à B.Simon d’utiliser l’authentification unique Microsoft Entra.
- Configurer l’authentification unique Akamai pour configurer les paramètres de l’authentification unique côté application.
- Configuration du fournisseur d’identité
- Authentification basée sur l’en-tête
- Bureau à distance
- SSH
- Authentification Kerberos
- Créer un utilisateur de test Akamai – pour avoir un homologue de B.Simon dans Akamai qui est lié à la représentation Microsoft Entra de l'utilisateur.
- Tester l’authentification unique pour vérifier si la configuration fonctionne.
Configurer Microsoft Entra SSO
Effectuez ces étapes pour activer l’authentification unique Microsoft Entra.
Connectez-vous au Centre d’administration de Microsoft Entra au minimum en tant qu’Administrateur d’application cloud.
Accédez à Identité>Applications>Applications d'entreprise>Akamai>Authentification unique.
Dans la page Sélectionner une méthode d’authentification unique, sélectionnez SAML.
Dans la page Configurer l’authentification unique avec SAML, cliquez sur l’icône de crayon de Configuration SAML de base afin de modifier les paramètres.
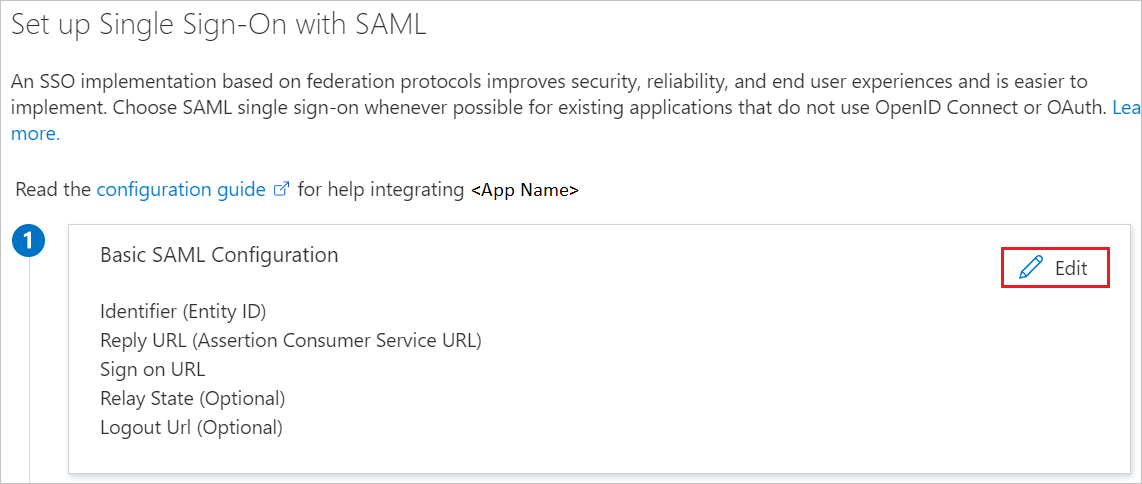
Dans la section Configuration SAML de base, si vous souhaitez configurer l’application en mode Initié par le fournisseur d’identité, entrez les valeurs pour les champs suivants :
a. Dans la zone de texte Identificateur, tapez une URL au format suivant :
https://<Yourapp>.login.go.akamai-access.com/saml/sp/responseb. Dans la zone de texte URL de réponse, tapez une URL au format suivant :
https:// <Yourapp>.login.go.akamai-access.com/saml/sp/responseNotes
Il ne s’agit pas de valeurs réelles. Mettez à jour ces valeurs avec l’identificateur et l’URL de réponse réels. Pour obtenir ces valeurs, contactez l’équipe de support technique d’Akamai. Vous pouvez également consulter les modèles figurant à la section Configuration SAML de base.
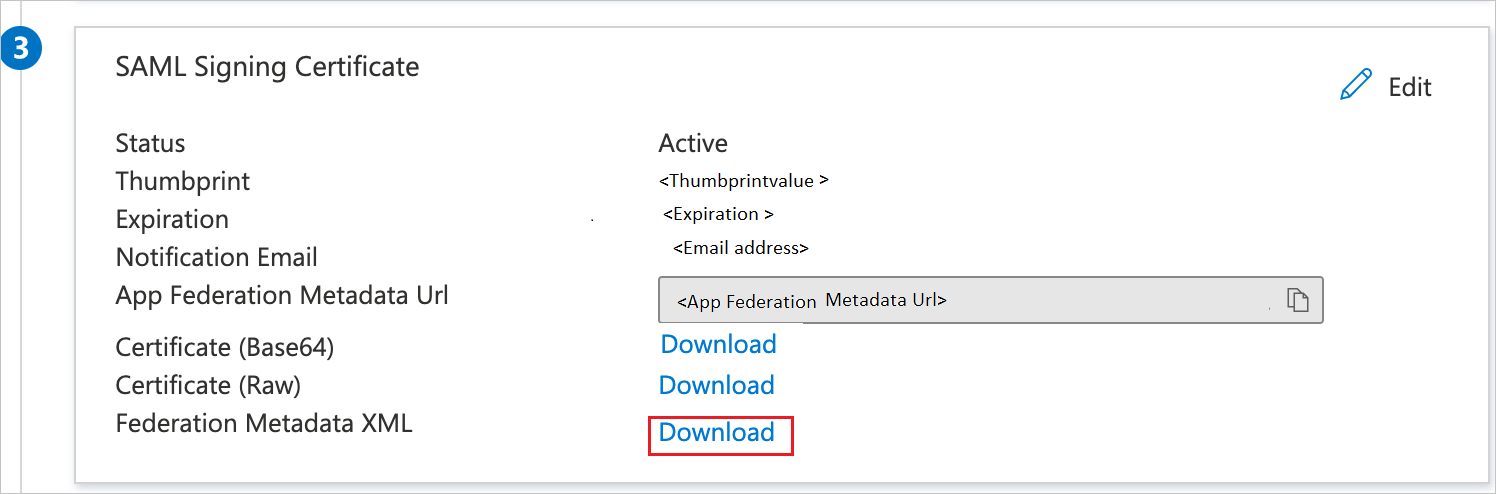
Dans la page Configurer l’authentification unique avec SAML, dans la section Certificat de signature SAML, recherchez XML de métadonnées de fédération et sélectionnez Télécharger pour télécharger le certificat et l’enregistrer sur votre ordinateur.
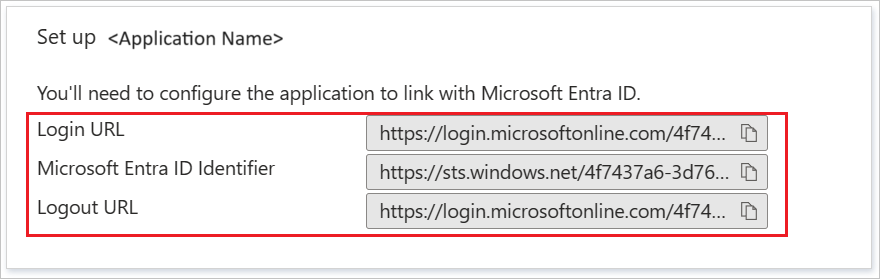
Dans la section Configurer Akamai, copiez la ou les URL appropriées en fonction de vos besoins.
Créer un utilisateur de test Microsoft Entra
Dans cette section, vous allez créer un utilisateur de test appelé B.Simon.
- Connectez-vous au Centre d’administration de Microsoft Entra en tant qu’Administrateur de l’utilisateur.
- Accédez à Identité>Utilisateurs>Tous les utilisateurs.
- Sélectionnez Nouvel utilisateur>Créer un utilisateur dans la partie supérieure de l’écran.
- Dans les propriétés Utilisateur, effectuez les étapes suivantes :
- Dans le champ Nom d’affichage, entrez
B.Simon. - Dans le champ Nom d’utilisateur principal, entrez username@companydomain.extension. Par exemple :
B.Simon@contoso.com. - Cochez la case Afficher le mot de passe, puis notez la valeur affichée dans le champ Mot de passe.
- Sélectionnez Revoir + créer.
- Dans le champ Nom d’affichage, entrez
- Sélectionnez Create (Créer).
Attribuer l’utilisateur test Microsoft Entra
Dans cette section, vous allez permettre à B.Simon d'utiliser l'authentification unique en accordant l'accès à Akamai.
- Connectez-vous au Centre d’administration de Microsoft Entra au minimum en tant qu’Administrateur d’application cloud.
- Accédez à Identité>Applications>Applications d’entreprise>Akamai.
- Dans la page de présentation de l’application, sélectionnez Utilisateurs et groupes.
- Sélectionnez Ajouter un utilisateur/groupe, puis Utilisateurs et groupes dans la boîte de dialogue Ajouter une attribution.
- Dans la boîte de dialogue Utilisateurs et groupes, sélectionnez B. Simon dans la liste Utilisateurs, puis cliquez sur le bouton Sélectionner au bas de l’écran.
- Si vous attendez qu’un rôle soit attribué aux utilisateurs, vous pouvez le sélectionner dans la liste déroulante Sélectionner un rôle . Si aucun rôle n’a été configuré pour cette application, vous voyez le rôle « Accès par défaut » sélectionné.
- Dans la boîte de dialogue Ajouter une attribution, cliquez sur le bouton Attribuer.
Configurer l’authentification unique Akamai
Configuration du fournisseur d’identité
Configuration du fournisseur d’identité Akamai EAA
Connectez-vous à la console Akamai Enterprise Application Access.
Dans la console Akamai EAA, sélectionnez Identity>Identity Providers (Identité > Fournisseurs d’identité), puis cliquez sur Add Identity Provider (Ajouter un fournisseur d’identité).
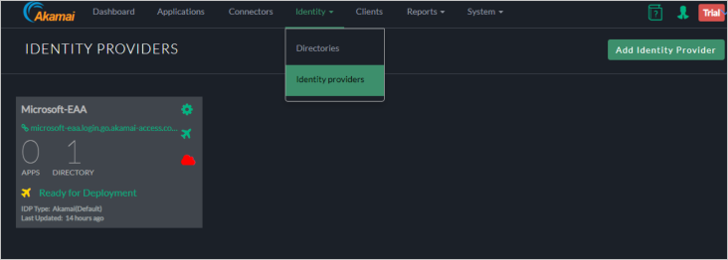
Dans la fenêtre Create New Identity Provider (Créer un fournisseur d’identité), effectuez les étapes suivantes :
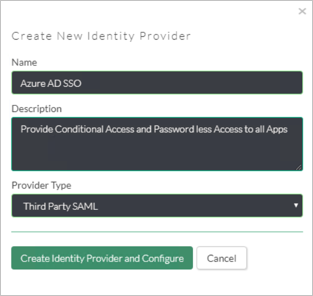
a. Spécifiez le nom unique (Unique Name).
b. Choisissez Third Party SAML (SAML tiers), puis cliquez sur Create Identity Provider and Configure (Créer un fournisseur d’identité et configurer).
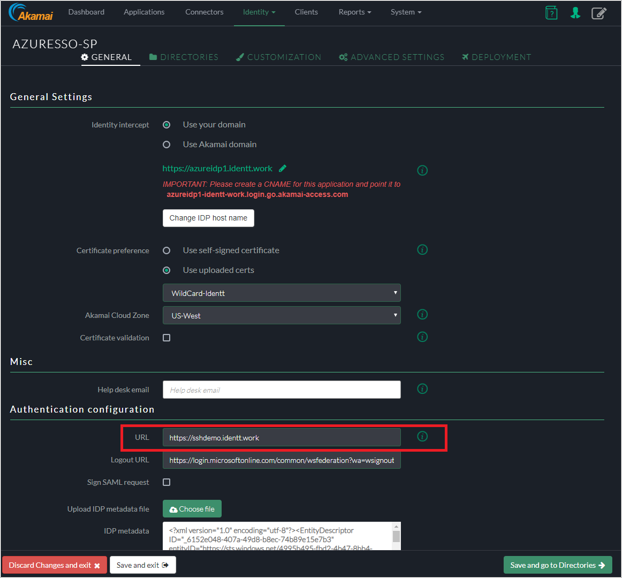
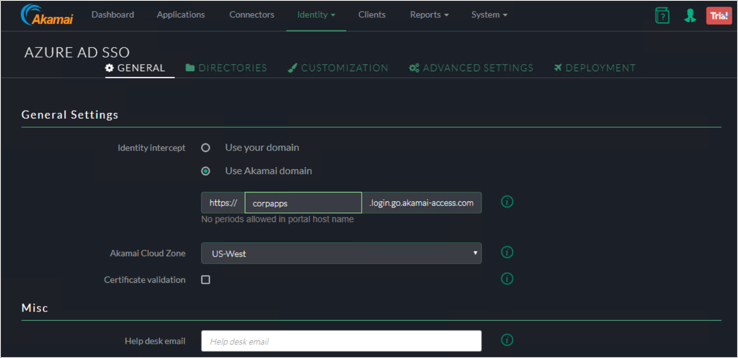
Paramètres généraux
Identity Intercept (Interception d’identité) : spécifiez le nom de l’URL de base du fournisseur de services ; elle sera utilisée pour la configuration de Microsoft Entra.
Remarque
Vous pouvez choisir d’avoir votre propre domaine personnalisé (nécessite une entrée DNS et un certificat). Pour cet exemple, nous allons utiliser le domaine Akamai.
Akamai Cloud Zone (Zone cloud Akamai) : sélectionnez la zone cloud appropriée.
Certificate Validation (Validation des certificats) : consultez la documentation Akamai (facultatif).
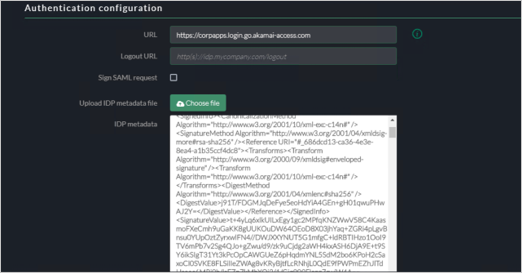
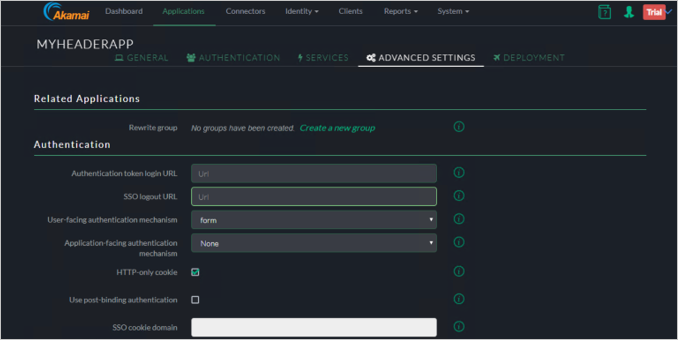
Configuration de l’authentification
URL : spécifiez la même URL que celle d’interception d’identité (c’est là où les utilisateurs sont redirigés après l’authentification).
Logout URL (URL de déconnexion) : mettez à jour l’URL de déconnexion.
Sign SAML Request (Signer la requête SAML) : option désactivée par défaut.
Pour le fichier de métadonnées IDP, ajoutez l’application dans la console Microsoft Entra ID.
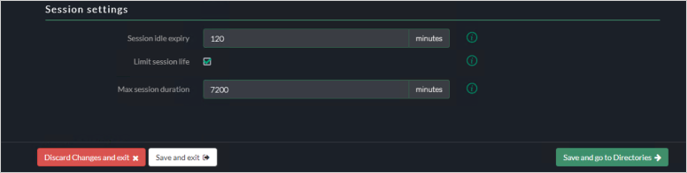
Paramètres de session
Conservez les paramètres par défaut.
Répertoires
Ignorez la configuration de l’annuaire.

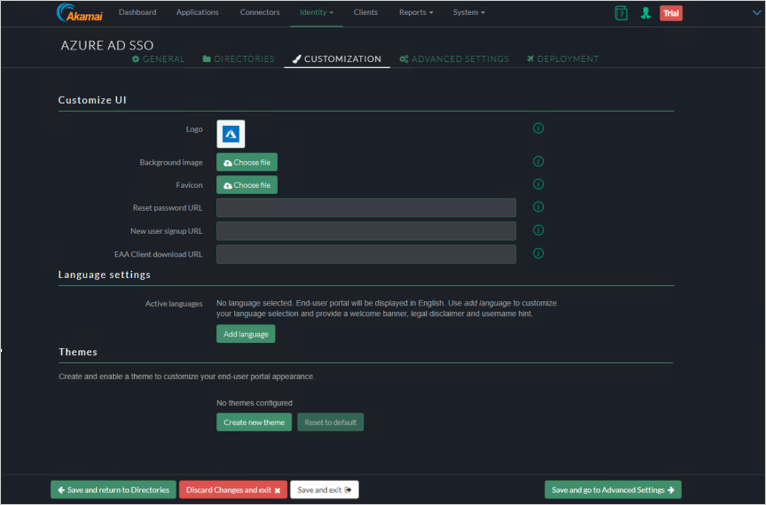
Personnalisation de l’interface utilisateur
Vous pouvez ajouter une personnalisation au fournisseur d’identité.
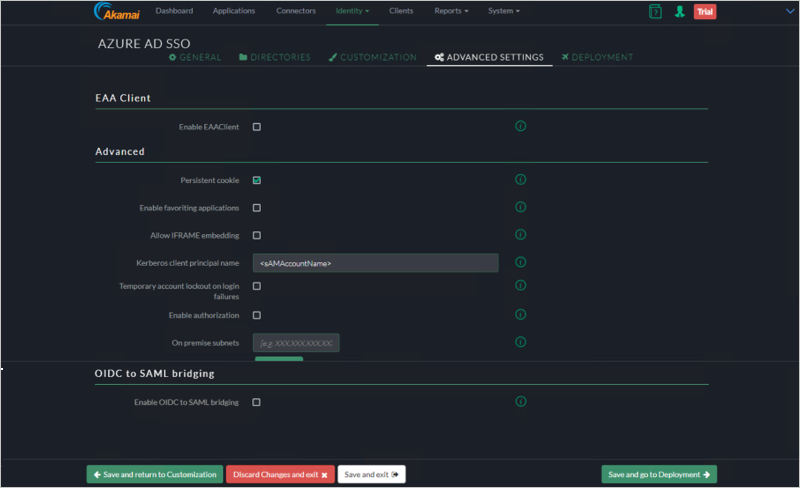
Paramètres avancés
Ignorez les paramètres avancés ; reportez-vous à la documentation Akamai pour plus d’informations.
Déploiement
Cliquez sur Deploy Identity Provider (Déployer le fournisseur d’identité).
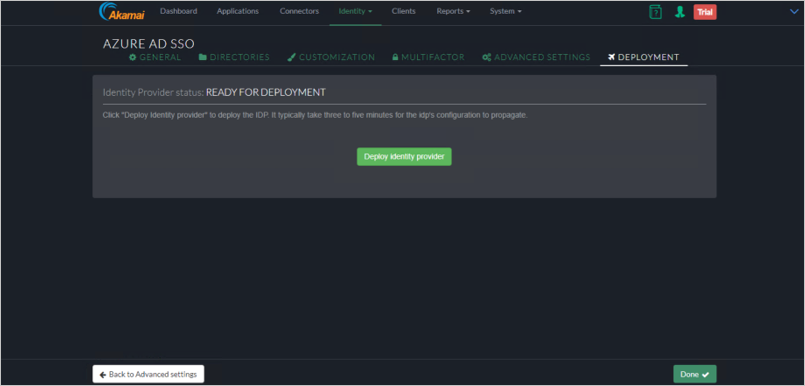
Vérifiez que déploiement a réussi.
Authentification basée sur l’en-tête
Authentification Akamai basée sur l’en-tête
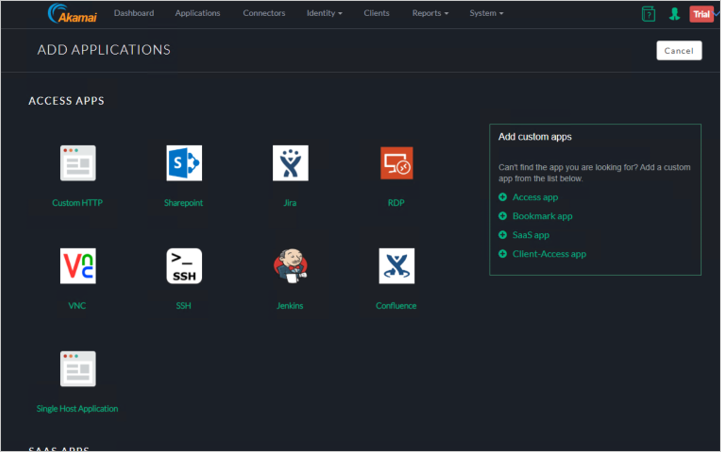
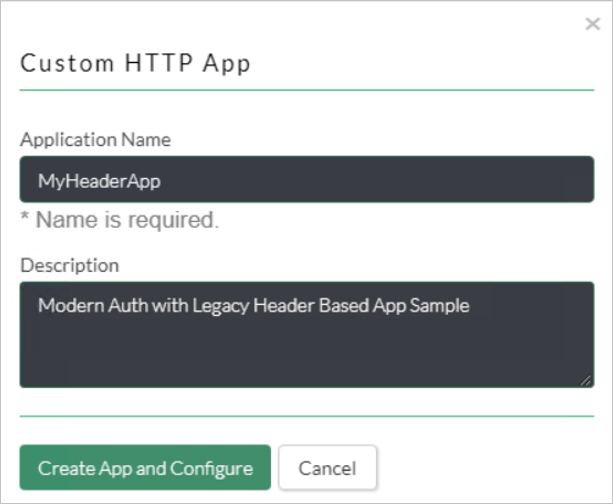
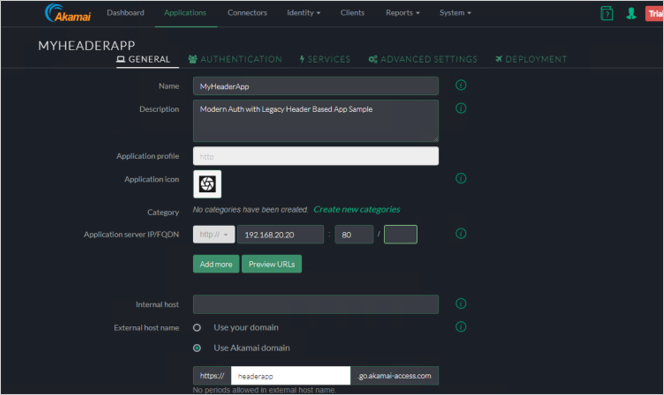
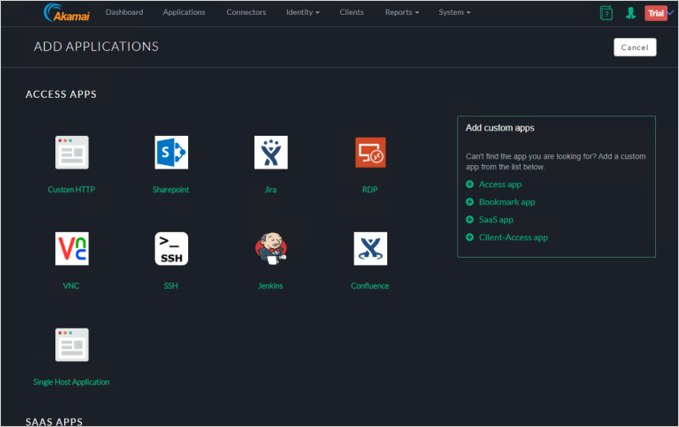
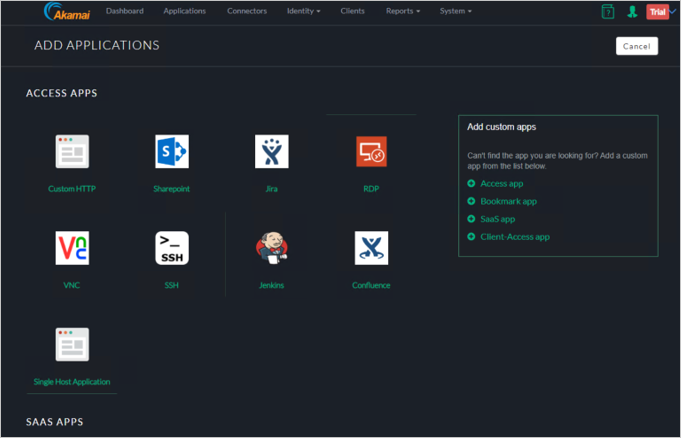
Choisissez Custom HTTP (HTTP personnalisé) dans l’Assistant Ajout d’applications.
Entrez le nom de l’application et une description.

Authentification
Sélectionnez l’onglet Authentication.
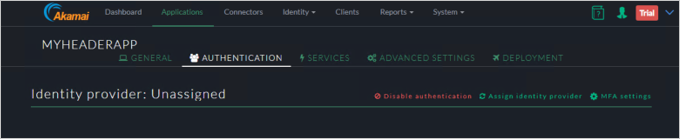
Attribuez le fournisseur d’identité.

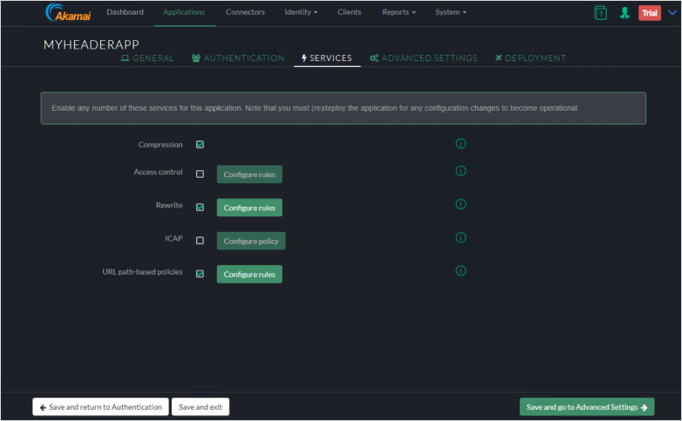
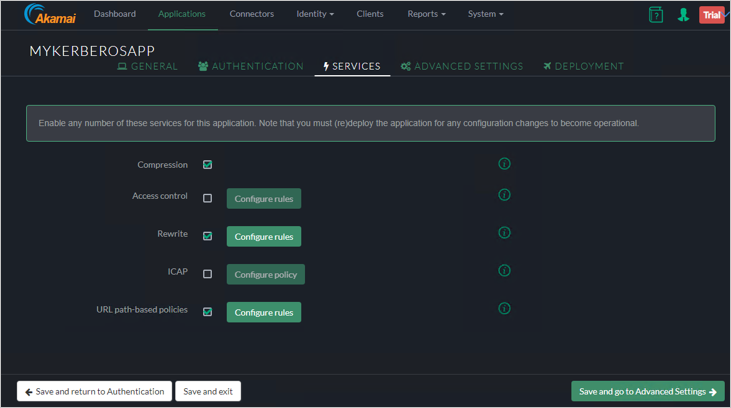
Services
Cliquez sur Save and Go to Authentication (Enregistrer et accéder à l’authentication).
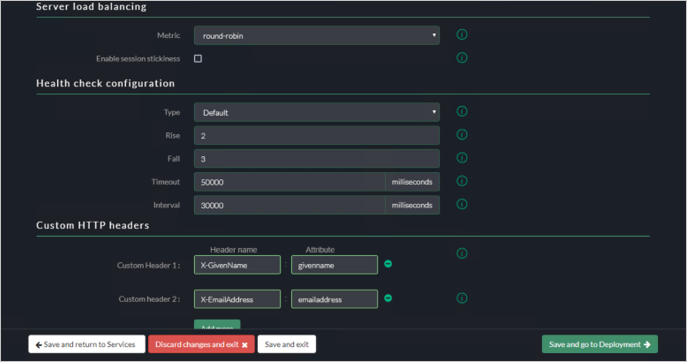
Paramètres avancés
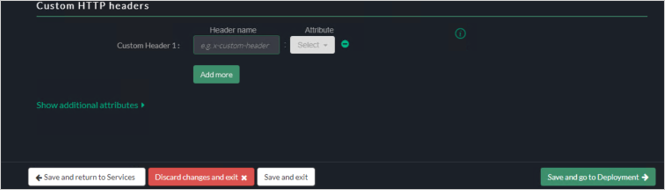
Sous Customer HTTP Headers (En-têtes HTTP du client), spécifiez l’en-tête du client (CustomerHeader) et l’attribut SAML (SAML Attribute).
Cliquez sur le bouton Save and go to Deployment (Enregistrer et accéder au déploiement).
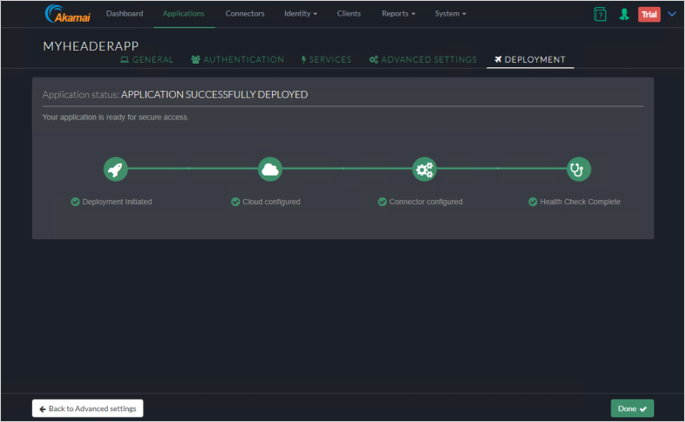
Déployer l’application
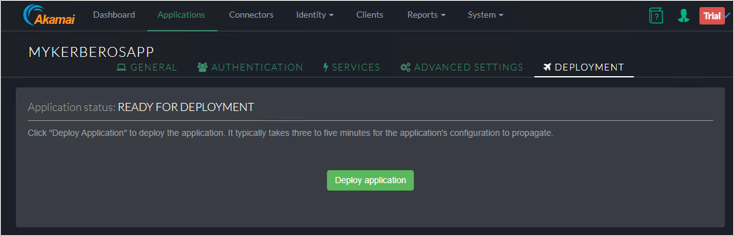
Cliquez sur le bouton Deploy Application (Déployer l’application).

Vérifiez que l’application a été déployée correctement.
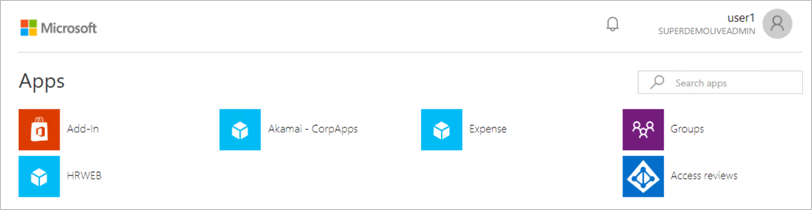
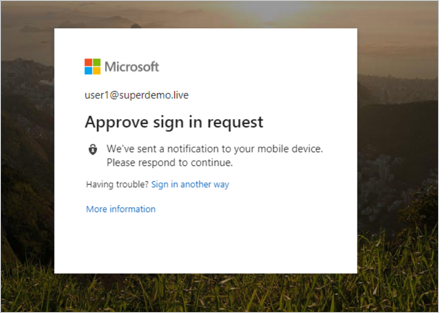
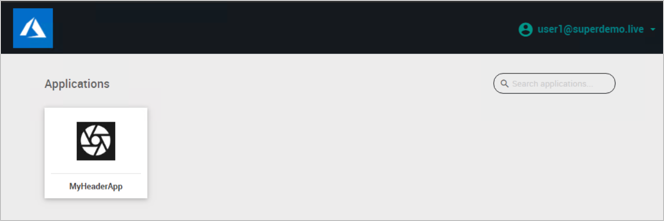
Expérience de l’utilisateur final.
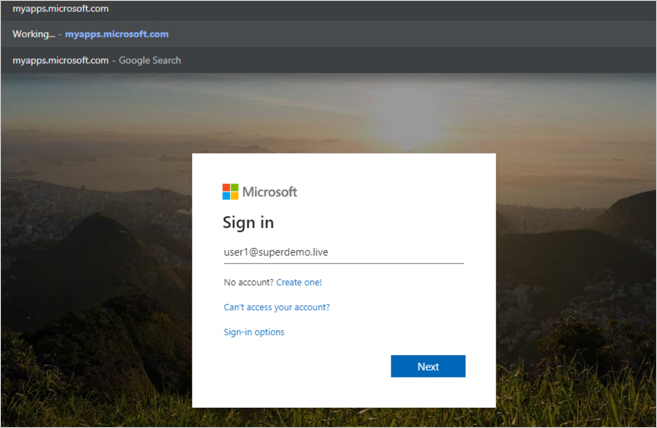
Accès conditionnel.
Bureau à distance
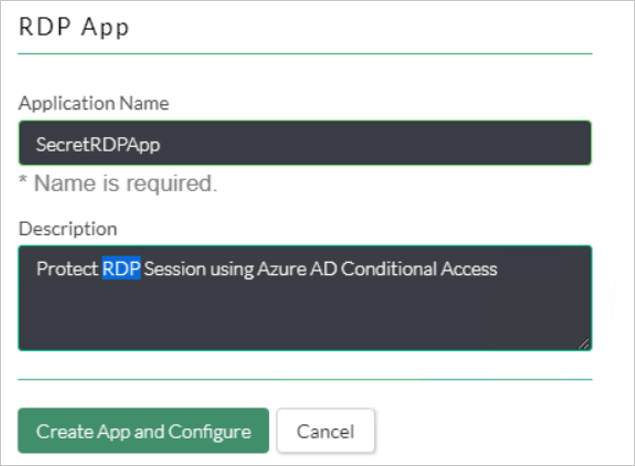
Choisissez RDP dans l’Assistant Ajout d’applications.
Entrez le nom de l’application et une description.

Spécifiez le connecteur qui servira à effectuer cette opération.

Authentification
Cliquez sur Save and go to Services (Enregistrer et accéder aux services).

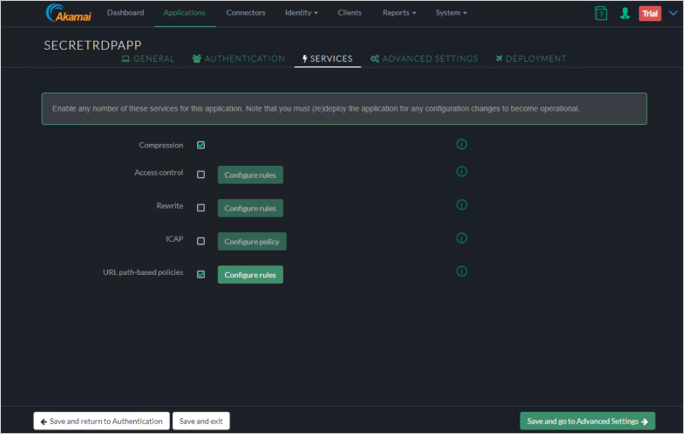
Services
Cliquez sur Save and go to Advanced Settings (Enregistrer et accéder aux paramètres avancés).
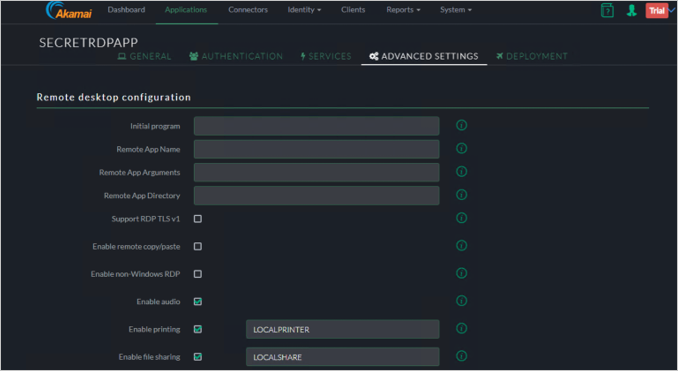
Paramètres avancés
Cliquez sur Save and go to Deployment.

Expérience de l’utilisateur final
Accès conditionnel

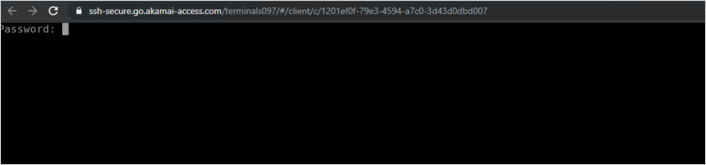
Vous pouvez également taper directement l’URL de l’application RDP.
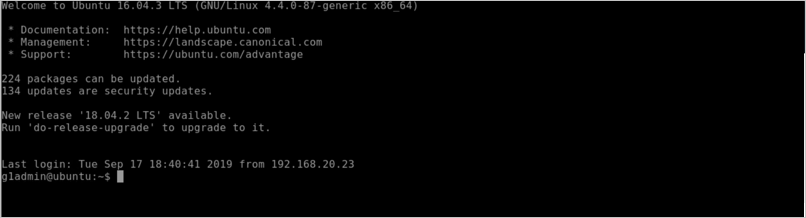
SSH
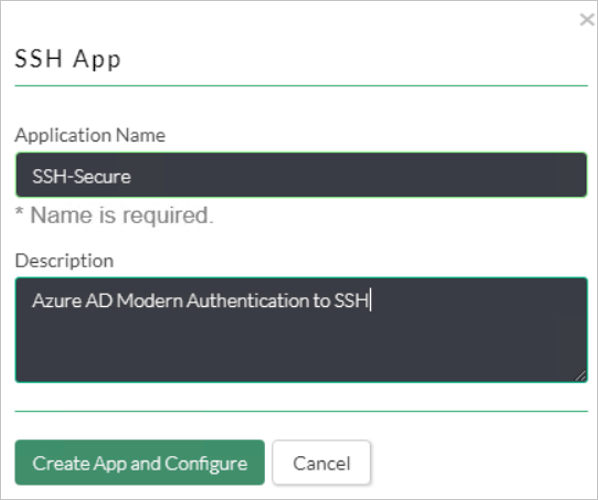
Accédez à Add Applications (Ajouter des applications), puis choisissez SSH.
Entrez le nom de l’application et une description.
Configurer l’identité de l’application
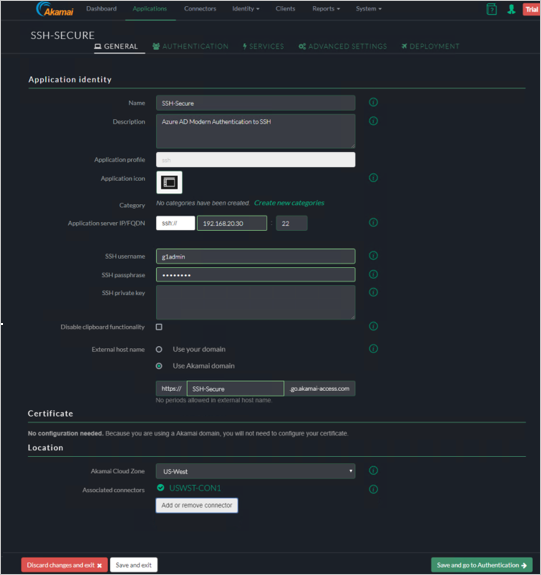
a. Spécifiez le nom/la description.
b. Spécifiez l’adresse IP/le nom de domaine complet du serveur d’applications et le port pour SSH.
c. Spécifiez le nom d’utilisateur SSH/la phrase secrète *Consultez Akamai EAA.
d. Spécifiez le nom d’hôte externe.
e. Spécifiez l’emplacement du connecteur et choisissez le connecteur.
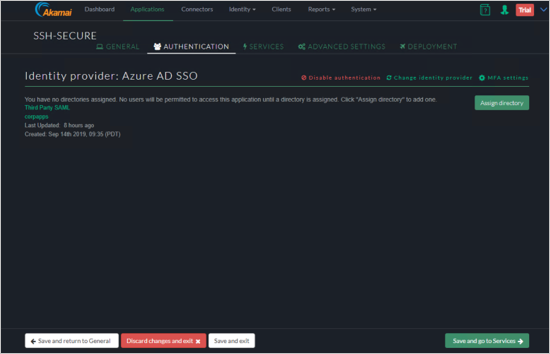
Authentification
Cliquez sur Save and go to Services.
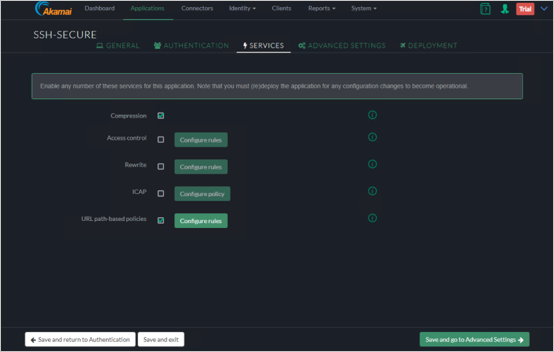
Services
Cliquez sur Save and go to Advanced Settings (Enregistrer et accéder aux paramètres avancés).
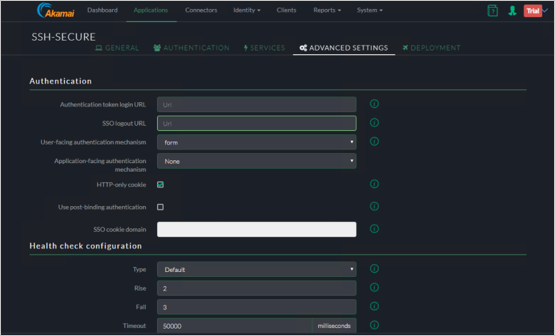
Paramètres avancés
Cliquez sur Save and go to Deployment.

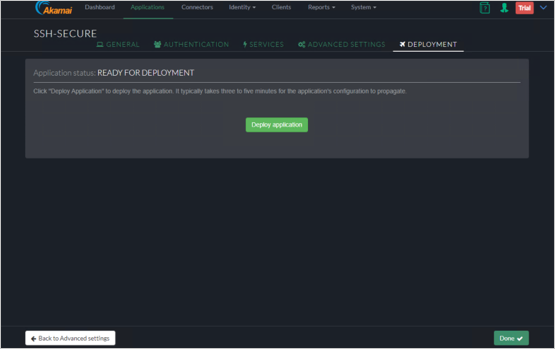
Déploiement
Cliquez sur Deploy Application.
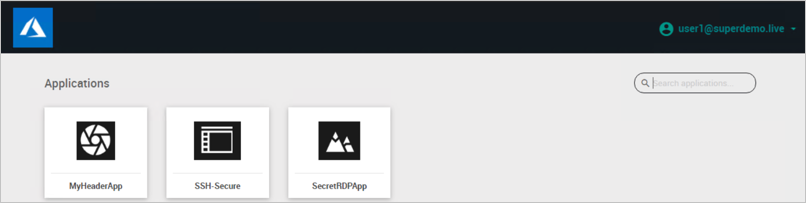
Expérience de l’utilisateur final
Accès conditionnel
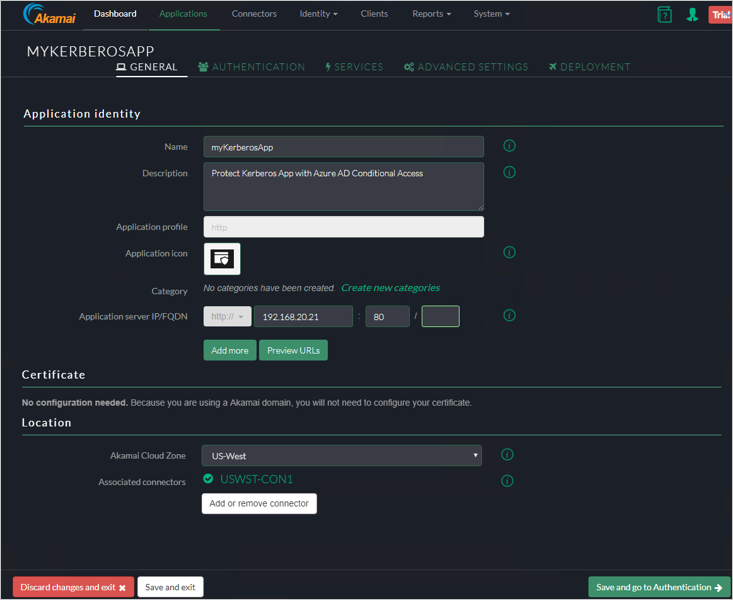
Authentification Kerberos
Dans l'exemple ci-dessous, nous publierons un serveur Web interne sur http://frp-app1.superdemo.live et activerons le SSO à l'aide de KCD.
Onglet General
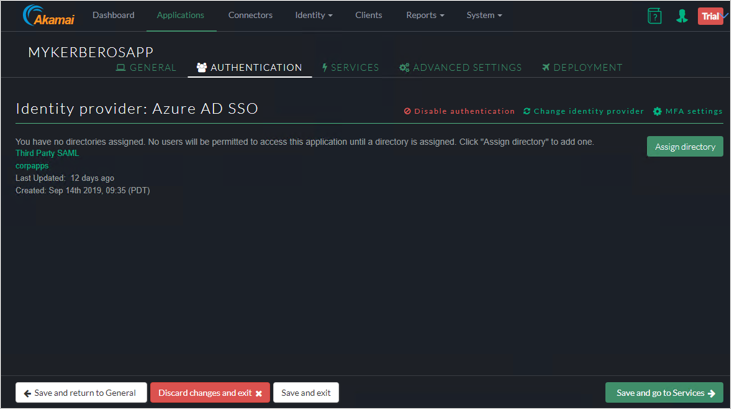
Onglet d’authentification
Attribuez le fournisseur d’identité.
Onglet Services
Paramètres avancés
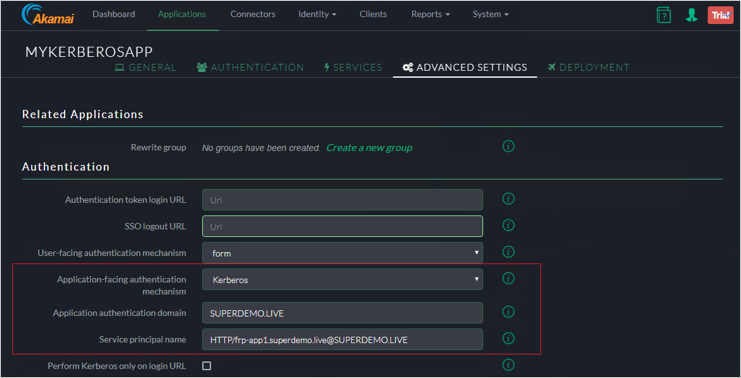
Remarque
Le nom de principal du service (SPN) du serveur web est au format SPN@Domaine. Par exemple, HTTP/frp-app1.superdemo.live@SUPERDEMO.LIVE pour cette démonstration. Conservez le reste des paramètres par défaut.
Onglet Deployment
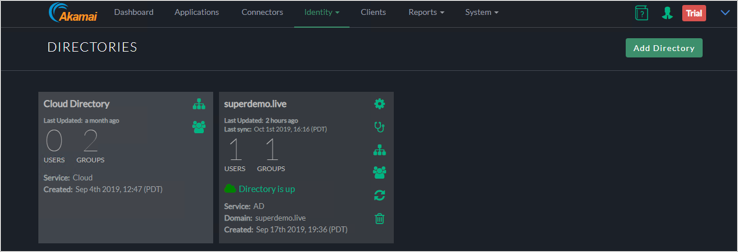
Ajout de l’annuaire
Dans la liste déroulante, sélectionnez AD.
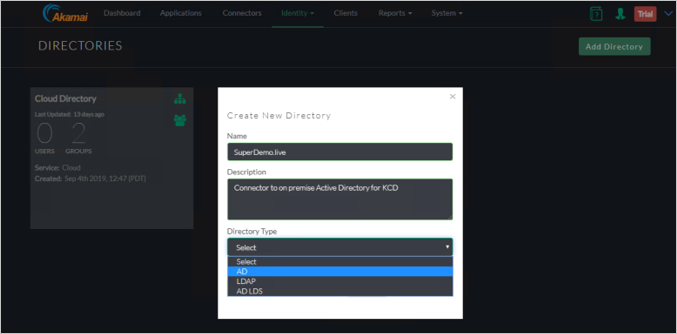
Fournissez les données nécessaires.

Vérifiez la création de l’annuaire.
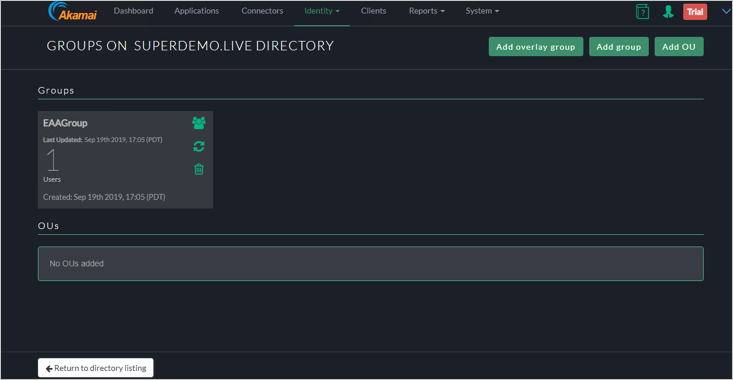
Ajoutez les groupes/unités d’organisation qui auraient besoin d’un accès.
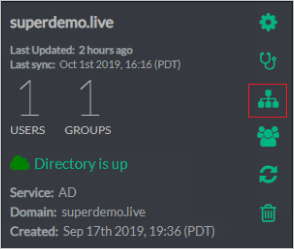
Ci-dessous, le groupe se nomme EAAGroup et compte un seul membre.
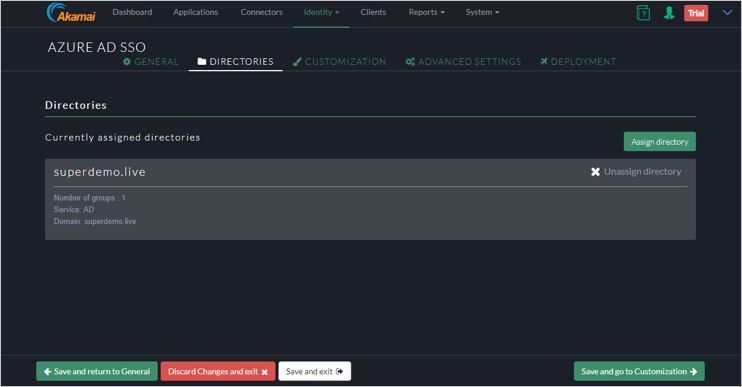
Ajoutez l’annuaire au fournisseur d’identité en cliquant sur Identity>Identity Providers (Identité > Fournisseurs d’identité) et cliquez sur l’onglet Directories (Annuaires), puis sur Assign directory (Assigner un annuaire).
Procédure pas à pas pour configurer la délégation KCD pour EAA
Étape 1 : Créer un compte
Dans l’exemple, nous allons utiliser un compte nommé EAADelegation. Vous pouvez effectuer cette opération à l’aide du composant logiciel enfichable Utilisateurs et ordinateurs Active Directory.
Remarque
Le nom d’utilisateur doit être dans un format spécifique basé sur le nom d’interception d’identité. Sur la figure 1, nous constatons qu’il s’agit de corpapps.login.go.akamai-access.com
Le nom d’ouverture de session de l’utilisateur sera :
HTTP/corpapps.login.go.akamai-access.com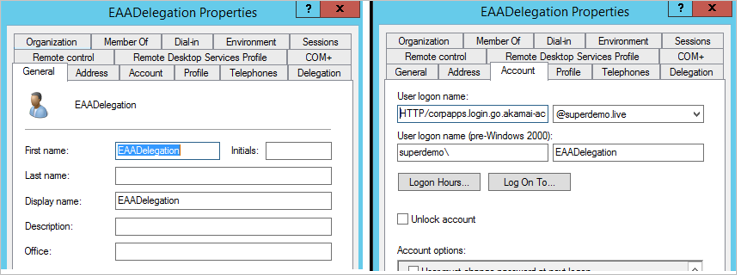
Étape 2 : Configurer le SPN pour ce compte
Sur la base de cet exemple, le SPN se présentera comme suit.
setspn -s Http/corpapps.login.go.akamai-access.com eaadelegation

Étape 3 : Configurer la délégation
Pour le compte EAADelegation, cliquez sur l’onglet Delegation.
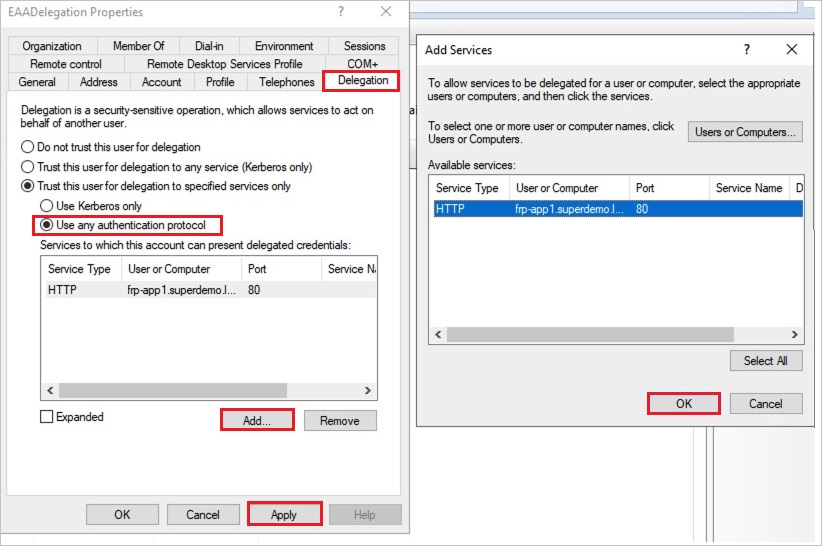
- Spécifiez l’utilisation de tout protocole d’authentification.
- Cliquez sur Add et ajoutez le compte du pool d’applications pour le site web Kerberos. Il doit être résolu automatiquement au SPN correct s’il est configuré correctement.
Étape 4 : Créer un fichier Keytab pour AKAMAI EAA
Voici la syntaxe générique.
ktpass /out ActiveDirectorydomain.keytab /princ
HTTP/yourloginportalurl@ADDomain.com/mapuser serviceaccount@ADdomain.com /pass +rdnPass /crypto All /ptype KRB5_NT_PRINCIPALExplication de l’exemple
Extrait Explication Ktpass /out EAADemo.keytab // Nom du fichier Keytab de sortie /princ HTTP/corpapps.login.go.akamai-access.com@superdemo.live // HTTP/yourIDPName@YourdomainName /mapuser eaadelegation@superdemo.live // Créer un compte de délégation EAA /pass RANDOMPASS // Mot de passe du compte de délégation EAA /crypto All ptype KRB5_NT_PRINCIPAL // consulter la documentation d’Akamai EAA Ktpass /out EAADemo.keytab /princ HTTP/corpapps.login.go.akamai-access.com@superdemo.live /mapuser eaadelegation@superdemo.live /pass RANDOMPASS /crypto All ptype KRB5_NT_PRINCIPAL

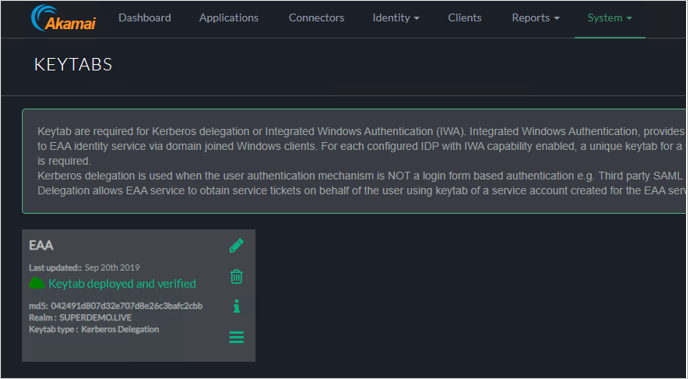
Étape 5 : Importer le fichier Keytab dans la console AKAMAI EAA
Cliquez sur System>Keytabs.

Dans Keytab Type, choisissez Kerberos Delegation.

Vérifiez que le fichier Keytab apparaît comme étant déployé et vérifié.
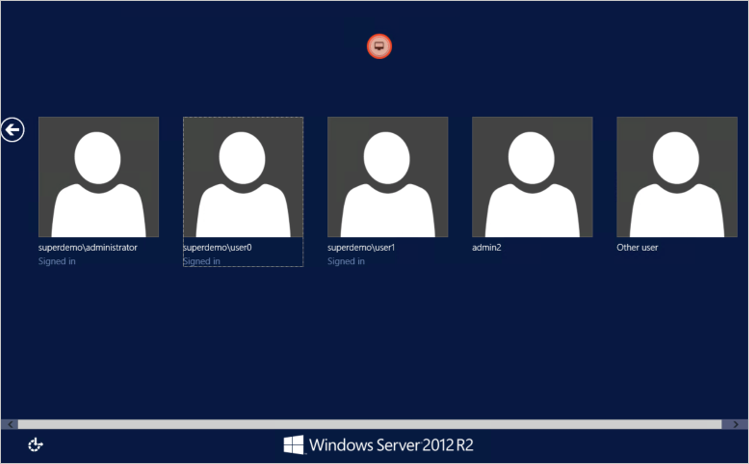
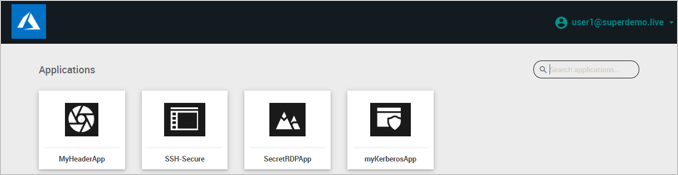
Expérience utilisateur
Accès conditionnel

Créer un utilisateur de test Akamai
Dans cette section, vous allez créer un utilisateur appelé B.Simon dans Akamai. Collaborez avec l’équipe du support technique Akamai pour ajouter des utilisateurs à la plateforme Akamai. Les utilisateurs doivent être créés et activés avant que vous utilisiez l’authentification unique.
Tester l’authentification unique (SSO)
Dans cette section, vous testez votre configuration d’authentification unique Microsoft Entra avec les options suivantes.
Cliquez sur Tester cette application, ce qui devrait automatiquement vous connecter à l’application Akamai pour laquelle vous avez configuré l’authentification unique.
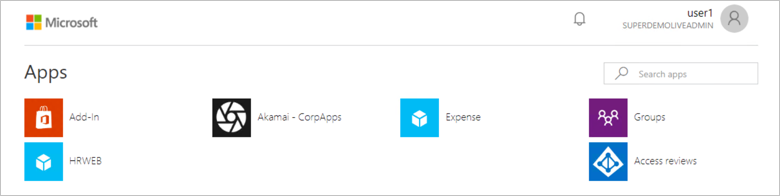
Vous pouvez utiliser Mes applications de Microsoft. Quand vous cliquez sur la vignette Akamai dans Mes applications, vous êtes connecté automatiquement à l’instance d’Akamai pour laquelle vous avez configuré l’authentification unique. Pour plus d’informations sur Mes applications, consultez Présentation de Mes applications.
Étapes suivantes
Après avoir configuré Akamai, vous pouvez appliquer le contrôle de session, qui protège contre l’exfiltration et l’infiltration des données sensibles de votre organisation en temps réel. Le contrôle de session est étendu à partir de l’accès conditionnel. Découvrez comment appliquer un contrôle de session avec Microsoft Defender for Cloud Apps.