Rövid útmutató: Linux kiszolgálói virtuális gép létrehozása a PowerShell használatával az Azure Stack Hubban
Ubuntu Server 20.04 LTS virtuális gépet (VM) az Azure Stack Hub PowerShell használatával hozhat létre. Ebben a cikkben egy virtuális gépet hozunk létre és használunk. Ez a cikk a következőket is bemutatja:
- Csatlakozzon a virtuális géphez egy távoli ügyféllel.
- Telepítsen egy NGINX-webkiszolgálót, és tekintse meg az alapértelmezett kezdőlapot.
- A nem használt erőforrások eltávolítása.
Előfeltételek
Linux-rendszerkép az Azure Stack Hub Marketplace-en. Az Azure Stack Hub Marketplace alapértelmezés szerint nem rendelkezik Linux-rendszerképpel. Kérje meg az Azure Stack Hub-operátort, hogy adja meg a szükséges Ubuntu Server 20.04 LTS-rendszerképet. Az operátor használhatja a Marketplace-elemek letöltése az Azure-ból az Azure Stack Hubba című cikkben található utasításokat.
Az Azure Stack Hub erőforrásainak létrehozásához és kezeléséhez az Azure CLI egy adott verziójára van szükség.
- Ha nincs konfigurálva a PowerShell az Azure Stack Hubhoz, tekintse meg a PowerShell telepítése az Azure Stack Hubhoz című témakört.
- Az Azure Stack Hub PowerShell beállítása után csatlakozni fog az Azure Stack Hub-környezethez. Útmutatásért lásd: Csatlakozás az Azure Stack Hubhoz a PowerShell-lel felhasználóként.
Nyilvános Secure Shell- (SSH-) kulcs, amelynek a neve id_rsa.pub a Windows-felhasználói profil .ssh könyvtárában van mentve. Az SSH-kulcsok létrehozásával kapcsolatos részletes információkért lásd: SSH-kulcspár használata az Azure Stack Hubbal.
Erőforráscsoport létrehozása
Az erőforráscsoport egy logikai tároló, ahol üzembe helyezheti és kezelheti az Azure Stack Hub erőforrásait. Erőforráscsoport létrehozásához futtassa a következő kódblokkot:
Megjegyzés
Az alábbi kód példákban minden változóhoz hozzárendeltünk értékeket. Azonban saját értékeket is hozzárendelhet.
# Create variables to store the location and resource group names.
$location = "local"
$ResourceGroupName = "myResourceGroup"

New-AzResourceGroup `
  -Name $ResourceGroupName `
  -Location $location
Tárerőforrások létrehozása
Hozzon létre egy tárfiókot, amely a rendszerindítási diagnosztikai kimenet tárolására szolgál.
# Create variables to store the storage account name and the storage account SKU information
$StorageAccountName = "mystorageaccount"
$SkuName = "Standard_LRS"

# Create a new storage account
$StorageAccount = New-AzStorageAccount `
  -Location $location `
  -ResourceGroupName $ResourceGroupName `
  -Type $SkuName `
  -Name $StorageAccountName

Set-AzCurrentStorageAccount `
  -StorageAccountName $storageAccountName `
  -ResourceGroupName $resourceGroupName
Hálózati erőforrások létrehozása
Hozzon létre egy virtuális hálózatot, egy alhálózatot és egy nyilvános IP-címet. Ezek az erőforrások a virtuális gép hálózati kapcsolatának biztosítására szolgálnak.
# Create a subnet configuration
$subnetConfig = New-AzVirtualNetworkSubnetConfig `
  -Name mySubnet `
  -AddressPrefix 192.168.1.0/24

# Create a virtual network
$vnet = New-AzVirtualNetwork `
  -ResourceGroupName $ResourceGroupName `
  -Location $location `
  -Name MyVnet `
  -AddressPrefix 192.168.0.0/16 `
  -Subnet $subnetConfig

# Create a public IP address and specify a DNS name
$pip = New-AzPublicIpAddress `
  -ResourceGroupName $ResourceGroupName `
  -Location $location `
  -AllocationMethod Static `
  -IdleTimeoutInMinutes 4 `
  -Name "mypublicdns$(Get-Random)"
Hálózati biztonsági csoport és hálózati biztonsági csoportszabály létrehozása
A hálózati biztonsági csoport bejövő és kimenő szabályokkal védi a virtuális gépet. Hozzon létre egy bejövő szabályt a 3389-ös porthoz a bejövő távoli asztali kapcsolatok engedélyezéséhez, valamint egy bejövő szabályt a 80-s porthoz a bejövő webes forgalom engedélyezéséhez.
# Create variables to store the network security group and rules names.
$nsgName = "myNetworkSecurityGroup"
$nsgRuleSSHName = "myNetworkSecurityGroupRuleSSH"
$nsgRuleWebName = "myNetworkSecurityGroupRuleWeb"


# Create an inbound network security group rule for port 22
$nsgRuleSSH = New-AzNetworkSecurityRuleConfig -Name $nsgRuleSSHName -Protocol Tcp `
-Direction Inbound -Priority 1000 -SourceAddressPrefix * -SourcePortRange * -DestinationAddressPrefix * `
-DestinationPortRange 22 -Access Allow

# Create an inbound network security group rule for port 80
$nsgRuleWeb = New-AzNetworkSecurityRuleConfig -Name $nsgRuleWebName -Protocol Tcp `
-Direction Inbound -Priority 1001 -SourceAddressPrefix * -SourcePortRange * -DestinationAddressPrefix * `
-DestinationPortRange 80 -Access Allow

# Create a network security group
$nsg = New-AzNetworkSecurityGroup -ResourceGroupName $ResourceGroupName -Location $location `
-Name $nsgName -SecurityRules $nsgRuleSSH,$nsgRuleWeb
Hálózati kártya létrehozása a virtuális géphez
A hálózati kártya csatlakoztatja a virtuális gépet egy alhálózathoz, egy hálózati biztonsági csoporthoz és egy nyilvános IP-címhez.
# Create a virtual network card and associate it with public IP address and NSG
$nic = New-AzNetworkInterface `
  -Name myNic `
  -ResourceGroupName $ResourceGroupName `
  -Location $location `
  -SubnetId $vnet.Subnets[0].Id `
  -PublicIpAddressId $pip.Id `
  -NetworkSecurityGroupId $nsg.Id
Virtuális gép létrehozása
Hozzon létre egy virtuálisgép-konfigurációt. Ez a konfiguráció tartalmazza a virtuális gép üzembe helyezésekor használandó beállításokat (például a felhasználói hitelesítő adatokat, a méretet és a virtuálisgép-rendszerképet).
# Define a credential object
$UserName='demouser'
$securePassword = ConvertTo-SecureString ' ' -AsPlainText -Force
$cred = New-Object System.Management.Automation.PSCredential ($UserName, $securePassword)

# Create the VM configuration object
$VmName = "VirtualMachinelatest"
$VmSize = "Standard_D1"
$VirtualMachine = New-AzVMConfig `
  -VMName $VmName `
  -VMSize $VmSize

$VirtualMachine = Set-AzVMOperatingSystem `
  -VM $VirtualMachine `
  -Linux `
  -ComputerName "MainComputer" `
  -Credential $cred

$VirtualMachine = Set-AzVMSourceImage `
  -VM $VirtualMachine `
  -PublisherName "Canonical" `
  -Offer "UbuntuServer" `
  -Skus "20.04-LTS" `
  -Version "latest"

# Set the operating system disk properties on a VM
$VirtualMachine = Set-AzVMOSDisk `
  -VM $VirtualMachine `
  -CreateOption FromImage | `
  Set-AzVMBootDiagnostic -ResourceGroupName $ResourceGroupName `
  -StorageAccountName $StorageAccountName -Enable |`
  Add-AzVMNetworkInterface -Id $nic.Id

# Configure SSH keys
$sshPublicKey = Get-Content "$env:USERPROFILE\.ssh\id_rsa.pub"

# Add the SSH key to the VM
Add-AzVMSshPublicKey -VM $VirtualMachine `
 -KeyData $sshPublicKey `
 -Path "/home/$UserName/.ssh/authorized_keys"

# Create the VM
New-AzVM `
  -ResourceGroupName $ResourceGroupName `
 -Location $location `
  -VM $VirtualMachine
Virtuális gép gyors létrehozása: Teljes szkript
Megjegyzés
Ez a lépés lényegében az előző kód összevonása, de a hitelesítéshez nem SSH-kulccsal, hanem jelszóval.
## Create a resource group

<#
A resource group is a logical container where you can deploy and manage Azure Stack Hub resources. From your development kit or the Azure Stack Hub integrated system, run the following code block to create a resource group. Though we've assigned values for all the variables in this article, you can use these values or assign new ones.
#>

# Edit your variables, if required

# Create variables to store the location and resource group names
$location = "local"
$ResourceGroupName = "myResourceGroup"

# Create variables to store the storage account name and the storage account SKU information
$StorageAccountName = "mystorageaccount"
$SkuName = "Standard_LRS"

# Create variables to store the network security group and rules names
$nsgName = "myNetworkSecurityGroup"
$nsgRuleSSHName = "myNetworkSecurityGroupRuleSSH"
$nsgRuleWebName = "myNetworkSecurityGroupRuleWeb"

# Create variable for VM password
$VMPassword = 'Password123!'

# End of variables - no need to edit anything past that point to deploy a single VM

# Create a resource group
New-AzResourceGroup `
  -Name $ResourceGroupName `
  -Location $location

## Create storage resources

# Create a storage account, and then create a storage container for the Ubuntu Server 20.04 LTS image

# Create a new storage account
$StorageAccount = New-AzStorageAccount `
  -Location $location `
  -ResourceGroupName $ResourceGroupName `
  -Type $SkuName `
  -Name $StorageAccountName

Set-AzCurrentStorageAccount `
  -StorageAccountName $storageAccountName `
  -ResourceGroupName $resourceGroupName

# Create a storage container to store the VM image
$containerName = 'osdisks'
$container = New-AzureStorageContainer `
  -Name $containerName `
  -Permission Blob


## Create networking resources

# Create a virtual network, a subnet, and a public IP address, resources that are used provide network connectivity to the VM

# Create a subnet configuration
$subnetConfig = New-AzVirtualNetworkSubnetConfig `
  -Name mySubnet `
  -AddressPrefix 192.168.1.0/24

# Create a virtual network
$vnet = New-AzVirtualNetwork `
  -ResourceGroupName $ResourceGroupName `
  -Location $location `
  -Name MyVnet `
  -AddressPrefix 192.168.0.0/16 `
  -Subnet $subnetConfig

# Create a public IP address and specify a DNS name
$pip = New-AzPublicIpAddress `
  -ResourceGroupName $ResourceGroupName `
  -Location $location `
  -AllocationMethod Static `
  -IdleTimeoutInMinutes 4 `
  -Name "mypublicdns$(Get-Random)"


### Create a network security group and a network security group rule

<#
The network security group secures the VM by using inbound and outbound rules. Create an inbound rule for port 3389 to allow incoming Remote Desktop connections and an inbound rule for port 80 to allow incoming web traffic.
#>

# Create an inbound network security group rule for port 22
$nsgRuleSSH = New-AzNetworkSecurityRuleConfig -Name $nsgRuleSSHName -Protocol Tcp `
-Direction Inbound -Priority 1000 -SourceAddressPrefix * -SourcePortRange * -DestinationAddressPrefix * `
-DestinationPortRange 22 -Access Allow

# Create an inbound network security group rule for port 80
$nsgRuleWeb = New-AzNetworkSecurityRuleConfig -Name $nsgRuleWebName -Protocol Tcp `
-Direction Inbound -Priority 1001 -SourceAddressPrefix * -SourcePortRange * -DestinationAddressPrefix * `
-DestinationPortRange 80 -Access Allow

# Create a network security group
$nsg = New-AzNetworkSecurityGroup -ResourceGroupName $ResourceGroupName -Location $location `
-Name $nsgName -SecurityRules $nsgRuleSSH,$nsgRuleWeb

### Create a network card for the VM

# The network card connects the VM to a subnet, network security group, and public IP address.

# Create a virtual network card and associate it with public IP address and NSG
$nic = New-AzNetworkInterface `
  -Name myNic `
  -ResourceGroupName $ResourceGroupName `
  -Location $location `
  -SubnetId $vnet.Subnets[0].Id `
  -PublicIpAddressId $pip.Id `
  -NetworkSecurityGroupId $nsg.Id

## Create a VM
<#
Create a VM configuration. This configuration includes the settings used when deploying the VM. For example: user credentials, size, and the VM image.
#>

# Define a credential object
$UserName='demouser'
$securePassword = ConvertTo-SecureString $VMPassword -AsPlainText -Force
$cred = New-Object System.Management.Automation.PSCredential ($UserName, $securePassword)

# Create the VM configuration object
$VmName = "VirtualMachinelatest"
$VmSize = "Standard_D1"
$VirtualMachine = New-AzVMConfig `
  -VMName $VmName `
  -VMSize $VmSize

$VirtualMachine = Set-AzVMOperatingSystem `
  -VM $VirtualMachine `
  -Linux `
  -ComputerName "MainComputer" `
  -Credential $cred

$VirtualMachine = Set-AzVMSourceImage `
  -VM $VirtualMachine `
  -PublisherName "Canonical" `
  -Offer "UbuntuServer" `
  -Skus "20.04-LTS" `
  -Version "latest"

$osDiskName = "OsDisk"
$osDiskUri = '{0}vhds/{1}-{2}.vhd' -f `
  $StorageAccount.PrimaryEndpoints.Blob.ToString(),`
  $vmName.ToLower(), `
  $osDiskName

# Set the operating system disk properties on a VM
$VirtualMachine = Set-AzVMOSDisk `
  -VM $VirtualMachine `
  -Name $osDiskName `
  -VhdUri $OsDiskUri `
  -CreateOption FromImage | `
  Add-AzVMNetworkInterface -Id $nic.Id

# Create the VM
New-AzVM `
  -ResourceGroupName $ResourceGroupName `
 -Location $location `
  -VM $VirtualMachine
Kapcsolódás a virtuális géphez
A virtuális gép üzembe helyezése után konfiguráljon hozzá egy SSH-kapcsolatot. A virtuális gép nyilvános IP-címének lekéréséhez használja a Get-AzPublicIpAddress parancsot:
Get-AzPublicIpAddress -ResourceGroupName myResourceGroup | Select IpAddress
Egy telepített SSH-val rendelkező ügyfélrendszerből a következő paranccsal csatlakozhat a virtuális géphez. Ha Windowson dolgozik, a PuTTY használatával hozhatja létre a kapcsolatot.
ssh <Public IP Address>
Amikor a rendszer kéri, jelentkezzen be azureuserként. Ha jelszót használt az SSH-kulcsok létrehozásakor, meg kell adnia a jelszót.
Az NGINX-webkiszolgáló telepítése
A csomag erőforrásainak frissítéséhez és a legújabb NGINX-csomag telepítéséhez futtassa a következő szkriptet:
#!/bin/bash

# update package source
apt-get -y update

# install NGINX
apt-get -y install nginx
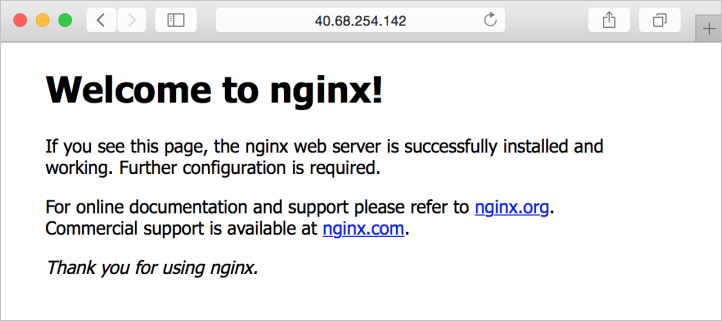
Az NGINX kezdőlapjának megtekintése
Ha az NGINX-webkiszolgáló telepítve van, és a 80-os port meg van nyitva a virtuális gépen, a virtuális gép nyilvános IP-címével érheti el a webkiszolgálót. Nyisson meg egy webböngészőt, és lépjen a webhelyre http://<public IP address>.
Az erőforrások eltávolítása
A Remove-AzResourceGroup paranccsal törölheti azokat az erőforrásokat, amelyekre már nincs szüksége. Az erőforráscsoport és az összes erőforrás törléséhez futtassa a következő parancsot:
Remove-AzResourceGroup -Name myResourceGroup
Következő lépések
Ebben a rövid útmutatóban üzembe helyezett egy alapszintű Linux-kiszolgálói virtuális gépet. Az Azure Stack Hub virtuális gépekkel kapcsolatos további információkért tekintse meg az Azure Stack Hubban lévő virtuális gépekre vonatkozó szempontokat ismertető témakört.
Visszajelzés
Hamarosan elérhető: 2024-ben fokozatosan kivezetjük a GitHub-problémákat a tartalom visszajelzési mechanizmusaként, és lecseréljük egy új visszajelzési rendszerre. További információ: https://aka.ms/ContentUserFeedback.
Visszajelzés küldése és megtekintése a következőhöz: