Quickstart: Get started with Video Analyzer live pipelines in the Azure portal
![]()
Alternatively, check out topics under Create intelligent video applications on the edge.
Note
Azure Video Analyzer has been retired and is no longer available.
Azure Video Analyzer for Media is not affected by this retirement. It is now rebranded to Azure Video Indexer. Click here to read more.
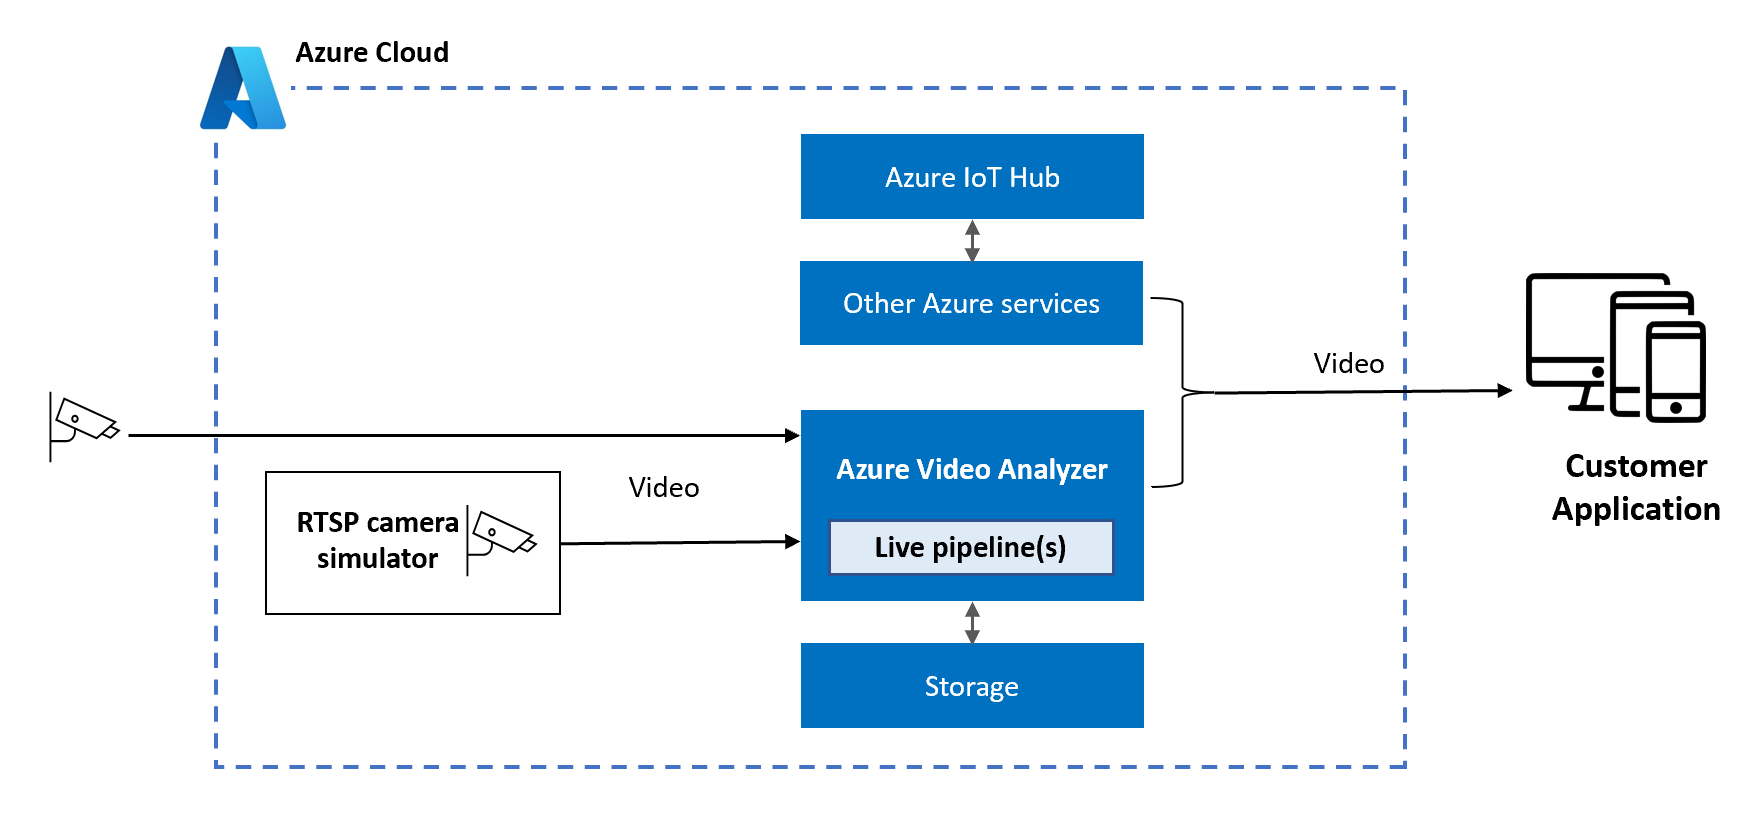
This quickstart walks you through the steps to capture and record video from a Real Time Streaming Protocol (RTSP) camera using live pipelines in Azure Video Analyzer service. You will create a Video Analyzer account and its accompanying resources by using the Azure portal. You will deploy an RTSP camera simulator, if you don’t have access to an actual RTSP camera (that can be made accessible over the internet). You’ll then deploy the relevant Video Analyzer resources to record video to your Video Analyzer account.
The steps outlined in this document apply to cameras that are made accessible over the internet and not shielded behind a firewall. The following diagram graphically represents the live pipeline that you will deploy to your Video Analyzer account.

Prerequisites
An active Azure subscription. If you don't have one, create a free account.
Note
You'll need an Azure subscription where you have access to both the Contributor role and the User Access Administrator role to the resource group under which you'll create new resources (user-assigned managed identity, storage account, Video Analyzer account). If you don't have the right permissions, ask your account administrator to grant you those permissions. The associated storage account must be in the same region as the Video Analyzer account. We recommend that you use a standard general-purpose v2 storage account.
Either an RTSP camera accessible over the internet, or an Azure Linux VM (with admin privileges) to host an RTSP camera simulator
Sample Architecture - Recording video from a camera over the internet
RTSP camera
You will need access to an RTSP capable camera see for supported cameras. The camera should be configured to encode video with a maximum bitrate under 3 Mbps. Make a note of this maximum bitrate setting. Further, the RTSP server on this camera needs to be accessible over the public internet. If you are able to use such a camera, then you can skip to Create Azure resources section. Alternatively, you can deploy an RTSP camera simulator as described in the section below.
Deploy RTSP camera simulator
This section shows you how to deploy an RTSP camera simulator on Azure Linux VM, running 'Ubuntu Server 18.04' operating system. This simulator makes use of the Live555 Media Server.
Note
References to third-party software are for informational and convenience purposes only. Microsoft does not endorse nor provide rights for the third-party software. For more information, see Live555 Media Server.
Warning
Please note that this RTSP camera simulator endpoint is exposed over the internet and hence will be accessible to anyone who knows the RTSP URL.
Deployment steps:
Deploy a standard_D2s_v3 series Azure Linux VM running 'Ubuntu Server 18.04' operating system, see here for VM creation steps, don't have to install web server mentioned in the linked article. Also allow SSH port in deployment wizard so that you could connect to VM using SSH connection.
Enable inbound connections for RTSP protocol. In the Azure portal, open the management pane for the Linux VM you created above.
- Click on Networking - you will see the blade open to the inbound port rules for the network security group (NSG) that was created for you to support inbound SSH connections.
- Click on Add inbound port rule to add a new one
- In the pane that opens up, change Destination port ranges to 554. Choose a Name for the rule, such as "RTSP". Keep all other values as default. See here for more details.
Install Docker on the VM using instructions here, only follow the steps till verifying the Docker installation by running the ‘hello-world’ image.
Connect to your VM, for example using SSH. From the terminal window, create a local folder such as 'localmedia' to host media files, this VM local folder will be used to map to RTSP mediaserver container.
Copy an MKV file used to simulate the camera feed as follows:
cd localmedia
wget https://avamedia.blob.core.windows.net/public/camera-1800s.mkv
Start the RTSP server on the VM using the pre-built container image as follow
sudo docker run -d -p 554:554 -v ${PWD}:/live/mediaServer/media mcr.microsoft.com/ava-utilities/rtspsim-live555:1.2Once the RTSP server is running, clients can now connect to it via an RTSP URL:
Go to 'Overview' page of your VM in Azure portal and note down the value of 'Public IP address'
- The RTSP URL is rtsp://{Public IP address}:554/media/camera-1800s.mkv, can be tested with a player from desktop e.g. VLC
Create Azure resources
The next step is to create the required Azure resources (Video Analyzer account, storage account and user-assigned managed identity).
Create a Video Analyzer account in the Azure portal
Sign in at the Azure portal.
On the search bar at the top, enter Video Analyzer.
Select Video Analyzers under Services.
Select Add.
In the Create Video Analyzer account section, enter these required values:
- Subscription: Choose the subscription that you're using to create the Video Analyzer account.
- Resource group: Choose a resource group where you're creating the Video Analyzer account, or select Create new to create a resource group.
- Video Analyzer account name: Enter a name for your Video Analyzer account. The name must be all lowercase letters or numbers with no spaces and 3 to 24 characters in length.
- Location: Choose a location to deploy your Video Analyzer account (for example, West US 2).
- Storage account: Create a storage account. We recommend that you select a standard general-purpose v2 storage account.
- User identity: Create and name a new user-assigned managed identity.
Select Review + create at the bottom of the form.
Deploy a live pipeline
Once the Video Analyzer account is created, you can go ahead with next steps to create a live pipeline topology and a live pipeline.
Go to Video Analyzer account and locate the Live menu item at the bottom left, select it.
In the Topologies plane, select the Create topology option from the top to create a live topology. Follow the portal wizard steps to create a live pipeline topology
Create a pipeline topology wizard will appear on the portal
Select Try sample topologies-> select Live capture, record, and stream from RTSP camera topology-> Select 'Proceed' on Load sample topology dialog box.
The wizard to create the live pipeline topology will be displayed, showing RTSP source node connected to a Video sink node.
Enter the required fields to create topology:
- Topology name – Enter the name for the topology
- Description (optional) – Brief description about the topology
- Kind (prepopulated ‘Live’)
- Select the RTSP source node, then set Transport property value as TCP
- Select Save with default configuration for rest of the properties
Next step is to create a live pipeline using the topology created in previous step.
Select Pipelines-> Select Create pipeline -> then select the live pipeline topology created in previous step to a create a pipeline. After selecting the topology click Create
Create a live pipeline wizard will appear on the portal. Enter the required fields:
- Live pipeline name – Use a unique name, allows alpha numerals and dashes
- Bitrate – It is the maximum capacity in Kbps that is reserved for the live pipeline, allowed range is 500 kbps to 3000 kbps. Use default 1000 for RTSP camera simulator camera-1800s.mkv file (this value should match with sample video file used).
- rtspUserNameParameter, rtspPasswordParameter - Set dummy values for these fields if using RTSP camera simulator else enter authentication credentials for actual RTSP camera stream
- rtspUrlParameter – Use
rtsp://<VMpublicIP>:554/media/camera-1800s.mkv(for RTSP camera simulator) else actual RTSP camera stream URL - videoNameParameter - Unique name for the target video resource to be recorded. Note: use a unique video resource for each camera (or MKV file)
Select Create and you will see a pipeline is created in the pipeline grid on the portal.
Select the live pipeline created in the grid, select Activate option available towards the right of the pane to activate the live pipeline. This will start your live pipeline and start recording the video
Now you would be able to see the video resource under Video Analyzer account-> Videos pane in the portal. Its status will indicate Recording as pipeline is active and recording the live video stream.
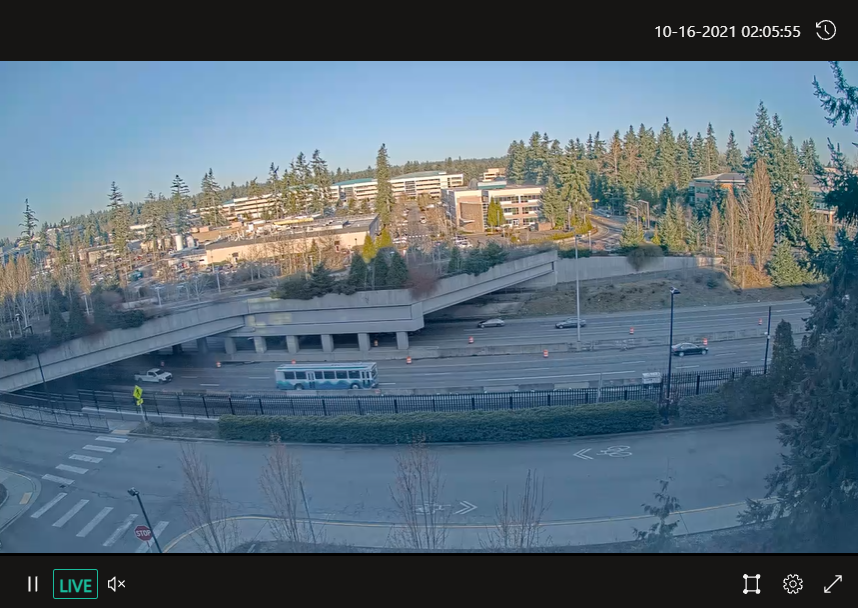
After a few seconds, select the video and you will be able to see the low latency stream.
Note
If you are using an RTSP camera simulator, it’s not possible to accurately determine end-to-end latency. Further, after the RTSP camera simulator reaches the end of the MKV file, it will stop. The live pipeline will attempt to reconnect and after a while, the simulator will restart the stream from the beginning of the file. If you let this live pipeline run for many hours, you will see gaps in the video recording whenever the simulator stops and restarts.
If necessary, refer Activity log to quickly verify your deployment operations. Refer here for monitoring and event logs.
To deactivate the pipeline recording go to your Video Analyzer account, on the left panel select Live-> Pipelines-> select the pipeline to be deactivated then select Deactivate in pipeline grid, it will stop the recording.
You can also continue to delete the pipeline & topology if they are not needed.
Clean up resources
If you want to try other quickstarts or tutorials, keep the resources that you created. Otherwise, go to the Azure portal, go to your resource groups, select the resource group where you ran this quickstart and delete all the resources.
Next steps
- Learn more about managing video's retention policy
- Try out different MKV sample files for media simulator from here, bitrate of sample file should match with pipeline setup.
- Learn more about Monitoring & logging for cloud pipelines.