Tutorial: Manage costs by using Cloudyn
You manage costs and produce showback reports in Cloudyn by allocating costs based on tags. The process of cost allocation assigns costs to your consumed cloud resources. Costs are fully allocated when all your resources are categorized with tags. After costs are allocated, you can provide showback or chargeback to your users with dashboards and reports. However, many resources might be untagged or untaggable when you start to use Cloudyn.
For example, you might want to get reimbursed for engineering costs. You need to be able to show your engineering team that you need a specific amount, based on resource costs. You can show them a report for all the consumed resources that are tagged engineering.
In this article, tags and categories are sometimes synonymous. Categories are broad collections and can be many things. They might include business units, cost centers, web services, or anything that is tagged. Tags are name/value pairs that enable you to categorize resources and to view and manage consolidated billing information by applying the same tag to multiple resources and resource groups. In earlier versions of the Azure portal, a tag name was referred to as a key. Tags are created for and stored by a single Azure subscription. Tags in AWS consist of key/value pairs. Because both Azure and AWS have used the term key, Cloudyn uses that term. Category Manager uses keys (tag names) to merge tags.
In this tutorial, you learn how to:
- Use custom tags to allocate costs.
- Create showback and chargeback reports.
If you don't have an Azure subscription, create a free account before you begin.
Note
Cloudyn was deprecated on June 30, 2021 and is no longer available.
Customers can use Azure Cost Management to view, analyze and optimize their cloud costs.
Prerequisites
- You must have an Azure account.
- You must have either a trial registration or paid subscription for Cloudyn.
- Unactivated accounts must be activated in the Cloudyn portal.
- Guest-level monitoring must be enabled on your virtual machines.
Use custom tags to allocate costs
Cloudyn gets resource group tag data from Azure and automatically propagates tag information to resources. In cost allocation, you can see cost by resource tags.
Using the Cost Allocation model, you define categories (tags) that get applied internally to uncategorized (untagged) resources to group your costs and define rules to handle the untagged costs. Cost allocation rules are your saved instructions where a service's costs are distributed to some other service. Afterward, those resources then show tags/categories in cost allocation reports by selecting the model that you created.
Keep in mind that tag information doesn't appear for those resources in cost analysis reports. Also, tags applied in Cloudyn using cost allocation aren't sent to Azure, so you won't see them in the Azure portal.
When you start cost allocation, the first thing you do is define the scope by using a cost model. The cost model does not change costs, it distributes them. When you create a cost model, you segment your data by cost entity, account, or subscription, and by multiple tags. Common example tags might include a billing code, cost center, or group name. Tags also help you perform showback or chargeback to other parts of your organization.
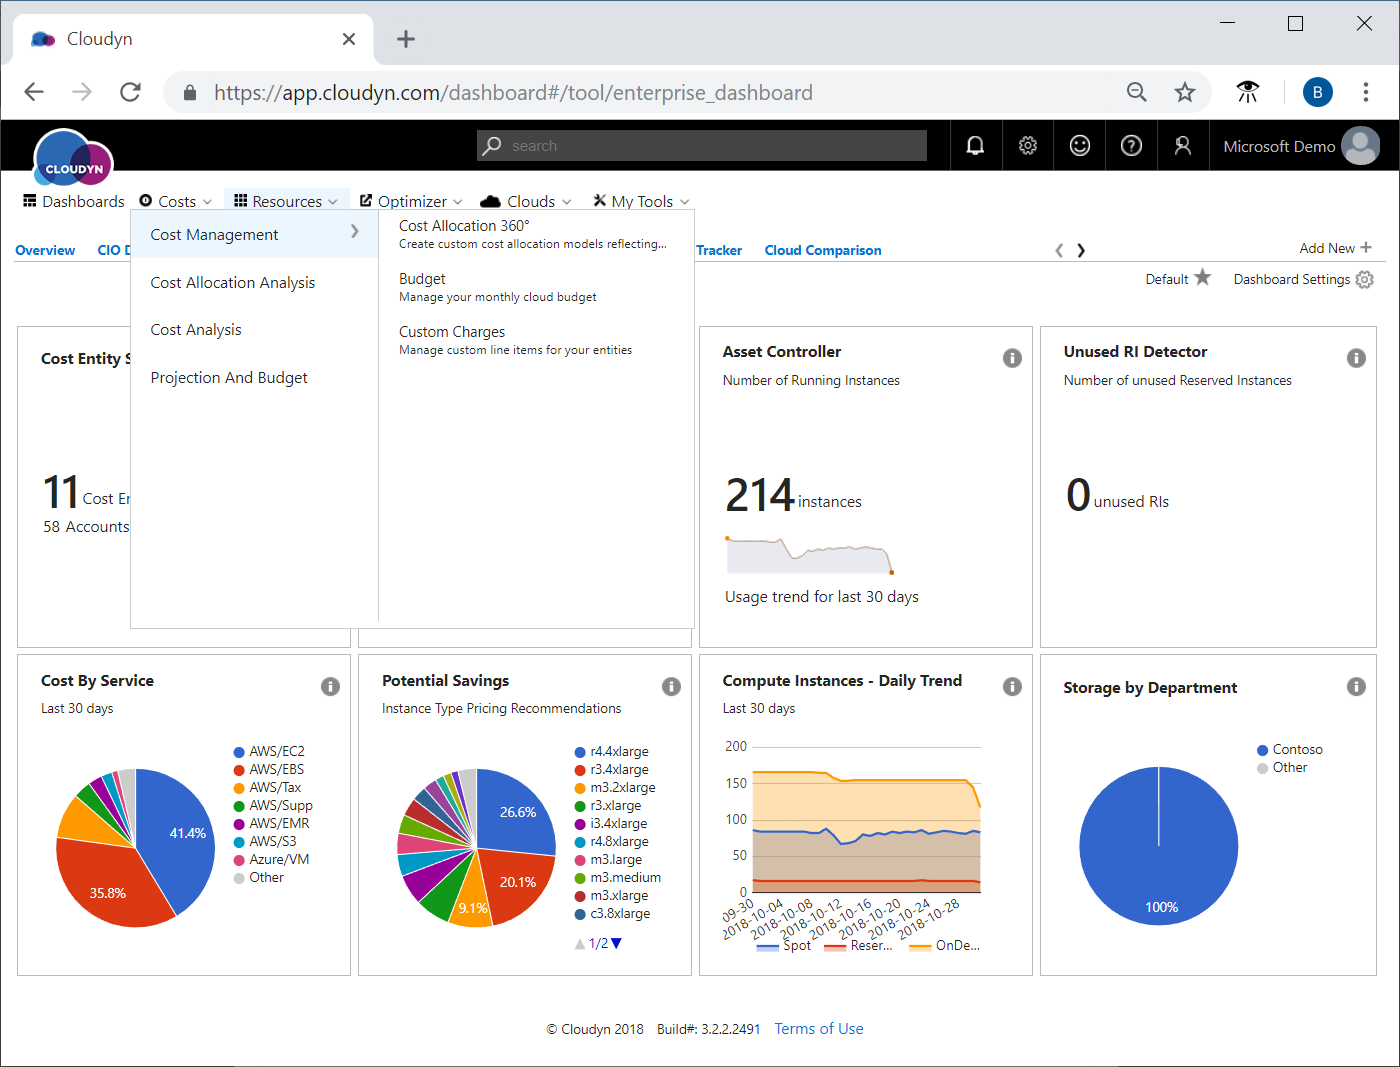
To create a custom cost allocation model, select Costs > Cost Management > Cost Allocation 360° on the report's menu.
On the Cost Allocation 360 page, select Add and then enter a name and description for your cost model. Select either all accounts or individual accounts. If you want to use individual accounts, you can select multiple accounts from multiple cloud service providers. Next, click Categorization to choose the discovered tags that categorize your cost data. Choose tags (categories) that you want to include in your model. In the following example, the Unit tag is selected.
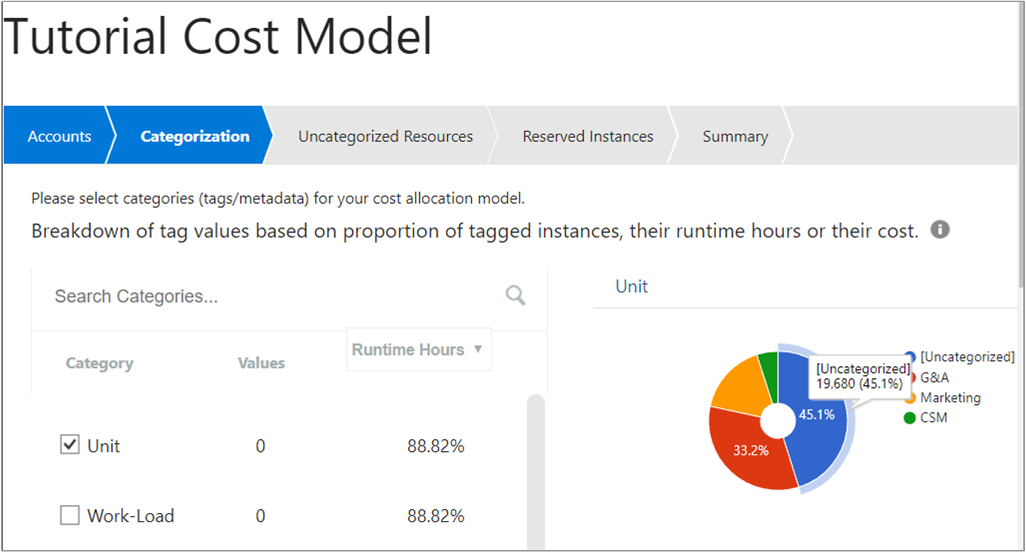
The example shows that $19,680 is uncategorized (without tags).
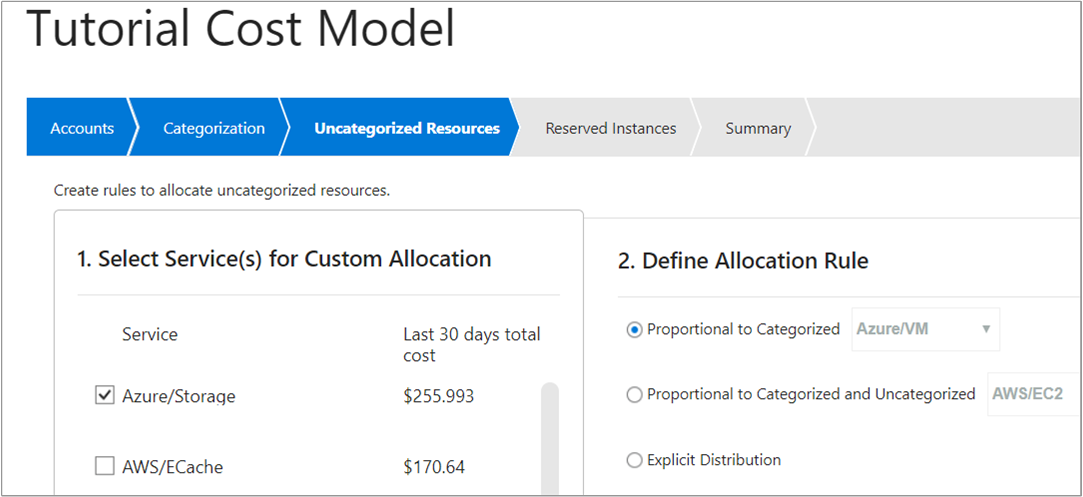
Next, select Uncategorized Resources and select services that have unallocated costs. Then, define rules to allocate costs.
For example, you might want to take your Azure storage costs and distribute the costs equally to Azure virtual machines (VMs). To do so, select the Azure/Storage service, select Proportional to Categorized, and then select Azure/VM. Then, select Create.
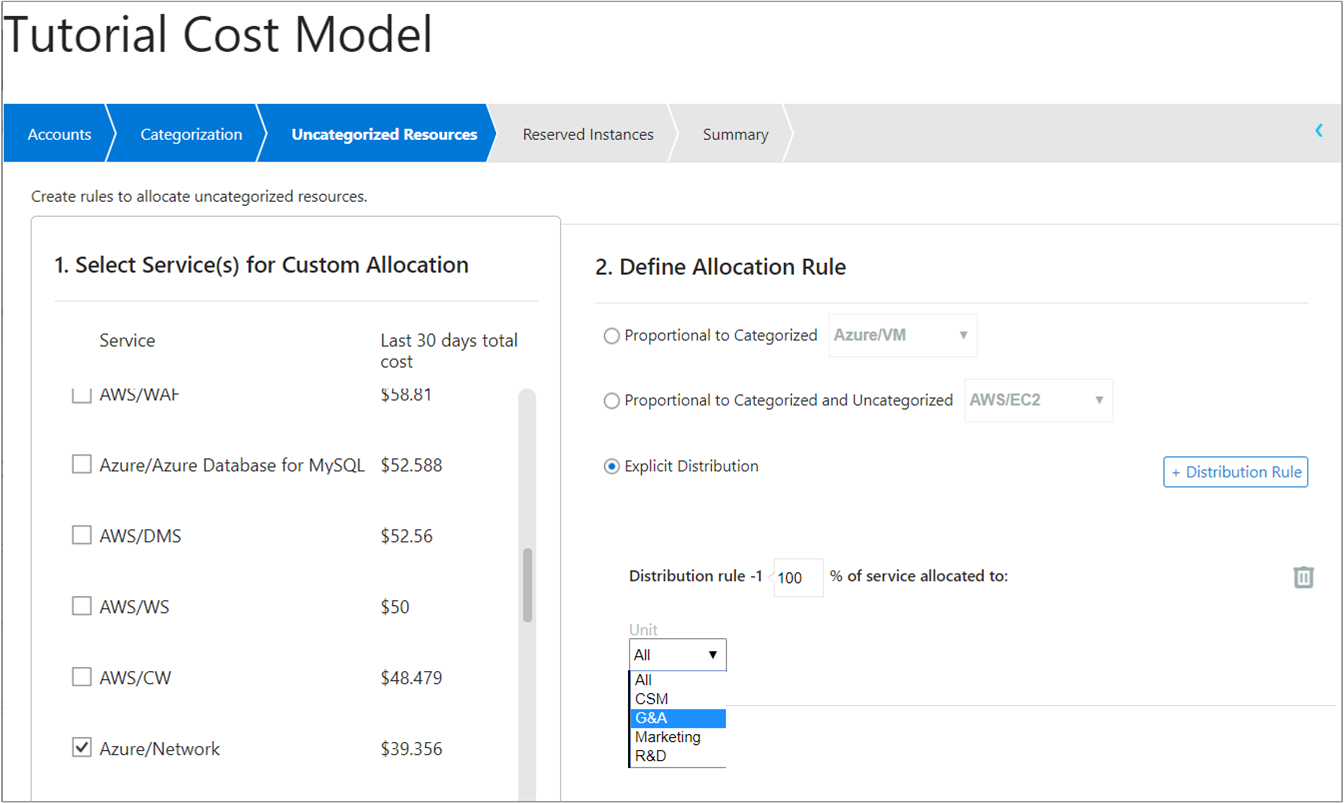
In a different example, you might want to allocate all your Azure network costs to a specific business unit in your organization. To do so, select the Azure/Network service and then under Define Allocation Rule, select Explicit Distribution. Then, set the distribution percentage to 100 and select the business unit—G&A in the following image:
For all remaining uncategorized resources, create additional allocation rules.
If you have any unallocated Amazon Web Services (AWS) reserved instances, you can assign them to tagged categories with Reserved Instances.
To view information about the choices that you made to allocate costs, select Summary. To save your information and to continue working on additional rules later, select Save As Draft. Or, to save your information and have Cloudyn start processing your cost allocation model, select Save and Activate.
The list of cost models shows your new cost model with Processing status. It can take some time before the Cloudyn database is updated with your cost model. When processing is done, the status is updated to Completed. You can then view data from your cost model in the Cost Analysis report under Extended Filters > Cost Model.
Category Manager
Category Manager is a data-cleansing tool that helps you merge the values of multiple categories (tags) to create new ones. It's a simple rule-based tool where you select a category and create rules to merge existing values. For example, you might have existing categories for R&D and dev where both represent the development group.
In the Cloudyn portal, click the gear symbol in the upper right and select Category Manager. To create a new category, select the plus symbol (+). Enter a name for the category and then under Keys, enter the category keys that you want to include in the new category.
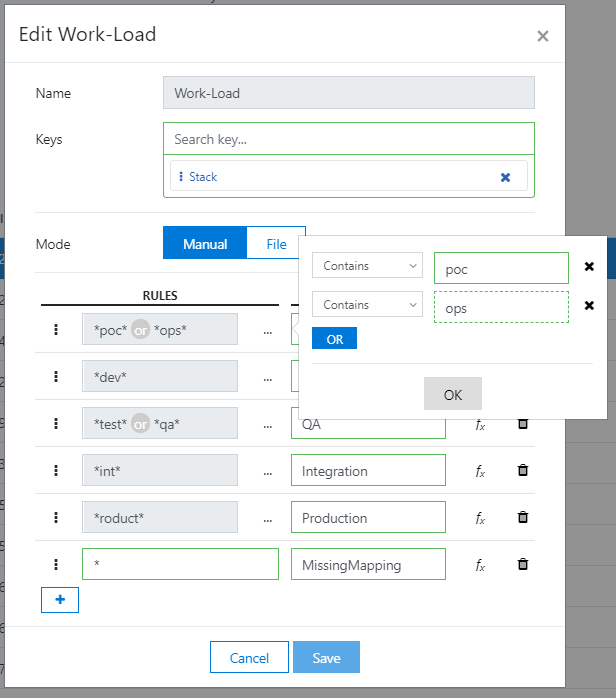
When you define a rule, you can add multiple values with an OR condition. You can also do some basic string operations. For either case, click the ellipsis symbol (…) to the right of Rule.
To define a new rule, in the Rules area, create a new rule. For example, enter dev under Rules and then enter R&D under Actions. When you're done, save your new category.
The following image shows an example of rules created for a new category named Work-Load:
Tag sources and reports
Tag data that you see in Cloudyn reports originates in three places:
- Cloud provider resources APIs
- Cloud provider billing APIs
- Manually-created tags from the following sources:
- Cloudyn entity tags - user-defined meta data applied to Cloudyn entities
- Category Manager - a data cleansing tool that creates new tags based on rules that are applied to existing tags
To view cloud provider tags in Cloudyn cost reports you must create a custom cost allocation model using Cost Allocation 360. To do so, go to Costs > Cost Management > Cost Allocation 360, select the desired tags, and then define rules to handle untagged costs. Then, create a new cost model. Afterward, you can view reports in Cost Allocation Analysis to view, filter, and sort on your Azure resource tags.
Azure resource tags only appear in Costs > Cost Allocation Analysis reports.
Cloud provider billing tags appear in all cost reports.
Cloudyn entity tags and tags that you manually create appear in all cost reports.
Create showback and chargeback reports
The method that organizations use to perform showback and chargeback varies greatly. However, you can use any of the dashboards and reports in the Cloudyn portal as the basis for either purpose. You can provide user access to anyone in your organization so that they can view dashboards and reports on demand. All Cost Analysis reports support showback because they show users the resources that they consumed. And, they allow users to drill into cost or usage data that's specific to their group within your organization.
To view the results of cost allocation, open the Cost Analysis report and select the cost model that you created. Then, add a grouping by one or more of the tags selected in the cost model.
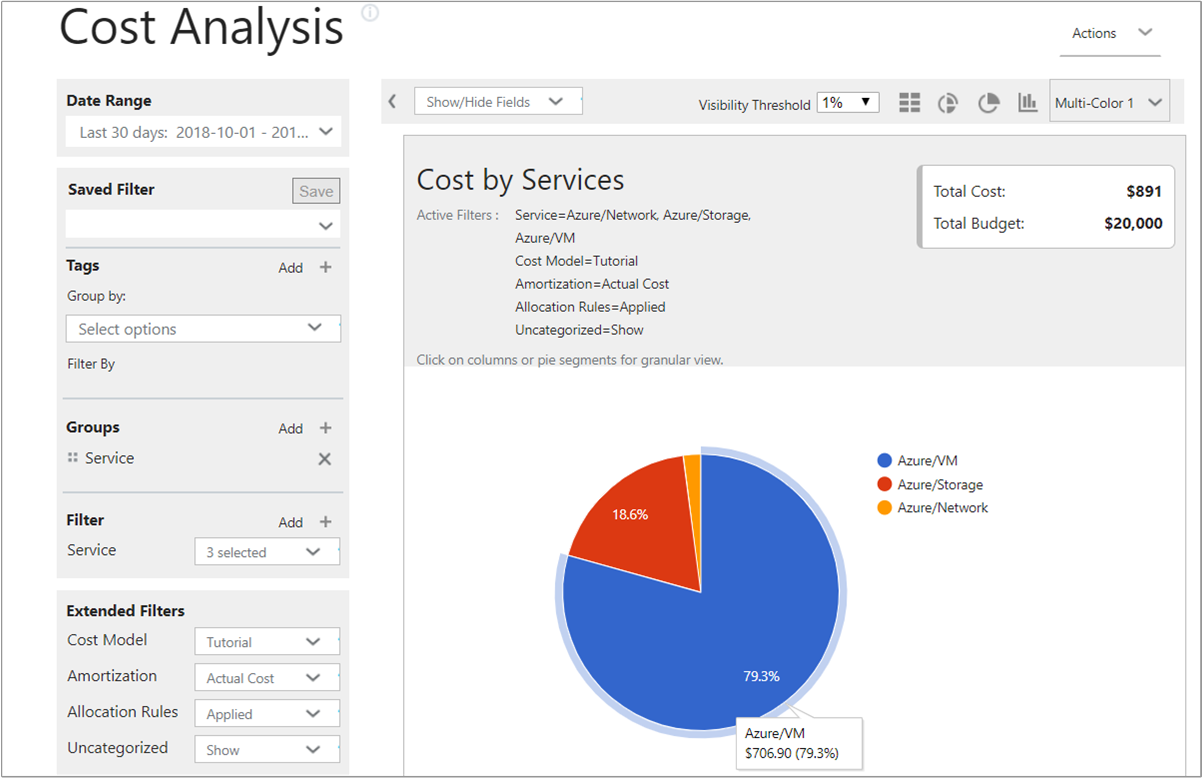
You can easily create and save reports that focus on specific services consumed by specific groups. For example, you might have a department that uses Azure VMs extensively. You can create a report that's filtered on Azure VMs to show consumption and costs.
If you need to provide snapshot data to other teams, you can export any report in PDF or CSV format.
Next steps
In this tutorial, you learned how to:
- Use custom tags to allocate costs.
- Create showback and chargeback reports.
Advance to the next tutorial to learn about controlling access to data.