Tutorial: Respond to Azure Service Bus events received via Azure Event Grid by using Azure Functions
In this tutorial, you learn how to respond to Azure Service Bus events that are received via Azure Event Grid by using Azure Functions and Azure Logic Apps.
In this tutorial, you learn how to:
- Create a Service Bus namespace
- Prepare a sample application to send messages
- Send messages to the Service Bus topic
- Receive messages by using Logic Apps
- Set up a test function on Azure
- Connect the function and namespace via Event Grid
- Receive messages by using Azure Functions
Prerequisites
If you don't have an Azure subscription, create a free account before you begin.
Create a Service Bus namespace
Follow instructions in this tutorial: Quickstart: Use the Azure portal to create a Service Bus topic and subscriptions to the topic to do the following tasks:
- Create a premium Service Bus namespace.
- Get the connection string.
- Create a Service Bus topic.
- Create a subscription to the topic. You need only one subscription in this tutorial, so no need to create subscriptions S2 and S3.
Send messages to the Service Bus topic
In this step, you use a sample application to send messages to the Service Bus topic you created in the previous step.
Clone the GitHub azure-service-bus repository or download the zip file and extract files from it.
In Visual Studio, go to the \samples\DotNet\Azure.Messaging.ServiceBus\ServiceBusEventGridIntegrationV2 folder, and then open the SBEventGridIntegration.sln file.
In the Solution Explorer window, expand the MessageSender project, and select Program.cs.
Replace
<SERVICE BUS NAMESPACE - CONNECTION STRING>with the connection string to your Service Bus namespace and<TOPIC NAME>with the name of the topic.const string ServiceBusConnectionString = "<SERVICE BUS NAMESPACE - CONNECTION STRING>"; const string TopicName = "<TOPIC NAME>";Build and run the program to send 5 test messages (
const int numberOfMessages = 5;) to the Service Bus topic.
Additional prerequisites
Install Visual Studio 2022 and include the Azure development workload. This workload includes Azure Function Tools that you need to create, build, and deploy Azure Functions projects in Visual Studio.
Deploy the function app
Note
To learn more about creating and deploying an Azure Functions app, see Develop Azure Functions using Visual Studio
Open ReceiveMessagesOnEvent.cs file from the FunctionApp1 project of the SBEventGridIntegration.sln solution.
Replace
<SERVICE BUS NAMESPACE - CONNECTION STRING>with the connection string to your Service Bus namespace. It should be the same as the one you used in the Program.cs file of the MessageSender project in the same solution.Right-click FunctionApp1, and select Publish.
On the Publish page, select Start. These steps might be different from what you see, but the process of publishing should be similar.
In the Publish wizard, on the Target page, select Azure for Target.
On the Specific target page, select Azure Function App (Windows).
On the Functions instance page, select Create a new Azure function.
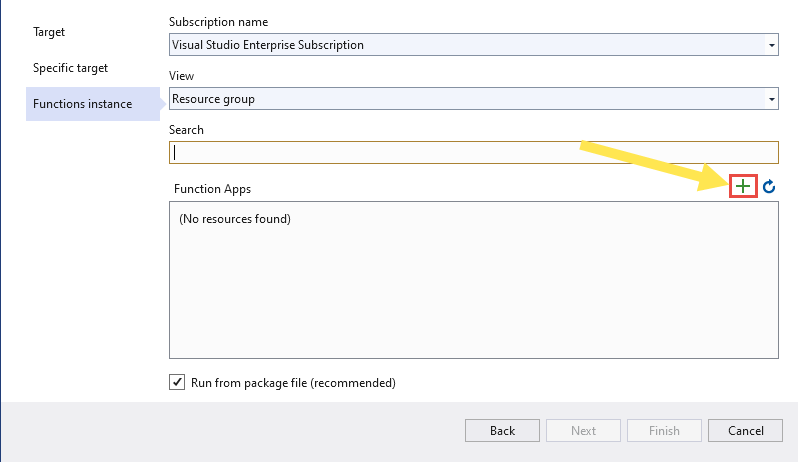
On the Function App (Windows) page, follow these steps:
- Enter a name for the function app.
- Select an Azure subscription.
- Select an existing resource group or create a new resource group. For this tutorial, select the resource group that has the Service Bus namespace.
- Select a plan type for App Service.
- Select a location. Select the same location as the Service Bus namespace.
- Select an existing Azure Storage or select New to create a new Storage account to be used by the Functions app.
- Select Create to create the Functions app.
Back on the Functions instance page of the Publish wizard, select Finish.
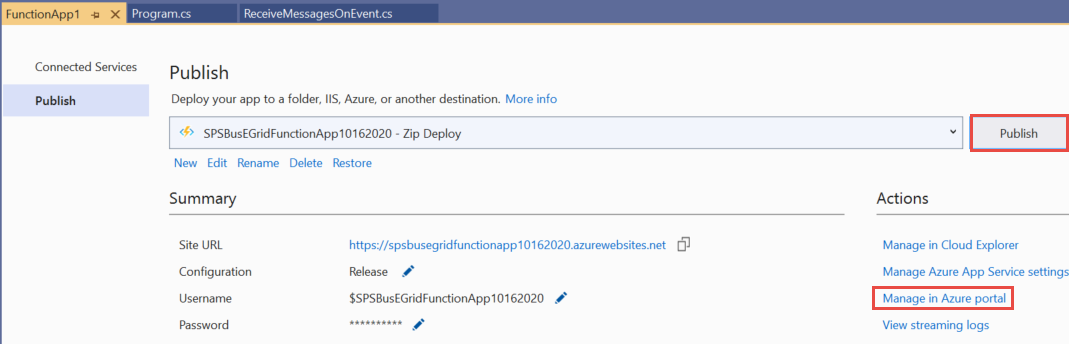
On the Publish page in Visual Studio, select Publish to publish the Functions app to Azure.
In the Output window, see the messages from build and publish, and confirm that they both succeeded.
Now, on the Publish page, in the Hosting section, select ... (ellipsis), and select Manage in Azure portal.
In the Azure portal, on the Function App page, select Functions in the left menu, and confirm that you see two functions:

Select EventGridTriggerFunction from the list. We recommend that you use the Event Grid trigger with Azure Functions as it has a few benefits over using the HTTP trigger. For details, see Azure function as an event handler for Event Grid events.
On the Function page for the EventGridTriggerFunction, select Monitor on the left menu.
Select Configure to configure Application Insights to capture invocation log. You use this page to monitor function executions upon receiving Service Bus events from Event Grid.
On the Application Insights page, enter a name for the resource, select a location for the resource, and then select OK.
Select the function EventGridTriggerFunction at the top (breadcrumb menu) to navigate back to the Function page.
Confirm that you on the Monitor page.
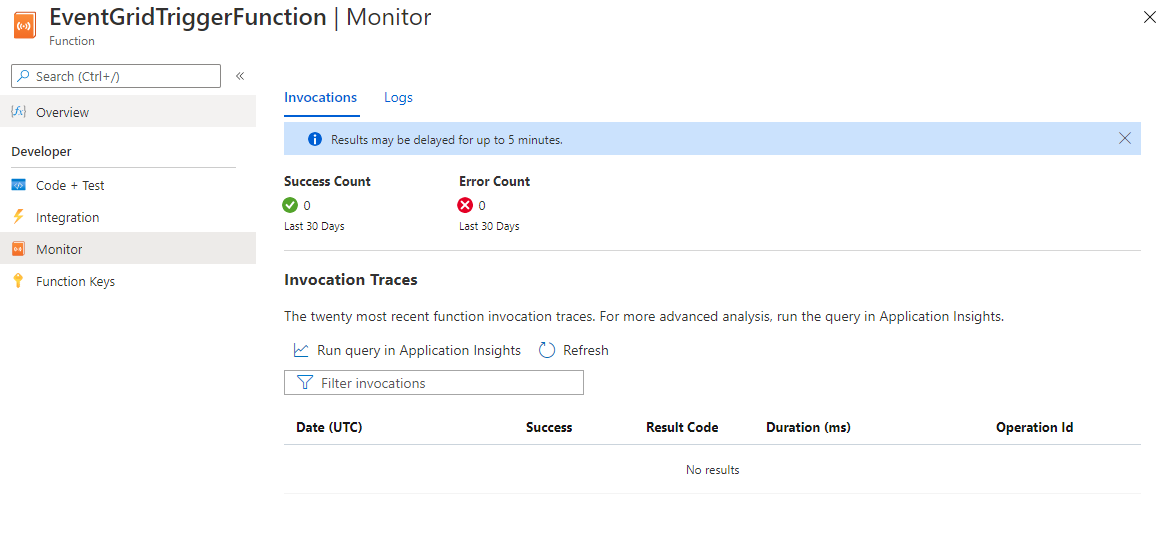
Keep this page open in a tab your web browser. You'll refresh this page to see invocations for this function later.
Connect the function and the Service Bus namespace via Event Grid
In this section, you tie together the function and the Service Bus namespace by using the Azure portal.
To create an Azure Event Grid subscription, follow these steps:
In the Azure portal, go to your Service Bus namespace and then, in the left pane, select Events. Your namespace window opens, with two Event Grid subscriptions displayed in the right pane.
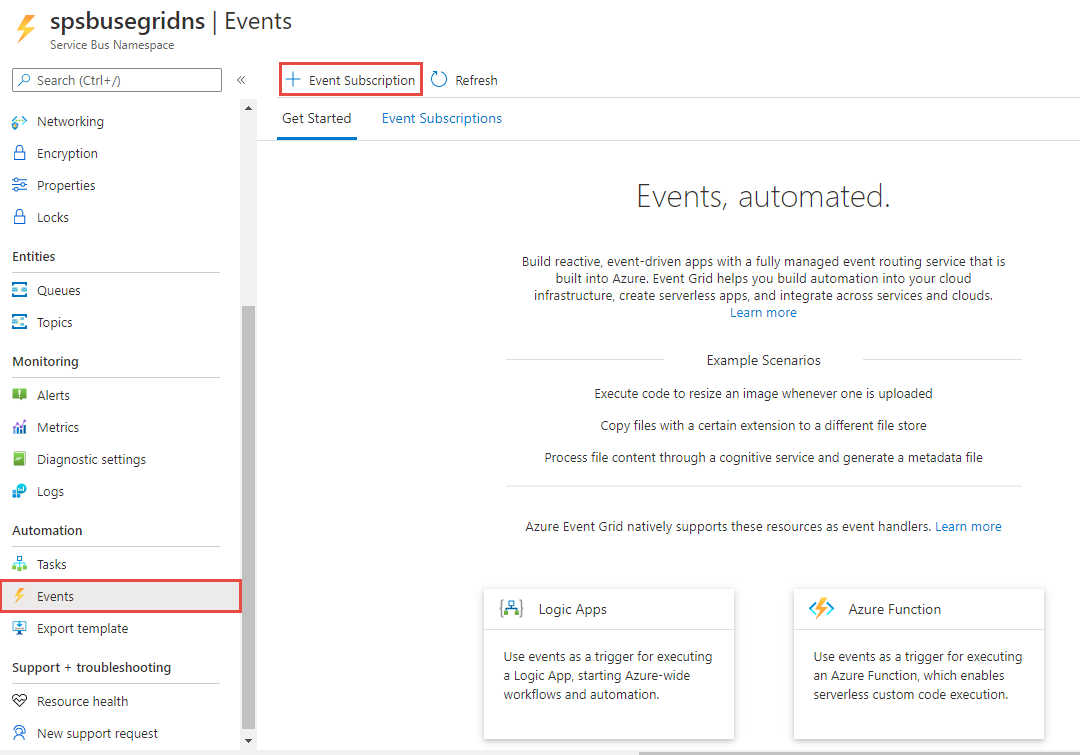
Select + Event Subscription on the toolbar.
On the Create Event Subscription page, do the following steps:
Enter a name for the subscription.
Enter a name for the system topic. System topics are topics created for Azure resources such as Azure Storage account and Azure Service Bus. To learn more about system topics, see System topics overview.
Select Azure Function for Endpoint Type, and choose Select an endpoint.
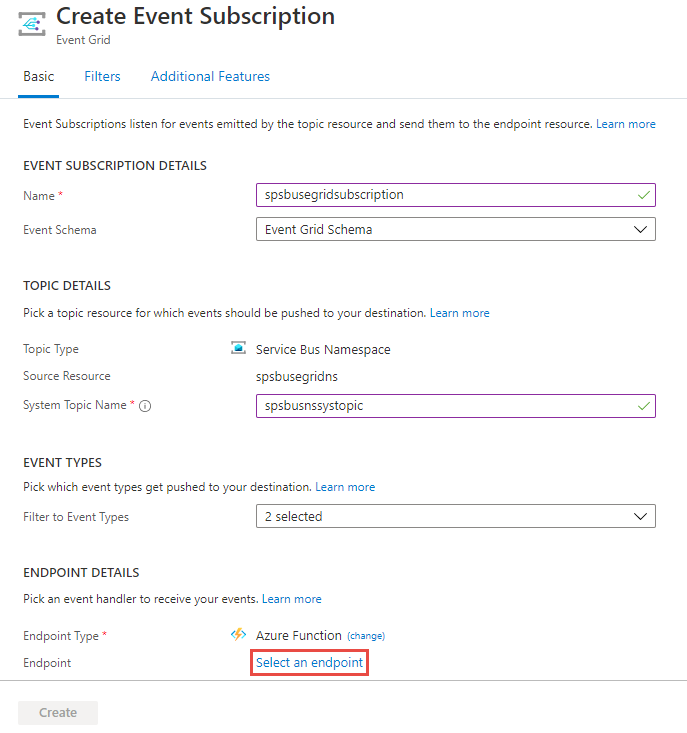
On the Select Azure Function page, select the subscription, resource group, function app, slot, and the function, and then select Confirm selection.

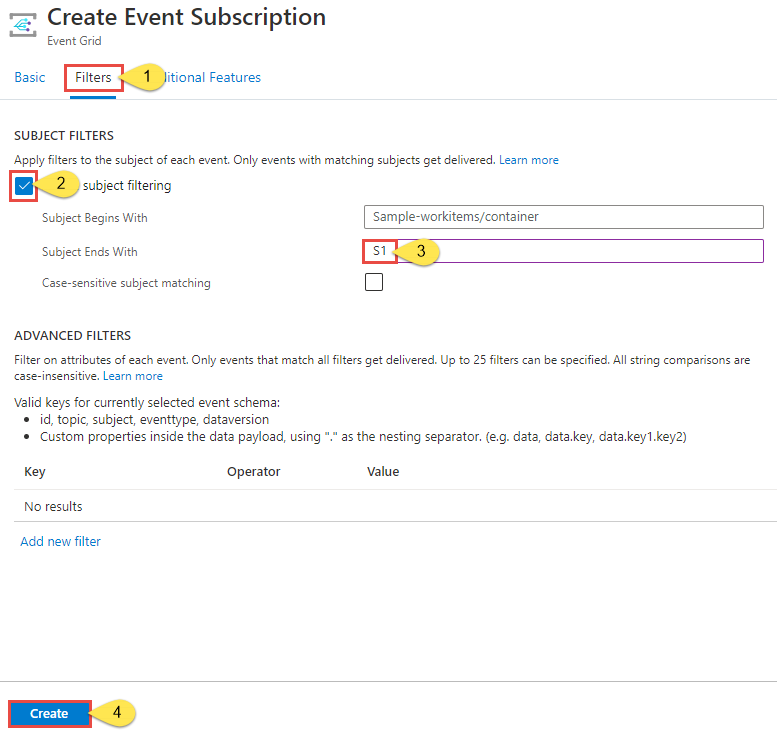
On the Create Event Subscription page, switch to the Filters tab, and do the following tasks:
Select Enable subject filtering
Enter the name of the subscription to the Service Bus topic (S1) you created earlier.
Select the Create button.
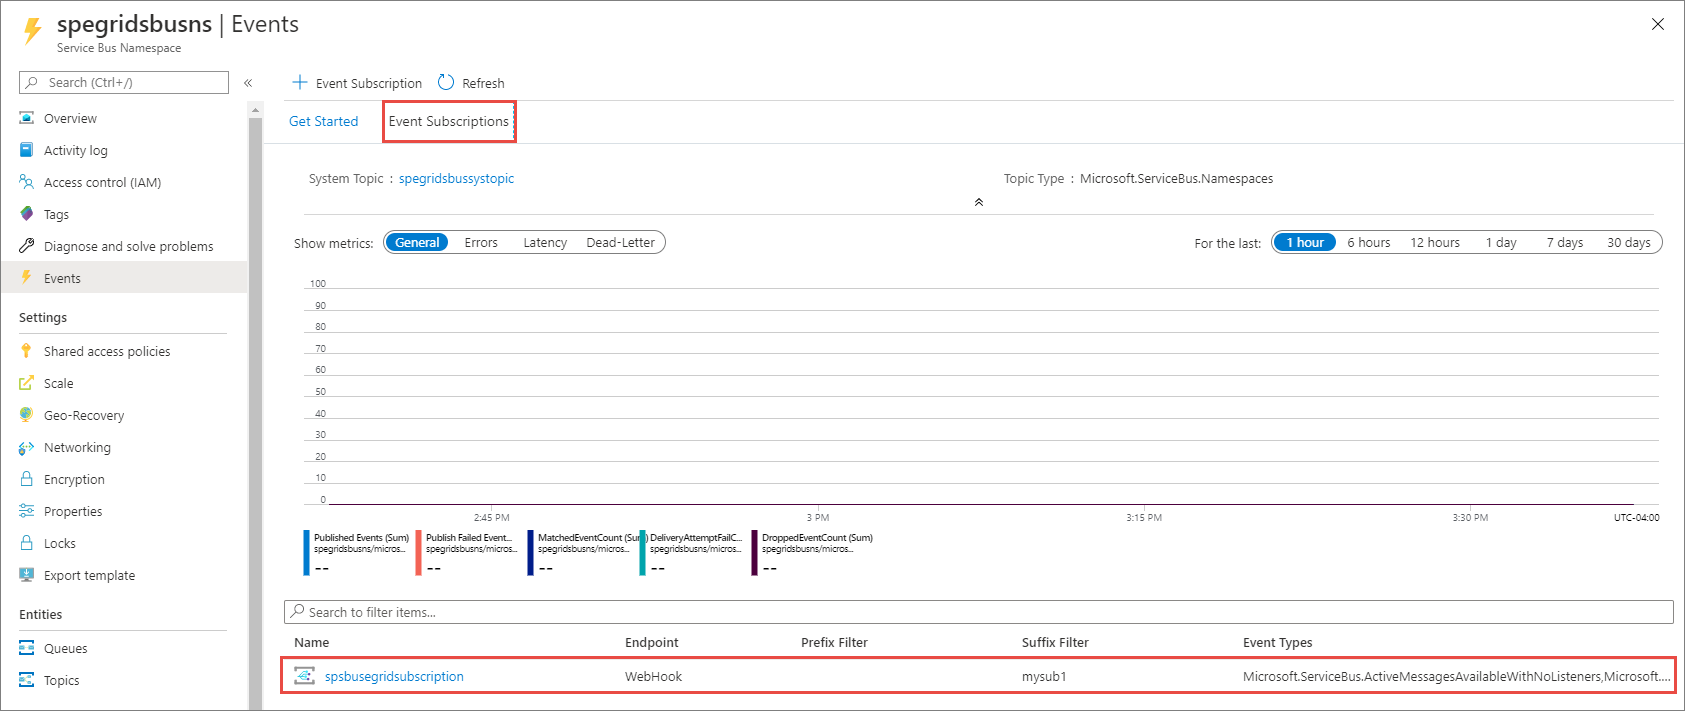
Switch to the Event Subscriptions tab of the Events page and confirm that you see the event subscription in the list.
Monitor the Functions app
The messages you sent to the Service Bus topic earlier are forwarded to the subscription (S1). Event Grid forwards the messages at the subscription to the Azure function. In this step of the tutorial, you confirm the function was invoked and view the logged informational messages.
On the page for your Azure function app, switch to the Monitor tab if it isn't already active. You should see an entry for each message posted to the Service Bus topic. If you don't see them, refresh the page after waiting for a few minutes.
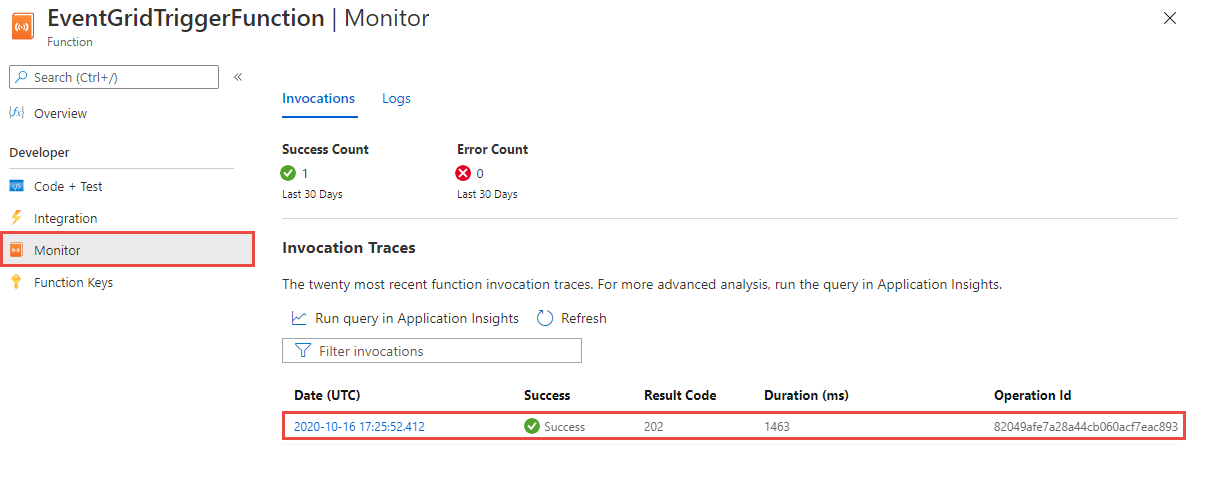
Select the invocation from the list to see the details.
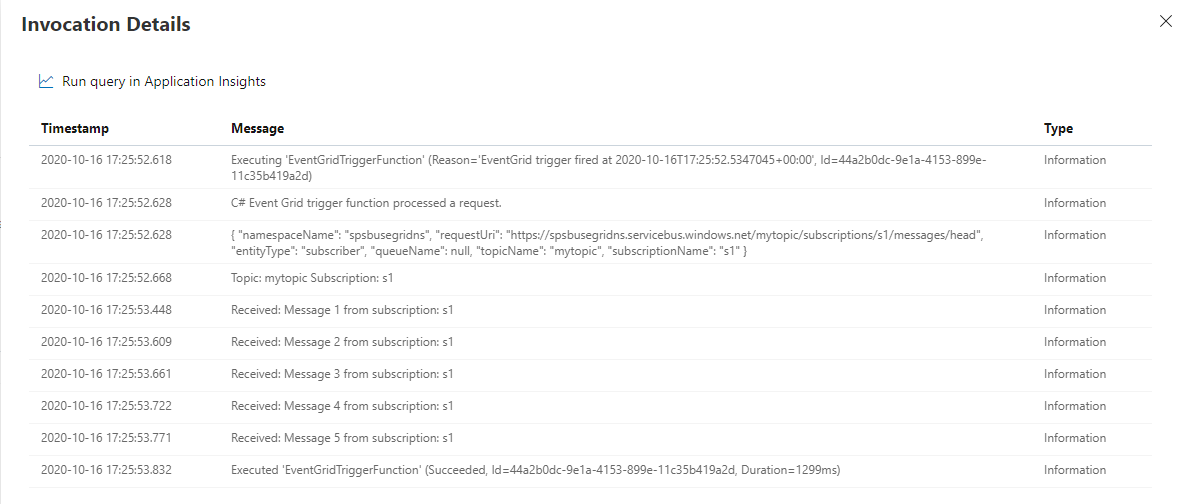
You can also use the Logs tab of the Monitor page to see the logging information as the messages are sent. There could some delay, so give it a few minutes to see the logged messages.


Troubleshoot
If you don't see any function invocations after waiting and refreshing for sometime, follow these steps:
Confirm that the messages reached the Service Bus topic. See the incoming messages counter on the Service Bus Topic page. In this case, I ran the MessageSender application twice, so I see 10 messages (5 messages for each run).

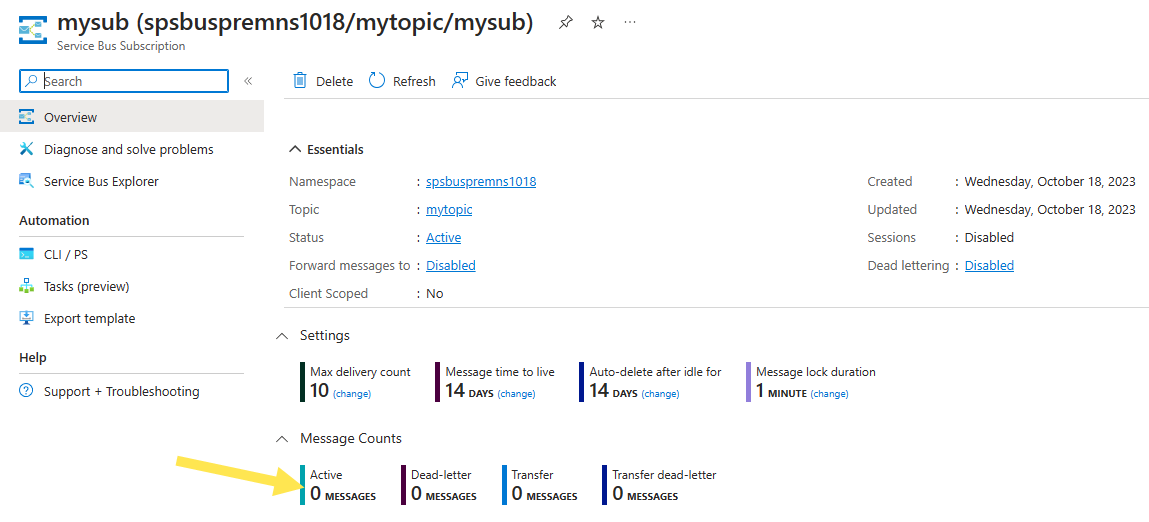
Confirm that there are no active messages at the Service Bus subscription. If you don't see any events on this page, verify that the Service Bus Subscription page doesn't show any Active message count. If the number for this counter is greater than zero, the messages at the subscription aren't forwarded to the handler function (event subscription handler) for some reason. Verify that you've set up the event subscription properly.
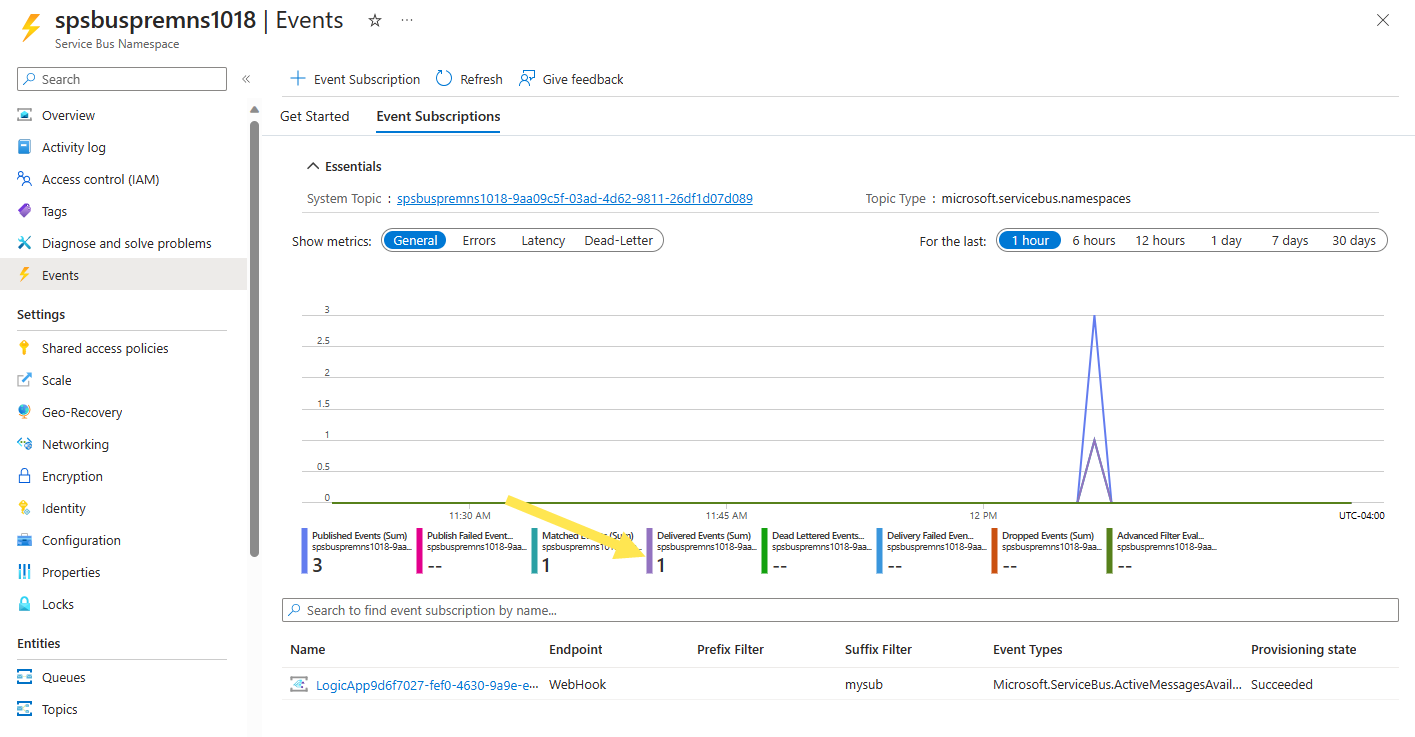
You also see delivered events on the Events page of the Service Bus namespace.
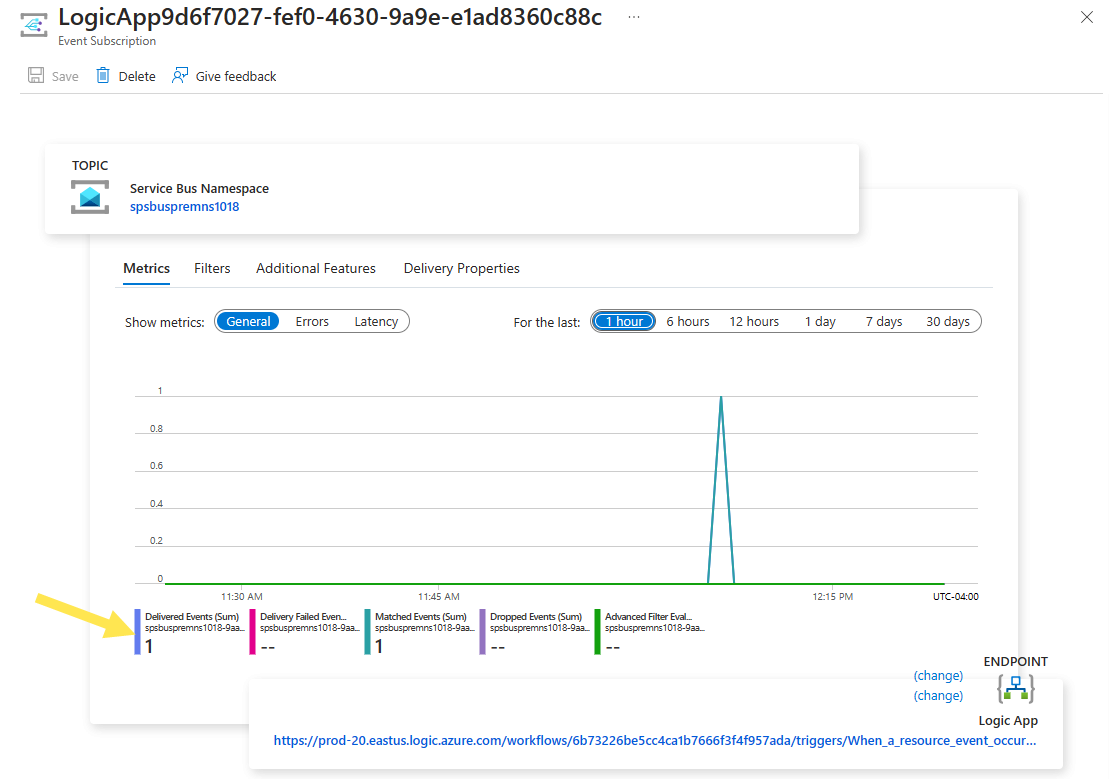
You can also see that the events are delivered on the Event Subscription page. You can get to this page by selecting the event subscription on the Events page.
Next steps
- Learn more about Azure Event Grid.
- Learn more about Azure Functions.
- Learn more about the Logic Apps feature of Azure App Service.
- Learn more about Azure Service Bus.
Athugasemdir
Væntanlegt: Á árinu 2024 munum við hætta með GitHub-mál sem ábendingaleið fyrir efni og skipta því út fyrir nýtt ábendingakerfi. Frekari upplýsingar er að finna hér: https://aka.ms/ContentUserFeedback.
Senda inn og skoða endurgjöf fyrir