Come aggiornare il modello LUIS con le API REST
Importante
LUIS verrà ritirato il 1 ottobre 2025 e a partire dal 1 aprile 2023 non sarà più possibile creare nuove risorse LUIS. Si consiglia di eseguire la migrazione delle applicazioni LUIS a comprensione del linguaggio di conversazione per sfruttare appieno un supporto costante per i prodotti e le funzionalità multilingue.
In questo articolo si aggiungono espressioni di esempio a un'app Pizza di cui si eseguirà il training. Le espressioni di esempio sono costituite da testo utente discorsivo di cui è stato eseguito il mapping a una finalità. Fornendo espressioni di esempio per le finalità, si insegna all'app LUIS quale tipo di testo specificato dall'utente appartiene a un determinato tipo di finalità.
Documentazione di riferimento | Esempio
Prerequisiti
File JSON delle espressioni di esempio
Le espressioni di esempio seguono un formato specifico.
Il campo text contiene il testo dell'espressione di esempio. Il campo intentName deve corrispondere al nome di una finalità esistente nell'app di LUIS. Il campo entityLabels è obbligatorio. Se non si desidera assegnare etichette alle entità, fornire una matrice vuota.
Se la matrice entityLabels non è vuota, è necessario che startCharIndex e endCharIndex contrassegnino l'entità a cui si fa riferimento nel campo entityName. L’indice è in base zero. Se si inizia o termina l'etichetta a uno spazio nel testo, la chiamata API per aggiungere le espressioni non riesce.
[
  {
    "text": "order a pizza",
    "intentName": "ModifyOrder",
    "entityLabels": [
      {
        "entityName": "Order",
        "startCharIndex": 6,
        "endCharIndex": 12
      }
    ]
  },
  {
    "text": "order a large pepperoni pizza",
    "intentName": "ModifyOrder",
    "entityLabels": [
      {
        "entityName": "Order",
        "startCharIndex": 6,
        "endCharIndex": 28
      },
      {
        "entityName": "FullPizzaWithModifiers",
        "startCharIndex": 6,
        "endCharIndex": 28
      },
      {
        "entityName": "PizzaType",
        "startCharIndex": 14,
        "endCharIndex": 28
      },
      {
        "entityName": "Size",
        "startCharIndex": 8,
        "endCharIndex": 12
      }
    ]
  },
  {
    "text": "I want two large pepperoni pizzas on thin crust",
    "intentName": "ModifyOrder",
    "entityLabels": [
      {
        "entityName": "Order",
        "startCharIndex": 7,
        "endCharIndex": 46
      },
      {
        "entityName": "FullPizzaWithModifiers",
        "startCharIndex": 7,
        "endCharIndex": 46
      },
      {
        "entityName": "PizzaType",
        "startCharIndex": 17,
        "endCharIndex": 32
      },
      {
        "entityName": "Size",
        "startCharIndex": 11,
        "endCharIndex": 15
      },
      {
        "entityName": "Quantity",
        "startCharIndex": 7,
        "endCharIndex": 9
      },
      {
        "entityName": "Crust",
        "startCharIndex": 37,
        "endCharIndex": 46
      }
    ]
  }
]
Creare l’app Pizza
Creare l'app Pizza.
- Selezionare pizza-app-for-luis-v6.json per aprire la pagina di GitHub per il file
pizza-app-for-luis.json. - Toccare e tenere premuto a lungo o fare clic con il pulsante destro del mouse sul pulsante Raw e selezionare Salva collegamento come per salvare
pizza-app-for-luis.jsonnel computer. - Accedere al portale LUIS.
- Selezionare App personali.
- Nella pagina App personali, selezionare + Nuova app di conversazione.
- Selezionare Importa come JSON.
- Nella finestra di dialogo Importa nuova app selezionare il pulsante Scegli file.
- Selezionare il file
pizza-app-for-luis.jsonscaricato e quindi selezionare Apri. - Nel campo Nome della finestra di dialogo Importa nuova app immettere un nome per l'app Pizza, quindi selezionare il pulsante Fatto.
L'app verrà importata.
Se viene visualizzata una finestra di dialogo Come creare un'app di LUIS efficace, chiudere la finestra di dialogo.
Eseguire il training dell’app Pizza e pubblicarla
Verrà visualizzata la pagina Finalità con un elenco delle finalità dell'app pizza.
In alto a destra nel sito Web LUIS selezionare il pulsante Train (Esegui il training).

Il training è completo quando il pulsante Esegui training risulta disabilitato.
Per ottenere una previsione LUIS in un chatbot o in un'altra applicazione client, è necessario pubblicare l'app nell'endpoint di previsione.
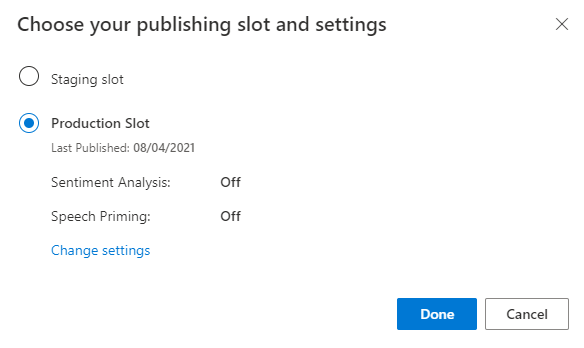
Selezionare Pubblica nel riquadro di spostamento in alto a destra.

Selezionare Slot di produzione e quindi Fatto.
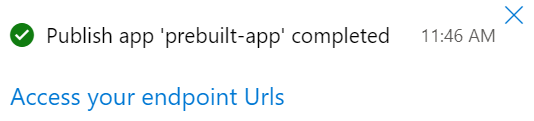
Selezionare il collegamento Accedi agli URL degli endpoint nella notifica per passare alla pagina Risorse di Azure. Sarà possibile visualizzare gli URL solo se all'app è associata una risorsa di previsione. Per passare alla pagina Risorse di Azure, è anche possibile fare clic su Gestisci.
Aggiungere una risorsa di creazione all'app Pizza
- Selezionare GESTISCI.
- Selezionare Azure Resources (Risorse di Azure).
- Selezionare Risorsa Creazione.
- Selezionare Change authoring resource (Modifica risorsa Creazione).
Se è disponibile una risorsa Creazione, immettere un valore nei campi Nome del tenant, Nome sottoscrizione e LUIS resource name (Nome risorsa LUIS) della risorsa Creazione.
Se non è disponibile alcuna risorsa Creazione:
- Selezionare Crea nuova risorsa.
- Immettere un valore in Nome del tenant, Nome della risorsa, Nome sottoscrizione e Nome gruppo di risorse di Azure.
L'app Pizza è ora pronta per essere usata.
Prendere nota dei valori di accesso per l'app Pizza
Per usare la nuova app Pizza, sono necessari l'ID app, la chiave di creazione e l'endpoint di creazione dell'app Pizza. Per ottenere stime, l'endpoint di stima e la chiave di stima dovranno essere separati.
Per trovare questi valori:
- Nella pagina Finalità, selezionare GESTISCi.
- Nella pagina Impostazioni applicazione, registrare l’ID app.
- Selezionare Azure Resources (Risorse di Azure).
- Selezionare Risorsa Creazione.
- Nelle schede Risorsa di creazione e Risorse di stima, annotare la Chiave primaria. Questo valore corrisponde alla chiave di creazione.
- Registrare l’URL dell'endpoint. Questo valore corrisponde all'endpoint di creazione.
Cambiare il modello a livello di codice
Creare una nuova applicazione console destinata al linguaggio C#, con un nome di progetto e di cartella
csharp-model-with-rest.dotnet new console -lang C# -n csharp-model-with-restPassare alla directory
csharp-model-with-restcreata e installare le dipendenze necessarie con i comandi seguenti:cd csharp-model-with-rest dotnet add package System.Net.Http dotnet add package JsonFormatterPlusSovrascrivere Program.cs con il codice seguente:
//
// This quickstart shows how to add utterances to a LUIS model using the REST APIs.
//

using System;
using System.IO;
using System.Net.Http;
using System.Text;
using System.Threading.Tasks;
using System.Collections.Generic;
using System.Linq;

// 3rd party NuGet packages
using JsonFormatterPlus;

namespace AddUtterances
{
    class Program
    {
        //////////
        // Values to modify.

        // YOUR-APP-ID: The App ID GUID found on the www.luis.ai Application Settings page.
        static string appID = "PASTE_YOUR_LUIS_APP_ID_HERE";

        // YOUR-AUTHORING-KEY: Your LUIS authoring key, 32 character value.
        static string authoringKey = "PASTE_YOUR_LUIS_AUTHORING_SUBSCRIPTION_KEY_HERE";

        // YOUR-AUTHORING-ENDPOINT: Replace this endpoint with your authoring key endpoint.
        // For example, "https://your-resource-name.cognitiveservices.azure.com/"
        static string authoringEndpoint = "PASTE_YOUR_LUIS_AUTHORING_ENDPOINT_HERE";

        // NOTE: Replace this your version number.
        static string appVersion = "0.1";
        //////////

        static string host = String.Format("{0}luis/authoring/v3.0-preview/apps/{1}/versions/{2}/", authoringEndpoint, appID, appVersion);

        // GET request with authentication
        async static Task<HttpResponseMessage> SendGet(string uri)
        {
            using (var client = new HttpClient())
            using (var request = new HttpRequestMessage())
            {
                request.Method = HttpMethod.Get;
                request.RequestUri = new Uri(uri);
                request.Headers.Add("Ocp-Apim-Subscription-Key", authoringKey);
                return await client.SendAsync(request);
            }
        }

        // POST request with authentication
        async static Task<HttpResponseMessage> SendPost(string uri, string requestBody)
        {
            using (var client = new HttpClient())
            using (var request = new HttpRequestMessage())
            {
                request.Method = HttpMethod.Post;
                request.RequestUri = new Uri(uri);

                if (!String.IsNullOrEmpty(requestBody))
                {
                    request.Content = new StringContent(requestBody, Encoding.UTF8, "text/json");
                }

                request.Headers.Add("Ocp-Apim-Subscription-Key", authoringKey);
                return await client.SendAsync(request);
            }
        }

        // Add utterances as string with POST request
        async static Task AddUtterances(string utterances)
        {
            string uri = host + "examples";

            var response = await SendPost(uri, utterances);
            var result = await response.Content.ReadAsStringAsync();
            Console.WriteLine("Added utterances.");
            Console.WriteLine(JsonFormatter.Format(result));
        }

        // Train app after adding utterances
        async static Task Train()
        {
            string uri = host  + "train";

            var response = await SendPost(uri, null);
            var result = await response.Content.ReadAsStringAsync();
            Console.WriteLine("Sent training request.");
            Console.WriteLine(JsonFormatter.Format(result));
        }

        // Check status of training
        async static Task Status()
        {
            var response = await SendGet(host  + "train");
            var result = await response.Content.ReadAsStringAsync();
            Console.WriteLine("Requested training status.");
            Console.WriteLine(JsonFormatter.Format(result));
        }

        // Add utterances, train, check status
        static void Main(string[] args)
        {
            string utterances = @"
            [
                {
                    'text': 'order a pizza',
                    'intentName': 'ModifyOrder',
                    'entityLabels': [
                        {
                            'entityName': 'Order',
                            'startCharIndex': 6,
                            'endCharIndex': 12
                        }
                    ]
                },
                {
                    'text': 'order a large pepperoni pizza',
                    'intentName': 'ModifyOrder',
                    'entityLabels': [
                        {
                            'entityName': 'Order',
                            'startCharIndex': 6,
                            'endCharIndex': 28
                        },
                        {
                            'entityName': 'FullPizzaWithModifiers',
                            'startCharIndex': 6,
                            'endCharIndex': 28
                        },
                        {
                            'entityName': 'PizzaType',
                            'startCharIndex': 14,
                            'endCharIndex': 28
                        },
                        {
                            'entityName': 'Size',
                            'startCharIndex': 8,
                            'endCharIndex': 12
                        }
                    ]
                },
                {
                    'text': 'I want two large pepperoni pizzas on thin crust',
                    'intentName': 'ModifyOrder',
                    'entityLabels': [
                        {
                            'entityName': 'Order',
                            'startCharIndex': 7,
                            'endCharIndex': 46
                        },
                        {
                            'entityName': 'FullPizzaWithModifiers',
                            'startCharIndex': 7,
                            'endCharIndex': 46
                        },
                        {
                            'entityName': 'PizzaType',
                            'startCharIndex': 17,
                            'endCharIndex': 32
                        },
                        {
                            'entityName': 'Size',
                            'startCharIndex': 11,
                            'endCharIndex': 15
                        },
                        {
                            'entityName': 'Quantity',
                            'startCharIndex': 7,
                            'endCharIndex': 9
                        },
                        {
                            'entityName': 'Crust',
                            'startCharIndex': 37,
                            'endCharIndex': 46
                        }
                    ]
                }
            ]
            ";

            AddUtterances(utterances).Wait();
            Train().Wait();
            Status().Wait();
        }
    }
}
Sostituire i valori che iniziano con
YOUR-con i propri valori.Informazioni Scopo YOUR-APP-IDL'ID app di LUIS. YOUR-AUTHORING-KEYLa chiave di creazione di 32 caratteri. YOUR-AUTHORING-ENDPOINTL'endpoint dell'URL di creazione. Ad esempio: https://replace-with-your-resource-name.api.cognitive.microsoft.com/. Il nome della risorsa è stato impostato quando è stata creata la risorsa.Le chiavi e le risorse assegnate sono visibili nel portale LUIS nella sezione Gestisci della pagina Risorse di Azure. L'ID app è disponibile nella stessa sezione Gestisci della pagina Impostazioni applicazione.
Importante
Al termine, ricordarsi di rimuovere la chiave dal codice e non renderlo mai pubblico. Per la produzione, usare un metodo sicuro per l'archiviazione e l'accesso alle proprie credenziali, ad esempio Azure Key Vault. Per altre informazioni, vedere l'articolo sulla sicurezza dei servizi di intelligenza artificiale di Azure.
Compilare l'applicazione console.
dotnet buildEseguire l'applicazione console.
dotnet runEsaminare la risposta della creazione:
Added utterances.
[
    {
        "value": {
            "ExampleId": 1137150691,
            "UtteranceText": "order a pizza"
        },
        "hasError": false
    },
    {
        "value": {
            "ExampleId": 1137150692,
            "UtteranceText": "order a large pepperoni pizza"
        },
        "hasError": false
    },
    {
        "value": {
            "ExampleId": 1137150693,
            "UtteranceText": "i want two large pepperoni pizzas on thin crust"
        },
        "hasError": false
    }
]
Sent training request.
{
    "statusId": 9,
    "status": "Queued"
}
Requested training status.
[
    {
        "modelId": "edb46abf-0000-41ab-beb2-a41a0fe1630f",
        "details": {
            "statusId": 9,
            "status": "Queued",
            "exampleCount": 0
        }
    },
    {
        "modelId": "a5030be2-616c-4648-bf2f-380fa9417d37",
        "details": {
            "statusId": 9,
            "status": "Queued",
            "exampleCount": 0
        }
    },
    {
        "modelId": "3f2b1f31-a3c3-4fbd-8182-e9d9dbc120b9",
        "details": {
            "statusId": 9,
            "status": "Queued",
            "exampleCount": 0
        }
    },
    {
        "modelId": "e4b6704b-1636-474c-9459-fe9ccbeba51c",
        "details": {
            "statusId": 9,
            "status": "Queued",
            "exampleCount": 0
        }
    },
    {
        "modelId": "031d3777-2a00-4a7a-9323-9a3280a30000",
        "details": {
            "statusId": 9,
            "status": "Queued",
            "exampleCount": 0
        }
    },
    {
        "modelId": "9250e7a1-06eb-4413-9432-ae132ed32583",
        "details": {
            "statusId": 9,
            "status": "Queued",
            "exampleCount": 0
        }
    }
]
Pulire le risorse
Al termine di questo argomento di avvio rapido, eliminare la cartella del progetto dal file system.
Passaggi successivi
Documentazione di riferimento | Esempio
Prerequisiti
- JDK SE (Java Development Kit, Standard Edition)
- Visual Studio Code o un altro IDE
File JSON delle espressioni di esempio
Le espressioni di esempio seguono un formato specifico.
Il campo text contiene il testo dell'espressione di esempio. Il campo intentName deve corrispondere al nome di una finalità esistente nell'app di LUIS. Il campo entityLabels è obbligatorio. Se non si desidera assegnare etichette alle entità, fornire una matrice vuota.
Se la matrice entityLabels non è vuota, è necessario che startCharIndex e endCharIndex contrassegnino l'entità a cui si fa riferimento nel campo entityName. L’indice è in base zero. Se si inizia o termina l'etichetta a uno spazio nel testo, la chiamata API per aggiungere le espressioni non riesce.
[
  {
    "text": "order a pizza",
    "intentName": "ModifyOrder",
    "entityLabels": [
      {
        "entityName": "Order",
        "startCharIndex": 6,
        "endCharIndex": 12
      }
    ]
  },
  {
    "text": "order a large pepperoni pizza",
    "intentName": "ModifyOrder",
    "entityLabels": [
      {
        "entityName": "Order",
        "startCharIndex": 6,
        "endCharIndex": 28
      },
      {
        "entityName": "FullPizzaWithModifiers",
        "startCharIndex": 6,
        "endCharIndex": 28
      },
      {
        "entityName": "PizzaType",
        "startCharIndex": 14,
        "endCharIndex": 28
      },
      {
        "entityName": "Size",
        "startCharIndex": 8,
        "endCharIndex": 12
      }
    ]
  },
  {
    "text": "I want two large pepperoni pizzas on thin crust",
    "intentName": "ModifyOrder",
    "entityLabels": [
      {
        "entityName": "Order",
        "startCharIndex": 7,
        "endCharIndex": 46
      },
      {
        "entityName": "FullPizzaWithModifiers",
        "startCharIndex": 7,
        "endCharIndex": 46
      },
      {
        "entityName": "PizzaType",
        "startCharIndex": 17,
        "endCharIndex": 32
      },
      {
        "entityName": "Size",
        "startCharIndex": 11,
        "endCharIndex": 15
      },
      {
        "entityName": "Quantity",
        "startCharIndex": 7,
        "endCharIndex": 9
      },
      {
        "entityName": "Crust",
        "startCharIndex": 37,
        "endCharIndex": 46
      }
    ]
  }
]
Cambiare il modello a livello di codice
Creare una nuova cartella che contenga il progetto Java, ad esempio
java-model-with-rest.Creare una sottodirectory denominata
libe copiare le librerie Java seguenti nellalibsottodirectory:Creare un file denominato
Model.java. Aggiungere il codice seguente:// // This quickstart shows how to add utterances to a LUIS model using the REST APIs. // import java.io.*; import java.net.URI; import org.apache.http.HttpEntity; import org.apache.http.HttpResponse; import org.apache.http.client.HttpClient; import org.apache.http.client.methods.HttpGet; import org.apache.http.client.methods.HttpPost; import org.apache.http.client.utils.URIBuilder; import org.apache.http.entity.StringEntity; import org.apache.http.impl.client.HttpClients; import org.apache.http.util.EntityUtils; // To compile, execute this command at the console: // Windows: javac -cp ";lib/*" Model.java // macOs: javac -cp ":lib/*" Model.java // Linux: javac -cp ":lib/*" Model.java // To run, execute this command at the console: // Windows: java -cp ";lib/*" Model // macOs: java -cp ":lib/*" Model // Linux: java -cp ":lib/*" Model public class Model { public static void main(String[] args) { try { ////////// // Values to modify. // YOUR-APP-ID: The App ID GUID found on the www.luis.ai Application Settings page. String AppId = "PASTE_YOUR_LUIS_APP_ID_HERE"; // YOUR-AUTHORING-KEY: Your LUIS authoring key, 32 character value. String Key = "PASTE_YOUR_LUIS_AUTHORING_SUBSCRIPTION_KEY_HERE"; // YOUR-AUTHORING-ENDPOINT: Replace this with your authoring key endpoint. // For example, "https://your-resource-name.cognitiveservices.azure.com/" String Endpoint = "PASTE_YOUR_LUIS_AUTHORING_ENDPOINT_HERE"; // NOTE: Replace this your version number. The Pizza app uses a version number of "0.1". String Version = "0.1"; ////////// // The list of utterances to add, in JSON format. String Utterances = "[{'text': 'order a pizza', 'intentName': 'ModifyOrder', 'entityLabels': [{'entityName': 'Order', 'startCharIndex': 6, 'endCharIndex': 12}]}, {'text': 'order a large pepperoni pizza', 'intentName': 'ModifyOrder', 'entityLabels': [{'entityName': 'Order', 'startCharIndex': 6, 'endCharIndex': 28}, {'entityName': 'FullPizzaWithModifiers', 'startCharIndex': 6, 'endCharIndex': 28}, {'entityName': 'PizzaType', 'startCharIndex': 14, 'endCharIndex': 28}, {'entityName': 'Size', 'startCharIndex': 8, 'endCharIndex': 12}]}, {'text': 'I want two large pepperoni pizzas on thin crust', 'intentName': 'ModifyOrder', 'entityLabels': [{'entityName': 'Order', 'startCharIndex': 7, 'endCharIndex': 46}, {'entityName': 'FullPizzaWithModifiers', 'startCharIndex': 7, 'endCharIndex': 46}, {'entityName': 'PizzaType', 'startCharIndex': 17, 'endCharIndex': 32}, {'entityName': 'Size', 'startCharIndex': 11, 'endCharIndex': 15}, {'entityName': 'Quantity', 'startCharIndex': 7, 'endCharIndex': 9}, {'entityName': 'Crust', 'startCharIndex': 37, 'endCharIndex': 46}]}]"; // Create the URLs for uploading example utterances and for training. URIBuilder addUtteranceURL = new URIBuilder(Endpoint + "luis/authoring/v3.0-preview/apps/" + AppId + "/versions/" + Version + "/examples"); URIBuilder trainURL = new URIBuilder(Endpoint + "luis/authoring/v3.0-preview/apps/" + AppId + "/versions/" + Version + "/train"); URI addUtterancesURI = addUtteranceURL.build(); URI trainURI = trainURL.build(); // Add the utterances. // Create the request. HttpClient addUtterancesClient = HttpClients.createDefault(); HttpPost addUtterancesRequest = new HttpPost(addUtterancesURI); // Add the headers. addUtterancesRequest.setHeader("Ocp-Apim-Subscription-Key",Key); addUtterancesRequest.setHeader("Content-type","application/json"); // Add the body. StringEntity stringEntity = new StringEntity(Utterances); addUtterancesRequest.setEntity(stringEntity); // Execute the request and obtain the response. HttpResponse addUtterancesResponse = addUtterancesClient.execute(addUtterancesRequest); HttpEntity addUtterancesEntity = addUtterancesResponse.getEntity(); // Print the response on the console. if (addUtterancesEntity != null) { System.out.println(EntityUtils.toString(addUtterancesEntity)); } // Train the model. // Create the request. HttpClient trainClient = HttpClients.createDefault(); HttpPost trainRequest = new HttpPost(trainURI); // Add the headers. trainRequest.setHeader("Ocp-Apim-Subscription-Key",Key); trainRequest.setHeader("Content-type","application/json"); // Execute the request and obtain the response. HttpResponse trainResponse = trainClient.execute(trainRequest); HttpEntity trainEntity = trainResponse.getEntity(); // Print the response on the console. if (trainEntity != null) { System.out.println(EntityUtils.toString(trainEntity)); } // Get the training status. // Create the request. HttpClient trainStatusClient = HttpClients.createDefault(); HttpGet trainStatusRequest = new HttpGet(trainURI); // Add the headers. trainStatusRequest.setHeader("Ocp-Apim-Subscription-Key",Key); trainStatusRequest.setHeader("Content-type","application/json"); // Execute the request and obtain the response. HttpResponse trainStatusResponse = trainStatusClient.execute(trainStatusRequest); HttpEntity trainStatusEntity = trainStatusResponse.getEntity(); // Print the response on the console. if (trainStatusEntity != null) { System.out.println(EntityUtils.toString(trainStatusEntity)); } } // Display errors if they occur. catch (Exception e) { System.out.println(e.getMessage()); } } }Sostituire i valori che iniziano con
YOUR-con i propri valori.Informazioni Scopo YOUR-APP-IDL'ID app di LUIS. YOUR-AUTHORING-KEYLa chiave di creazione di 32 caratteri. YOUR-AUTHORING-ENDPOINTL'endpoint dell'URL di creazione. Ad esempio: https://replace-with-your-resource-name.api.cognitive.microsoft.com/. Il nome della risorsa è stato impostato quando è stata creata la risorsa.Le chiavi e le risorse assegnate sono visibili nel portale LUIS nella sezione Gestisci della pagina Risorse di Azure. L'ID app è disponibile nella stessa sezione Gestisci della pagina Impostazioni applicazione.
Importante
Al termine, ricordarsi di rimuovere la chiave dal codice e non renderlo mai pubblico. Per la produzione, usare un metodo sicuro per l'archiviazione e l'accesso alle proprie credenziali, ad esempio Azure Key Vault. Per altre informazioni, vedere l'articolo sulla sicurezza dei servizi di intelligenza artificiale di Azure.
Da un prompt dei comandi nella stessa directory in cui è stato creato il file
Model.java, immettere il comando seguente per compilare il file Java:- Se si usa Windows, usare questo comando:
javac -cp ";lib/*" Model.java - Se si usa macOS o Linux, usare questo comando:
javac -cp ":lib/*" Model.java
- Se si usa Windows, usare questo comando:
Eseguire l'applicazione Java dalla riga di comando immettendo il testo seguente al prompt dei comandi:
- Se si usa Windows, usare questo comando:
java -cp ";lib/*" Model - Se si usa macOS o Linux, usare questo comando:
java -cp ":lib/*" Model
- Se si usa Windows, usare questo comando:
Esaminare la risposta della creazione:
[{"value":{"ExampleId":1137150691,"UtteranceText":"order a pizza"},"hasError":false},{"value":{"ExampleId":1137150692,"UtteranceText":"order a large pepperoni pizza"},"hasError":false},{"value":{"ExampleId":1137150693,"UtteranceText":"i want two large pepperoni pizzas on thin crust"},"hasError":false}]
{"statusId":9,"status":"Queued"}
[{"modelId":"edb46abf-0000-41ab-beb2-a41a0fe1630f","details":{"statusId":9,"status":"Queued","exampleCount":0}},{"modelId":"a5030be2-616c-4648-bf2f-380fa9417d37","details":{"statusId":9,"status":"Queued","exampleCount":0}},{"modelId":"3f2b1f31-a3c3-4fbd-8182-e9d9dbc120b9","details":{"statusId":9,"status":"Queued","exampleCount":0}},{"modelId":"e4b6704b-1636-474c-9459-fe9ccbeba51c","details":{"statusId":9,"status":"Queued","exampleCount":0}},{"modelId":"031d3777-2a00-4a7a-9323-9a3280a30000","details":{"statusId":9,"status":"Queued","exampleCount":0}},{"modelId":"9250e7a1-06eb-4413-9432-ae132ed32583","details":{"statusId":3,"status":"InProgress","exampleCount":0,"progressSubstatus":"CollectingData"}}]
Ecco l'output formattato per una migliore leggibilità:
[
  {
    "value": {
      "ExampleId": 1137150691,
      "UtteranceText": "order a pizza"
    },
    "hasError": false
  },
  {
    "value": {
      "ExampleId": 1137150692,
      "UtteranceText": "order a large pepperoni pizza"
    },
    "hasError": false
  },
  {
    "value": {
      "ExampleId": 1137150693,
      "UtteranceText": "i want two large pepperoni pizzas on thin crust"
    },
    "hasError": false
  }
]
{
  "statusId": 9,
  "status": "Queued"
}
[
  {
    "modelId": "edb46abf-0000-41ab-beb2-a41a0fe1630f",
    "details": {
      "statusId": 9,
      "status": "Queued",
      "exampleCount": 0
    }
  },
  {
    "modelId": "a5030be2-616c-4648-bf2f-380fa9417d37",
    "details": {
      "statusId": 9,
      "status": "Queued",
      "exampleCount": 0
    }
  },
  {
    "modelId": "3f2b1f31-a3c3-4fbd-8182-e9d9dbc120b9",
    "details": {
      "statusId": 9,
      "status": "Queued",
      "exampleCount": 0
    }
  },
  {
    "modelId": "e4b6704b-1636-474c-9459-fe9ccbeba51c",
    "details": {
      "statusId": 9,
      "status": "Queued",
      "exampleCount": 0
    }
  },
  {
    "modelId": "031d3777-2a00-4a7a-9323-9a3280a30000",
    "details": {
      "statusId": 9,
      "status": "Queued",
      "exampleCount": 0
    }
  },
  {
    "modelId": "9250e7a1-06eb-4413-9432-ae132ed32583",
    "details": {
      "statusId": 3,
      "status": "InProgress",
      "exampleCount": 0,
      "progressSubstatus": "CollectingData"
    }
  }
]
Pulire le risorse
Al termine di questo argomento di avvio rapido, eliminare la cartella del progetto dal file system.
Passaggi successivi
Documentazione di riferimento | Esempio
Prerequisiti
- Linguaggio di programmazione Go
- Visual Studio Code
File JSON delle espressioni di esempio
Le espressioni di esempio seguono un formato specifico.
Il campo text contiene il testo dell'espressione di esempio. Il campo intentName deve corrispondere al nome di una finalità esistente nell'app di LUIS. Il campo entityLabels è obbligatorio. Se non si desidera assegnare etichette alle entità, fornire una matrice vuota.
Se la matrice entityLabels non è vuota, è necessario che startCharIndex e endCharIndex contrassegnino l'entità a cui si fa riferimento nel campo entityName. L’indice è in base zero. Se si inizia o termina l'etichetta a uno spazio nel testo, la chiamata API per aggiungere le espressioni non riesce.
[
  {
    "text": "order a pizza",
    "intentName": "ModifyOrder",
    "entityLabels": [
      {
        "entityName": "Order",
        "startCharIndex": 6,
        "endCharIndex": 12
      }
    ]
  },
  {
    "text": "order a large pepperoni pizza",
    "intentName": "ModifyOrder",
    "entityLabels": [
      {
        "entityName": "Order",
        "startCharIndex": 6,
        "endCharIndex": 28
      },
      {
        "entityName": "FullPizzaWithModifiers",
        "startCharIndex": 6,
        "endCharIndex": 28
      },
      {
        "entityName": "PizzaType",
        "startCharIndex": 14,
        "endCharIndex": 28
      },
      {
        "entityName": "Size",
        "startCharIndex": 8,
        "endCharIndex": 12
      }
    ]
  },
  {
    "text": "I want two large pepperoni pizzas on thin crust",
    "intentName": "ModifyOrder",
    "entityLabels": [
      {
        "entityName": "Order",
        "startCharIndex": 7,
        "endCharIndex": 46
      },
      {
        "entityName": "FullPizzaWithModifiers",
        "startCharIndex": 7,
        "endCharIndex": 46
      },
      {
        "entityName": "PizzaType",
        "startCharIndex": 17,
        "endCharIndex": 32
      },
      {
        "entityName": "Size",
        "startCharIndex": 11,
        "endCharIndex": 15
      },
      {
        "entityName": "Quantity",
        "startCharIndex": 7,
        "endCharIndex": 9
      },
      {
        "entityName": "Crust",
        "startCharIndex": 37,
        "endCharIndex": 46
      }
    ]
  }
]
Creare l’app Pizza
Creare l'app Pizza.
- Selezionare pizza-app-for-luis-v6.json per aprire la pagina di GitHub per il file
pizza-app-for-luis.json. - Toccare e tenere premuto a lungo o fare clic con il pulsante destro del mouse sul pulsante Raw e selezionare Salva collegamento come per salvare
pizza-app-for-luis.jsonnel computer. - Accedere al portale LUIS.
- Selezionare App personali.
- Nella pagina App personali, selezionare + Nuova app di conversazione.
- Selezionare Importa come JSON.
- Nella finestra di dialogo Importa nuova app selezionare il pulsante Scegli file.
- Selezionare il file
pizza-app-for-luis.jsonscaricato e quindi selezionare Apri. - Nel campo Nome della finestra di dialogo Importa nuova app immettere un nome per l'app Pizza, quindi selezionare il pulsante Fatto.
L'app verrà importata.
Se viene visualizzata una finestra di dialogo Come creare un'app di LUIS efficace, chiudere la finestra di dialogo.
Eseguire il training dell’app Pizza e pubblicarla
Verrà visualizzata la pagina Finalità con un elenco delle finalità dell'app pizza.
In alto a destra nel sito Web LUIS selezionare il pulsante Train (Esegui il training).
Il training è completo quando il pulsante Esegui training risulta disabilitato.
Per ottenere una previsione LUIS in un chatbot o in un'altra applicazione client, è necessario pubblicare l'app nell'endpoint di previsione.
Selezionare Pubblica nel riquadro di spostamento in alto a destra.
Selezionare Slot di produzione e quindi Fatto.
Selezionare il collegamento Accedi agli URL degli endpoint nella notifica per passare alla pagina Risorse di Azure. Sarà possibile visualizzare gli URL solo se all'app è associata una risorsa di previsione. Per passare alla pagina Risorse di Azure, è anche possibile fare clic su Gestisci.
Aggiungere una risorsa di creazione all'app Pizza
- Selezionare GESTISCI.
- Selezionare Azure Resources (Risorse di Azure).
- Selezionare Risorsa Creazione.
- Selezionare Change authoring resource (Modifica risorsa Creazione).
Se è disponibile una risorsa Creazione, immettere un valore nei campi Nome del tenant, Nome sottoscrizione e LUIS resource name (Nome risorsa LUIS) della risorsa Creazione.
Se non è disponibile alcuna risorsa Creazione:
- Selezionare Crea nuova risorsa.
- Immettere un valore in Nome del tenant, Nome della risorsa, Nome sottoscrizione e Nome gruppo di risorse di Azure.
L'app Pizza è ora pronta per essere usata.
Prendere nota dei valori di accesso per l'app Pizza
Per usare la nuova app Pizza, sono necessari l'ID app, la chiave di creazione e l'endpoint di creazione dell'app Pizza. Per ottenere stime, l'endpoint di stima e la chiave di stima dovranno essere separati.
Per trovare questi valori:
- Nella pagina Finalità, selezionare GESTISCi.
- Nella pagina Impostazioni applicazione, registrare l’ID app.
- Selezionare Azure Resources (Risorse di Azure).
- Selezionare Risorsa Creazione.
- Nelle schede Risorsa di creazione e Risorse di stima, annotare la Chiave primaria. Questo valore corrisponde alla chiave di creazione.
- Registrare l’URL dell'endpoint. Questo valore corrisponde all'endpoint di creazione.
Cambiare il modello a livello di codice
Creare un file denominato
predict.go. Aggiungere il codice seguente:// // This quickstart shows how to add utterances to a LUIS model using the REST APIs. // // dependencies package main import ( "fmt" "net/http" "io/ioutil" "log" "strings" ) // main function func main() { ////////// // Values to modify. // YOUR-APP-ID: The App ID GUID found on the www.luis.ai Application Settings page. var appID = "PASTE_YOUR_LUIS_APP_ID_HERE" // YOUR-AUTHORING-KEY: Your LUIS authoring key, 32 character value. var authoringKey = "PASTE_YOUR_LUIS_AUTHORING_SUBSCRIPTION_KEY_HERE" // YOUR-AUTHORING-ENDPOINT: Replace this with your authoring key endpoint. // For example, "https://your-resource-name.cognitiveservices.azure.com/" var endpoint = "PASTE_YOUR_LUIS_AUTHORING_ENDPOINT_HERE" // NOTE: Replace this your version number. The Pizza app uses a version number of "0.1". var version = "0.1" ////////// var exampleUtterances = "[{'text': 'order a pizza', 'intentName': 'ModifyOrder', 'entityLabels': [{'entityName': 'Order', 'startCharIndex': 6, 'endCharIndex': 12}]}, {'text': 'order a large pepperoni pizza', 'intentName': 'ModifyOrder', 'entityLabels': [{'entityName': 'Order', 'startCharIndex': 6, 'endCharIndex': 28}, {'entityName': 'FullPizzaWithModifiers', 'startCharIndex': 6, 'endCharIndex': 28}, {'entityName': 'PizzaType', 'startCharIndex': 14, 'endCharIndex': 28}, {'entityName': 'Size', 'startCharIndex': 8, 'endCharIndex': 12}]}, {'text': 'I want two large pepperoni pizzas on thin crust', 'intentName': 'ModifyOrder', 'entityLabels': [{'entityName': 'Order', 'startCharIndex': 7, 'endCharIndex': 46}, {'entityName': 'FullPizzaWithModifiers', 'startCharIndex': 7, 'endCharIndex': 46}, {'entityName': 'PizzaType', 'startCharIndex': 17, 'endCharIndex': 32}, {'entityName': 'Size', 'startCharIndex': 11, 'endCharIndex': 15}, {'entityName': 'Quantity', 'startCharIndex': 7, 'endCharIndex': 9}, {'entityName': 'Crust', 'startCharIndex': 37, 'endCharIndex': 46}]}]" fmt.Println("add example utterances requested") addUtterance(authoringKey, appID, version, exampleUtterances, endpoint) fmt.Println("training selected") requestTraining(authoringKey, appID, version, endpoint) fmt.Println("training status selected") getTrainingStatus(authoringKey, appID, version, endpoint) } // Send the list of utterances to the model. func addUtterance(authoringKey string, appID string, version string, labeledExampleUtterances string, endpoint string){ var authoringUrl = fmt.Sprintf("%sluis/authoring/v3.0-preview/apps/%s/versions/%s/examples", endpoint, appID, version) httpRequest("POST", authoringUrl, authoringKey, labeledExampleUtterances) } // Request training. func requestTraining(authoringKey string, appID string, version string, endpoint string){ trainApp("POST", authoringKey, appID, version, endpoint) } func trainApp(httpVerb string, authoringKey string, appID string, version string, endpoint string){ var authoringUrl = fmt.Sprintf("%sluis/authoring/v3.0-preview/apps/%s/versions/%s/train", endpoint, appID, version) httpRequest(httpVerb,authoringUrl, authoringKey, "") } func getTrainingStatus(authoringKey string, appID string, version string, endpoint string){ trainApp("GET", authoringKey, appID, version, endpoint) } // generic HTTP request // includes setting header with authoring key func httpRequest(httpVerb string, url string, authoringKey string, body string){ client := &http.Client{} request, err := http.NewRequest(httpVerb, url, strings.NewReader(body)) request.Header.Add("Ocp-Apim-Subscription-Key", authoringKey) fmt.Println("body") fmt.Println(body) response, err := client.Do(request) if err != nil { log.Fatal(err) } else { defer response.Body.Close() contents, err := ioutil.ReadAll(response.Body) if err != nil { log.Fatal(err) } fmt.Println(" ", response.StatusCode) fmt.Println(string(contents)) } }Sostituire i valori che iniziano con
YOUR-con i propri valori.Informazioni Scopo YOUR-APP-IDL'ID app di LUIS. YOUR-AUTHORING-KEYLa chiave di creazione di 32 caratteri. YOUR-AUTHORING-ENDPOINTL'endpoint dell'URL di creazione. Ad esempio: https://replace-with-your-resource-name.api.cognitive.microsoft.com/. Il nome della risorsa è stato impostato quando è stata creata la risorsa.Le chiavi e le risorse assegnate sono visibili nel portale LUIS nella sezione Gestisci della pagina Risorse di Azure. L'ID app è disponibile nella stessa sezione Gestisci della pagina Impostazioni applicazione.
Importante
Al termine, ricordarsi di rimuovere la chiave dal codice e non renderlo mai pubblico. Per la produzione, usare un metodo sicuro per l'archiviazione e l'accesso alle proprie credenziali, ad esempio Azure Key Vault. Per altre informazioni, vedere l'articolo sulla sicurezza dei servizi di intelligenza artificiale di Azure.
Da un prompt dei comandi nella stessa directory in cui è stato creato il file immettere il comando seguente per compilare il file Go:
go build model.goEseguire l'applicazione Go alla riga di comando immettendo il testo seguente nel prompt dei comandi:
go run model.goEsaminare la risposta della creazione:
add example utterances requested
body
[{'text': 'order a pizza', 'intentName': 'ModifyOrder', 'entityLabels': [{'entityName': 'Order', 'startCharIndex': 6, 'endCharIndex': 12}]}, {'text': 'order a large pepperoni pizza', 'intentName': 'ModifyOrder', 'entityLabels': [{'entityName': 'Order', 'startCharIndex': 6, 'endCharIndex': 28}, {'entityName': 'FullPizzaWithModifiers', 'startCharIndex': 6, 'endCharIndex': 28}, {'entityName': 'PizzaType', 'startCharIndex': 14, 'endCharIndex': 28}, {'entityName': 'Size', 'startCharIndex': 8, 'endCharIndex': 12}]}, {'text': 'I want two large pepperoni pizzas on thin crust', 'intentName': 'ModifyOrder', 'entityLabels': [{'entityName': 'Order', 'startCharIndex': 7, 'endCharIndex': 46}, {'entityName': 'FullPizzaWithModifiers', 'startCharIndex': 7, 'endCharIndex': 46}, {'entityName': 'PizzaType', 'startCharIndex': 17, 'endCharIndex': 32}, {'entityName': 'Size', 'startCharIndex': 11, 'endCharIndex': 15}, {'entityName': 'Quantity', 'startCharIndex': 7, 'endCharIndex': 9}, {'entityName': 'Crust', 'startCharIndex': 37, 'endCharIndex': 46}]}]
    201
[{"value":{"ExampleId":1137150691,"UtteranceText":"order a pizza"},"hasError":false},{"value":{"ExampleId":1137150692,"UtteranceText":"order a large pepperoni pizza"},"hasError":false},{"value":{"ExampleId":1137150693,"UtteranceText":"i want two large pepperoni pizzas on thin crust"},"hasError":false}]
training selected
body

    202
{"statusId":9,"status":"Queued"}
training status selected
body

    200
[{"modelId":"edb46abf-0000-41ab-beb2-a41a0fe1630f","details":{"statusId":9,"status":"Queued","exampleCount":0}},{"modelId":"a5030be2-616c-4648-bf2f-380fa9417d37","details":{"statusId":9,"status":"Queued","exampleCount":0}},{"modelId":"3f2b1f31-a3c3-4fbd-8182-e9d9dbc120b9","details":{"statusId":9,"status":"Queued","exampleCount":0}},{"modelId":"e4b6704b-1636-474c-9459-fe9ccbeba51c","details":{"statusId":9,"status":"Queued","exampleCount":0}},{"modelId":"031d3777-2a00-4a7a-9323-9a3280a30000","details":{"statusId":9,"status":"Queued","exampleCount":0}},{"modelId":"9250e7a1-06eb-4413-9432-ae132ed32583","details":{"statusId":9,"status":"Queued","exampleCount":0}}]
Ecco l'output formattato per una migliore leggibilità:
add example utterances requested
body
[
  {
    'text': 'order a pizza',
    'intentName': 'ModifyOrder',
    'entityLabels': [
      {
        'entityName': 'Order',
        'startCharIndex': 6,
        'endCharIndex': 12
      }
    ]
  },
  {
    'text': 'order a large pepperoni pizza',
    'intentName': 'ModifyOrder',
    'entityLabels': [
      {
        'entityName': 'Order',
        'startCharIndex': 6,
        'endCharIndex': 28
      },
      {
        'entityName': 'FullPizzaWithModifiers',
        'startCharIndex': 6,
        'endCharIndex': 28
      },
      {
        'entityName': 'PizzaType',
        'startCharIndex': 14,
        'endCharIndex': 28
      },
      {
        'entityName': 'Size',
        'startCharIndex': 8,
        'endCharIndex': 12
      }
    ]
  },
  {
    'text': 'I want two large pepperoni pizzas on thin crust',
    'intentName': 'ModifyOrder',
    'entityLabels': [
      {
        'entityName': 'Order',
        'startCharIndex': 7,
        'endCharIndex': 46
      },
      {
        'entityName': 'FullPizzaWithModifiers',
        'startCharIndex': 7,
        'endCharIndex': 46
      },
      {
        'entityName': 'PizzaType',
        'startCharIndex': 17,
        'endCharIndex': 32
      },
      {
        'entityName': 'Size',
        'startCharIndex': 11,
        'endCharIndex': 15
      },
      {
        'entityName': 'Quantity',
        'startCharIndex': 7,
        'endCharIndex': 9
      },
      {
        'entityName': 'Crust',
        'startCharIndex': 37,
        'endCharIndex': 46
      }
    ]
  }
]

    201
[
  {
    "value": {
      "ExampleId": 1137150691,
      "UtteranceText": "order a pizza"
    },
    "hasError": false
  },
  {
    "value": {
      "ExampleId": 1137150692,
      "UtteranceText": "order a large pepperoni pizza"
    },
    "hasError": false
  },
  {
    "value": {
      "ExampleId": 1137150693,
      "UtteranceText": "i want two large pepperoni pizzas on thin crust"
    },
    "hasError": false
  }
]
training selected
body

    202
{
  "statusId": 9,
  "status": "Queued"
}
training status selected
body

    200
[
  {
    "modelId": "edb46abf-0000-41ab-beb2-a41a0fe1630f",
    "details": {
      "statusId": 9,
      "status": "Queued",
      "exampleCount": 0
    }
  },
  {
    "modelId": "a5030be2-616c-4648-bf2f-380fa9417d37",
    "details": {
      "statusId": 9,
      "status": "Queued",
      "exampleCount": 0
    }
  },
  {
    "modelId": "3f2b1f31-a3c3-4fbd-8182-e9d9dbc120b9",
    "details": {
      "statusId": 9,
      "status": "Queued",
      "exampleCount": 0
    }
  },
  {
    "modelId": "e4b6704b-1636-474c-9459-fe9ccbeba51c",
    "details": {
      "statusId": 9,
      "status": "Queued",
      "exampleCount": 0
    }
  },
  {
    "modelId": "031d3777-2a00-4a7a-9323-9a3280a30000",
    "details": {
      "statusId": 9,
      "status": "Queued",
      "exampleCount": 0
    }
  },
  {
    "modelId": "9250e7a1-06eb-4413-9432-ae132ed32583",
    "details": {
      "statusId": 9,
      "status": "Queued",
      "exampleCount": 0
    }
  }
]
Pulire le risorse
Al termine di questo argomento di avvio rapido, eliminare il file dal file system.
Passaggi successivi
Documentazione di riferimento | Esempio
Prerequisiti
- Linguaggio di programmazione Node.js
- Visual Studio Code
File JSON delle espressioni di esempio
Le espressioni di esempio seguono un formato specifico.
Il campo text contiene il testo dell'espressione di esempio. Il campo intentName deve corrispondere al nome di una finalità esistente nell'app di LUIS. Il campo entityLabels è obbligatorio. Se non si desidera assegnare etichette alle entità, fornire una matrice vuota.
Se la matrice entityLabels non è vuota, è necessario che startCharIndex e endCharIndex contrassegnino l'entità a cui si fa riferimento nel campo entityName. L’indice è in base zero. Se si inizia o termina l'etichetta a uno spazio nel testo, la chiamata API per aggiungere le espressioni non riesce.
[
  {
    "text": "order a pizza",
    "intentName": "ModifyOrder",
    "entityLabels": [
      {
        "entityName": "Order",
        "startCharIndex": 6,
        "endCharIndex": 12
      }
    ]
  },
  {
    "text": "order a large pepperoni pizza",
    "intentName": "ModifyOrder",
    "entityLabels": [
      {
        "entityName": "Order",
        "startCharIndex": 6,
        "endCharIndex": 28
      },
      {
        "entityName": "FullPizzaWithModifiers",
        "startCharIndex": 6,
        "endCharIndex": 28
      },
      {
        "entityName": "PizzaType",
        "startCharIndex": 14,
        "endCharIndex": 28
      },
      {
        "entityName": "Size",
        "startCharIndex": 8,
        "endCharIndex": 12
      }
    ]
  },
  {
    "text": "I want two large pepperoni pizzas on thin crust",
    "intentName": "ModifyOrder",
    "entityLabels": [
      {
        "entityName": "Order",
        "startCharIndex": 7,
        "endCharIndex": 46
      },
      {
        "entityName": "FullPizzaWithModifiers",
        "startCharIndex": 7,
        "endCharIndex": 46
      },
      {
        "entityName": "PizzaType",
        "startCharIndex": 17,
        "endCharIndex": 32
      },
      {
        "entityName": "Size",
        "startCharIndex": 11,
        "endCharIndex": 15
      },
      {
        "entityName": "Quantity",
        "startCharIndex": 7,
        "endCharIndex": 9
      },
      {
        "entityName": "Crust",
        "startCharIndex": 37,
        "endCharIndex": 46
      }
    ]
  }
]
Creare il progetto Node.js
Creare una nuova cartella che contenga il progetto Node.js, ad esempio
node-model-with-rest.Aprire un nuovo prompt dei comandi, passare alla cartella creata ed eseguire il comando seguente:
npm initPremere INVIO a ogni richiesta per accettare le impostazioni predefinite.
Installare il modulo richiesta-promessa immettendo il comando seguente:
npm install --save request
npm install --save request-promise
npm install --save querystring
Cambiare il modello a livello di codice
Creare un file denominato
model.js. Aggiungere il codice seguente:// // This quickstart shows how to add utterances to a LUIS model using the REST APIs. // var request = require('request-promise'); ////////// // Values to modify. // YOUR-APP-ID: The App ID GUID found on the www.luis.ai Application Settings page. const LUIS_appId = "PASTE_YOUR_LUIS_APP_ID_HERE"; // YOUR-AUTHORING-KEY: Your LUIS authoring key, 32 character value. const LUIS_authoringKey = "PASTE_YOUR_LUIS_AUTHORING_SUBSCRIPTION_KEY_HERE"; // YOUR-AUTHORING-ENDPOINT: Replace this with your authoring key endpoint. // For example, "https://your-resource-name.cognitiveservices.azure.com/" const LUIS_endpoint = "PASTE_YOUR_LUIS_AUTHORING_ENDPOINT_HERE"; // NOTE: Replace this your version number. The Pizza app uses a version number of "0.1". const LUIS_versionId = "0.1"; ////////// const addUtterancesURI = `${LUIS_endpoint}luis/authoring/v3.0-preview/apps/${LUIS_appId}/versions/${LUIS_versionId}/examples`; const addTrainURI = `${LUIS_endpoint}luis/authoring/v3.0-preview/apps/${LUIS_appId}/versions/${LUIS_versionId}/train`; const utterances = [ { 'text': 'order a pizza', 'intentName': 'ModifyOrder', 'entityLabels': [ { 'entityName': 'Order', 'startCharIndex': 6, 'endCharIndex': 12 } ] }, { 'text': 'order a large pepperoni pizza', 'intentName': 'ModifyOrder', 'entityLabels': [ { 'entityName': 'Order', 'startCharIndex': 6, 'endCharIndex': 28 }, { 'entityName': 'FullPizzaWithModifiers', 'startCharIndex': 6, 'endCharIndex': 28 }, { 'entityName': 'PizzaType', 'startCharIndex': 14, 'endCharIndex': 28 }, { 'entityName': 'Size', 'startCharIndex': 8, 'endCharIndex': 12 } ] }, { 'text': 'I want two large pepperoni pizzas on thin crust', 'intentName': 'ModifyOrder', 'entityLabels': [ { 'entityName': 'Order', 'startCharIndex': 7, 'endCharIndex': 46 }, { 'entityName': 'FullPizzaWithModifiers', 'startCharIndex': 7, 'endCharIndex': 46 }, { 'entityName': 'PizzaType', 'startCharIndex': 17, 'endCharIndex': 32 }, { 'entityName': 'Size', 'startCharIndex': 11, 'endCharIndex': 15 }, { 'entityName': 'Quantity', 'startCharIndex': 7, 'endCharIndex': 9 }, { 'entityName': 'Crust', 'startCharIndex': 37, 'endCharIndex': 46 } ] } ]; // Main function. const main = async() =>{ await addUtterances(utterances); await train("POST"); await train("GET"); } // Adds the utterances to the model. const addUtterances = async (utterances) => { const options = { uri: addUtterancesURI, method: 'POST', headers: { 'Ocp-Apim-Subscription-Key': LUIS_authoringKey }, json: true, body: utterances }; const response = await request(options) console.log("addUtterance:\n" + JSON.stringify(response, null, 2)); } // With verb === "POST", sends a training request. // With verb === "GET", obtains the training status. const train = async (verb) => { const options = { uri: addTrainURI, method: verb, headers: { 'Ocp-Apim-Subscription-Key': LUIS_authoringKey }, json: true, body: null // The body can be empty for a training request }; const response = await request(options) console.log("train " + verb + ":\n" + JSON.stringify(response, null, 2)); } // MAIN main().then(() => console.log("done")).catch((err)=> console.log(err));Sostituire i valori che iniziano con
YOUR-con i propri valori.Informazioni Scopo YOUR-APP-IDL'ID app di LUIS. YOUR-AUTHORING-KEYLa chiave di creazione di 32 caratteri. YOUR-AUTHORING-ENDPOINTL'endpoint dell'URL di creazione. Ad esempio: https://replace-with-your-resource-name.api.cognitive.microsoft.com/. Il nome della risorsa è stato impostato quando è stata creata la risorsa.Le chiavi e le risorse assegnate sono visibili nel portale LUIS nella sezione Gestisci della pagina Risorse di Azure. L'ID app è disponibile nella stessa sezione Gestisci della pagina Impostazioni applicazione.
Importante
Al termine, ricordarsi di rimuovere la chiave dal codice e non renderlo mai pubblico. Per la produzione, usare un metodo sicuro per l'archiviazione e l'accesso alle proprie credenziali, ad esempio Azure Key Vault. Per altre informazioni, vedere l'articolo sulla sicurezza dei servizi di intelligenza artificiale di Azure.
Al prompt dei comandi immettere il seguente comando per eseguire il progetto:
node model.jsEsaminare la risposta della creazione:
addUtterance:
[
  {
    "value": {
      "ExampleId": 1137150691,
      "UtteranceText": "order a pizza"
    },
    "hasError": false
  },
  {
    "value": {
      "ExampleId": 1137150692,
      "UtteranceText": "order a large pepperoni pizza"
    },
    "hasError": false
  },
  {
    "value": {
      "ExampleId": 1137150693,
      "UtteranceText": "i want two large pepperoni pizzas on thin crust"
    },
    "hasError": false
  }
]
train POST:
{
  "statusId": 9,
  "status": "Queued"
}
train GET:
[
  {
    "modelId": "edb46abf-0000-41ab-beb2-a41a0fe1630f",
    "details": {
      "statusId": 9,
      "status": "Queued",
      "exampleCount": 0
    }
  },
  {
    "modelId": "a5030be2-616c-4648-bf2f-380fa9417d37",
    "details": {
      "statusId": 9,
      "status": "Queued",
      "exampleCount": 0
    }
  },
  {
    "modelId": "3f2b1f31-a3c3-4fbd-8182-e9d9dbc120b9",
    "details": {
      "statusId": 9,
      "status": "Queued",
      "exampleCount": 0
    }
  },
  {
    "modelId": "e4b6704b-1636-474c-9459-fe9ccbeba51c",
    "details": {
      "statusId": 9,
      "status": "Queued",
      "exampleCount": 0
    }
  },
  {
    "modelId": "031d3777-2a00-4a7a-9323-9a3280a30000",
    "details": {
      "statusId": 9,
      "status": "Queued",
      "exampleCount": 0
    }
  },
  {
    "modelId": "9250e7a1-06eb-4413-9432-ae132ed32583",
    "details": {
      "statusId": 9,
      "status": "Queued",
      "exampleCount": 0
    }
  }
]
done
Pulire le risorse
Al termine di questo argomento di avvio rapido, eliminare la cartella del progetto dal file system.
Passaggi successivi
Documentazione di riferimento | Esempio
Prerequisiti
- Python 3.6 o versione successiva.
- Visual Studio Code
File JSON delle espressioni di esempio
Le espressioni di esempio seguono un formato specifico.
Il campo text contiene il testo dell'espressione di esempio. Il campo intentName deve corrispondere al nome di una finalità esistente nell'app di LUIS. Il campo entityLabels è obbligatorio. Se non si desidera assegnare etichette alle entità, fornire una matrice vuota.
Se la matrice entityLabels non è vuota, è necessario che startCharIndex e endCharIndex contrassegnino l'entità a cui si fa riferimento nel campo entityName. L’indice è in base zero. Se si inizia o termina l'etichetta a uno spazio nel testo, la chiamata API per aggiungere le espressioni non riesce.
[
  {
    "text": "order a pizza",
    "intentName": "ModifyOrder",
    "entityLabels": [
      {
        "entityName": "Order",
        "startCharIndex": 6,
        "endCharIndex": 12
      }
    ]
  },
  {
    "text": "order a large pepperoni pizza",
    "intentName": "ModifyOrder",
    "entityLabels": [
      {
        "entityName": "Order",
        "startCharIndex": 6,
        "endCharIndex": 28
      },
      {
        "entityName": "FullPizzaWithModifiers",
        "startCharIndex": 6,
        "endCharIndex": 28
      },
      {
        "entityName": "PizzaType",
        "startCharIndex": 14,
        "endCharIndex": 28
      },
      {
        "entityName": "Size",
        "startCharIndex": 8,
        "endCharIndex": 12
      }
    ]
  },
  {
    "text": "I want two large pepperoni pizzas on thin crust",
    "intentName": "ModifyOrder",
    "entityLabels": [
      {
        "entityName": "Order",
        "startCharIndex": 7,
        "endCharIndex": 46
      },
      {
        "entityName": "FullPizzaWithModifiers",
        "startCharIndex": 7,
        "endCharIndex": 46
      },
      {
        "entityName": "PizzaType",
        "startCharIndex": 17,
        "endCharIndex": 32
      },
      {
        "entityName": "Size",
        "startCharIndex": 11,
        "endCharIndex": 15
      },
      {
        "entityName": "Quantity",
        "startCharIndex": 7,
        "endCharIndex": 9
      },
      {
        "entityName": "Crust",
        "startCharIndex": 37,
        "endCharIndex": 46
      }
    ]
  }
]
Creare l’app Pizza
Creare l'app Pizza.
- Selezionare pizza-app-for-luis-v6.json per aprire la pagina di GitHub per il file
pizza-app-for-luis.json. - Toccare e tenere premuto a lungo o fare clic con il pulsante destro del mouse sul pulsante Raw e selezionare Salva collegamento come per salvare
pizza-app-for-luis.jsonnel computer. - Accedere al portale LUIS.
- Selezionare App personali.
- Nella pagina App personali, selezionare + Nuova app di conversazione.
- Selezionare Importa come JSON.
- Nella finestra di dialogo Importa nuova app selezionare il pulsante Scegli file.
- Selezionare il file
pizza-app-for-luis.jsonscaricato e quindi selezionare Apri. - Nel campo Nome della finestra di dialogo Importa nuova app immettere un nome per l'app Pizza, quindi selezionare il pulsante Fatto.
L'app verrà importata.
Se viene visualizzata una finestra di dialogo Come creare un'app di LUIS efficace, chiudere la finestra di dialogo.
Eseguire il training dell’app Pizza e pubblicarla
Verrà visualizzata la pagina Finalità con un elenco delle finalità dell'app pizza.
In alto a destra nel sito Web LUIS selezionare il pulsante Train (Esegui il training).
Il training è completo quando il pulsante Esegui training risulta disabilitato.
Per ottenere una previsione LUIS in un chatbot o in un'altra applicazione client, è necessario pubblicare l'app nell'endpoint di previsione.
Selezionare Pubblica nel riquadro di spostamento in alto a destra.
Selezionare Slot di produzione e quindi Fatto.
Selezionare il collegamento Accedi agli URL degli endpoint nella notifica per passare alla pagina Risorse di Azure. Sarà possibile visualizzare gli URL solo se all'app è associata una risorsa di previsione. Per passare alla pagina Risorse di Azure, è anche possibile fare clic su Gestisci.
Aggiungere una risorsa di creazione all'app Pizza
- Selezionare GESTISCI.
- Selezionare Azure Resources (Risorse di Azure).
- Selezionare Risorsa Creazione.
- Selezionare Change authoring resource (Modifica risorsa Creazione).
Se è disponibile una risorsa Creazione, immettere un valore nei campi Nome del tenant, Nome sottoscrizione e LUIS resource name (Nome risorsa LUIS) della risorsa Creazione.
Se non è disponibile alcuna risorsa Creazione:
- Selezionare Crea nuova risorsa.
- Immettere un valore in Nome del tenant, Nome della risorsa, Nome sottoscrizione e Nome gruppo di risorse di Azure.
L'app Pizza è ora pronta per essere usata.
Prendere nota dei valori di accesso per l'app Pizza
Per usare la nuova app Pizza, sono necessari l'ID app, la chiave di creazione e l'endpoint di creazione dell'app Pizza. Per ottenere stime, l'endpoint di stima e la chiave di stima dovranno essere separati.
Per trovare questi valori:
- Nella pagina Finalità, selezionare GESTISCi.
- Nella pagina Impostazioni applicazione, registrare l’ID app.
- Selezionare Azure Resources (Risorse di Azure).
- Selezionare Risorsa Creazione.
- Nelle schede Risorsa di creazione e Risorse di stima, annotare la Chiave primaria. Questo valore corrisponde alla chiave di creazione.
- Registrare l’URL dell'endpoint. Questo valore corrisponde all'endpoint di creazione.
Cambiare il modello a livello di codice
Creare un file denominato
model.py. Aggiungere il codice seguente:########### Python 3.6 ############# # # This quickstart shows how to add utterances to a LUIS model using the REST APIs. # import requests try: ########## # Values to modify. # YOUR-APP-ID: The App ID GUID found on the www.luis.ai Application Settings page. appId = "PASTE_YOUR_LUIS_APP_ID_HERE" # YOUR-AUTHORING-KEY: Your LUIS authoring key, 32 character value. authoring_key = "PASTE_YOUR_LUIS_AUTHORING_SUBSCRIPTION_KEY_HERE" # YOUR-AUTHORING-ENDPOINT: Replace this with your authoring key endpoint. # For example, "https://your-resource-name.cognitiveservices.azure.com/" authoring_endpoint = "PASTE_YOUR_LUIS_AUTHORING_ENDPOINT_HERE" # The version number of your LUIS app app_version = "0.1" ########## # The headers to use in this REST call. headers = {'Ocp-Apim-Subscription-Key': authoring_key} # The URL parameters to use in this REST call. params ={ #'timezoneOffset': '0', #'verbose': 'true', #'show-all-intents': 'true', #'spellCheck': 'false', #'staging': 'false' } # List of example utterances to send to the LUIS app. data = """[ { 'text': 'order a pizza', 'intentName': 'ModifyOrder', 'entityLabels': [ { 'entityName': 'Order', 'startCharIndex': 6, 'endCharIndex': 12 } ] }, { 'text': 'order a large pepperoni pizza', 'intentName': 'ModifyOrder', 'entityLabels': [ { 'entityName': 'Order', 'startCharIndex': 6, 'endCharIndex': 28 }, { 'entityName': 'FullPizzaWithModifiers', 'startCharIndex': 6, 'endCharIndex': 28 }, { 'entityName': 'PizzaType', 'startCharIndex': 14, 'endCharIndex': 28 }, { 'entityName': 'Size', 'startCharIndex': 8, 'endCharIndex': 12 } ] }, { 'text': 'I want two large pepperoni pizzas on thin crust', 'intentName': 'ModifyOrder', 'entityLabels': [ { 'entityName': 'Order', 'startCharIndex': 7, 'endCharIndex': 46 }, { 'entityName': 'FullPizzaWithModifiers', 'startCharIndex': 7, 'endCharIndex': 46 }, { 'entityName': 'PizzaType', 'startCharIndex': 17, 'endCharIndex': 32 }, { 'entityName': 'Size', 'startCharIndex': 11, 'endCharIndex': 15 }, { 'entityName': 'Quantity', 'startCharIndex': 7, 'endCharIndex': 9 }, { 'entityName': 'Crust', 'startCharIndex': 37, 'endCharIndex': 46 } ] } ] """ # Make the REST call to POST the list of example utterances. response = requests.post(f'{authoring_endpoint}luis/authoring/v3.0-preview/apps/{appId}/versions/{app_version}/examples', headers=headers, params=params, data=data) # Display the results on the console. print('Add the list of utterances:') print(response.json()) # Make the REST call to initiate a training session. response = requests.post(f'{authoring_endpoint}luis/authoring/v3.0-preview/apps/{appId}/versions/{app_version}/train', headers=headers, params=params, data=None) # Display the results on the console. print('Request training:') print(response.json()) # Make the REST call to request the status of training. response = requests.get(f'{authoring_endpoint}luis/authoring/v3.0-preview/apps/{appId}/versions/{app_version}/train', headers=headers, params=params, data=None) # Display the results on the console. print('Request training status:') print(response.json()) except Exception as e: # Display the error string. print(f'{e}')Sostituire i valori che iniziano con
YOUR-con i propri valori.Informazioni Scopo YOUR-APP-IDL'ID app di LUIS. YOUR-AUTHORING-KEYLa chiave di creazione di 32 caratteri. YOUR-AUTHORING-ENDPOINTL'endpoint dell'URL di creazione. Ad esempio: https://replace-with-your-resource-name.api.cognitive.microsoft.com/. Il nome della risorsa è stato impostato quando è stata creata la risorsa.Le chiavi e le risorse assegnate sono visibili nel portale LUIS nella sezione Gestisci della pagina Risorse di Azure. L'ID app è disponibile nella stessa sezione Gestisci della pagina Impostazioni applicazione.
Importante
Al termine, ricordarsi di rimuovere la chiave dal codice e non renderlo mai pubblico. Per la produzione, usare un metodo sicuro per l'archiviazione e l'accesso alle proprie credenziali, ad esempio Azure Key Vault. Per altre informazioni, vedere l'articolo sulla sicurezza dei servizi di intelligenza artificiale di Azure.
Da un prompt dei comandi nella stessa directory in cui è stato creato il file immettere il comando seguente per eseguire il file:
python model.pyEsaminare la risposta della creazione:
Add the list of utterances:
[{'value': {'ExampleId': 1137150691, 'UtteranceText': 'order a pizza'}, 'hasError': False}, {'value': {'ExampleId': 1137150692, 'UtteranceText': 'order a large pepperoni pizza'}, 'hasError': False}, {'value': {'ExampleId': 1137150693, 'UtteranceText': 'i want two large pepperoni pizzas on thin crust'}, 'hasError': False}]
Request training:
{'statusId': 9, 'status': 'Queued'}
Request training status:
[{'modelId': 'edb46abf-0000-41ab-beb2-a41a0fe1630f', 'details': {'statusId': 3, 'status': 'InProgress', 'exampleCount': 0, 'progressSubstatus': 'CollectingData'}}, {'modelId': 'a5030be2-616c-4648-bf2f-380fa9417d37', 'details': {'statusId': 3, 'status': 'InProgress', 'exampleCount': 0, 'progressSubstatus': 'CollectingData'}}, {'modelId': '3f2b1f31-a3c3-4fbd-8182-e9d9dbc120b9', 'details': {'statusId': 3, 'status': 'InProgress', 'exampleCount': 0, 'progressSubstatus': 'CollectingData'}}, {'modelId': 'e4b6704b-1636-474c-9459-fe9ccbeba51c', 'details': {'statusId': 3, 'status': 'InProgress', 'exampleCount': 0, 'progressSubstatus': 'CollectingData'}}, {'modelId': '031d3777-2a00-4a7a-9323-9a3280a30000', 'details': {'statusId': 3, 'status': 'InProgress', 'exampleCount': 0, 'progressSubstatus': 'CollectingData'}}, {'modelId': '9250e7a1-06eb-4413-9432-ae132ed32583', 'details': {'statusId': 3, 'status': 'InProgress', 'exampleCount': 0, 'progressSubstatus': 'CollectingData'}}]
Ecco l'output formattato per una migliore leggibilità:
Add the list of utterances:
[
  {
    'value': {
      'ExampleId': 1137150691,
      'UtteranceText': 'order a pizza'
    },
    'hasError': False
  },
  {
    'value': {
      'ExampleId': 1137150692,
      'UtteranceText': 'order a large pepperoni pizza'
    },
    'hasError': False
  },
  {
    'value': {
      'ExampleId': 1137150693,
      'UtteranceText': 'i want two large pepperoni pizzas on thin crust'
    },
    'hasError': False
  }
]

Request training:
{
  'statusId': 9,
  'status': 'Queued'
}

Request training status:
[
  {
    'modelId': 'edb46abf-0000-41ab-beb2-a41a0fe1630f',
    'details': {
      'statusId': 3,
      'status': 'InProgress',
      'exampleCount': 0,
      'progressSubstatus': 'CollectingData'
    }
  },
  {
    'modelId': 'a5030be2-616c-4648-bf2f-380fa9417d37',
    'details': {
      'statusId': 3,
      'status': 'InProgress',
      'exampleCount': 0,
      'progressSubstatus': 'CollectingData'
    }
  },
  {
    'modelId': '3f2b1f31-a3c3-4fbd-8182-e9d9dbc120b9',
    'details': {
      'statusId': 3,
      'status': 'InProgress',
      'exampleCount': 0,
      'progressSubstatus': 'CollectingData'
    }
  },
  {
    'modelId': 'e4b6704b-1636-474c-9459-fe9ccbeba51c',
    'details': {
      'statusId': 3,
      'status': 'InProgress',
      'exampleCount': 0,
      'progressSubstatus': 'CollectingData'
    }
  },
  {
    'modelId': '031d3777-2a00-4a7a-9323-9a3280a30000',
    'details': {
      'statusId': 3,
      'status': 'InProgress',
      'exampleCount': 0,
      'progressSubstatus': 'CollectingData'
    }
  },
  {
    'modelId': '9250e7a1-06eb-4413-9432-ae132ed32583',
    'details': {
      'statusId': 3,
      'status': 'InProgress',
      'exampleCount': 0,
      'progressSubstatus': 'CollectingData'
    }
  }
]
Pulire le risorse
Al termine di questo argomento di avvio rapido, eliminare il file dal file system.