Speech SDK を使用してクライアント アプリケーションと統合する
重要
Custom Commands は 2026 年 4 月 30 日に廃止される予定です。 2023 年 10 月 30 日以降、Speech Studio で新しい Custom Commands アプリケーションを作成することはできません。 この変更に関連して、LUIS は 2025 年 10 月 1 日に廃止される予定です。 2023 年 4 月 1 日以降、新しい LUIS リソースを作成することはできません。
この記事では、UWP アプリケーションで実行されている Speech SDK から、発行されたカスタム コマンド アプリケーションに対して要求を行う方法について説明します。 カスタム コマンド アプリケーションへの接続を確立するには、次のことが必要です。
- カスタム コマンド アプリケーションを発行してアプリケーション識別子 (アプリ ID) を取得する
- Speech SDK を使用してユニバーサル Windows プラットフォーム (UWP) クライアント アプリを作成し、カスタム コマンド アプリケーションと対話できるようにする
前提条件
この記事を完了するには、カスタム コマンド アプリケーションが必要です。 Custom Commands アプリケーションを作成するクイック スタートを試してみてください。
以下も必要です。
- Visual Studio 2019 またはそれ以降。 このガイドは、Visual Studio 2019 に基づいています。
- Azure AI Speech リソース キーとリージョン: Azure portal で Speech リソースを作成します。 詳細については、「マルチ サービス リソースを作成する」を参照してください。
- デバイスを開発用に有効にする
手順 1:カスタム コマンド アプリケーションを発行する
前に作成した Custom Commands アプリケーションを開きます。
[設定]、[LUIS リソース] に移動します。
予測リソースが割り当てられていない場合は、クエリ予測キーを選択するか、新しいキーを作成します。
クエリ予測キーはアプリケーションを公開する前に常に必要です。 LUIS リソースの詳細については、「LUIS リソースを作成する」を参照してください
編集コマンドに戻り、[発行] を選択します。
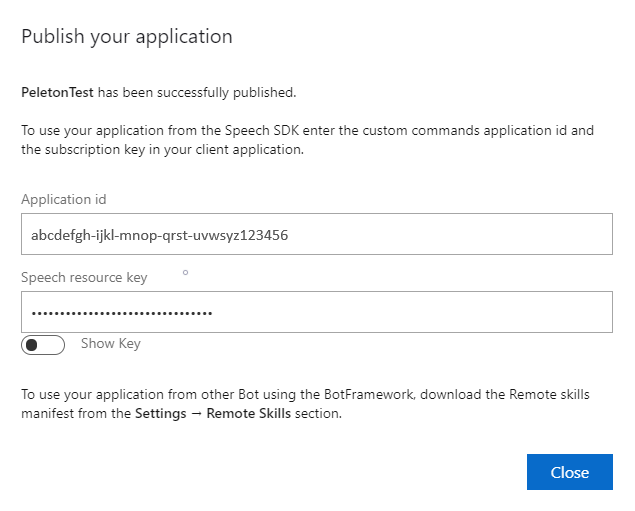
後で使用するために、"発行" 通知からアプリ ID をコピーします。
後で使用するために Speech リソース キーをコピーします。
手順 2:Visual Studio プロジェクトを作成する
UWP 開発の Visual Studio プロジェクトを作成し、Speech SDK をインストールします。
手順 3:サンプル コードを追加する
この手順では、アプリケーションのユーザー インターフェイスを定義する XAML コードを追加し、C# のコードビハインド実装を追加します。
XAML コード
次の XAML コードを追加してアプリケーションのユーザー インターフェイスを作成します。
ソリューション エクスプローラーで、
MainPage.xamlを開きますデザイナーの XAML ビューで、内容全体を次のコード スニペットに置き換えます。
<Page
    x:Class="helloworld.MainPage"
    xmlns="http://schemas.microsoft.com/winfx/2006/xaml/presentation"
    xmlns:x="http://schemas.microsoft.com/winfx/2006/xaml"
    xmlns:local="using:helloworld"
    xmlns:d="http://schemas.microsoft.com/expression/blend/2008"
    xmlns:mc="http://schemas.openxmlformats.org/markup-compatibility/2006"
    mc:Ignorable="d"
    Background="{ThemeResource ApplicationPageBackgroundThemeBrush}">

    <Grid>
        <StackPanel Orientation="Vertical" HorizontalAlignment="Center"
                    Margin="20,50,0,0" VerticalAlignment="Center" Width="800">
            <Button x:Name="EnableMicrophoneButton" Content="Enable Microphone"
                    Margin="0,10,10,0" Click="EnableMicrophone_ButtonClicked"
                    Height="35"/>
            <Button x:Name="ListenButton" Content="Talk"
                    Margin="0,10,10,0" Click="ListenButton_ButtonClicked"
                    Height="35"/>
            <StackPanel x:Name="StatusPanel" Orientation="Vertical"
                        RelativePanel.AlignBottomWithPanel="True"
                        RelativePanel.AlignRightWithPanel="True"
                        RelativePanel.AlignLeftWithPanel="True">
                <TextBlock x:Name="StatusLabel" Margin="0,10,10,0"
                           TextWrapping="Wrap" Text="Status:" FontSize="20"/>
                <Border x:Name="StatusBorder" Margin="0,0,0,0">
                    <ScrollViewer VerticalScrollMode="Auto"
                                  VerticalScrollBarVisibility="Auto" MaxHeight="200">
                        <!-- Use LiveSetting to enable screen readers to announce
                             the status update. -->
                        <TextBlock
                            x:Name="StatusBlock" FontWeight="Bold"
                            AutomationProperties.LiveSetting="Assertive"
                            MaxWidth="{Binding ElementName=Splitter, Path=ActualWidth}"
                            Margin="10,10,10,20" TextWrapping="Wrap"  />
                    </ScrollViewer>
                </Border>
            </StackPanel>
        </StackPanel>
        <MediaElement x:Name="mediaElement"/>
    </Grid>
</Page>
デザイン ビューが更新されてアプリケーションのユーザー インターフェイスが表示されます。
C# のコードビハインド ソース
アプリケーションが想定どおりに動作するよう、コードビハインド ソースを追加します。 コードビハインド ソースには、次の内容が含まれています。
Speech名前空間とSpeech.Dialog名前空間の、必要なusingステートメント。- ボタン ハンドラーに接続された、マイクへのアクセスを確実にするための簡単な実装。
- アプリケーション内のメッセージとエラーを表示する基本的な UI ヘルパー。
- 初期化コード パスのランディング ポイント。
- テキスト読み上げを再生するヘルパー (ストリーミングのサポートなし)。
- リッスンを開始する空のボタン ハンドラー。
次のようにしてコードビハインドのソースを追加します。
ソリューション エクスプローラーで、コードビハインドのソース ファイル
MainPage.xaml.csを開きます (MainPage.xamlにグループ化されています)ファイルの内容を次のコードに置き換えます。
using Microsoft.CognitiveServices.Speech;
using Microsoft.CognitiveServices.Speech.Audio;
using Microsoft.CognitiveServices.Speech.Dialog;
using System;
using System.IO;
using System.Text;
using Windows.UI.Xaml;
using Windows.UI.Xaml.Controls;
using Windows.UI.Xaml.Media;

namespace helloworld
{
    public sealed partial class MainPage : Page
    {
        private DialogServiceConnector connector;

        private enum NotifyType
        {
            StatusMessage,
            ErrorMessage
        };

        public MainPage()
        {
            this.InitializeComponent();
        }

        private async void EnableMicrophone_ButtonClicked(
            object sender, RoutedEventArgs e)
        {
            bool isMicAvailable = true;
            try
            {
                var mediaCapture = new Windows.Media.Capture.MediaCapture();
                var settings =
                    new Windows.Media.Capture.MediaCaptureInitializationSettings();
                settings.StreamingCaptureMode =
                    Windows.Media.Capture.StreamingCaptureMode.Audio;
                await mediaCapture.InitializeAsync(settings);
            }
            catch (Exception)
            {
                isMicAvailable = false;
            }
            if (!isMicAvailable)
            {
                await Windows.System.Launcher.LaunchUriAsync(
                    new Uri("ms-settings:privacy-microphone"));
            }
            else
            {
                NotifyUser("Microphone was enabled", NotifyType.StatusMessage);
            }
        }

        private void NotifyUser(
            string strMessage, NotifyType type = NotifyType.StatusMessage)
        {
            // If called from the UI thread, then update immediately.
            // Otherwise, schedule a task on the UI thread to perform the update.
            if (Dispatcher.HasThreadAccess)
            {
                UpdateStatus(strMessage, type);
            }
            else
            {
                var task = Dispatcher.RunAsync(
                    Windows.UI.Core.CoreDispatcherPriority.Normal,
                    () => UpdateStatus(strMessage, type));
            }
        }

        private void UpdateStatus(string strMessage, NotifyType type)
        {
            switch (type)
            {
                case NotifyType.StatusMessage:
                    StatusBorder.Background = new SolidColorBrush(
                        Windows.UI.Colors.Green);
                    break;
                case NotifyType.ErrorMessage:
                    StatusBorder.Background = new SolidColorBrush(
                        Windows.UI.Colors.Red);
                    break;
            }
            StatusBlock.Text += string.IsNullOrEmpty(StatusBlock.Text)
                ? strMessage : "\n" + strMessage;

            if (!string.IsNullOrEmpty(StatusBlock.Text))
            {
                StatusBorder.Visibility = Visibility.Visible;
                StatusPanel.Visibility = Visibility.Visible;
            }
            else
            {
                StatusBorder.Visibility = Visibility.Collapsed;
                StatusPanel.Visibility = Visibility.Collapsed;
            }
            // Raise an event if necessary to enable a screen reader
            // to announce the status update.
            var peer = Windows.UI.Xaml.Automation.Peers.FrameworkElementAutomationPeer.FromElement(StatusBlock);
            if (peer != null)
            {
                peer.RaiseAutomationEvent(
                    Windows.UI.Xaml.Automation.Peers.AutomationEvents.LiveRegionChanged);
            }
        }

        // Waits for and accumulates all audio associated with a given
        // PullAudioOutputStream and then plays it to the MediaElement. Long spoken
        // audio will create extra latency and a streaming playback solution
        // (that plays audio while it continues to be received) should be used --
        // see the samples for examples of this.
        private void SynchronouslyPlayActivityAudio(
            PullAudioOutputStream activityAudio)
        {
            var playbackStreamWithHeader = new MemoryStream();
            playbackStreamWithHeader.Write(Encoding.ASCII.GetBytes("RIFF"), 0, 4); // ChunkID
            playbackStreamWithHeader.Write(BitConverter.GetBytes(UInt32.MaxValue), 0, 4); // ChunkSize: max
            playbackStreamWithHeader.Write(Encoding.ASCII.GetBytes("WAVE"), 0, 4); // Format
            playbackStreamWithHeader.Write(Encoding.ASCII.GetBytes("fmt "), 0, 4); // Subchunk1ID
            playbackStreamWithHeader.Write(BitConverter.GetBytes(16), 0, 4); // Subchunk1Size: PCM
            playbackStreamWithHeader.Write(BitConverter.GetBytes(1), 0, 2); // AudioFormat: PCM
            playbackStreamWithHeader.Write(BitConverter.GetBytes(1), 0, 2); // NumChannels: mono
            playbackStreamWithHeader.Write(BitConverter.GetBytes(16000), 0, 4); // SampleRate: 16kHz
            playbackStreamWithHeader.Write(BitConverter.GetBytes(32000), 0, 4); // ByteRate
            playbackStreamWithHeader.Write(BitConverter.GetBytes(2), 0, 2); // BlockAlign
            playbackStreamWithHeader.Write(BitConverter.GetBytes(16), 0, 2); // BitsPerSample: 16-bit
            playbackStreamWithHeader.Write(Encoding.ASCII.GetBytes("data"), 0, 4); // Subchunk2ID
            playbackStreamWithHeader.Write(BitConverter.GetBytes(UInt32.MaxValue), 0, 4); // Subchunk2Size

            byte[] pullBuffer = new byte[2056];

            uint lastRead = 0;
            do
            {
                lastRead = activityAudio.Read(pullBuffer);
                playbackStreamWithHeader.Write(pullBuffer, 0, (int)lastRead);
            }
            while (lastRead == pullBuffer.Length);

            var task = Dispatcher.RunAsync(
                Windows.UI.Core.CoreDispatcherPriority.Normal, () =>
            {
                mediaElement.SetSource(
                    playbackStreamWithHeader.AsRandomAccessStream(), "audio/wav");
                mediaElement.Play();
            });
        }

        private void InitializeDialogServiceConnector()
        {
            // New code will go here
        }

        private async void ListenButton_ButtonClicked(
            object sender, RoutedEventArgs e)
        {
            // New code will go here
        }
    }
}
Note
次のエラーが表示された場合: "型 'Object' は、参照されていないアセンブリに定義されています"
- ソリューションを右クリックします。
- [ソリューションの NuGet パッケージの管理] を選択し、 [更新] を選択します。
- 更新リストに Microsoft.NETCore.UniversalWindowsPlatform が表示される場合は、Microsoft.NETCore.UniversalWindowsPlatform を最新バージョンに更新します。
InitializeDialogServiceConnectorのメソッド本体に次のコードを追加します// This code creates the `DialogServiceConnector` with your resource information. // create a DialogServiceConfig by providing a Custom Commands application id and Speech resource key // The RecoLanguage property is optional (default en-US); note that only en-US is supported in Preview const string speechCommandsApplicationId = "YourApplicationId"; // Your application id const string speechSubscriptionKey = "YourSpeechSubscriptionKey"; // Your Speech resource key const string region = "YourServiceRegion"; // The Speech resource region. var speechCommandsConfig = CustomCommandsConfig.FromSubscription(speechCommandsApplicationId, speechSubscriptionKey, region); speechCommandsConfig.SetProperty(PropertyId.SpeechServiceConnection_RecoLanguage, "en-us"); connector = new DialogServiceConnector(speechCommandsConfig);YourApplicationId、YourSpeechSubscriptionKey、YourServiceRegionの各文字列を、実際のアプリ、音声キー、リージョンの値に置き換えますInitializeDialogServiceConnectorのメソッド本体の最後に、次のコード スニペットを追加します// // This code sets up handlers for events relied on by `DialogServiceConnector` to communicate its activities, // speech recognition results, and other information. // // ActivityReceived is the main way your client will receive messages, audio, and events connector.ActivityReceived += (sender, activityReceivedEventArgs) => { NotifyUser( $"Activity received, hasAudio={activityReceivedEventArgs.HasAudio} activity={activityReceivedEventArgs.Activity}"); if (activityReceivedEventArgs.HasAudio) { SynchronouslyPlayActivityAudio(activityReceivedEventArgs.Audio); } }; // Canceled will be signaled when a turn is aborted or experiences an error condition connector.Canceled += (sender, canceledEventArgs) => { NotifyUser($"Canceled, reason={canceledEventArgs.Reason}"); if (canceledEventArgs.Reason == CancellationReason.Error) { NotifyUser( $"Error: code={canceledEventArgs.ErrorCode}, details={canceledEventArgs.ErrorDetails}"); } }; // Recognizing (not 'Recognized') will provide the intermediate recognized text // while an audio stream is being processed connector.Recognizing += (sender, recognitionEventArgs) => { NotifyUser($"Recognizing! in-progress text={recognitionEventArgs.Result.Text}"); }; // Recognized (not 'Recognizing') will provide the final recognized text // once audio capture is completed connector.Recognized += (sender, recognitionEventArgs) => { NotifyUser($"Final speech to text result: '{recognitionEventArgs.Result.Text}'"); }; // SessionStarted will notify when audio begins flowing to the service for a turn connector.SessionStarted += (sender, sessionEventArgs) => { NotifyUser($"Now Listening! Session started, id={sessionEventArgs.SessionId}"); }; // SessionStopped will notify when a turn is complete and // it's safe to begin listening again connector.SessionStopped += (sender, sessionEventArgs) => { NotifyUser($"Listening complete. Session ended, id={sessionEventArgs.SessionId}"); };MainPageクラスのListenButton_ButtonClickedメソッドの本体に次のコード スニペットを追加します// This code sets up `DialogServiceConnector` to listen, since you already established the configuration and // registered the event handlers. if (connector == null) { InitializeDialogServiceConnector(); // Optional step to speed up first interaction: if not called, // connection happens automatically on first use var connectTask = connector.ConnectAsync(); } try { // Start sending audio await connector.ListenOnceAsync(); } catch (Exception ex) { NotifyUser($"Exception: {ex.ToString()}", NotifyType.ErrorMessage); }メニュー バーから [ファイル]>[すべて保存] を選択して変更内容を保存します
試してみる
メニュー バーから [ビルド]>[ソリューションのビルド] を選択してアプリケーションをビルドします。 コードはエラーなくコンパイルされるはずです。
[デバッグ]>[デバッグの開始] の順に選択するか、F5 キーを押して、アプリケーションを起動します。 [helloworld] ウィンドウが表示されます。
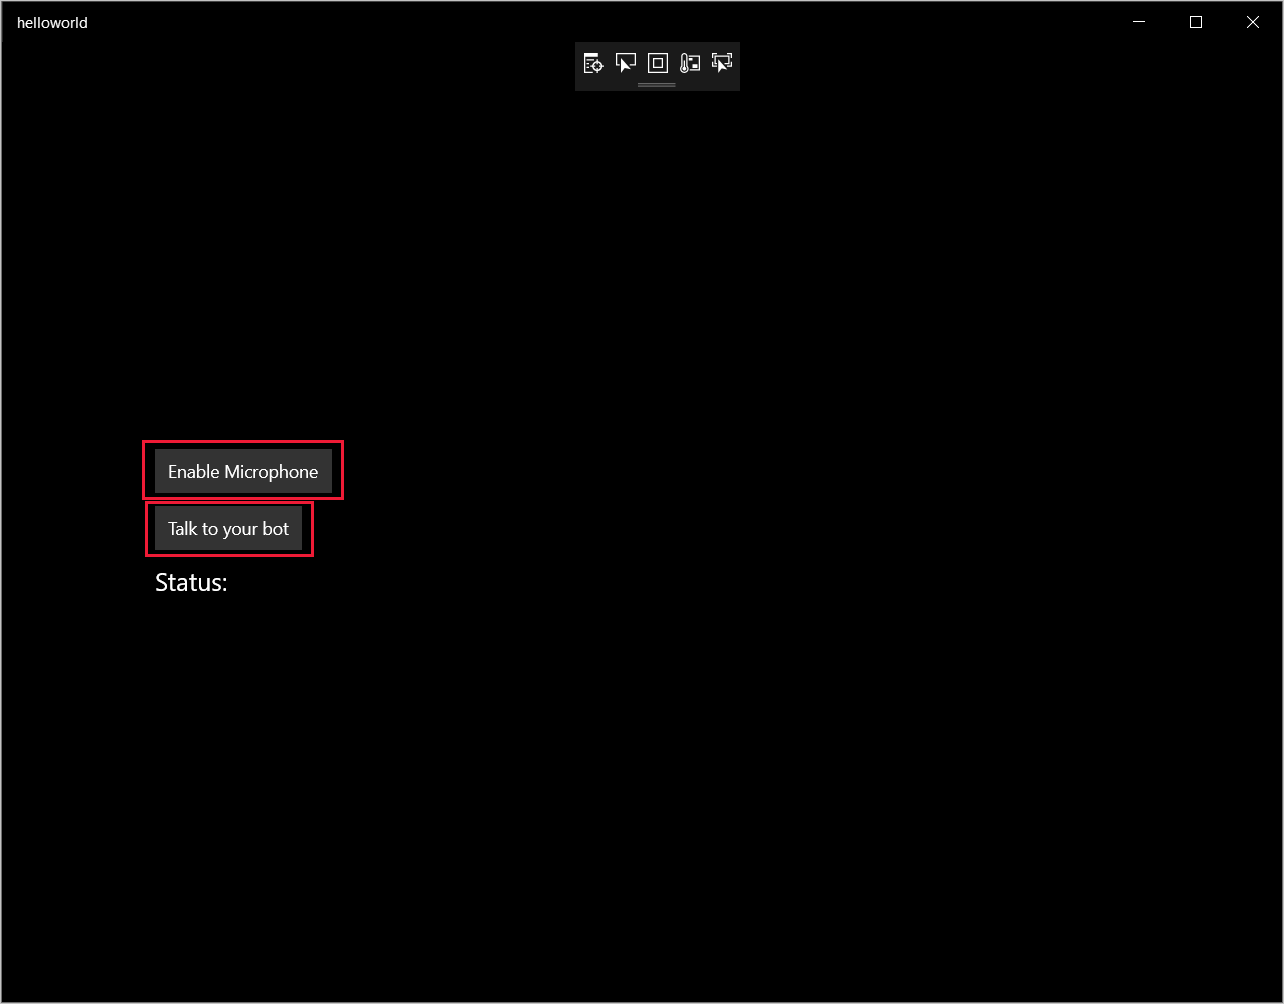
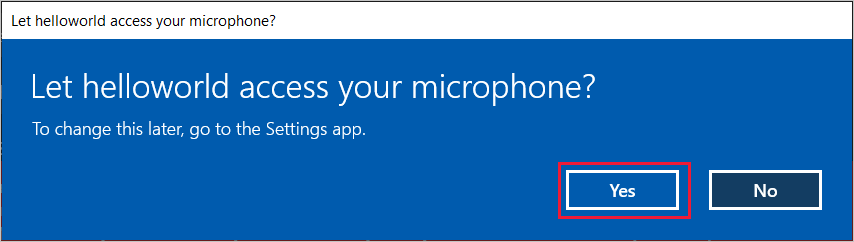
[Enable Microphone](マイクを有効にする) を選択します。 アクセス許可要求が表示された場合、 [はい] を選択します。
[Talk](会話) を選択し、デバイスのマイクに向かって英語のフレーズや文章を話します。 音声が Direct Line Speech チャネルに送信されてテキストに変換され、ウィンドウに表示されます。