クイック スタート: Terraform を使用して Windows VM を作成する
適用対象: ✔️ Windows VM
この記事では、Terraform を使用して、完全な Windows 環境とサポート リソースを作成する方法を示します。 これらのリソースには、仮想ネットワーク、サブネット、パブリック IP アドレスなどが含まれます。
Terraform を使用すると、クラウド インフラストラクチャの定義、プレビュー、およびデプロイを行うことができます。 Terraform を使用する際は、HCL 構文を使って構成ファイルを作成します。 HCL 構文では、Azure などのクラウド プロバイダーと、クラウド インフラストラクチャを構成する要素を指定できます。 構成ファイルを作成したら、"実行プラン" を作成します。これにより、インフラストラクチャの変更をデプロイ前にプレビューすることができます。 変更を確認したら、実行プランを適用してインフラストラクチャをデプロイします。
この記事では、次のことについて説明します。
- random_pet を使用して Azure リソース グループ名のランダムな値を作成する。
- azurerm_resource_group を使用して Azure リソース グループを作成する。
- azurerm_virtual_network を使用して Azure 仮想ネットワーク (VNET) を作成します。
- azurerm_subnet を使用して Azure サブネットを作成します。
- azurerm_public_ip を使用してパブリック IP を作成します。
- azurerm_network_security_group を使用してネットワーク セキュリティ グループを作成します。
- azurerm_network_interface を使用してネットワーク インターフェイスを作成します。
- azurerm_network_interface_security_group_association を使用して、ネットワーク セキュリティ グループとネットワーク インターフェイスの間に関連付けを作成します。
- random_id を使用して、一意のストレージ アカウント名のランダムな値を生成します。
- azurerm_storage_account を使ってブート診断用のストレージ アカウントを作成します。
- azurerm_windows_virtual_machine を使用して、IIS Web サーバーを使用して Windows VM を作成します。
- azurerm_virtual_machine_extension を使用して Windows VM 拡張機能を作成します。
前提条件
- Azure サブスクリプション:Azure サブスクリプションをお持ちでない場合は、開始する前に 無料アカウント を作成してください。
Terraform コードを実装する
注意
この記事のサンプル コードは、Azure Terraform GitHub リポジトリにあります。 Terraform の現在および以前のバージョンのテスト結果を含むログ ファイルを表示できます。
Terraform を使用して Azure リソースを管理する方法を示すその他の記事とサンプル コードを参照してください
サンプルの Terraform コードをテストするディレクトリを作成し、それを現在のディレクトリにします。
providers.tfという名前のファイルを作成し、次のコードを挿入します。terraform { required_version = ">=1.0" required_providers { azurerm = { source = "hashicorp/azurerm" version = "~>3.0" } random = { source = "hashicorp/random" version = "~>3.0" } } } provider "azurerm" { features {} }main.tfという名前のファイルを作成し、次のコードを挿入します。resource "azurerm_resource_group" "rg" { location = var.resource_group_location name = "${random_pet.prefix.id}-rg" } # Create virtual network resource "azurerm_virtual_network" "my_terraform_network" { name = "${random_pet.prefix.id}-vnet" address_space = ["10.0.0.0/16"] location = azurerm_resource_group.rg.location resource_group_name = azurerm_resource_group.rg.name } # Create subnet resource "azurerm_subnet" "my_terraform_subnet" { name = "${random_pet.prefix.id}-subnet" resource_group_name = azurerm_resource_group.rg.name virtual_network_name = azurerm_virtual_network.my_terraform_network.name address_prefixes = ["10.0.1.0/24"] } # Create public IPs resource "azurerm_public_ip" "my_terraform_public_ip" { name = "${random_pet.prefix.id}-public-ip" location = azurerm_resource_group.rg.location resource_group_name = azurerm_resource_group.rg.name allocation_method = "Dynamic" } # Create Network Security Group and rules resource "azurerm_network_security_group" "my_terraform_nsg" { name = "${random_pet.prefix.id}-nsg" location = azurerm_resource_group.rg.location resource_group_name = azurerm_resource_group.rg.name security_rule { name = "RDP" priority = 1000 direction = "Inbound" access = "Allow" protocol = "*" source_port_range = "*" destination_port_range = "3389" source_address_prefix = "*" destination_address_prefix = "*" } security_rule { name = "web" priority = 1001 direction = "Inbound" access = "Allow" protocol = "Tcp" source_port_range = "*" destination_port_range = "80" source_address_prefix = "*" destination_address_prefix = "*" } } # Create network interface resource "azurerm_network_interface" "my_terraform_nic" { name = "${random_pet.prefix.id}-nic" location = azurerm_resource_group.rg.location resource_group_name = azurerm_resource_group.rg.name ip_configuration { name = "my_nic_configuration" subnet_id = azurerm_subnet.my_terraform_subnet.id private_ip_address_allocation = "Dynamic" public_ip_address_id = azurerm_public_ip.my_terraform_public_ip.id } } # Connect the security group to the network interface resource "azurerm_network_interface_security_group_association" "example" { network_interface_id = azurerm_network_interface.my_terraform_nic.id network_security_group_id = azurerm_network_security_group.my_terraform_nsg.id } # Create storage account for boot diagnostics resource "azurerm_storage_account" "my_storage_account" { name = "diag${random_id.random_id.hex}" location = azurerm_resource_group.rg.location resource_group_name = azurerm_resource_group.rg.name account_tier = "Standard" account_replication_type = "LRS" } # Create virtual machine resource "azurerm_windows_virtual_machine" "main" { name = "${var.prefix}-vm" admin_username = "azureuser" admin_password = random_password.password.result location = azurerm_resource_group.rg.location resource_group_name = azurerm_resource_group.rg.name network_interface_ids = [azurerm_network_interface.my_terraform_nic.id] size = "Standard_DS1_v2" os_disk { name = "myOsDisk" caching = "ReadWrite" storage_account_type = "Premium_LRS" } source_image_reference { publisher = "MicrosoftWindowsServer" offer = "WindowsServer" sku = "2022-datacenter-azure-edition" version = "latest" } boot_diagnostics { storage_account_uri = azurerm_storage_account.my_storage_account.primary_blob_endpoint } } # Install IIS web server to the virtual machine resource "azurerm_virtual_machine_extension" "web_server_install" { name = "${random_pet.prefix.id}-wsi" virtual_machine_id = azurerm_windows_virtual_machine.main.id publisher = "Microsoft.Compute" type = "CustomScriptExtension" type_handler_version = "1.8" auto_upgrade_minor_version = true settings = <<SETTINGS { "commandToExecute": "powershell -ExecutionPolicy Unrestricted Install-WindowsFeature -Name Web-Server -IncludeAllSubFeature -IncludeManagementTools" } SETTINGS } # Generate random text for a unique storage account name resource "random_id" "random_id" { keepers = { # Generate a new ID only when a new resource group is defined resource_group = azurerm_resource_group.rg.name } byte_length = 8 } resource "random_password" "password" { length = 20 min_lower = 1 min_upper = 1 min_numeric = 1 min_special = 1 special = true } resource "random_pet" "prefix" { prefix = var.prefix length = 1 }variables.tfという名前のファイルを作成し、次のコードを挿入します。variable "resource_group_location" { default = "eastus" description = "Location of the resource group." } variable "prefix" { type = string default = "win-vm-iis" description = "Prefix of the resource name" }outputs.tfという名前のファイルを作成し、次のコードを挿入します。output "resource_group_name" { value = azurerm_resource_group.rg.name } output "public_ip_address" { value = azurerm_windows_virtual_machine.main.public_ip_address } output "admin_password" { sensitive = true value = azurerm_windows_virtual_machine.main.admin_password }
Terraform を初期化する
terraform init を実行して、Terraform のデプロイを初期化します。 このコマンドによって、Azure リソースを管理するために必要な Azure プロバイダーがダウンロードされます。
terraform init -upgrade
重要なポイント:
-upgradeパラメーターは、必要なプロバイダー プラグインを、構成のバージョン制約に準拠する最新バージョンにアップグレードします。
Terraform 実行プランを作成する
terraform plan を実行して、実行プランを作成します。
terraform plan -out main.tfplan
重要なポイント:
terraform planコマンドは、実行プランを作成しますが、実行はしません。 代わりに、構成ファイルに指定された構成を作成するために必要なアクションを決定します。 このパターンを使用すると、実際のリソースに変更を加える前に、実行プランが自分の想定と一致しているかどうかを確認できます。- 省略可能な
-outパラメーターを使用すると、プランの出力ファイルを指定できます。-outパラメーターを使用すると、レビューしたプランが適用内容とまったく同じであることが確実になります。 - 実行プランの永続化とセキュリティの詳細については、「セキュリティの警告」セクションを参照してください。
Terraform 実行プランを適用する
terraform apply を実行して、クラウド インフラストラクチャに実行プランを適用します。
terraform apply main.tfplan
重要なポイント:
terraform applyコマンドの例は、以前にterraform plan -out main.tfplanが実行されたことを前提としています。-outパラメーターに別のファイル名を指定した場合は、terraform applyの呼び出しで同じファイル名を使用します。-outパラメーターを使用しなかった場合は、パラメーターを指定せずにterraform applyを呼び出します。
Terraform での仮想マシン作成プロセス中のコスト情報は、Azure portal と同じようには表示されません。 仮想マシンのコストのしくみの詳細を知りたい場合は、コスト最適化の概要ページを参照してください。
結果を確認する
次のコマンドを実行して VM のパブリック IP アドレスを取得し、メモしておきます。
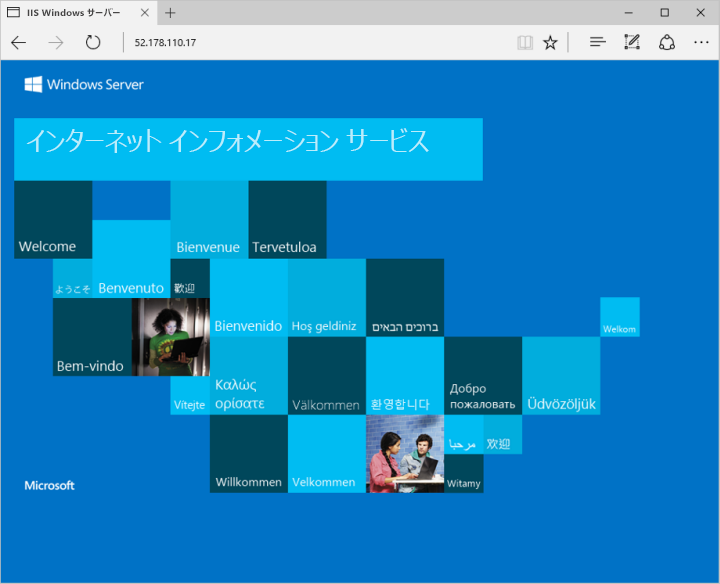
echo $(terraform output -raw public_ip_address)IIS をインストールし、VM のポート 80 をインターネットから開いたら、任意の Web ブラウザーを使用して IIS の既定のウェルカム ページを表示することができます。 前のコマンドで取得した VM のパブリック IP アドレスを使用します。 次の例は、既定の IIS Web サイトを示しています。
リソースをクリーンアップする
Terraform を使用して作成したリソースが不要になった場合は、次の手順を実行します。
terraform plan を実行して、
destroyフラグを指定します。terraform plan -destroy -out main.destroy.tfplan重要なポイント:
terraform planコマンドは、実行プランを作成しますが、実行はしません。 代わりに、構成ファイルに指定された構成を作成するために必要なアクションを決定します。 このパターンを使用すると、実際のリソースに変更を加える前に、実行プランが自分の想定と一致しているかどうかを確認できます。- 省略可能な
-outパラメーターを使用すると、プランの出力ファイルを指定できます。-outパラメーターを使用すると、レビューしたプランが適用内容とまったく同じであることが確実になります。 - 実行プランの永続化とセキュリティの詳細については、「セキュリティの警告」セクションを参照してください。
terraform apply を実行して、実行プランを適用します。
terraform apply main.destroy.tfplan
Azure での Terraform のトラブルシューティング
Azure で Terraform を使用する場合の一般的な問題のトラブルシューティング
次のステップ
このクイックスタートでは、Terraform を使用してシンプルな仮想マシンをデプロイしました。 Azure 仮想マシンの詳細については、Linux VM のチュートリアルを参照してください。