チュートリアル:Firebase SDK バージョン 0.6 を使用して Android デバイスにプッシュ通知を送信する
このチュートリアルでは、Azure Notification Hubs と Firebase Cloud Messaging (FCM) SDK バージョン 0.6 を使用して Android アプリケーションにプッシュ通知を送信する方法について説明します。 このチュートリアルでは、Firebase Cloud Messaging (FCM) を使用してプッシュ通知を受信する空の Android アプリケーションを作成します。
重要
Google は、2024 年 6 月 20 日に FCM レガシ HTTP のサポートを終了する予定です。 詳細については、「Azure Notification Hubs および Google Firebase Cloud Messaging の移行」を参照してください。
このチュートリアルの完成したコードは、GitHub からダウンロードできます。
このチュートリアルでは、次の手順を実行します。
- Android Studio プロジェクトを作成します。
- Firebase Cloud Messaging をサポートする Firebase プロジェクトを作成します。
- ハブを作成します。
- そのハブにアプリを接続します。
- アプリをテストします。
前提条件
このチュートリアルを完了するには、アクティブな Azure アカウントが必要です。 アカウントがない場合は、無料試用アカウントを数分で作成することができます。 詳細については、「Azure の無料試用版サイト」を参照してください。
次のものも必要です。
- 最新バージョンの Android Studio
- Android 2.3 以上 (Firebase Cloud Messaging 対応)
- Google Repository リビジョン 27 以上 (Firebase Cloud Messaging 対応)
- Google Play 開発者サービス 9.0.2 以上 (Firebase Cloud Messaging 対応)
このチュートリアルを完了することは、Android アプリの他のすべての Notification Hubs チュートリアルを行うための前提条件です。
Android Studio プロジェクトを作成する
- Android Studio を起動します。
- [File](ファイル) を選択し、 [New](新規) をポイントして、 [New Project](新しいプロジェクト) を選択します。
- [Choose your project](プロジェクトの選択) ページで、 [Empty Activity](空のアクティビティ) を選択してから、 [Next](次へ) を選択します。
- [Configure your project]\(プロジェクトの構成\) ページで、次の手順を実行します。
アプリケーションの名前を入力します。
プロジェクト ファイルを保存する場所を指定します。
[完了] を選びます。

FCM をサポートする Firebase プロジェクトを作成する
Firebase コンソールにサインインします。 Firebase プロジェクトがまだない場合は、新しく作成します。
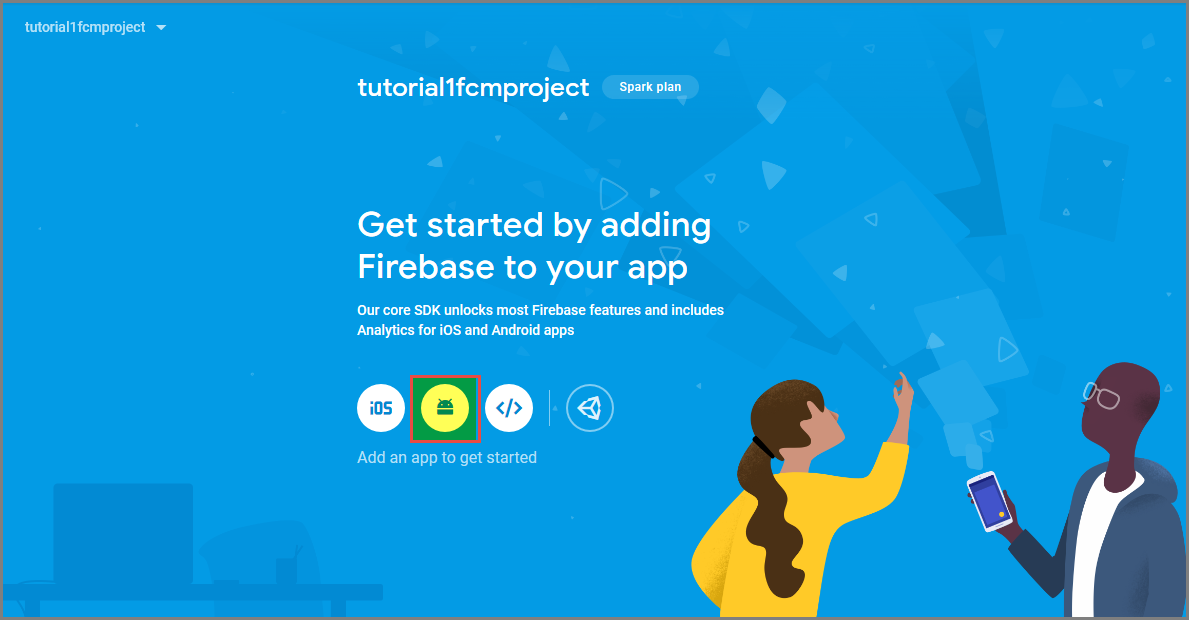
プロジェクトを作成した後、 [Add Firebase to your Android app](Android アプリに Firebase を追加する) を選択します。
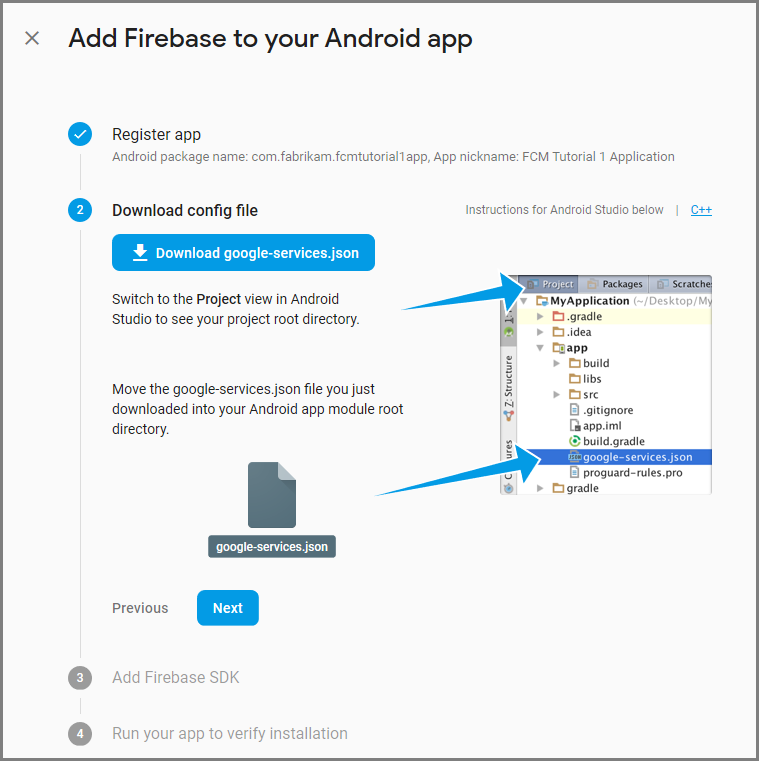
[Android アプリへの Firebase の追加] ページで、次の手順を実行します。
[Android package name](Android パッケージ名) については、お使いのアプリケーションの build.gradle ファイル内にある applicationId の値をコピーします。 この例では
com.fabrikam.fcmtutorial1appです。
[アプリの登録] を選択します。
[google-services.json をダウンロード] を選択し、プロジェクトの app フォルダーにファイルを保存して、[次へ] をクリックします。
Android Studio で、プロジェクトに次の構成変更を加えます。
プロジェクト レベルの build.gradle ファイル (<project>/build.gradle) で、dependencies セクションに次のステートメントを追加します。
classpath 'com.google.gms:google-services:4.0.1'アプリレベルの build.gradle ファイル (<project>/<app-module>/build.gradle) で、dependencies セクションに次のステートメントを追加します。
implementation 'com.google.firebase:firebase-core:16.0.8'
implementation 'com.google.firebase:firebase-messaging:17.3.4'
アプリ レベルの build.gradle ファイルの最後の dependencies セクションの末尾に次の行を追加します。
apply plugin: 'com.google.gms.google-services'ツールバーの [今すぐ同期] を選択します。

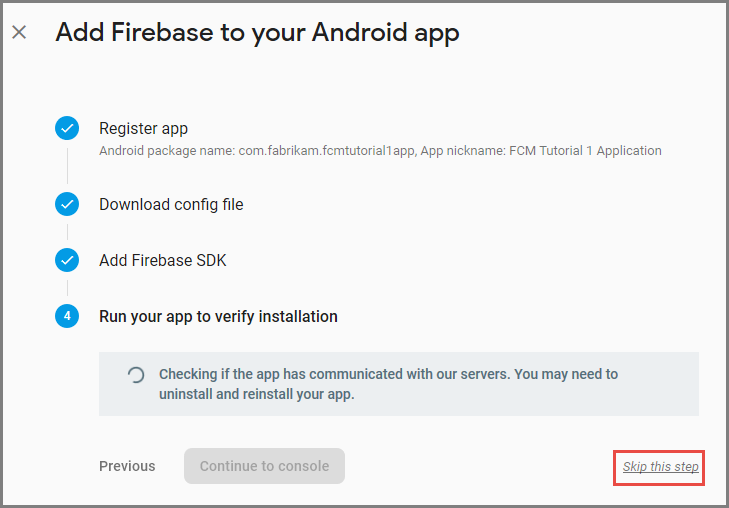
[次へ] を選択します。
[この手順をスキップする] を選択します。
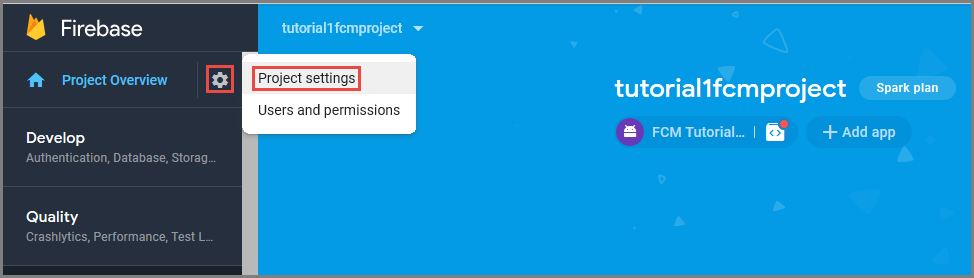
Firebase コンソールで、プロジェクトの歯車アイコンを選択します。 次に、 [Project Settings](プロジェクト設定) を選択します。
google-services.json ファイルを Android Studio プロジェクトの app フォルダーにダウンロードしていない場合は、このページでダウンロードできます。
上部にある [クラウド メッセージング] タブに切り替えます。
後で使用するために、サーバー キーをコピーし、保存します。 この値を使用して、ハブを構成します。
firebase の [クラウド メッセージング] タブに [サーバー キー] が表示されない場合、次の追加手順を行います。
- "クラウド メッセージング API (レガシ) 🚫 無効" という見出しの 3 点メニューをクリックします
- 表示された "Google クラウド コンソールで API を管理する" リンクにアクセスします。
- Google クラウド コンソールで、ボタンを押して googlecloudmessaging API を有効にします。
- 数分待ちます。
- firebase コンソール プロジェクトの [クラウド メッセージング] タブに戻り、ページを更新します。
- [クラウド メッセージング API] 見出しが "クラウド メッセージング API (レガシ) ✅ 有効" に変更され、サーバー キーが表示されます。

ハブの構成
Azure portal にサインインします。
左側のメニューから、 [すべてのサービス] を選択します。

[サービスのフィルター] テキスト ボックスに「Notification Hubs」と入力します。 サービス名の横にある星のアイコンを選択して、左側のメニューにある [お気に入り] セクションにサービスを追加します。 [Notification Hubs] を選択します。

[Notification Hubs] ページで、ツール バーの [作成] を選択します。

[Notification Hub] ページの [基本] タブで、次の手順を行います。
[サブスクリプション] で、使用する Azure サブスクリプションの名前を選択し、既存のリソース グループを選択するか、新しいリソース グループを作成します。
[名前空間の詳細] に新しい名前空間の一意の名前を入力します。
名前空間には 1 つ以上の通知ハブが含まれているので、 [通知ハブの詳細] にそのハブの名前を入力します。
[場所] ドロップダウン リスト ボックスで値を選択します。 この値には、ハブを作成する場所を指定します。

Availability Zones オプションをレビューします。 可用性ゾーンがあるリージョンを選んだ場合は、既定でチェック ボックスが選択されます。 Availability Zones は有料機能であるため、追加料金がレベルに追加されます。
[ディザスター リカバリー] オプションを選びます。[None] (なし)、[Paired recovery region] (ペアの復旧リージョン)、または [Flexible recovery region] (フレキシブル復旧リージョン) のオプションがあります。 Paired recovery region (ペアリングされた復旧リージョン) を選択すると、フェールオーバー リージョンが表示されます。 Flexible recovery region (柔軟な復旧リージョン) を選択した場合は、ドロップダウンを使用して復旧リージョンの一覧から選択します。

[作成] を選択します
デプロイが完了したら、[リソースに移動] を選択します。


Firebase Cloud Messaging の設定をハブ用に構成する
左側のウィンドウの [Settings](設定) で、 [Google (GCM/FCM)] を選択します。
前に保存した FCM プロジェクトのサーバー キーを入力します。
ツールバーで、 [Save](保存) をクリックします。

Azure portal に、ハブが正常に更新されたことを示すアラートのメッセージが表示されます。 [Save](保存) ボタンが無効になります。
これで、Firebase Cloud Messaging と連携するようにハブが構成されました。 また、デバイスに通知を送信したり、通知を受信するアプリを登録したりするために必要な接続文字列も取得されました。
通知ハブにアプリケーションを接続する
プロジェクトへの Google Play Services の追加
Android Studio で、メニューから [ツール] を選択し、 [SDK Manager] を選択します。
自分のプロジェクトで使用される Android SDK のターゲット バージョンを選択します。 次に、 [パッケージの詳細ページの表示] を選択します。

まだインストールされていない場合は、 [Google API] を選択します。

[SDK Tools](SDK ツール) タブに切り替えます。Google Play 開発者サービスをまだインストールしていない場合は、次の図に示すように [Google Play 開発者サービス] を選択します。 次に、 [適用] をクリックしてインストールします。 SDK のパスは後の手順で使用するので、メモしておいてください。

[Confirm Change](変更の確認) ダイアログ ボックスが表示される場合は、 [OK] を選択します。 コンポーネント インストーラーによって、要求したコンポーネントがインストールされます。 コンポーネントがインストールされた後、 [Finish](完了) を選択します。
[OK] を選択して、 [Settings for New Projects](新しいプロジェクトの設定) ダイアログ ボックスを閉じます。
AndroidManifest.xml ファイルを開き、次のタグを application タグに追加します。
<meta-data android:name="com.google.android.gms.version"
     android:value="@integer/google_play_services_version" />
Azure Notification Hubs ライブラリの追加
アプリの Build.Gradle ファイルで、dependencies セクションに次の行を追加します。
implementation 'com.microsoft.azure:notification-hubs-android-sdk:0.6@aar'dependencies セクションの後に次のリポジトリを追加します。
repositories {
    maven {
        url "https://dl.bintray.com/microsoftazuremobile/SDK"
    }
}
Google Firebase のサポートを追加する
アプリの Build.Gradle ファイルで、dependencies セクションに次の行を追加します (まだ存在しない場合)。
implementation 'com.google.firebase:firebase-core:16.0.8'
implementation 'com.google.firebase:firebase-messaging:17.3.4'
implementation 'com.google.firebase:firebase-iid:21.1.0'
ファイルの最後に次のプラグインを追加します (まだそこにない場合)。
apply plugin: 'com.google.gms.google-services'ツール バーの [Sync Now](今すぐ同期) を選択します。
AndroidManifest.xml ファイルの更新
FCM 登録トークンを受信したら、それを使用して Azure Notification Hubs に登録します。 この登録は、
RegistrationIntentServiceという名前のIntentServiceを使用してバックグラウンドでサポートします。 また、このサービスは FCM 登録トークンを更新します。 さらに、通知の受信と処理のために、FirebaseMessagingServiceのサブクラスとしてFirebaseServiceという名前のクラスを作成し、onMessageReceivedメソッドをオーバーライドします。次のサービス定義を AndroidManifest.xml ファイルの
<application>タグ内に追加します。<service android:name=".RegistrationIntentService" android:exported="false"> </service> <service android:name=".FirebaseService" android:exported="false"> <intent-filter> <action android:name="com.google.firebase.MESSAGING_EVENT" /> </intent-filter> </service>次の必要な FCM 関連のアクセス許可を
</application>タグの下に追加します。<uses-permission android:name="android.permission.INTERNET"/> <uses-permission android:name="android.permission.GET_ACCOUNTS"/> <uses-permission android:name="com.google.android.c2dm.permission.RECEIVE" />
コードの追加
[Project (プロジェクト)] ビューで、 [app]>[src]>[main]>[java] の順に展開します。 [java] のパッケージ フォルダーを右クリックして、 [New](新規) 、 [Java Class](Java クラス) の順に選択します。 名前に「NotificationSettings」と入力して、 [OK] を選択します。
以下の
NotificationSettingsクラスのコード内にある次の 2 つのプレースホルダーを忘れずに更新してください。HubListenConnectionString: ハブの DefaultListenAccessSignature 接続文字列。 接続文字列をコピーするには、Azure portal のハブにある [アクセス ポリシー] をクリックします。
HubName: Azure portal のハブ ページに表示されるハブの名前を使用します。
NotificationSettingsのコードは次のとおりです。public class NotificationSettings { public static String HubName = "<Your HubName>"; public static String HubListenConnectionString = "<Enter your DefaultListenSharedAccessSignature connection string>"; }重要
先に進む前に、ハブの名前と DefaultListenSharedAccessSignature を入力します。
RegistrationIntentServiceという名前の別の新しいクラスをプロジェクトに追加します。 このクラスによって、IntentServiceインターフェイスが実装されます。 また、FCM トークンの更新と通知ハブへの登録も処理されます。次のコードをこのクラスに使用します。
import android.app.IntentService; import android.content.Intent; import android.content.SharedPreferences; import android.preference.PreferenceManager; import android.util.Log; import com.google.android.gms.tasks.OnSuccessListener; import com.google.firebase.iid.FirebaseInstanceId; import com.google.firebase.iid.InstanceIdResult; import com.microsoft.windowsazure.messaging.NotificationHub; import java.util.concurrent.TimeUnit; public class RegistrationIntentService extends IntentService { private static final String TAG = "RegIntentService"; String FCM_token = null; private NotificationHub hub; public RegistrationIntentService() { super(TAG); } @Override protected void onHandleIntent(Intent intent) { SharedPreferences sharedPreferences = PreferenceManager.getDefaultSharedPreferences(this); String resultString = null; String regID = null; String storedToken = null; try { FirebaseInstanceId.getInstance().getInstanceId().addOnSuccessListener(new OnSuccessListener<InstanceIdResult>() { @Override public void onSuccess(InstanceIdResult instanceIdResult) { FCM_token = instanceIdResult.getToken(); Log.d(TAG, "FCM Registration Token: " + FCM_token); } }); TimeUnit.SECONDS.sleep(1); // Storing the registration ID that indicates whether the generated token has been // sent to your server. If it is not stored, send the token to your server. // Otherwise, your server should have already received the token. if (((regID=sharedPreferences.getString("registrationID", null)) == null)){ NotificationHub hub = new NotificationHub(NotificationSettings.HubName, NotificationSettings.HubListenConnectionString, this); Log.d(TAG, "Attempting a new registration with NH using FCM token : " + FCM_token); regID = hub.register(FCM_token).getRegistrationId(); // If you want to use tags... // Refer to : https://azure.microsoft.com/documentation/articles/notification-hubs-routing-tag-expressions/ // regID = hub.register(token, "tag1,tag2").getRegistrationId(); resultString = "New NH Registration Successfully - RegId : " + regID; Log.d(TAG, resultString); sharedPreferences.edit().putString("registrationID", regID ).apply(); sharedPreferences.edit().putString("FCMtoken", FCM_token ).apply(); } // Check to see if the token has been compromised and needs refreshing. else if (!(storedToken = sharedPreferences.getString("FCMtoken", "")).equals(FCM_token)) { NotificationHub hub = new NotificationHub(NotificationSettings.HubName, NotificationSettings.HubListenConnectionString, this); Log.d(TAG, "NH Registration refreshing with token : " + FCM_token); regID = hub.register(FCM_token).getRegistrationId(); // If you want to use tags... // Refer to : https://azure.microsoft.com/documentation/articles/notification-hubs-routing-tag-expressions/ // regID = hub.register(token, "tag1,tag2").getRegistrationId(); resultString = "New NH Registration Successfully - RegId : " + regID; Log.d(TAG, resultString); sharedPreferences.edit().putString("registrationID", regID ).apply(); sharedPreferences.edit().putString("FCMtoken", FCM_token ).apply(); } else { resultString = "Previously Registered Successfully - RegId : " + regID; } } catch (Exception e) { Log.e(TAG, resultString="Failed to complete registration", e); // If an exception happens while fetching the new token or updating registration data // on a third-party server, this ensures that we'll attempt the update at a later time. } // Notify UI that registration has completed. if (MainActivity.isVisible) { MainActivity.mainActivity.ToastNotify(resultString); } } }MainActivityクラスで、クラス宣言の上に次のimportステートメントを追加します。import com.google.android.gms.common.ConnectionResult; import com.google.android.gms.common.GoogleApiAvailability; import android.content.Intent; import android.util.Log; import android.widget.TextView; import android.widget.Toast;クラスの先頭に次のメンバーを追加します。 これらのフィールドは、Google の推奨に従って Google Play 開発者サービスの可用性をチェックするために使用します。
public static MainActivity mainActivity; public static Boolean isVisible = false; private static final String TAG = "MainActivity"; private static final int PLAY_SERVICES_RESOLUTION_REQUEST = 9000;MainActivityクラスに、Google Play 開発者サービスが利用可能かどうかを確認する次のメソッドを追加します。/** * Check the device to make sure it has the Google Play Services APK. If * it doesn't, display a dialog box that enables users to download the APK from * the Google Play Store or enable it in the device's system settings. */ private boolean checkPlayServices() { GoogleApiAvailability apiAvailability = GoogleApiAvailability.getInstance(); int resultCode = apiAvailability.isGooglePlayServicesAvailable(this); if (resultCode != ConnectionResult.SUCCESS) { if (apiAvailability.isUserResolvableError(resultCode)) { apiAvailability.getErrorDialog(this, resultCode, PLAY_SERVICES_RESOLUTION_REQUEST) .show(); } else { Log.i(TAG, "This device is not supported by Google Play Services."); ToastNotify("This device is not supported by Google Play Services."); finish(); } return false; } return true; }MainActivityクラスに次のコードを追加します。このコードは、Google Play 開発者サービスを確認してから、IntentServiceを呼び出して FCM 登録トークンを取得し、ハブに登録します。public void registerWithNotificationHubs() { if (checkPlayServices()) { // Start IntentService to register this application with FCM. Intent intent = new Intent(this, RegistrationIntentService.class); startService(intent); } }MainActivityクラスのOnCreateメソッドで、アクティビティの作成時に登録プロセスを開始するために次のコードを追加します。@Override protected void onCreate(Bundle savedInstanceState) { super.onCreate(savedInstanceState); setContentView(R.layout.activity_main); mainActivity = this; registerWithNotificationHubs(); FirebaseService.createChannelAndHandleNotifications(getApplicationContext()); }アプリの状態を確認してアプリ内で報告するには、次の追加メソッドを
MainActivityに追加します。@Override protected void onStart() { super.onStart(); isVisible = true; } @Override protected void onPause() { super.onPause(); isVisible = false; } @Override protected void onResume() { super.onResume(); isVisible = true; } @Override protected void onStop() { super.onStop(); isVisible = false; } public void ToastNotify(final String notificationMessage) { runOnUiThread(new Runnable() { @Override public void run() { Toast.makeText(MainActivity.this, notificationMessage, Toast.LENGTH_LONG).show(); TextView helloText = (TextView) findViewById(R.id.text_hello); helloText.setText(notificationMessage); } }); }ToastNotifyメソッドでは "Hello World"TextViewコントロールを使用し、アプリで状態と通知を継続的に報告します。 res>layout>activity_main.xml レイアウトで、そのコントロールに次の ID を追加します。android:id="@+id/text_hello"
次に、AndroidManifest.xml で定義したレシーバーのサブクラスを追加します。
FirebaseServiceという名前の別の新しいクラスをプロジェクトに追加します。次の import ステートメントを
FirebaseService.javaの先頭に追加します。import com.google.firebase.messaging.FirebaseMessagingService; import com.google.firebase.messaging.RemoteMessage; import android.util.Log; import android.app.NotificationChannel; import android.app.NotificationManager; import android.app.PendingIntent; import android.content.Context; import android.content.Intent; import android.media.RingtoneManager; import android.net.Uri; import android.os.Build; import android.os.Bundle; import androidx.core.app.NotificationCompat;FirebaseServiceクラス用に次のコードを追加して、FirebaseMessagingServiceのサブクラスにします。このコードでは
onMessageReceivedメソッドをオーバーライドし、受信した通知をレポートします。 また、sendNotification()メソッドを使用して Android の通知マネージャーにプッシュ通知を送信します。 アプリが動作していないときに通知を受信した場合は、sendNotification()メソッドを呼び出します。public class FirebaseService extends FirebaseMessagingService { private String TAG = "FirebaseService"; public static final String NOTIFICATION_CHANNEL_ID = "nh-demo-channel-id"; public static final String NOTIFICATION_CHANNEL_NAME = "Notification Hubs Demo Channel"; public static final String NOTIFICATION_CHANNEL_DESCRIPTION = "Notification Hubs Demo Channel"; public static final int NOTIFICATION_ID = 1; private NotificationManager mNotificationManager; NotificationCompat.Builder builder; static Context ctx; @Override public void onMessageReceived(RemoteMessage remoteMessage) { // ... // TODO(developer): Handle FCM messages here. // Not getting messages here? See why this may be: https://goo.gl/39bRNJ Log.d(TAG, "From: " + remoteMessage.getFrom()); String nhMessage; // Check if message contains a notification payload. if (remoteMessage.getNotification() != null) { Log.d(TAG, "Message Notification Body: " + remoteMessage.getNotification().getBody()); nhMessage = remoteMessage.getNotification().getBody(); } else { nhMessage = remoteMessage.getData().values().iterator().next(); } // Also if you intend on generating your own notifications as a result of a received FCM // message, here is where that should be initiated. See sendNotification method below. if (MainActivity.isVisible) { MainActivity.mainActivity.ToastNotify(nhMessage); } sendNotification(nhMessage); } private void sendNotification(String msg) { Intent intent = new Intent(ctx, MainActivity.class); intent.addFlags(Intent.FLAG_ACTIVITY_CLEAR_TOP); mNotificationManager = (NotificationManager) ctx.getSystemService(Context.NOTIFICATION_SERVICE); PendingIntent contentIntent = PendingIntent.getActivity(ctx, 0, intent, PendingIntent.FLAG_ONE_SHOT); Uri defaultSoundUri = RingtoneManager.getDefaultUri(RingtoneManager.TYPE_NOTIFICATION); NotificationCompat.Builder notificationBuilder = new NotificationCompat.Builder( ctx, NOTIFICATION_CHANNEL_ID) .setContentText(msg) .setPriority(NotificationCompat.PRIORITY_HIGH) .setSmallIcon(android.R.drawable.ic_popup_reminder) .setBadgeIconType(NotificationCompat.BADGE_ICON_SMALL); notificationBuilder.setContentIntent(contentIntent); mNotificationManager.notify(NOTIFICATION_ID, notificationBuilder.build()); } public static void createChannelAndHandleNotifications(Context context) { ctx = context; if (Build.VERSION.SDK_INT >= Build.VERSION_CODES.O) { NotificationChannel channel = new NotificationChannel( NOTIFICATION_CHANNEL_ID, NOTIFICATION_CHANNEL_NAME, NotificationManager.IMPORTANCE_HIGH); channel.setDescription(NOTIFICATION_CHANNEL_DESCRIPTION); channel.setShowBadge(true); NotificationManager notificationManager = context.getSystemService(NotificationManager.class); notificationManager.createNotificationChannel(channel); } } }Android Studio のメニュー バーで、 [Build](ビルド)>[Rebuild Project](プロジェクトのリビルド) の順に選択し、コードにエラーがないことを確認します。
ic_launcherアイコンに関するエラーが発生する場合は、AndroidManifest.xml ファイルから次のステートメントを削除します。android:icon="@mipmap/ic_launcher"アプリを実行するための仮想デバイスがあることを確認します。 ない場合は、次の手順に従って追加してください。
選択したデバイスでアプリを実行し、そのアプリがハブに正常に登録されることを確認します。
注意
インスタンス ID サービスの
onTokenRefresh()メソッドが呼び出されるまでは、初期起動時に登録が失敗する場合があります。 更新すると、通知ハブに正常に登録されるようになります。


通知ハブから通知をテスト送信する
次の手順を実行することで、Azure portal からプッシュ通知を送信できます。
Azure portal 内のお使いのハブの [Notification Hub] ページで、 [トラブルシューティング] セクションの [テスト送信] を選択します。
[プラットフォーム] として、 [Android] を選択します。
[送信] を選択します。 Android デバイス上でモバイル アプリを実行していないため、まだそのデバイスに通知は表示されません。 モバイル アプリを実行したら、再度 [送信] ボタンを選択して通知メッセージを表示します。
一番下の一覧にある操作の結果を確認します。

デバイスに通知メッセージが表示されます。

プッシュ通知は通常、互換性のあるライブラリを使用して Mobile Apps などのバックエンド サービスや ASP.NET に送信されます。 ライブラリがバックエンドに使用できない場合は、REST API を直接使用して通知メッセージを送信することもできます。
通知の送信方法を確認できるチュートリアルの一覧を次に示します。
- Azure Mobile Apps:Notification Hubs に統合されている Mobile Apps バックエンドから通知を送信する方法の例については、「iOS アプリへのプッシュ通知の追加」を参照してください。
- ASP.NET: Notification Hubs を使用したユーザーへのプッシュ通知。
- Azure Notification Hub Java SDK: Java からの通知を送信するには「 Java から Notification Hubs を使用する方法 」を参照してください。 これは Android の開発用に Eclipse でテストされています。
- PHP: PHP から Notification Hubs を使用する方法
エミュレーターでモバイル アプリを実行する
エミュレーターの内部でプッシュ通知をテストする前に、エミュレーター イメージがアプリ用に選択した Google API レベルをサポートしていることを確認してください。 イメージでネイティブの Google API がサポートされていない場合、SERVICE_NOT_AVAILABLE 例外が発生することがあります。
また、 [設定]>[アカウント] で、実行中のエミュレーターに Google アカウントを追加したことを確認してください。 そうでない場合、FCM で登録しようとすると、AUTHENTICATION_FAILED 例外が発生する可能性があります。
次のステップ
このチュートリアルでは、Firebase Cloud Messaging を使用して、このサービスに登録されたすべての Android デバイスに通知をブロードキャストしました。 特定のデバイスにプッシュ通知を送信する方法を学習するには、次のチュートリアルに進んでください。