How do I schedule lessons for my Schedule As You Go students?
For Schedule As You Go (“SAYGO”) students, you can schedule each individual lesson on their Student Details page. If your student has a recurring schedule, their lessons are already scheduled for you.
(Click the links to learn more about Recurring schedules or Schedule As You Go plans.)
1. Open your student’s Details page
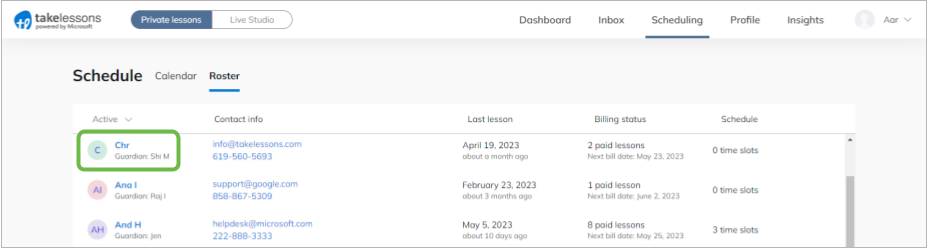
Log in to your TakeLessons teacher account and open your Roster page from the Scheduling tab.

Click on your student’s name link to open their Student Details page.
2. View your student’s paid lessons
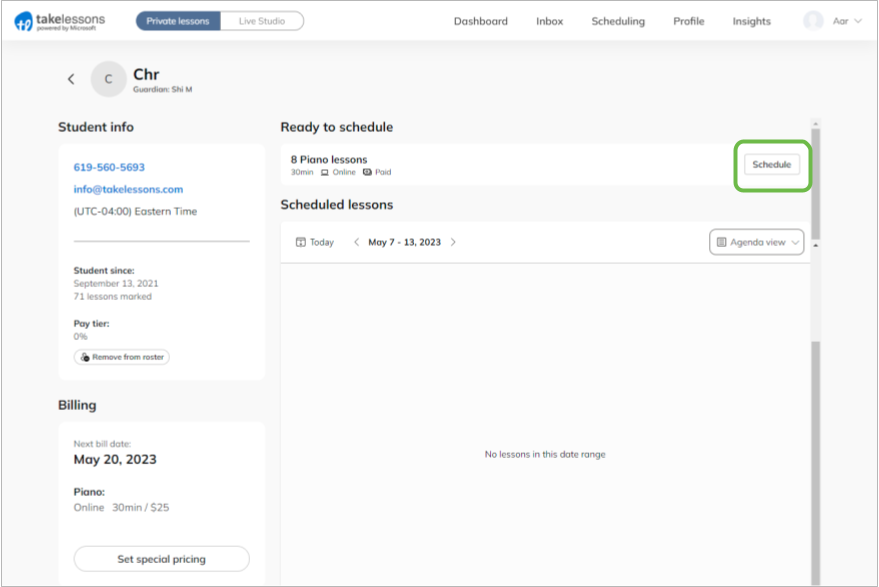
On your student’s Details page, you’ll see your student’s paid lesson credits. As long as your student has at least one paid lesson credit left, you can click Schedule to add future lessons to their calendar.
3. Schedule lessons
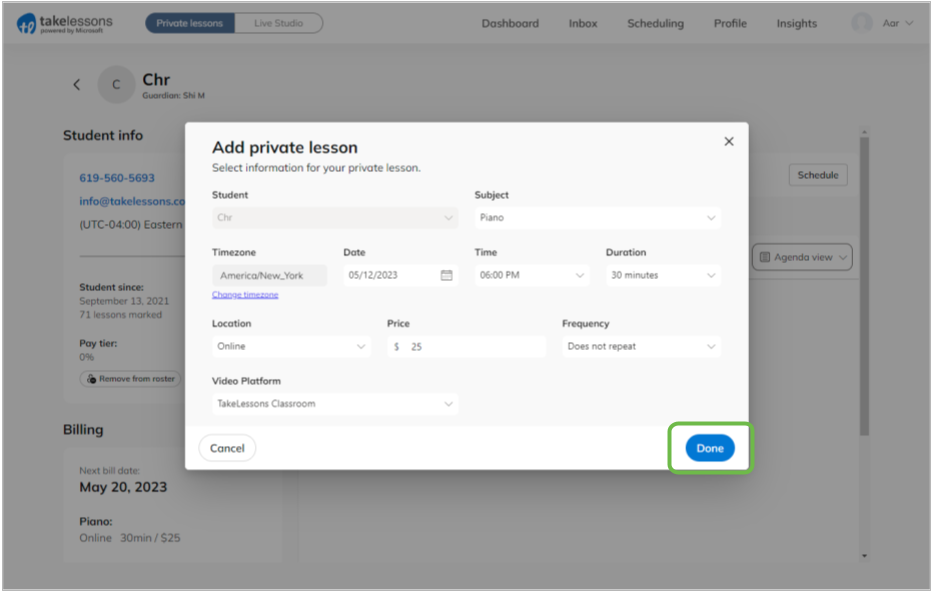
In the Schedule Lesson panel, enter the date and time you’d like to schedule the lesson.
(Note: Lesson details like service, location, duration, and the price shouldn't be edited here, since they reflect what the student has already paid for by default.)
To schedule only one lesson, select Does not repeat in the Lesson Repeat dropdown.
To automatically schedule all remaining paid lessons at the same time, on the same day of the week, select Repeats every (x) week(s).
Double check that the the details are correct, then click Done.
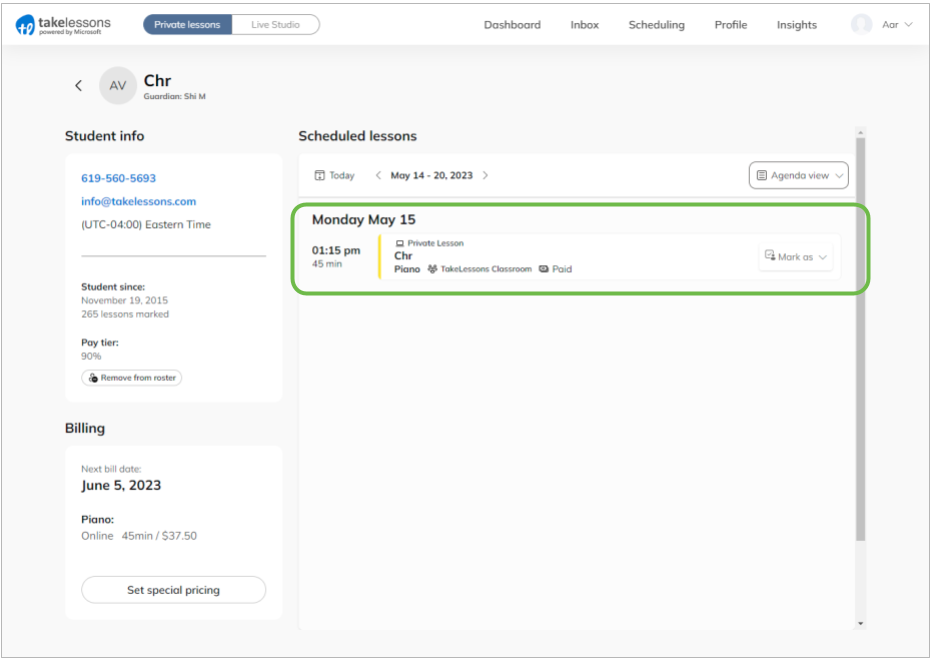
4. Scheduled lessons appear in your student’s Calendar
When you schedule future lessons for a SAYGO student, your student (or your student’s guardian) will be notified via email. You can click on any lesson in the student’s Calendar to mark attendance, edit/reschedule or cancel any lesson.