チュートリアル: Visual Studio で XAML と C# を使用して最初のユニバーサル Windows プラットフォーム アプリを作成する
Note
ユニバーサル Windows プラットフォーム (UWP) の現在の機能に満足している場合は、プロジェクトの種類を Windows App SDK に移行する必要はありません。 WinUI 2.x と Windows SDK では、UWP プロジェクトの種類がサポートされています。 WinUI 3 と Windows App SDK の使用を開始したい場合は、Windows App SDK のチュートリアルの手順に従ってください。
ここでは、Visual Studio 統合開発環境 (IDE) の概要を示し、任意の Windows 10 以降のデバイスで実行できる "Hello World" アプリケーションを作成します。 これの実行には、ユニバーサル Windows プラットフォーム (UWP) のプロジェクト テンプレート、Extensible Application Markup Language (XAML) および C# のプログラミング言語を使用します。
Visual Studio をまだインストールしていない場合は、Visual Studio のダウンロード ページに移動し、無料試用版をインストールしてください。
プロジェクトを作成する
まず、ユニバーサル Windows プラットフォーム プロジェクトを作成します。 この種類のプロジェクトには、必要となるすべてのテンプレート ファイルが付属していますので、何も追加する必要はありません。
Visual Studio を開き、[スタート] ウィンドウで [新しいプロジェクトの作成] を選択します。
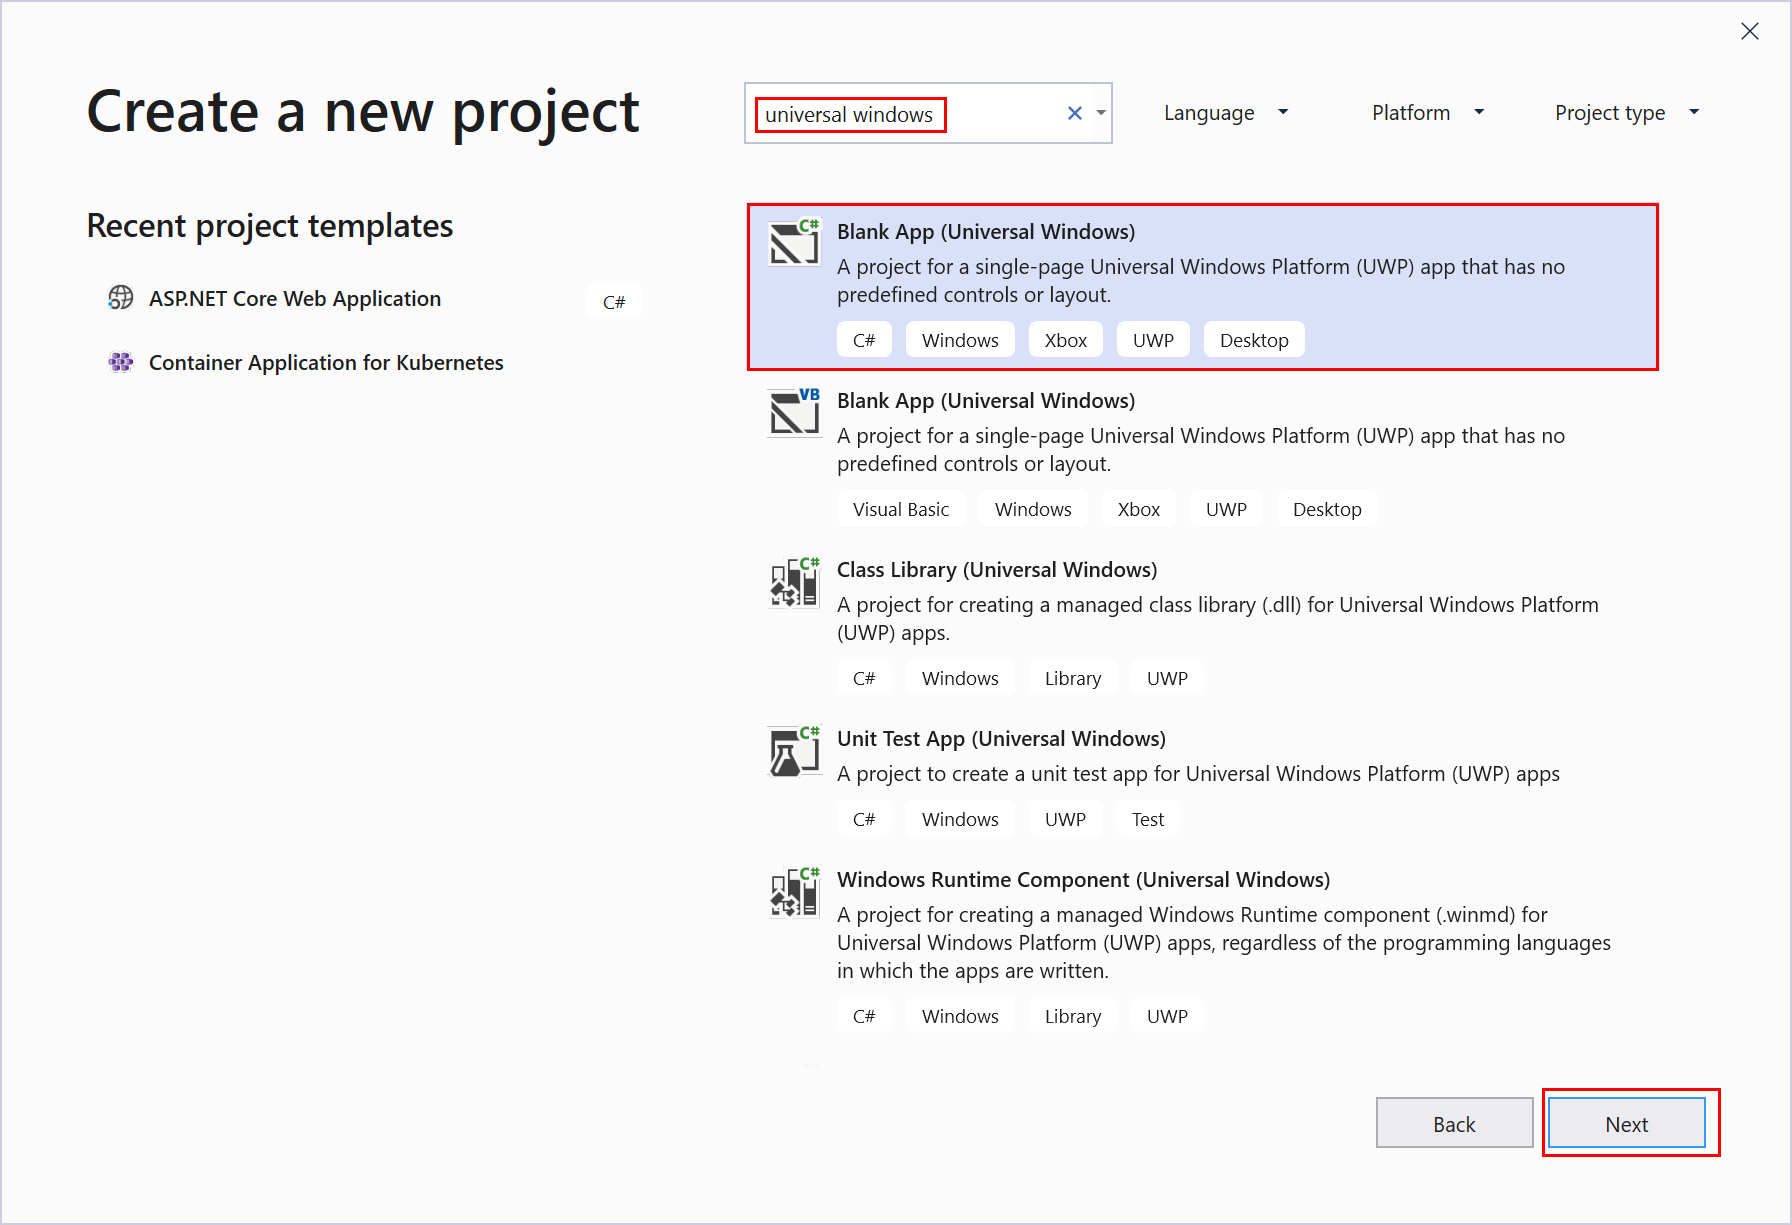
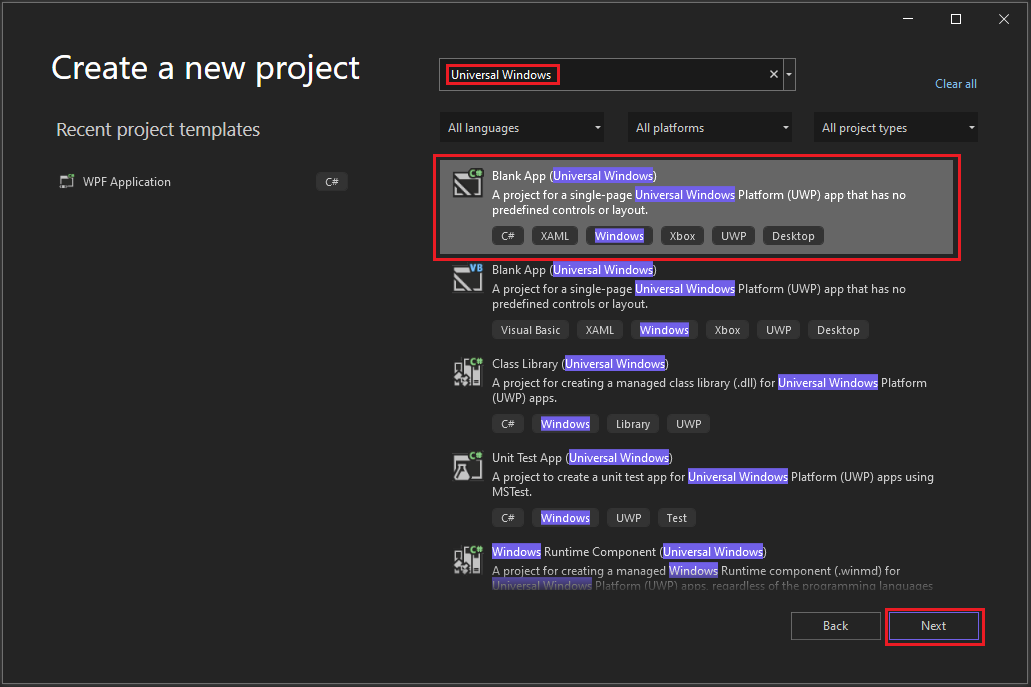
[新しいプロジェクトの作成] 画面で、検索ボックスに「ユニバーサル Windows」と入力し、 [空のアプリ (ユニバーサル Windows)] 用の C# テンプレートを選択して、 [次へ] を選択します。
Note
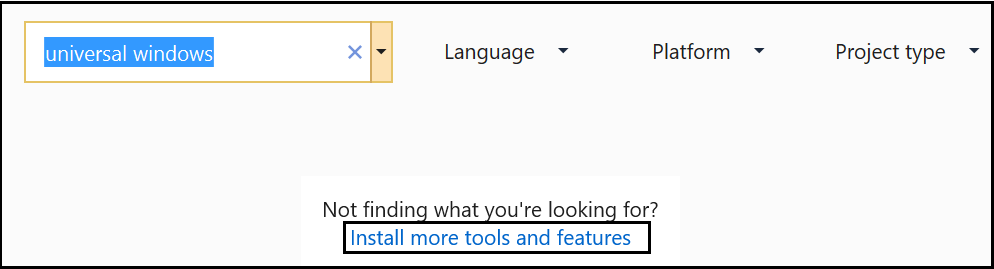
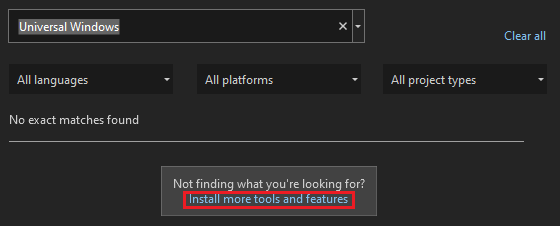
[空のアプリ (ユニバーサル Windows)] プロジェクト テンプレートが表示されない場合は、 [さらにツールと機能をインストールする] リンクをクリックします。
Visual Studio インストーラーが起動します。 [ユニバーサル Windows プラットフォーム開発] ワークロードを選択し、 [変更] を選択します。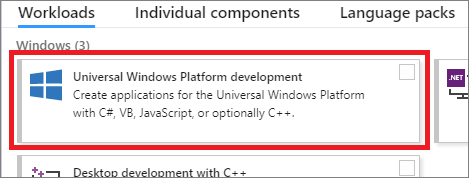
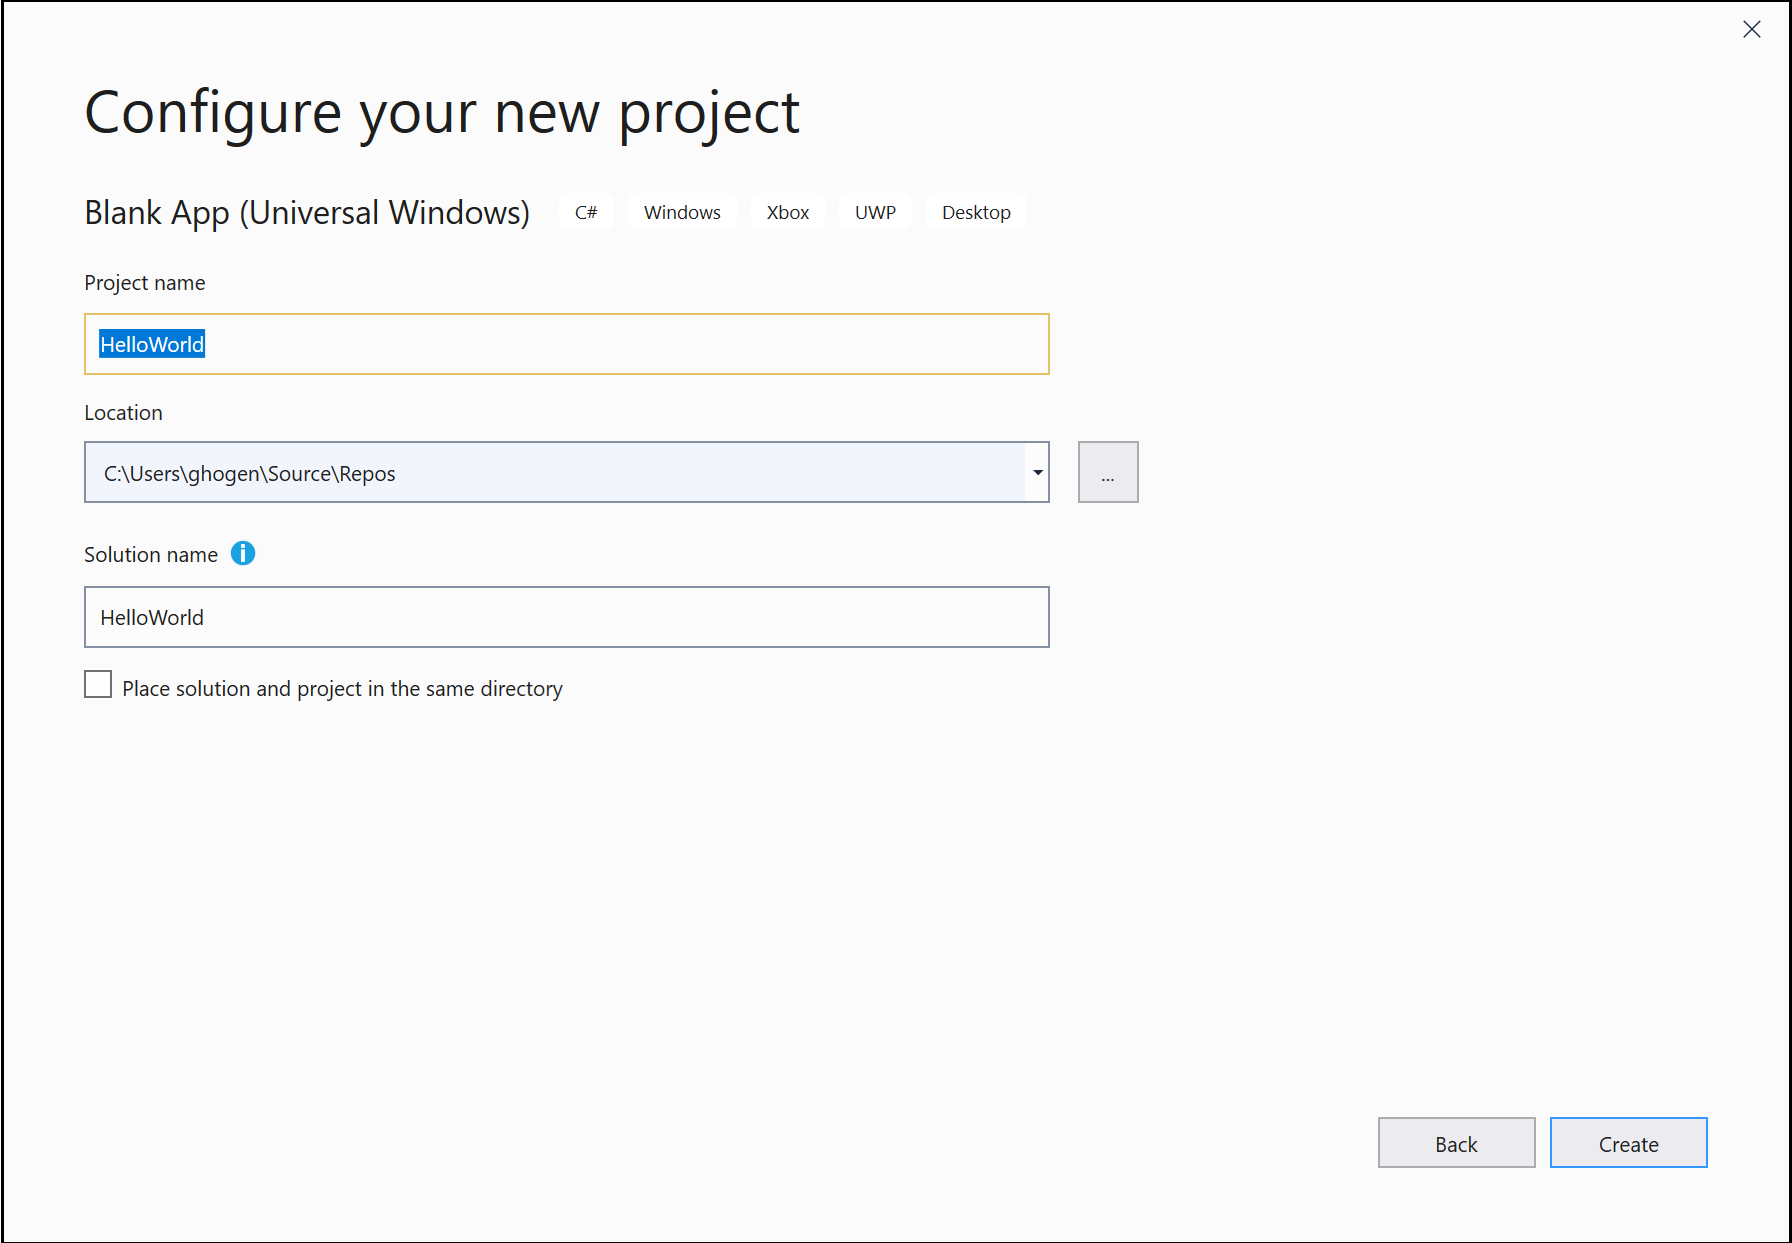
プロジェクトに「HelloWorld」という名前を付け、 [作成] を選択します。
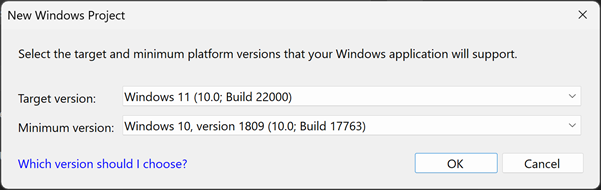
[新しいユニバーサル Windows プラットフォーム プロジェクト] ダイアログ ボックスで、 [ターゲット バージョン] と [最小バージョン] の既定の設定をそのまま使用します。

Note
UWP アプリを作成するために Visual Studio を初めて使用する場合、 [設定] ダイアログ ボックスが表示されます。 [開発者モード] 、 [はい] の順に選択します。
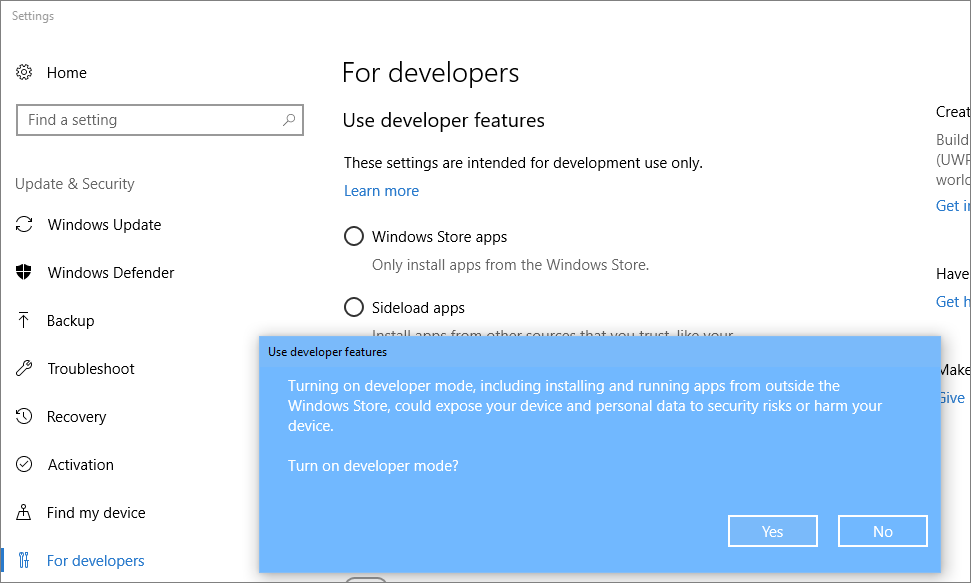
Visual Studio では、開発者モード パッケージが追加でインストールされます。 パッケージのインストールが完了したら、 [設定] ダイアログ ボックスを閉じます。
Visual Studio を開き、[スタート] ウィンドウで [新しいプロジェクトの作成] を選択します。
[新しいプロジェクトの作成] 画面で、検索ボックスに「ユニバーサル Windows」と入力し、 [空のアプリ (ユニバーサル Windows)] 用の C# テンプレートを選択して、 [次へ] を選択します。
Note
[空のアプリ (ユニバーサル Windows)] プロジェクト テンプレートが表示されない場合は、 [さらにツールと機能をインストールする] リンクをクリックします。
Visual Studio インストーラーが起動します。 [ユニバーサル Windows プラットフォーム開発] ワークロードを選択して、 [変更] を選択します。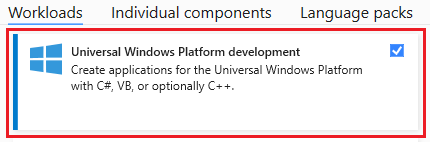
プロジェクトに「HelloWorld」という名前を付け、 [作成] を選択します。
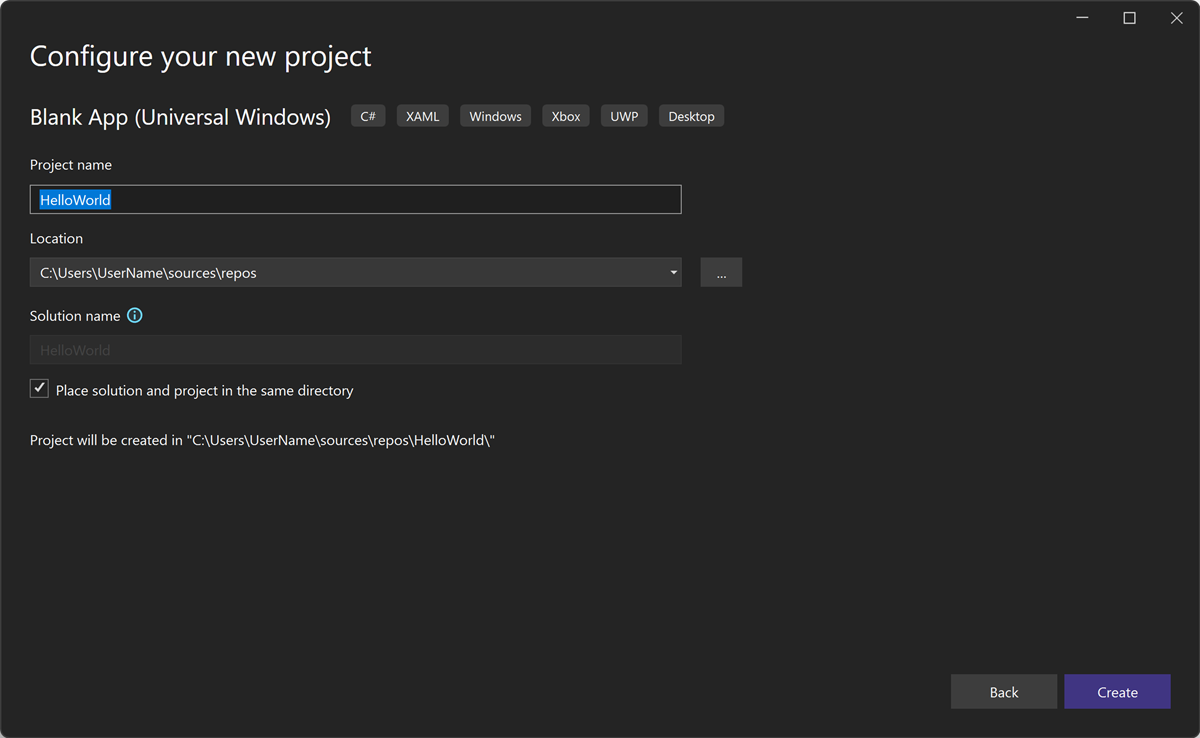
[新しいユニバーサル Windows プラットフォーム プロジェクト] ダイアログ ボックスで、 [ターゲット バージョン] と [最小バージョン] の既定の設定をそのまま使用します。
Note
Visual Studio を使用して UWP アプリを作成するのが初めての場合は、[Windows の開発者モードを有効にする] ダイアログが表示されます。 開発者用の設定を選択して、[設定] を開きます。 [開発者モード] をオンにし、[はい] を選択します。
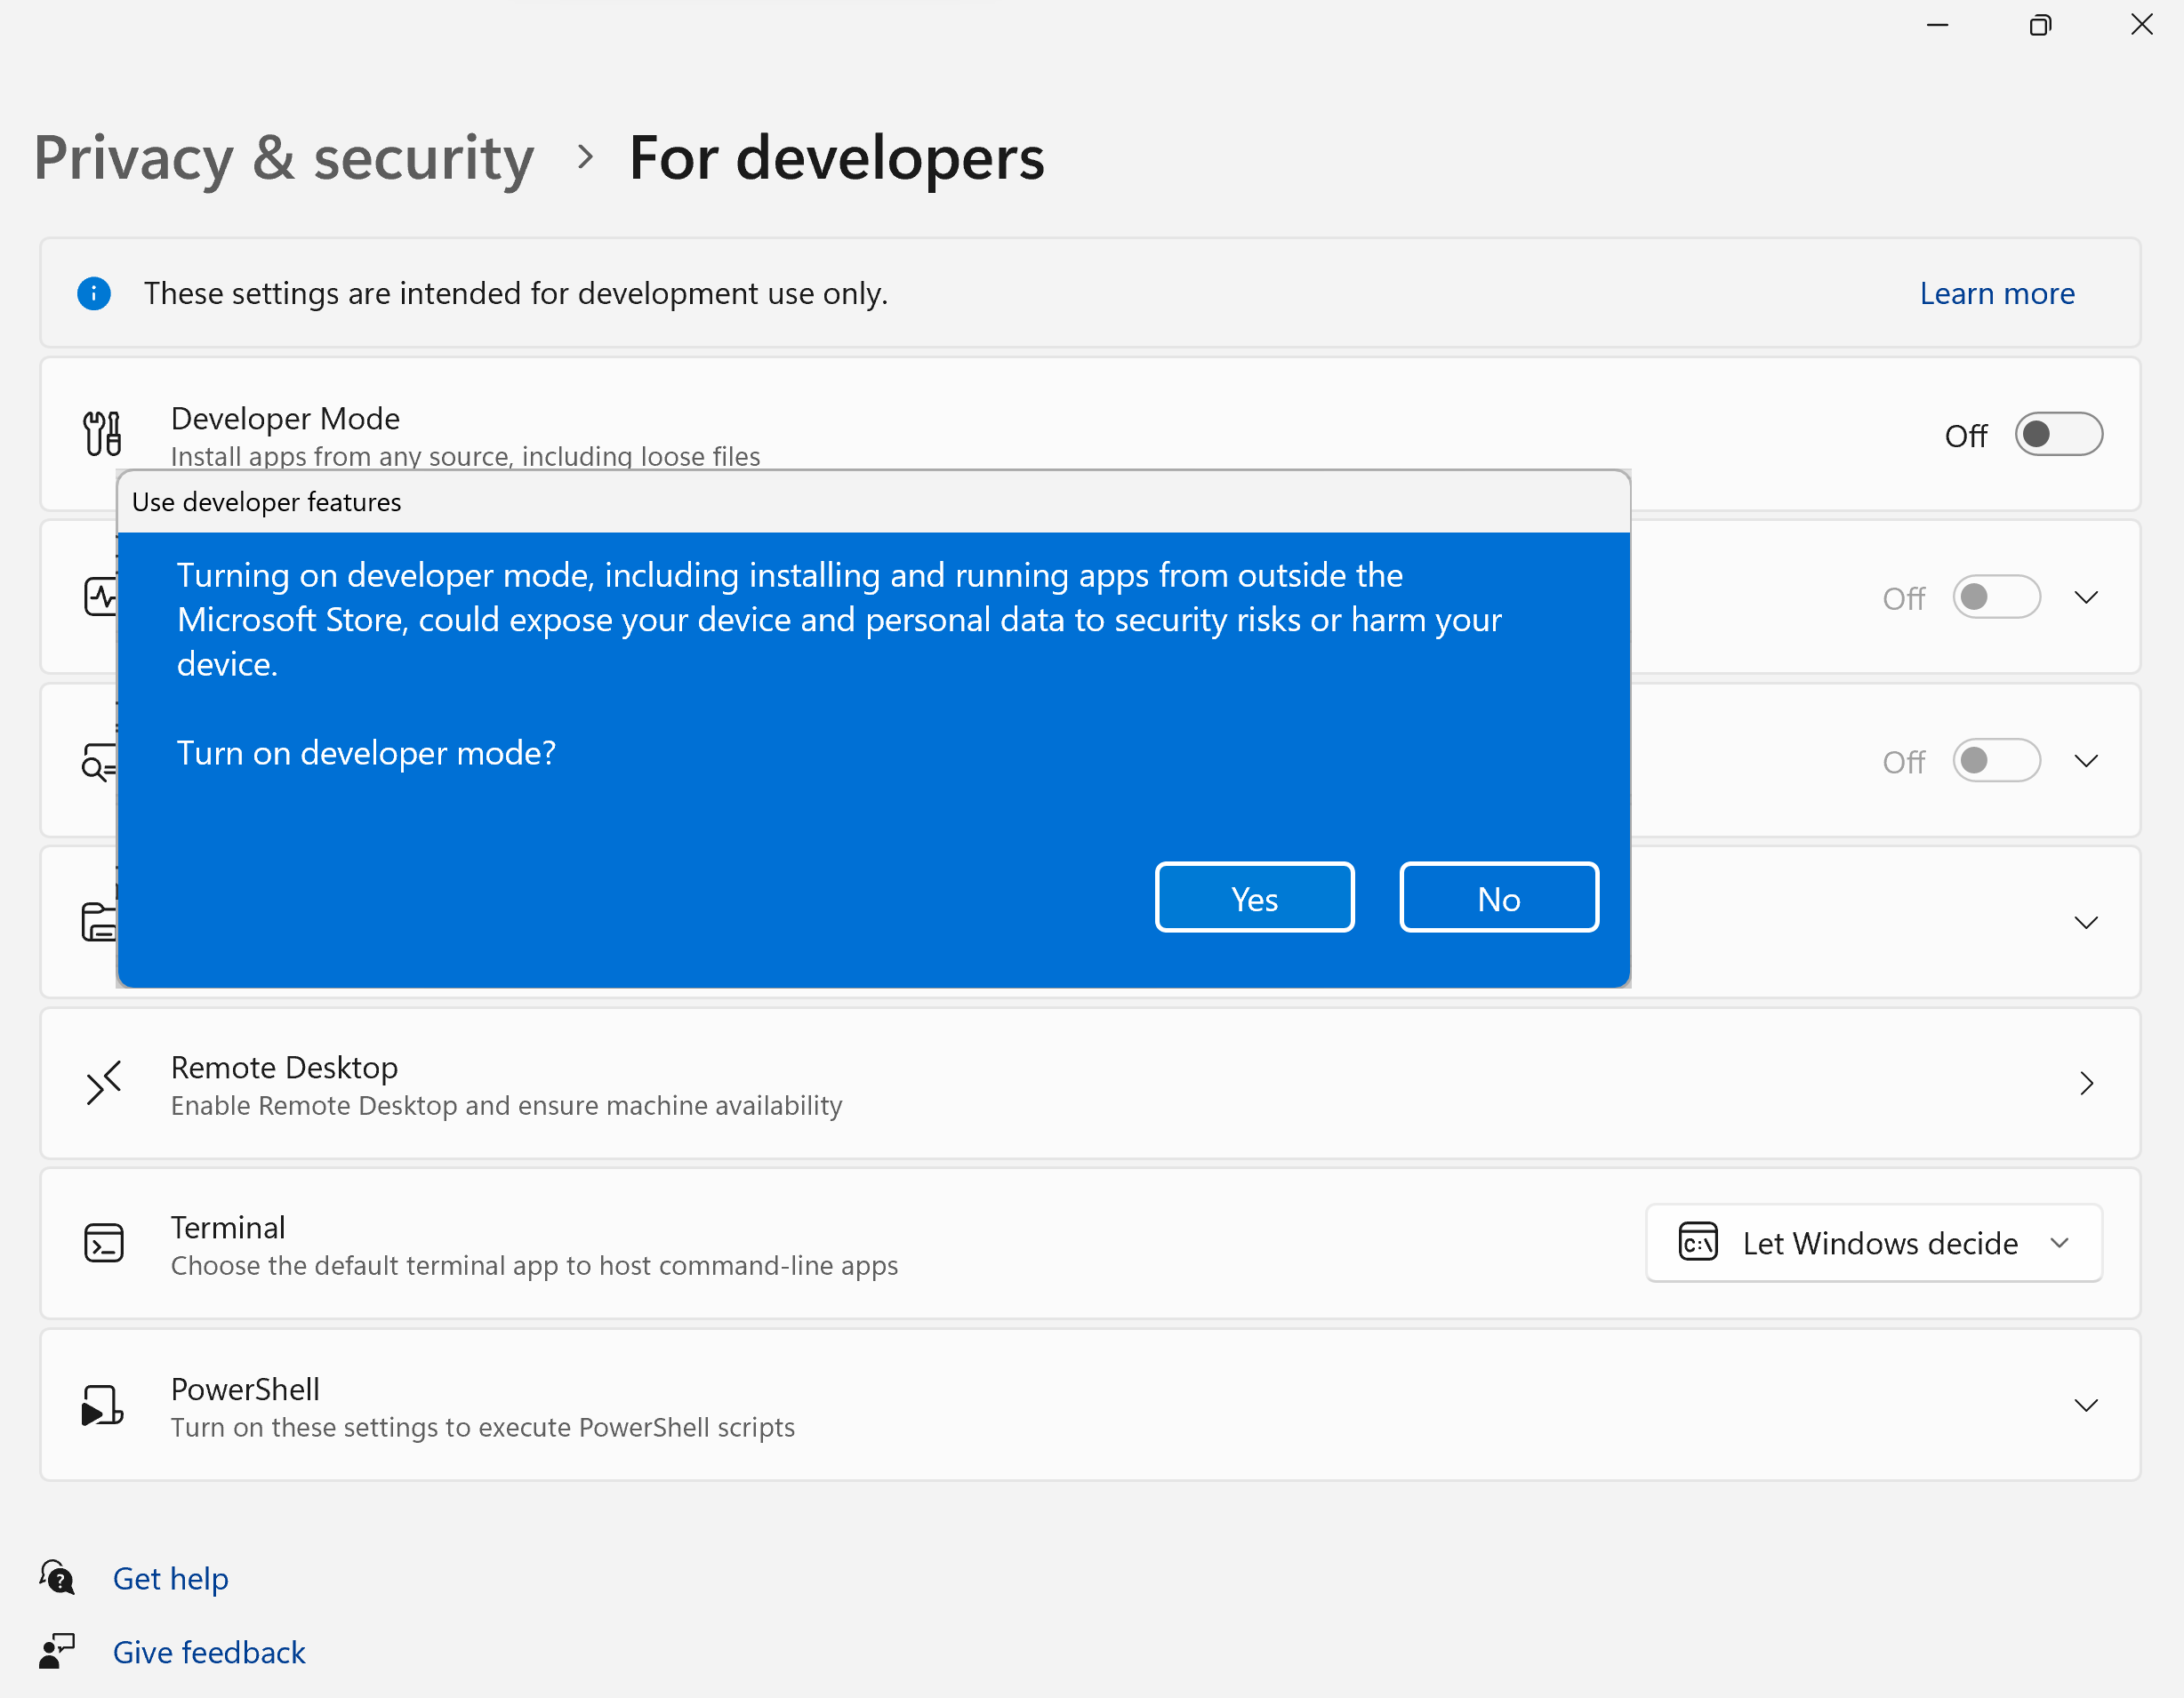
Visual Studio では、開発者モード パッケージが追加でインストールされます。 パッケージのインストールが完了したら、 [設定] ダイアログ ボックスを閉じます。
アプリケーションを作成する
開発を始めるときがきました。 これから、ボタン コントロールを追加し、ボタンにアクションを追加し、"Hello World" アプリを起動してどのように動作するか確認します。
デザイン キャンバスにボタンを追加する
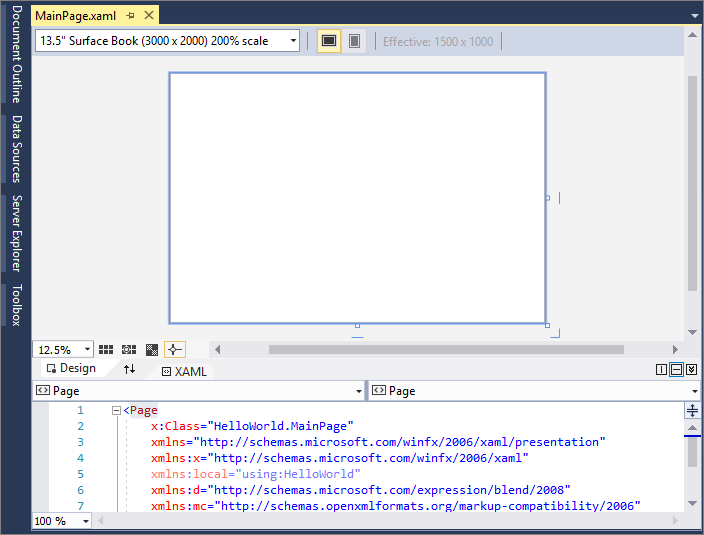
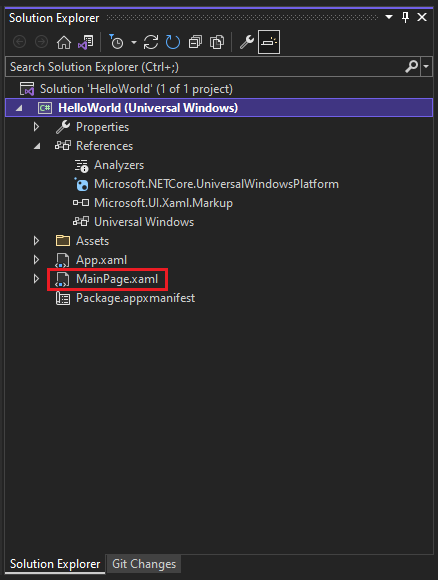
ソリューション エクスプローラーで、MainPage.xaml をダブルクリックして分割ビューを開きます。

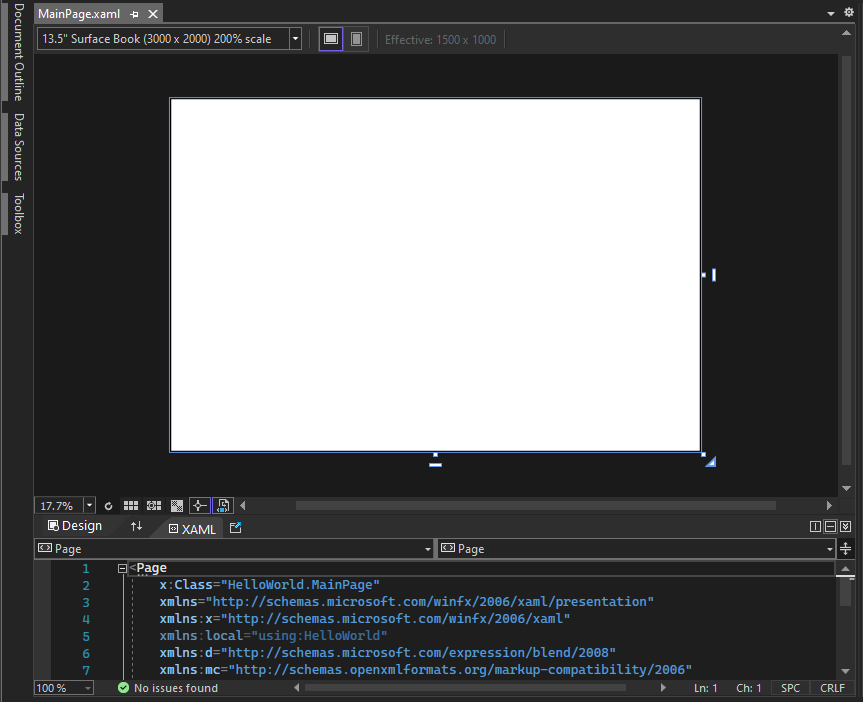
デザイン キャンバスを含む XAML デザイナーと、コードを追加または変更できる XAML エディターの 2 つのウィンドウがあります。
[ツールボックス] を選択して、ツールボックスのスライド アウト ウィンドウを開きます。
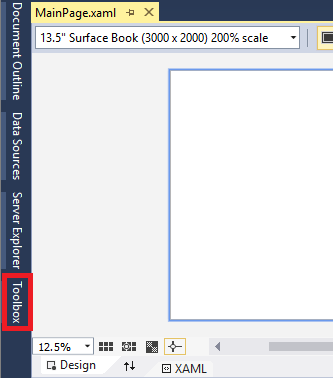
([ツールボックス] オプションが表示されない場合は、メニュー バーから開くことができます。これを行うには、[表示]>[ツール バー] を選びます。または、Ctrl+Alt+X キーを押します。)
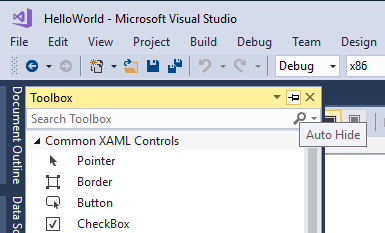
[ピン設定] アイコンをクリックして、[ツールボックス] ウィンドウをドッキングします。
[ボタン] コントロールをクリックし、デザイン キャンバスまでドラッグします。
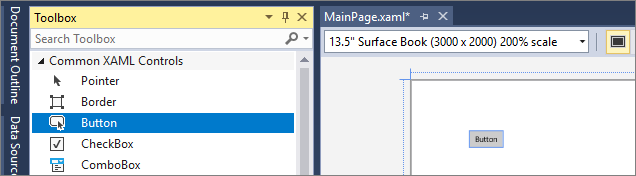
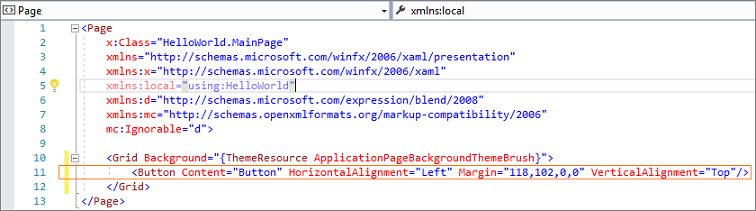
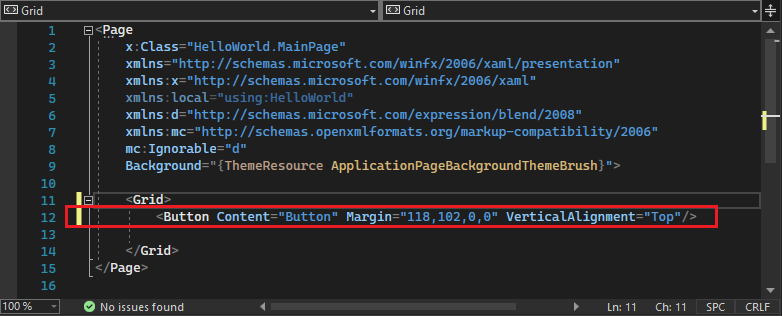
XAML エディターでコードを参照すると、そこにもボタンが追加されていることを確認できます。
ソリューション エクスプローラーで、MainPage.xaml をダブルクリックして分割ビューを開きます。
デザイン キャンバスを含む XAML デザイナーと、コードを追加または変更できる XAML エディターの 2 つのウィンドウがあります。
[ツールボックス] を選択して、ツールボックスのスライド アウト ウィンドウを開きます。
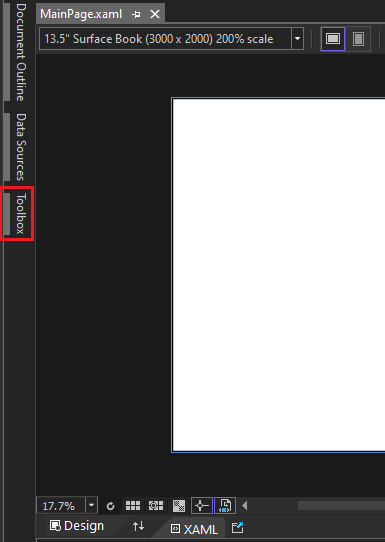
([ツールボックス] オプションが表示されない場合は、メニュー バーから開くことができます。これを行うには、[表示]>[ツール バー] を選びます。または、Ctrl+Alt+X キーを押します。)
[固定表示] アイコンを選択して、[ツールボックス] ウィンドウをドッキングします。

[ボタン] コントロールを選択し、デザイン キャンバスまでドラッグします。
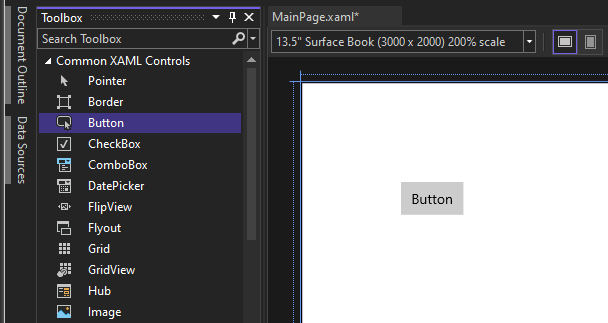
XAML エディターでコードを参照すると、そこにもボタンが追加されていることを確認できます。
ボタンにラベルを追加する
XAML エディターで、Button Content の値を "Button" から "Hello World!" に変更します。

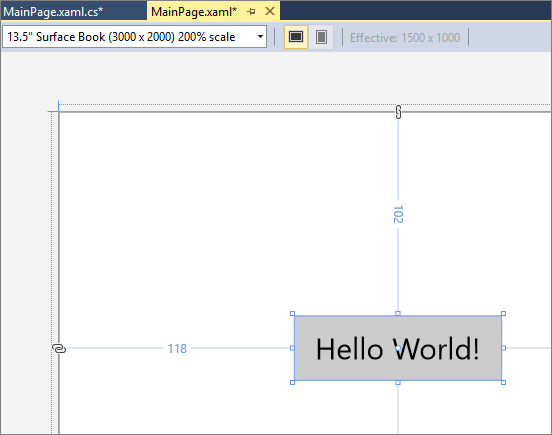
XAML デザイナーのボタンも変更されることに注目してください。
XAML エディターで、Button Content の値を "Button" から "Hello World!" に変更します。

XAML デザイナーのボタンも変更されることに注目してください。
イベント ハンドラーを追加する
「イベント ハンドラー」とは、難しそうに聞こえますが、イベントが発生したときに呼び出されるコードの単なる別名です。 この場合、"Hello World!" ボタンにアクションが追加されます。
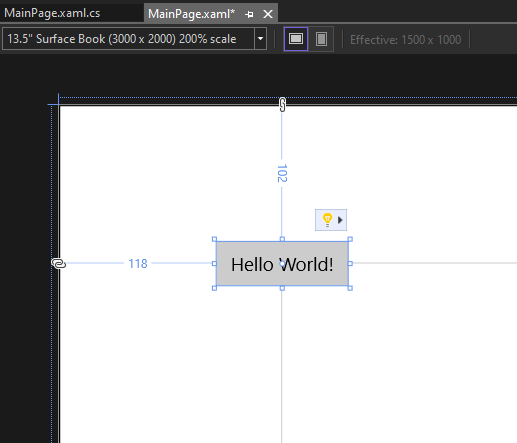
デザイン キャンパスでボタン コントロールをダブルクリックします。
分離コード ページの MainPage.xaml.cs でイベント ハンドラー コードを編集します。
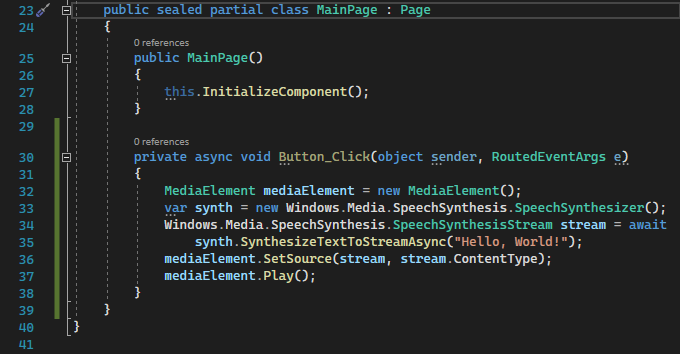
ポイントはここからです。 既定のイベント ハンドラーは次のようになります。

これを変更して次のようにします。
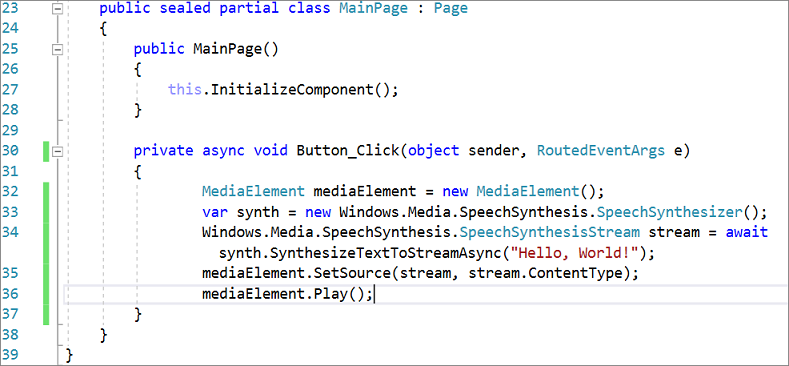
コピーして貼り付けるコードは次のとおりです。
private async void Button_Click(object sender, RoutedEventArgs e)
{
   MediaElement mediaElement = new MediaElement();
   var synth = new Windows.Media.SpeechSynthesis.SpeechSynthesizer();
   Windows.Media.SpeechSynthesis.SpeechSynthesisStream stream = await synth.SynthesizeTextToStreamAsync("Hello, World!");
   mediaElement.SetSource(stream, stream.ContentType);
   mediaElement.Play();
}
デザイン キャンパスでボタン コントロールをダブルクリックします。
分離コード ページの MainPage.xaml.cs でイベント ハンドラー コードを編集します。
ポイントはここからです。 既定のイベント ハンドラーは次のようになります。

これを変更して次のようにします。
コピーして貼り付けるコードは次のとおりです。
private async void Button_Click(object sender, RoutedEventArgs e)
{
   MediaElement mediaElement = new MediaElement();
   var synth = new Windows.Media.SpeechSynthesis.SpeechSynthesizer();
   Windows.Media.SpeechSynthesis.SpeechSynthesisStream stream = await synth.SynthesizeTextToStreamAsync("Hello, World!");
   mediaElement.SetSource(stream, stream.ContentType);
   mediaElement.Play();
}
行った処理
コードでいくつかの Windows API が使用され、いくつかのテキストを読み上げられる、音声合成オブジェクトが作成されました。 (SpeechSynthesis の使用について詳しくは、「System.Speech.Synthesis」をご覧ください)。
アプリケーションの実行
"Hello World" UWP アプリを、ビルド、配置、および起動して、どのように表示および読み上げがあるか確認してみましょう。 ここではその方法を説明します。
再生ボタン (表示は [ローカル コンピューター] ) を使用して、ローカル コンピューターでアプリケーションを起動します。
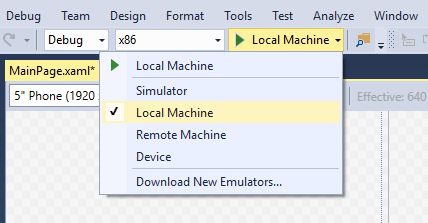
(または、メニュー バーから [デバッグ]>[デバッグの開始] を選択するか、F5 キーを押してアプリを開始します)。
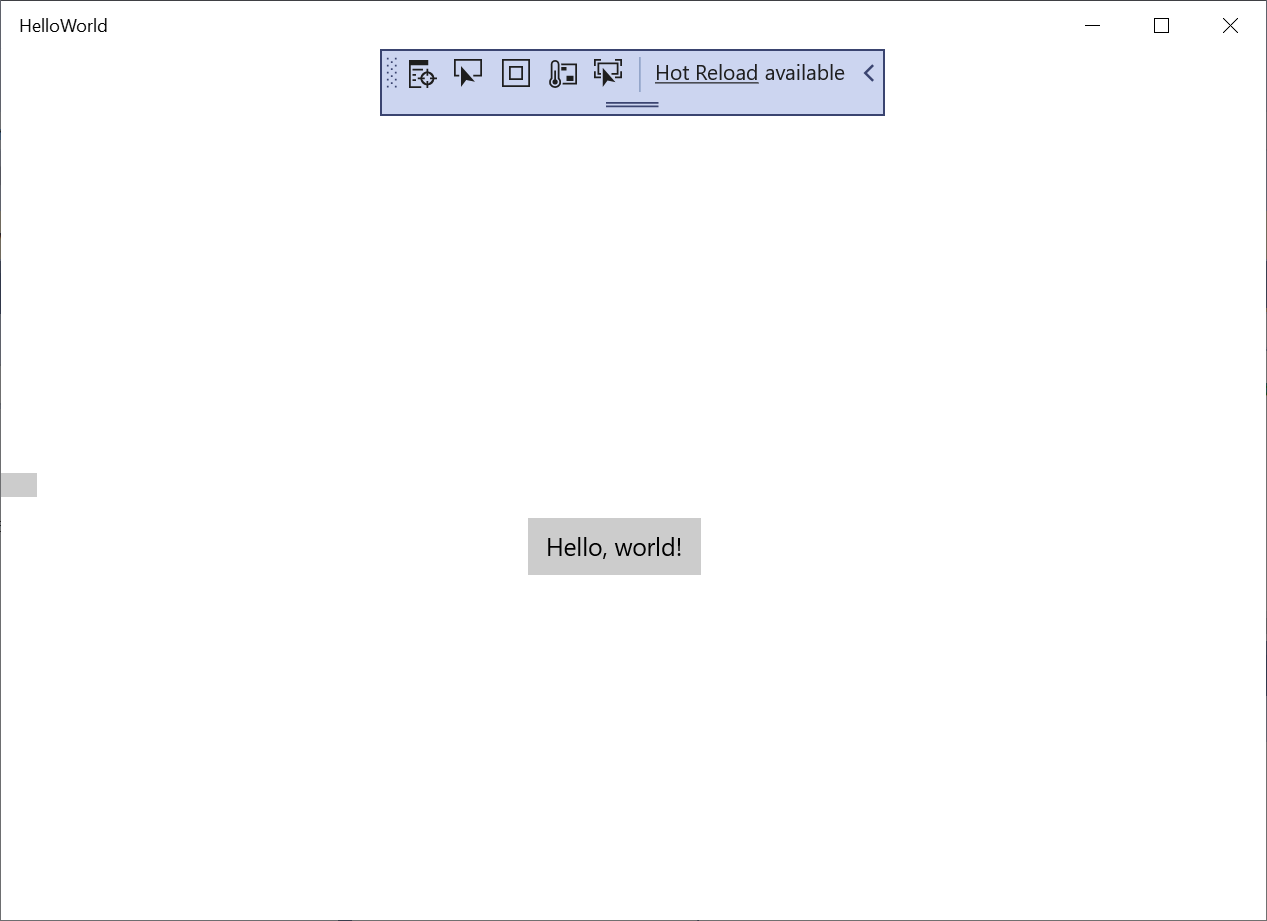
スプラッシュ スクリーンが消えるとすぐ表示されるアプリを確認します。 アプリは次のように表示されるはずです。
[Hello World] ボタンをクリックします。
Windows 10 以降のデバイスでは、"Hello, World!" と文字通り読み上げられます。
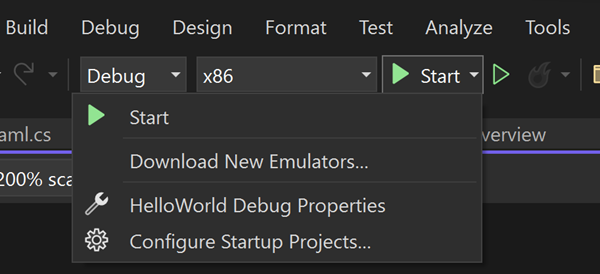
アプリを閉じるには、ツール バーで [デバッグの停止] ボタンをクリックします。 (または、メニュー バーから [デバッグ]>[デバッグの停止] を選択するか、Shift + F5 キーを押します)。
"Hello World" UWP アプリを、ビルド、配置、および起動して、どのように表示および読み上げがあるか確認してみましょう。 ここではその方法を説明します。
再生ボタン (表示は [ローカル コンピューター] ) を使用して、ローカル コンピューターでアプリケーションを起動します。
(または、メニュー バーから [デバッグ]>[デバッグの開始] を選択するか、F5 キーを押してアプリを開始します)。
スプラッシュ スクリーンが消えるとすぐ表示されるアプリを確認します。 アプリは次の画像のように表示されるはずです。

[Hello World] ボタンを選択します。
Windows 10 以降のデバイスでは、"Hello, World!" と文字通り読み上げられます。
アプリを閉じるには、ツール バーで [デバッグの停止] ボタンを選択します。 (または、メニュー バーから [デバッグ]>[デバッグの停止] を選択するか、Shift + F5 キーを押します)。
次の手順
これでこのチュートリアルは完了です。 これで UWP および Visual Studio IDE の基本を学習できたはずです。 詳細については、引き続き以下のチュートリアルをご覧ください。
関連項目
フィードバック
以下は間もなく提供いたします。2024 年を通じて、コンテンツのフィードバック メカニズムとして GitHub の issue を段階的に廃止し、新しいフィードバック システムに置き換えます。 詳細については、「https://aka.ms/ContentUserFeedback」を参照してください。
フィードバックの送信と表示