자습서: 기본 Active Directory 환경
이 자습서에서는 기본 Active Directory 환경을 만드는 과정을 안내합니다.
자습서에서 만든 환경을 사용하여 하이브리드 ID 시나리오의 다양한 측면을 테스트할 수 있으며, 이는 일부 자습서의 필수 구성 요소가 됩니다. 기존 Active Directory 환경이 이미 있는 경우 이를 대체 방법으로 사용할 수 있습니다. 이 정보는 처음부터 시작하는 개인에게 제공됩니다.
이 자습서는 다음과 같은 요소로 구성됩니다.
필수 조건
다음은 이 자습서를 완료하는 데 필요한 필수 구성 요소입니다.
- Hyper-V가 설치되어 있는 컴퓨터. Windows 10 또는 Windows Server 2016 컴퓨터에서 수행하는 것이 좋습니다.
- 가상 머신이 인터넷과 통신할 수 있는 외부 네트워크 어댑터.
- Azure 구독
- Windows Server 2016의 복사본
- Microsoft .NET Framework 4.7.1
참고 항목
이 자습서에서는 가장 빠른 시간 내에 자습서 환경을 만들 수 있도록 PowerShell 스크립트를 사용합니다. 각 스크립트는 스크립트의 시작 부분에 선언된 변수를 사용합니다. 사용자 환경에 맞게 변수를 변경할 수 있으며, 변경해야 합니다.
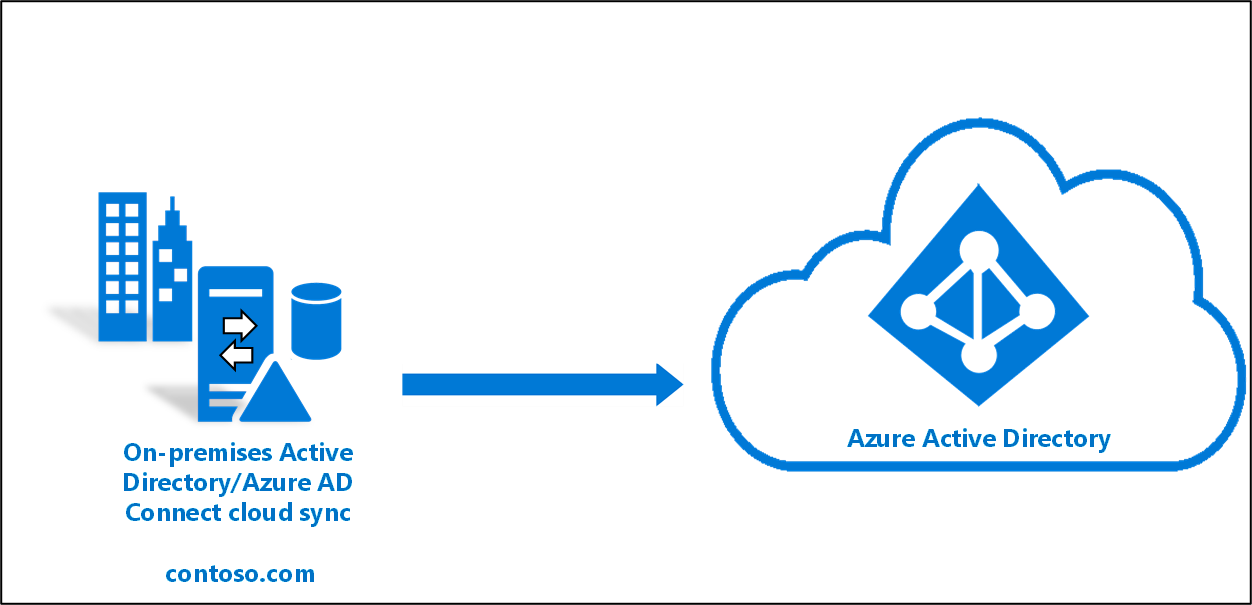
사용된 스크립트는 Microsoft Entra Connect 클라우드 프로비저닝 에이전트를 설치하기 전에 일반 Active Directory 환경을 만듭니다. 모든 자습서와 관련이 있습니다.
이 자습서에 사용된 PowerShell 스크립트의 복사본은 GitHub 여기에서 사용할 수 있습니다.
가상 머신 만들기
하이브리드 ID 환경을 시작하고 실행하기 위해 첫 번째로 수행해야 하는 것은 온-프레미스 Active Directory 서버로 사용할 가상 머신을 만드는 것입니다. 다음을 수행하십시오:
관리자 권한으로 PowerShell ISE를 엽니다.
다음 스크립트를 실행합니다.
#Declare variables
$VMName = 'DC1'
$Switch = 'External'
$InstallMedia = 'D:\ISO\en_windows_server_2016_updated_feb_2018_x64_dvd_11636692.iso'
$Path = 'D:\VM'
$VHDPath = 'D:\VM\DC1\DC1.vhdx'
$VHDSize = '64424509440'

#Create New Virtual Machine
New-VM -Name $VMName -MemoryStartupBytes 16GB -BootDevice VHD -Path $Path -NewVHDPath $VHDPath -NewVHDSizeBytes $VHDSize  -Generation 2 -Switch $Switch

#Set the memory to be non-dynamic
Set-VMMemory $VMName -DynamicMemoryEnabled $false

#Add DVD Drive to Virtual Machine
Add-VMDvdDrive -VMName $VMName -ControllerNumber 0 -ControllerLocation 1 -Path $InstallMedia

#Mount Installation Media
$DVDDrive = Get-VMDvdDrive -VMName $VMName

#Configure Virtual Machine to Boot from DVD
Set-VMFirmware -VMName $VMName -FirstBootDevice $DVDDrive
운영 체제 배포 완료
가상 머신 빌드를 완료하려면 운영 체제 설치를 완료해야 합니다.
- Hyper-V 관리자에서 가상 머신을 두 번 클릭합니다.
- 시작 단추를 클릭합니다.
- ‘CD 또는 DVD에서 부팅하려면 아무 키나 누르세요’라는 메시지가 표시됩니다. 계속 진행합니다.
- Windows Server 시작 화면에서 언어를 선택하고 다음을 클릭합니다.
- 지금 설치를 클릭합니다.
- 라이선스 키를 입력하고 다음을 클릭합니다.
- **사용 약관에 동의에 확인 표시를 한 후 다음을 클릭합니다.
- 사용자 지정: Windows만 설치(고급)를 선택합니다.
- 다음을 클릭합니다.
- 설치가 완료되고 나면 가상 머신을 다시 시작하고, 로그인한 후, Windows 업데이트를 실행하여 VM이 최신 버전이 되도록 합니다. 최신 업데이트를 설치합니다.
Active Directory 설치 필수 조건
가상 머신을 만들었으면, Active Directory를 설치하기 전에 몇 가지를 수행해야 합니다. 즉, 가상 머신의 이름을 바꾸고, 고정 IP 주소 및 DNS 정보를 설정하고, 원격 서버 관리 도구를 설치해야 합니다. 다음을 수행하십시오:
관리자 권한으로 PowerShell ISE를 엽니다.
다음 스크립트를 실행합니다.
#Declare variables
$ipaddress = "10.0.1.117"
$ipprefix = "24"
$ipgw = "10.0.1.1"
$ipdns = "10.0.1.117"
$ipdns2 = "8.8.8.8"
$ipif = (Get-NetAdapter).ifIndex
$featureLogPath = "c:\poshlog\featurelog.txt"
$newname = "DC1"
$addsTools = "RSAT-AD-Tools"

#Set static IP address
New-NetIPAddress -IPAddress $ipaddress -PrefixLength $ipprefix -InterfaceIndex $ipif -DefaultGateway $ipgw

# Set the DNS servers
Set-DnsClientServerAddress -InterfaceIndex $ipif -ServerAddresses ($ipdns, $ipdns2)

#Rename the computer
Rename-Computer -NewName $newname -force

#Install features
New-Item $featureLogPath -ItemType file -Force
Add-WindowsFeature $addsTools
Get-WindowsFeature | Where installed >>$featureLogPath

#Restart the computer
Restart-Computer
Windows Server AD 환경 만들기
VM을 만들고 이름을 변경했으며 고정 IP 주소가 준비되었으면, Active Directory Domain Services를 설치하고 구성할 수 있습니다. 다음을 수행하십시오:
관리자 권한으로 PowerShell ISE를 엽니다.
다음 스크립트를 실행합니다.
#Declare variables
$DatabasePath = "c:\windows\NTDS"
$DomainMode = "WinThreshold"
$DomainName = "contoso.com"
$DomaninNetBIOSName = "CONTOSO"
$ForestMode = "WinThreshold"
$LogPath = "c:\windows\NTDS"
$SysVolPath = "c:\windows\SYSVOL"
$featureLogPath = "c:\poshlog\featurelog.txt"
$Password = "Pass1w0rd"
$SecureString = ConvertTo-SecureString $Password -AsPlainText -Force

#Install AD DS, DNS and GPMC
start-job -Name addFeature -ScriptBlock {
Add-WindowsFeature -Name "ad-domain-services" -IncludeAllSubFeature -IncludeManagementTools
Add-WindowsFeature -Name "dns" -IncludeAllSubFeature -IncludeManagementTools
Add-WindowsFeature -Name "gpmc" -IncludeAllSubFeature -IncludeManagementTools }
Wait-Job -Name addFeature
Get-WindowsFeature | Where installed >>$featureLogPath

#Create New AD Forest
Install-ADDSForest -CreateDnsDelegation:$false -DatabasePath $DatabasePath -DomainMode $DomainMode -DomainName $DomainName -SafeModeAdministratorPassword $SecureString -DomainNetbiosName $DomainNetBIOSName -ForestMode $ForestMode -InstallDns:$true -LogPath $LogPath -NoRebootOnCompletion:$false -SysvolPath $SysVolPath -Force:$true
Windows Server AD 사용자 만들기
Active Directory 환경이 준비되었으면 테스트 계정이 필요합니다. 이 계정은 온-프레미스 AD 환경에 생성된 다음, Microsoft Entra ID에 동기화됩니다. 다음을 수행하십시오:
관리자 권한으로 PowerShell ISE를 엽니다.
다음 스크립트를 실행합니다.
# Filename:    4_CreateUser.ps1
# Description: Creates a user in Active Directory.  This is part of
#              the Azure AD Connect password hash sync tutorial.
#
# DISCLAIMER:
# Copyright (c) Microsoft Corporation. All rights reserved. This
# script is made available to you without any express, implied or
# statutory warranty, not even the implied warranty of
# merchantability or fitness for a particular purpose, or the
# warranty of title or non-infringement. The entire risk of the
# use or the results from the use of this script remains with you.
#
#
#
#
#Declare variables
$Givenname = "Allie"
$Surname = "McCray"
$Displayname = "Allie McCray"
$Name = "amccray"
$Password = "Pass1w0rd"
$Identity = "CN=ammccray,CN=Users,DC=contoso,DC=com"
$SecureString = ConvertTo-SecureString $Password -AsPlainText -Force


#Create the user
New-ADUser -Name $Name -GivenName $Givenname -Surname $Surname -DisplayName $Displayname -AccountPassword $SecureString

#Set the password to never expire
Set-ADUser -Identity $Identity -PasswordNeverExpires $true -ChangePasswordAtLogon $false -Enabled $true
Microsoft Entra 테넌트 만들기
팁
이 문서의 단계는 시작하는 포털에 따라 약간 다를 수 있습니다.
이제 사용자를 클라우드에 동기화할 수 있도록 Microsoft Entra 테넌트를 만들어야 합니다. 새 Microsoft Entra 테넌트를 만들려면 다음을 수행합니다.
- Microsoft Entra 관리 센터에 로그인하고 Microsoft Entra 구독이 있는 계정으로 로그인합니다.
- 개요를 클릭합니다.
- 테넌트 관리를 클릭합니다.
- 만들기
를 선택합니다. - 초기 도메인 이름과 함께 조직에 사용할 이름을 입력합니다. 다음으로 만들기를 선택합니다. 그러면 디렉터리가 만들어집니다.
- 이 작업이 완료되면 여기 링크를 클릭하여 디렉터리를 관리합니다.
Microsoft Entra ID에서 전역 관리자 만들기
이제 Microsoft Entra 테넌트가 준비되었으면 전역 관리자 계정을 만듭니다. 글로벌 관리자 계정을 만들려면 다음을 수행합니다.
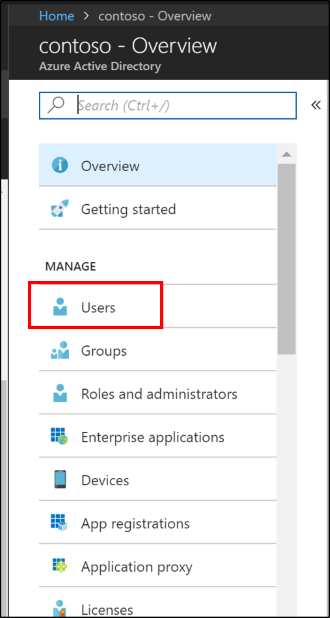
- 관리에서 사용자를 선택합니다.
- 모든 사용자를 선택한 다음, +새 사용자를 선택합니다.
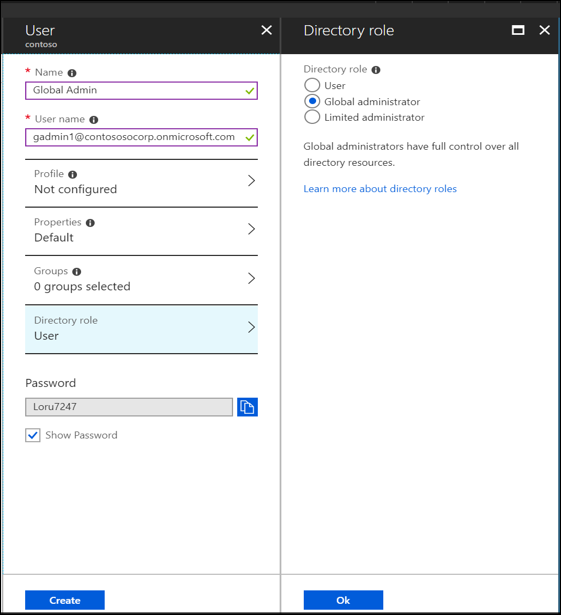
- 이 사용자에 대한 이름 및 사용자 이름을 입력합니다. 이는 테넌트의 전역 관리자가 됩니다. 디렉터리 역할을 전역 관리자로 변경해야 합니다. 임시 암호를 표시할 수도 있습니다. 완료되면 만들기를 선택합니다.
- 이 작업이 완료되면 새 웹 브라우저를 열고 새 글로벌 관리자 계정 및 임시 암호를 사용하여 myapps.microsoft.com에 로그인합니다.
- 전역 관리자의 암호를 기억할 수 있는 암호로 변경합니다.
선택 사항: 추가 서버 및 포리스트
다음은 추가 서버 및 포리스트를 만드는 단계를 제공하는 선택적 섹션입니다. 이는 Microsoft Entra Connect 클라우드 동기화에 대한 파일럿과 같은 고급 자습서 중 일부에서 사용할 수 있습니다.
서버를 추가해야 하는 경우에는 - 가상 머신 만들기 단계를 중지하고 위에서 만든 기존 도메인에 서버를 가입시킬 수 있습니다.
가상 머신 만들기
관리자 권한으로 PowerShell ISE를 엽니다.
다음 스크립트를 실행합니다.
# Filename:    1_CreateVM_CP.ps1
# Description: Creates a VM to be used in the tutorial.
#
# DISCLAIMER:
# Copyright (c) Microsoft Corporation. All rights reserved. #This script is made available to you without any express, implied or statutory warranty, not even the implied warranty of merchantability or fitness for a particular purpose, or the warranty of title or non-infringement. The entire risk of the use or the results from the use of this script remains with you.
#
#
#
#
#Declare variables
$VMName = 'CP1'
$Switch = 'External'
$InstallMedia = 'D:\ISO\en_windows_server_2016_updated_feb_2018_x64_dvd_11636692.iso'
$Path = 'D:\VM'
$VHDPath = 'D:\VM\CP1\CP1.vhdx'
$VHDSize = '64424509440'

#Create New Virtual Machine
New-VM -Name $VMName -MemoryStartupBytes 16GB -BootDevice VHD -Path $Path -NewVHDPath $VHDPath -NewVHDSizeBytes $VHDSize  -Generation 2 -Switch $Switch

#Set the memory to be non-dynamic
Set-VMMemory $VMName -DynamicMemoryEnabled $false

#Add DVD Drive to Virtual Machine
Add-VMDvdDrive -VMName $VMName -ControllerNumber 0 -ControllerLocation 1 -Path $InstallMedia

#Mount Installation Media
$DVDDrive = Get-VMDvdDrive -VMName $VMName

#Configure Virtual Machine to Boot from DVD
Set-VMFirmware -VMName $VMName -FirstBootDevice $DVDDrive
운영 체제 배포 완료
가상 머신 빌드를 완료하려면 운영 체제 설치를 완료해야 합니다.
- Hyper-V 관리자에서 가상 머신을 두 번 클릭합니다.
- 시작 단추를 클릭합니다.
- ‘CD 또는 DVD에서 부팅하려면 아무 키나 누르세요’라는 메시지가 표시됩니다. 계속 진행합니다.
- Windows Server 시작 화면에서 언어를 선택하고 다음을 클릭합니다.
- 지금 설치를 클릭합니다.
- 라이선스 키를 입력하고 다음을 클릭합니다.
- **사용 약관에 동의에 확인 표시를 한 후 다음을 클릭합니다.
- 사용자 지정: Windows만 설치(고급)를 선택합니다.
- 다음을 클릭합니다.
- 설치가 완료되고 나면 가상 머신을 다시 시작하고, 로그인한 후, Windows 업데이트를 실행하여 VM이 최신 버전이 되도록 합니다. 최신 업데이트를 설치합니다.
Active Directory 설치 필수 조건
가상 머신을 만들었으면, Active Directory를 설치하기 전에 몇 가지를 수행해야 합니다. 즉, 가상 머신의 이름을 바꾸고, 고정 IP 주소 및 DNS 정보를 설정하고, 원격 서버 관리 도구를 설치해야 합니다. 다음을 수행하십시오:
관리자 권한으로 PowerShell ISE를 엽니다.
다음 스크립트를 실행합니다.
# Filename:    2_ADPrep_CP.ps1
# Description: Prepares your environment for Active Directory.  This is part of
#              the Azure AD Connect password hash sync tutorial.
#
# DISCLAIMER:
# Copyright (c) Microsoft Corporation. All rights reserved. This
# script is made available to you without any express, implied or
# statutory warranty, not even the implied warranty of
# merchantability or fitness for a particular purpose, or the
# warranty of title or non-infringement. The entire risk of the
# use or the results from the use of this script remains with you.
#
#
#
#
#Declare variables
$ipaddress = "10.0.1.118"
$ipprefix = "24"
$ipgw = "10.0.1.1"
$ipdns = "10.0.1.118"
$ipdns2 = "8.8.8.8"
$ipif = (Get-NetAdapter).ifIndex
$featureLogPath = "c:\poshlog\featurelog.txt"
$newname = "CP1"
$addsTools = "RSAT-AD-Tools"

#Set static IP address
New-NetIPAddress -IPAddress $ipaddress -PrefixLength $ipprefix -InterfaceIndex $ipif -DefaultGateway $ipgw

#Set the DNS servers
Set-DnsClientServerAddress -InterfaceIndex $ipif -ServerAddresses ($ipdns, $ipdns2)

#Rename the computer
Rename-Computer -NewName $newname -force

#Install features
New-Item $featureLogPath -ItemType file -Force
Add-WindowsFeature $addsTools
Get-WindowsFeature | Where installed >>$featureLogPath

#Restart the computer
Restart-Computer
Windows Server AD 환경 만들기
VM을 만들고 이름을 변경했으며 고정 IP 주소가 준비되었으면, Active Directory Domain Services를 설치하고 구성할 수 있습니다. 다음을 수행하십시오:
관리자 권한으로 PowerShell ISE를 엽니다.
다음 스크립트를 실행합니다.
# Filename:    3_InstallAD_CP.ps1
# Description: Creates an on-premises AD environment.  This is part of
#              the Azure AD Connect password hash sync tutorial.
#
# DISCLAIMER:
# Copyright (c) Microsoft Corporation. All rights reserved. This
# script is made available to you without any express, implied or
# statutory warranty, not even the implied warranty of
# merchantability or fitness for a particular purpose, or the
# warranty of title or non-infringement. The entire risk of the
# use or the results from the use of this script remains with you.
#
#
#
#
#Declare variables
$DatabasePath = "c:\windows\NTDS"
$DomainMode = "WinThreshold"
$DomainName = "fabrikam.com"
$DomaninNetBIOSName = "FABRIKAM"
$ForestMode = "WinThreshold"
$LogPath = "c:\windows\NTDS"
$SysVolPath = "c:\windows\SYSVOL"
$featureLogPath = "c:\poshlog\featurelog.txt"
$Password = "Pass1w0rd"
$SecureString = ConvertTo-SecureString $Password -AsPlainText -Force

#Install AD DS, DNS and GPMC
start-job -Name addFeature -ScriptBlock {
Add-WindowsFeature -Name "ad-domain-services" -IncludeAllSubFeature -IncludeManagementTools
Add-WindowsFeature -Name "dns" -IncludeAllSubFeature -IncludeManagementTools
Add-WindowsFeature -Name "gpmc" -IncludeAllSubFeature -IncludeManagementTools }
Wait-Job -Name addFeature
Get-WindowsFeature | Where installed >>$featureLogPath

#Create New AD Forest
Install-ADDSForest -CreateDnsDelegation:$false -DatabasePath $DatabasePath -DomainMode $DomainMode -DomainName $DomainName -SafeModeAdministratorPassword $SecureString -DomainNetbiosName $DomainNetBIOSName -ForestMode $ForestMode -InstallDns:$true -LogPath $LogPath -NoRebootOnCompletion:$false -SysvolPath $SysVolPath -Force:$true
Windows Server AD 사용자 만들기
Active Directory 환경이 준비되었으면 테스트 계정이 필요합니다. 이 계정은 온-프레미스 AD 환경에 생성된 다음, Microsoft Entra ID에 동기화됩니다. 다음을 수행하십시오:
관리자 권한으로 PowerShell ISE를 엽니다.
다음 스크립트를 실행합니다.
# Filename:    4_CreateUser_CP.ps1
# Description: Creates a user in Active Directory.  This is part of
#              the Azure AD Connect password hash sync tutorial.
#
# DISCLAIMER:
# Copyright (c) Microsoft Corporation. All rights reserved. This
# script is made available to you without any express, implied or
# statutory warranty, not even the implied warranty of
# merchantability or fitness for a particular purpose, or the
# warranty of title or non-infringement. The entire risk of the
# use or the results from the use of this script remains with you.
#
#
#
#
#Declare variables
$Givenname = "Anna"
$Surname = "Ringdal"
$Displayname = "Anna Ringdal"
$Name = "aringdal"
$Password = "Pass1w0rd"
$Identity = "CN=aringdal,CN=Users,DC=fabrikam,DC=com"
$SecureString = ConvertTo-SecureString $Password -AsPlainText -Force


#Create the user
New-ADUser -Name $Name -GivenName $Givenname -Surname $Surname -DisplayName $Displayname -AccountPassword $SecureString

#Set the password to never expire
Set-ADUser -Identity $Identity -PasswordNeverExpires $true -ChangePasswordAtLogon $false -Enabled $true
결론
이제 기존 자습서에 사용할 수 있는 환경이 있고 클라우드 동기화에서 제공하는 추가 기능을 테스트할 수 있습니다.