Xamarin.iOS 앱에 푸시 알림 추가
개요
이 자습서에서는 푸시 알림을 Xamarin.iOS 빠른 시작 프로젝트에 추가하여 레코드가 삽입될 때마다 디바이스에 푸시 알림이 전송됩니다.
다운로드한 빠른 시작 서버 프로젝트를 사용하지 않는 경우 푸시 알림 확장 패키지가 필요합니다. 자세한 내용은 Azure Mobile Apps용 .NET 백 엔드 서버 SDK 사용을 참조하세요.
필수 선행 작업
- Xamarin.iOS 빠른 시작 자습서 를 완료합니다.
- 실제 iOS 디바이스. 푸시 알림은 iOS 시뮬레이터에서 지원되지 않습니다.
Apple 개발자 포털의 푸시 알림에 대한 앱 등록
- 앱의 앱 ID를 등록합니다. 명시적 앱 ID(와일드카드 앱 ID 아님)를 만들고 번들 ID의 경우 Xcode 빠른 시작 프로젝트에 있는 정확한 번들 ID를 사용합니다. 푸시 알림 옵션을 선택하는 것도 중요합니다.
- 다음으로 푸시 알림 구성을 준비하려면, "개발" 또는 "배포" SSL 인증서를 만듭니다.
푸시 알림을 전송하도록 모바일 앱 구성
- Mac에서 Keychain Access를 시작합니다. 왼쪽 탐색 모음의 범주 아래에서 내 인증서를 엽니다. 이전 섹션에서 다운로드한 SSL 인증서를 찾은 다음, 해당 콘텐츠를 공개합니다. 인증서만 선택합니다.(프라이빗 키를 선택하지 않습니다.) 그런 다음, 내보내기 합니다.
- Azure Portal에서 모두 찾아보기>App Services를 선택합니다. 그런 다음, Mobile Apps 백엔드를 선택합니다.
- 설정에서 App Service Push를 선택합니다. 그런 다음, 알림 허브 이름을 선택합니다.
- Apple Push Notification Services>업로드 Certificate로 이동합니다. .p12 파일을 업로드 올바른 모드를 선택합니다(이전의 클라이언트 SSL 인증서가 프로덕션 또는 샌드박스인지 여부에 따라 다름). 변경 내용을 저장합니다.
이제 iOS의 푸시 알림과 작동하도록 서비스가 구성되었습니다.
푸시 알림을 전송하도록 서버 프로젝트 업데이트
이 섹션에서는 새 항목이 추가될 때마다 푸시 알림을 보내도록 기존 Mobile Apps 백 엔드 프로젝트의 코드를 업데이트합니다. 이 프로세스는 플랫폼 간 푸시를 구현하는 Azure Notification Hubs의 템플릿 기능으로 구동됩니다. 템플릿을 사용한 푸시 알림에 대해 다양한 클라이언트가 등록되며 단일 범용 푸시를 통해 모든 클라이언트 플랫폼을 가져올 수 있습니다.
백 엔드 프로젝트 유형( .NET 백 엔드 또는 Node.js 백 엔드)과 일치하는 다음 절차 중 하나를 선택합니다.
.NET 백 엔드 프로젝트
Visual Studio에서 서버 프로젝트를 마우스 오른쪽 단추로 클릭합니다. 그런 다음, NuGet 패키지 관리를 클릭합니다.
Microsoft.Azure.NotificationHubs를 검색한 다음, 설치를 선택합니다. 이 프로세스는 백 엔드에서 알림을 보내기 위한 Notification Hubs 라이브러리를 설치합니다.서버 프로젝트에서 ControllersTodoItemController.cs>를 엽니다. 그런 다음, 명령문을 사용하여 다음을 추가합니다.
using System.Collections.Generic;
using Microsoft.Azure.NotificationHubs;
using Microsoft.Azure.Mobile.Server.Config;
PostTodoItem 메서드에서 InsertAsync에 대한 호출 뒤에 다음 코드를 추가합니다.
// Get the settings for the server project.
HttpConfiguration config = this.Configuration;
MobileAppSettingsDictionary settings =
    this.Configuration.GetMobileAppSettingsProvider().GetMobileAppSettings();

// Get the Notification Hubs credentials for the mobile app.
string notificationHubName = settings.NotificationHubName;
string notificationHubConnection = settings
    .Connections[MobileAppSettingsKeys.NotificationHubConnectionString].ConnectionString;

// Create a new Notification Hub client.
NotificationHubClient hub = NotificationHubClient
.CreateClientFromConnectionString(notificationHubConnection, notificationHubName);

// Send the message so that all template registrations that contain "messageParam"
// receive the notifications. This includes APNS, GCM, WNS, and MPNS template registrations.
Dictionary<string,string> templateParams = new Dictionary<string,string>();
templateParams["messageParam"] = item.Text + " was added to the list.";

try
{
    // Send the push notification and log the results.
    var result = await hub.SendTemplateNotificationAsync(templateParams);

    // Write the success result to the logs.
    config.Services.GetTraceWriter().Info(result.State.ToString());
}
catch (System.Exception ex)
{
    // Write the failure result to the logs.
    config.Services.GetTraceWriter()
        .Error(ex.Message, null, "Push.SendAsync Error");
}
이 프로세스는 새 항목이 삽입된 경우 item.Text가 포함된 템플릿 알림을 보냅니다.
서버 프로젝트를 다시 게시합니다.
백 엔드 프로젝트 Node.js
백 엔드 프로젝트를 설정합니다.
todoitem.js의 기존 코드를 다음 코드로 바꿉니다.
var azureMobileApps = require('azure-mobile-apps'),
promises = require('azure-mobile-apps/src/utilities/promises'),
logger = require('azure-mobile-apps/src/logger');

var table = azureMobileApps.table();

table.insert(function (context) {
// For more information about the Notification Hubs JavaScript SDK,
// see https://aka.ms/nodejshubs.
logger.info('Running TodoItem.insert');

// Define the template payload.
var payload = '{"messageParam": "' + context.item.text + '" }';

// Execute the insert. The insert returns the results as a promise.
// Do the push as a post-execute action within the promise flow.
return context.execute()
    .then(function (results) {
        // Only do the push if configured.
        if (context.push) {
            // Send a template notification.
            context.push.send(null, payload, function (error) {
                if (error) {
                    logger.error('Error while sending push notification: ', error);
                } else {
                    logger.info('Push notification sent successfully!');
                }
            });
        }
        // Don't forget to return the results from the context.execute().
        return results;
    })
    .catch(function (error) {
        logger.error('Error while running context.execute: ', error);
    });
});

module.exports = table;
이 프로세스는 새 항목이 삽입된 경우 item.text가 포함된 템플릿 알림을 보냅니다.
로컬 컴퓨터에서 파일을 편집할 때 서버 프로젝트를 다시 게시합니다.
Xamarin.iOS 프로젝트 구성
Xamarin Studio에서 iOS 프로젝트 구성
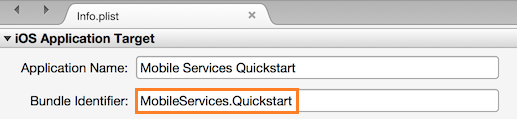
Xamarin.Studio에서 Info.plist를 열고, 이전에 만든 번들 ID로 번들 식별자를 새 앱 ID로 업데이트합니다.
아래의 Background Modes로 스크롤합니다. Enable Background Modes 상자와 Remote notifications 상자를 선택합니다.

Solution Panel에서 프로젝트를 두 번 클릭하여 Project Options를 엽니다.
Build에서 iOS Bundle Signing을 선택하고 방금 이 프로젝트에 대해 설정한 해당 ID 및 프로비전 프로필을 선택합니다.

이제 프로젝트에서 코드 서명에 새 프로필을 사용하게 됩니다. 공식 Xamarin 디바이스 프로비저닝 설명서를 보려면 Xamarin 디바이스 프로비저닝을 참조하세요.
Visual Studio에서 iOS 프로젝트 구성
Visual Studio에서 프로젝트를 마우스 오른쪽 단추로 클릭한 다음 속성을 클릭합니다.
속성 페이지에서 iOS 애플리케이션 탭을 클릭하고 앞에서 만든 ID를 사용하여 식별자를 업데이트합니다.

iOS Bundle Signing 탭에서 방금 이 프로젝트에 대해 설정한 해당 ID 및 프로비전 프로필을 선택합니다.

이제 프로젝트에서 코드 서명에 새 프로필을 사용하게 됩니다. 공식 Xamarin 디바이스 프로비저닝 설명서를 보려면 Xamarin 디바이스 프로비저닝을 참조하세요.
Info.plist를 두 번 클릭하여 연 다음 Background Modes에서 RemoteNotifications를 사용하도록 설정합니다.
앱에 푸시 알림 추가
QSTodoService에서 AppDelegate가 모바일 클라이언트를 가져올 수 있도록 다음 속성을 추가합니다.
public MobileServiceClient GetClient {
    get
    {
        return client;
    }
    private set
    {
        client = value;
    }
}
다음
using문을 AppDelegate.cs 파일의 맨 위에 추가합니다.using Microsoft.WindowsAzure.MobileServices; using Newtonsoft.Json.Linq;AppDelegate에서 FinishedLaunching 이벤트를 재정의합니다.
 public override bool FinishedLaunching(UIApplication application, NSDictionary launchOptions)
 {
     // registers for push for iOS8
     var settings = UIUserNotificationSettings.GetSettingsForTypes(
         UIUserNotificationType.Alert
         | UIUserNotificationType.Badge
         | UIUserNotificationType.Sound,
         new NSSet());

     UIApplication.SharedApplication.RegisterUserNotificationSettings(settings);
     UIApplication.SharedApplication.RegisterForRemoteNotifications();

     return true;
 }
동일한 파일에서
RegisteredForRemoteNotifications이벤트를 재정의합니다. 이 코드에서는 서버에서 지원하는 모든 플랫폼에서 전송되는 간단한 템플릿 알림을 등록하게 됩니다.Notification Hubs를 사용하는 템플릿에 대한 자세한 내용은 템플릿을 참조하세요.
public override void RegisteredForRemoteNotifications(UIApplication application, NSData deviceToken)
{
    MobileServiceClient client = QSTodoService.DefaultService.GetClient;

    const string templateBodyAPNS = "{\"aps\":{\"alert\":\"$(messageParam)\"}}";

    JObject templates = new JObject();
    templates["genericMessage"] = new JObject
    {
        {"body", templateBodyAPNS}
    };

    // Register for push with your mobile app
    var push = client.GetPush();
    push.RegisterAsync(deviceToken, templates);
}
그런 다음 DidReceivedRemoteNotification 이벤트를 재정의합니다.
 public override void DidReceiveRemoteNotification (UIApplication application, NSDictionary userInfo, Action<UIBackgroundFetchResult> completionHandler)
 {
     NSDictionary aps = userInfo.ObjectForKey(new NSString("aps")) as NSDictionary;

     string alert = string.Empty;
     if (aps.ContainsKey(new NSString("alert")))
         alert = (aps [new NSString("alert")] as NSString).ToString();

     //show alert
     if (!string.IsNullOrEmpty(alert))
     {
         UIAlertView avAlert = new UIAlertView("Notification", alert, null, "OK", null);
         avAlert.Show();
     }
 }
이제 푸시 알림을 지원하도록 앱이 업데이트됩니다.
앱에서 푸시 알림 테스트
실행 단추를 눌러 프로젝트를 빌드하고 iOS 지원 디바이스에서 앱을 시작한 다음, 확인을 클릭하여 푸시 알림을 수락합니다.
참고
앱에서 푸시 알림을 명시적으로 수락해야 합니다. 이 요청은 앱이 처음 실행될 때만 발생합니다.
앱에서 작업을 입력한 다음 더하기(+) 아이콘을 클릭합니다.
알림이 수신되었는지 확인한 다음 확인을 클릭하여 알림을 해제합니다.
2단계를 반복하여 앱을 즉시 닫은 후 알림이 표시되는지 확인합니다.
이 자습서를 성공적으로 완료했습니다.