Automanage 계정 복구하기
Important
이 문서는 이전 버전의 Automanage(API 버전 2020-06-30-preview)에 온보딩된 컴퓨터에만 해당됩니다. 이러한 컴퓨터의 상태는 업그레이드 필요입니다.
Azure Automanage 계정은 자동화된 작업이 수행되는 ID 또는 보안 컨텍스트입니다. Automanage 계정을 포함하는 구독을 최근에 새 테넌트로 이동한 경우 계정을 다시 구성해야 합니다. 다시 구성하려면 ID 유형을 다시 설정하고 계정에 적절한 역할을 할당해야 합니다.
1단계: Automanage 계정 ID 유형 초기화
다음 ARM(Azure Resource Manager) 템플릿을 사용하여 자동 관리 계정 ID 유형을 다시 설정합니다. 파일을 armdeploy.json이나 비슷한 이름으로 로컬에 저장합니다. Automanage 계정 이름과 위치는 ARM 템플릿에서 필수 매개 변수이므로 적어 둡니다.
다음 템플릿을 사용하여 Resource Manager 배포를 만듭니다.
identityType = None을 사용합니다.az deployment sub create를 사용하여 Azure CLI에서 배포를 만들 수 있습니다. 자세한 내용은 az deployment sub를 참조하세요.New-AzDeployment모듈을 사용하여 PowerShell에서 배포를 만들 수 있습니다. 자세한 내용은 New-AzDeployment를 참조하세요.
identityType = SystemAssigned로 다시 동일한 ARM 템플릿을 실행합니다.
{
    "$schema": "https://schema.management.azure.com/schemas/2019-04-01/deploymentTemplate.json#",
    "contentVersion": "1.0.0.0",
    "parameters": {
        "accountName": {
            "type": "string"
        },
        "location": {
            "type": "string"
        },
        "identityType": {
            "type": "string",
            "allowedValues": [ "None", "SystemAssigned" ]
        }
    },
    "resources": [
        {
            "apiVersion": "2020-06-30-preview",
            "name": "[parameters('accountName')]",
            "location": "[parameters('location')]",
            "type": "Microsoft.Automanage/accounts",
            "identity": {
                "type": "[parameters('identityType')]"
            }
        }
    ]
}
2단계: Automanage 계정에 적절한 역할 할당
Automanage 계정에는 Automanage에서 관리하는 VM을 포함하는 구독에 대한 기여자 및 리소스 정책 기여자 역할이 필요합니다. Azure Portal, ARM 템플릿, Azure CLI를 사용하여 이러한 역할을 할당할 수 있습니다.
ARM 템플릿이나 Azure CLI를 사용하는 경우 Automanage 계정의 보안 주체 ID(개체 ID 라고도 함)가 필요합니다. (Azure Portal을 사용하는 경우 ID가 필요하지 않습니다.) 다음 방법을 사용하여 이 ID를 찾을 수 있습니다.
Azure CLI:
az ad sp list --display-name <name of your Automanage Account>명령을 사용합니다.Azure Portal: Microsoft Entra ID로 이동하여 이름으로 Automanage 계정을 검색합니다. 표시되는 경우 엔터프라이즈 애플리케이션에서 Automanage 계정 이름을 선택합니다.
Azure Portal
구독에서 자동 관리되는 VM이 포함된 구독으로 이동합니다.
액세스 제어(IAM) 를 선택합니다.
추가>역할 할당 추가를 선택하여 역할 할당 추가 페이지를 엽니다.
다음 역할을 할당합니다. 세부 단계에 대해서는 Azure Portal을 사용하여 Azure 역할 할당을 참조하세요.
설정 값 역할 참가자 다음에 대한 액세스 할당 사용자, 그룹 또는 서비스 주체 멤버 <Automanage 계정 이름> 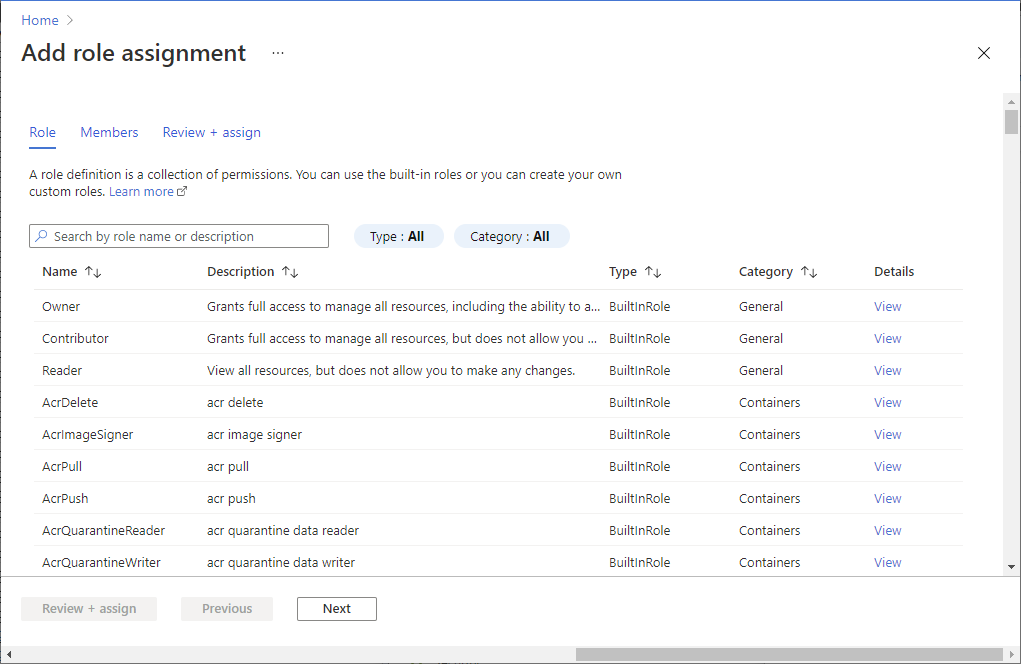
리소스 정책 기여자 역할을 선택하여 2~4단계를 반복합니다.
ARM 템플릿
다음 ARM 템플릿을 실행합니다. Automanage 계정의 보안 주체 ID가 필요합니다. 이를 가져오는 단계는 이 섹션의 시작 부분에 있습니다. 메시지가 나타나면 ID를 입력합니다.
{
    "$schema": "https://schema.management.azure.com/schemas/2015-01-01/deploymentTemplate.json#",
    "contentVersion": "1.0.0.0",
    "parameters": {
        "principalId": {
            "type": "string",
            "metadata": {
                "description": "The principal to assign the role to"
            }
        }
    },
    "variables": {
        "Contributor": "[concat('/subscriptions/', subscription().subscriptionId, '/providers/Microsoft.Authorization/roleDefinitions/', 'b24988ac-6180-42a0-ab88-20f7382dd24c')]",
        "Resource Policy Contributor": "[concat('/subscriptions/', subscription().subscriptionId, '/providers/Microsoft.Authorization/roleDefinitions/', '36243c78-bf99-498c-9df9-86d9f8d28608')]"
    },
    "resources": [
        {
            "type": "Microsoft.Authorization/roleAssignments",
            "apiVersion": "2018-09-01-preview",
            "name": "[guid(uniqueString(variables('Contributor')))]",
            "properties": {
                "roleDefinitionId": "[variables('Contributor')]",
                "principalId": "[parameters('principalId')]"
            }
        },
        {
            "type": "Microsoft.Authorization/roleAssignments",
            "apiVersion": "2018-09-01-preview",
            "name": "[guid(uniqueString(variables('Resource Policy Contributor')))]",
            "properties": {
                "roleDefinitionId": "[variables('Resource Policy Contributor')]",
                "principalId": "[parameters('principalId')]"
            }
        }
    ]
}
Azure CLI
다음 명령을 실행하세요.
az role assignment create --assignee-object-id <your Automanage Account Object ID> --role "Contributor" --scope /subscriptions/<your subscription ID>

az role assignment create --assignee-object-id <your Automanage Account Object ID> --role "Resource Policy Contributor" --scope /subscriptions/<your subscription ID>