Create a virtual network with encryption using the Azure portal
Azure Virtual Network encryption is a feature of Azure Virtual Network. Virtual network encryption allows you to seamlessly encrypt and decrypt internal network traffic over the wire, with minimal effect to performance and scale. Azure Virtual Network encryption protects data traversing your virtual network virtual machine to virtual machine and virtual machine to on-premises.
Prerequisites
- An Azure account with an active subscription. Create one for free.
Create a virtual network
The following procedure creates a virtual network with a resource subnet.
In the portal, search for and select Virtual networks.
On the Virtual networks page, select + Create.
On the Basics tab of Create virtual network, enter or select the following information:
Setting Value Project details Subscription Select your subscription. Resource group Select Create new.
Enter test-rg in Name.
Select OK.Instance details Name Enter vnet-1. Region Select East US 2. 
Select Next to proceed to the Security tab.
Select Next to proceed to the IP Addresses tab.
In the address space box in Subnets, select the default subnet.
In Edit subnet, enter or select the following information:
Setting Value Subnet details Subnet template Leave the default Default. Name Enter subnet-1. Starting address Leave the default of 10.0.0.0. Subnet size Leave the default of /24(256 addresses). 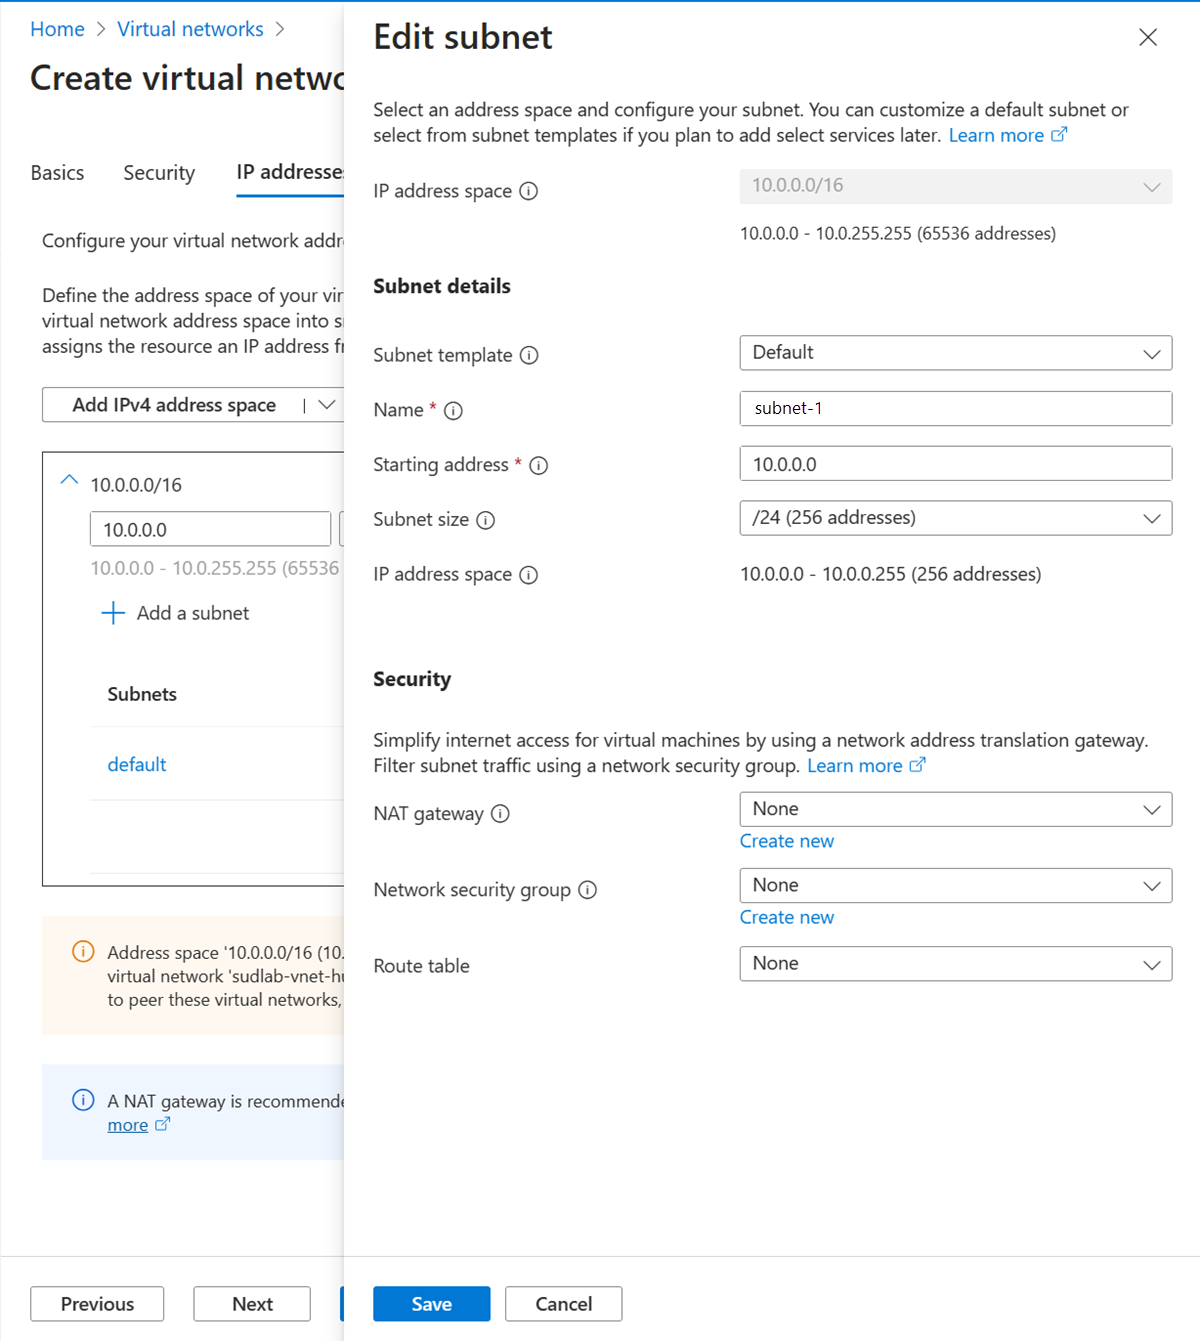
Select Save.
Select Review + create at the bottom of the screen, and when validation passes, select Create.

Important
Azure Virtual Network encryption requires supported virtual machine SKUs in the virtual network for traffic to be encrypted. The setting dropUnencrypted will drop traffic between unsupported virtual machine SKUs if they are deployed in the virtual network. For more information, see Azure Virtual Network encryption requirements.
Enable encryption
Use the following steps to enable encryption for a virtual network.
In the search box at the top of the portal, begin typing Virtual networks. When Virtual networks appears in the search results, select it.
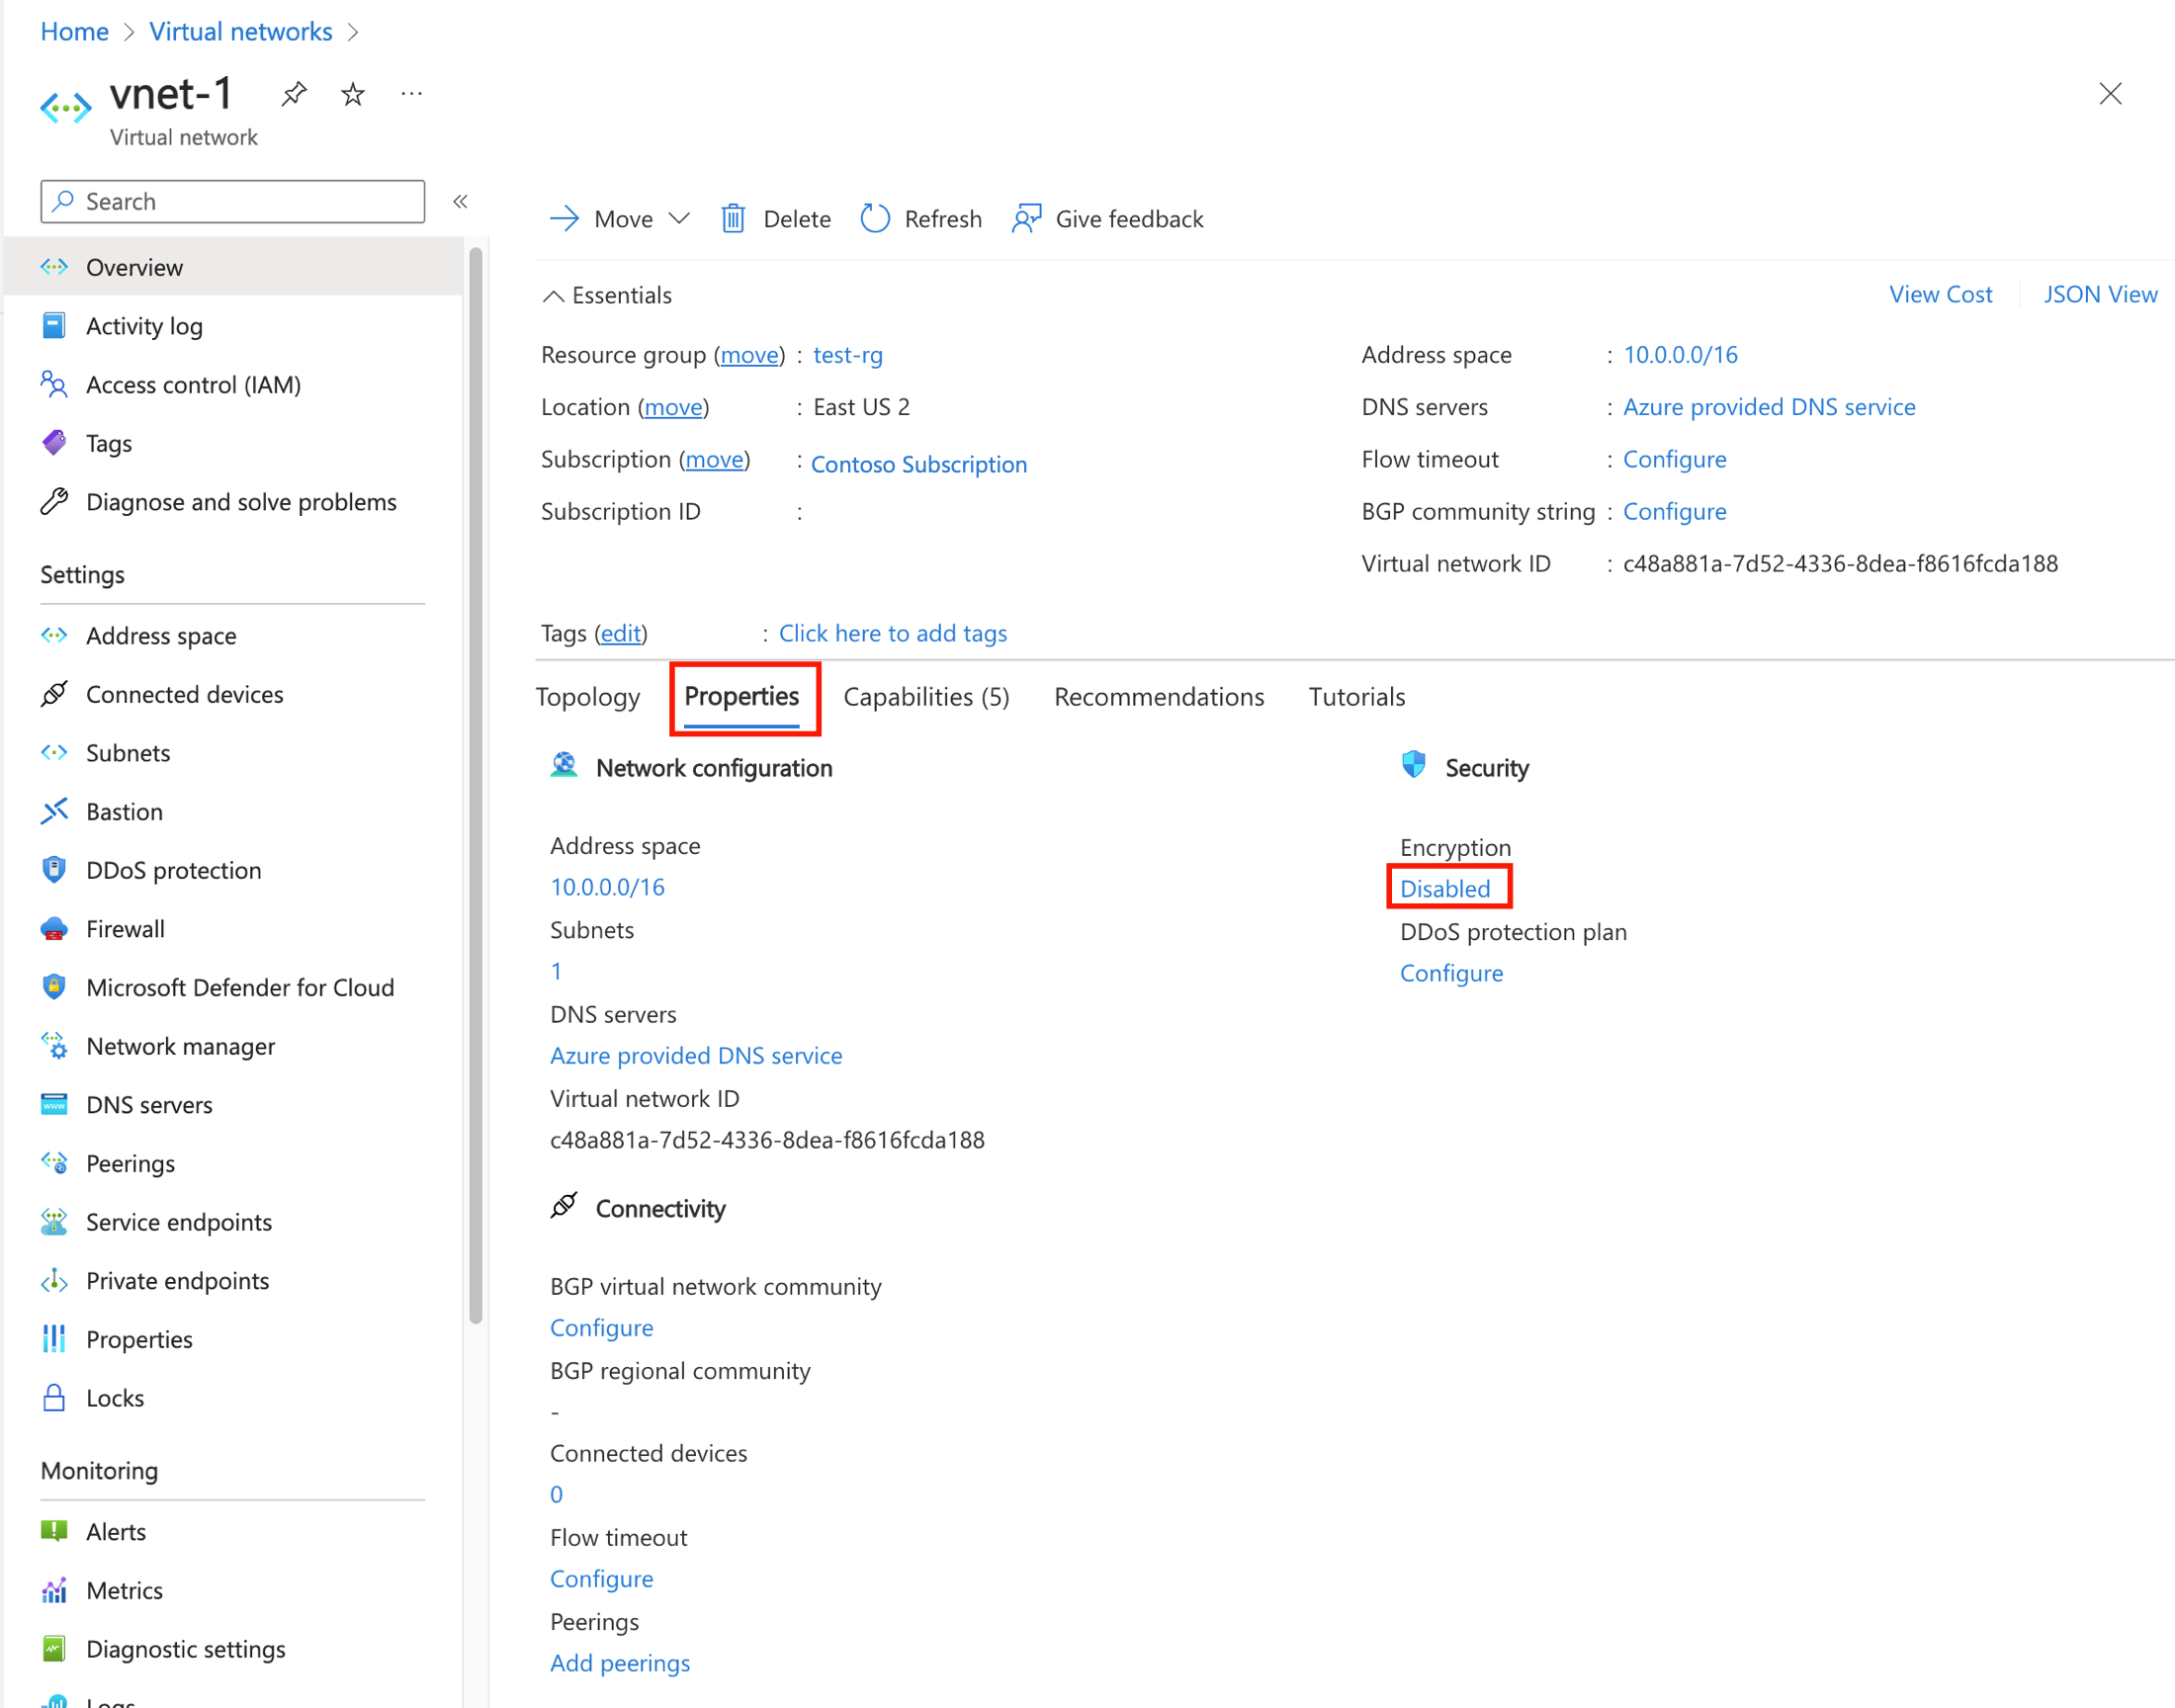
Select vnet-1.
In the Overview of vnet-1, select the Properties tab.
Select Disabled next to Encryption:
Select the box next to Virtual network encryption.
Select Save.
Verify encryption enabled
In the search box at the top of the portal, begin typing Virtual networks. When Virtual networks appears in the search results, select it.
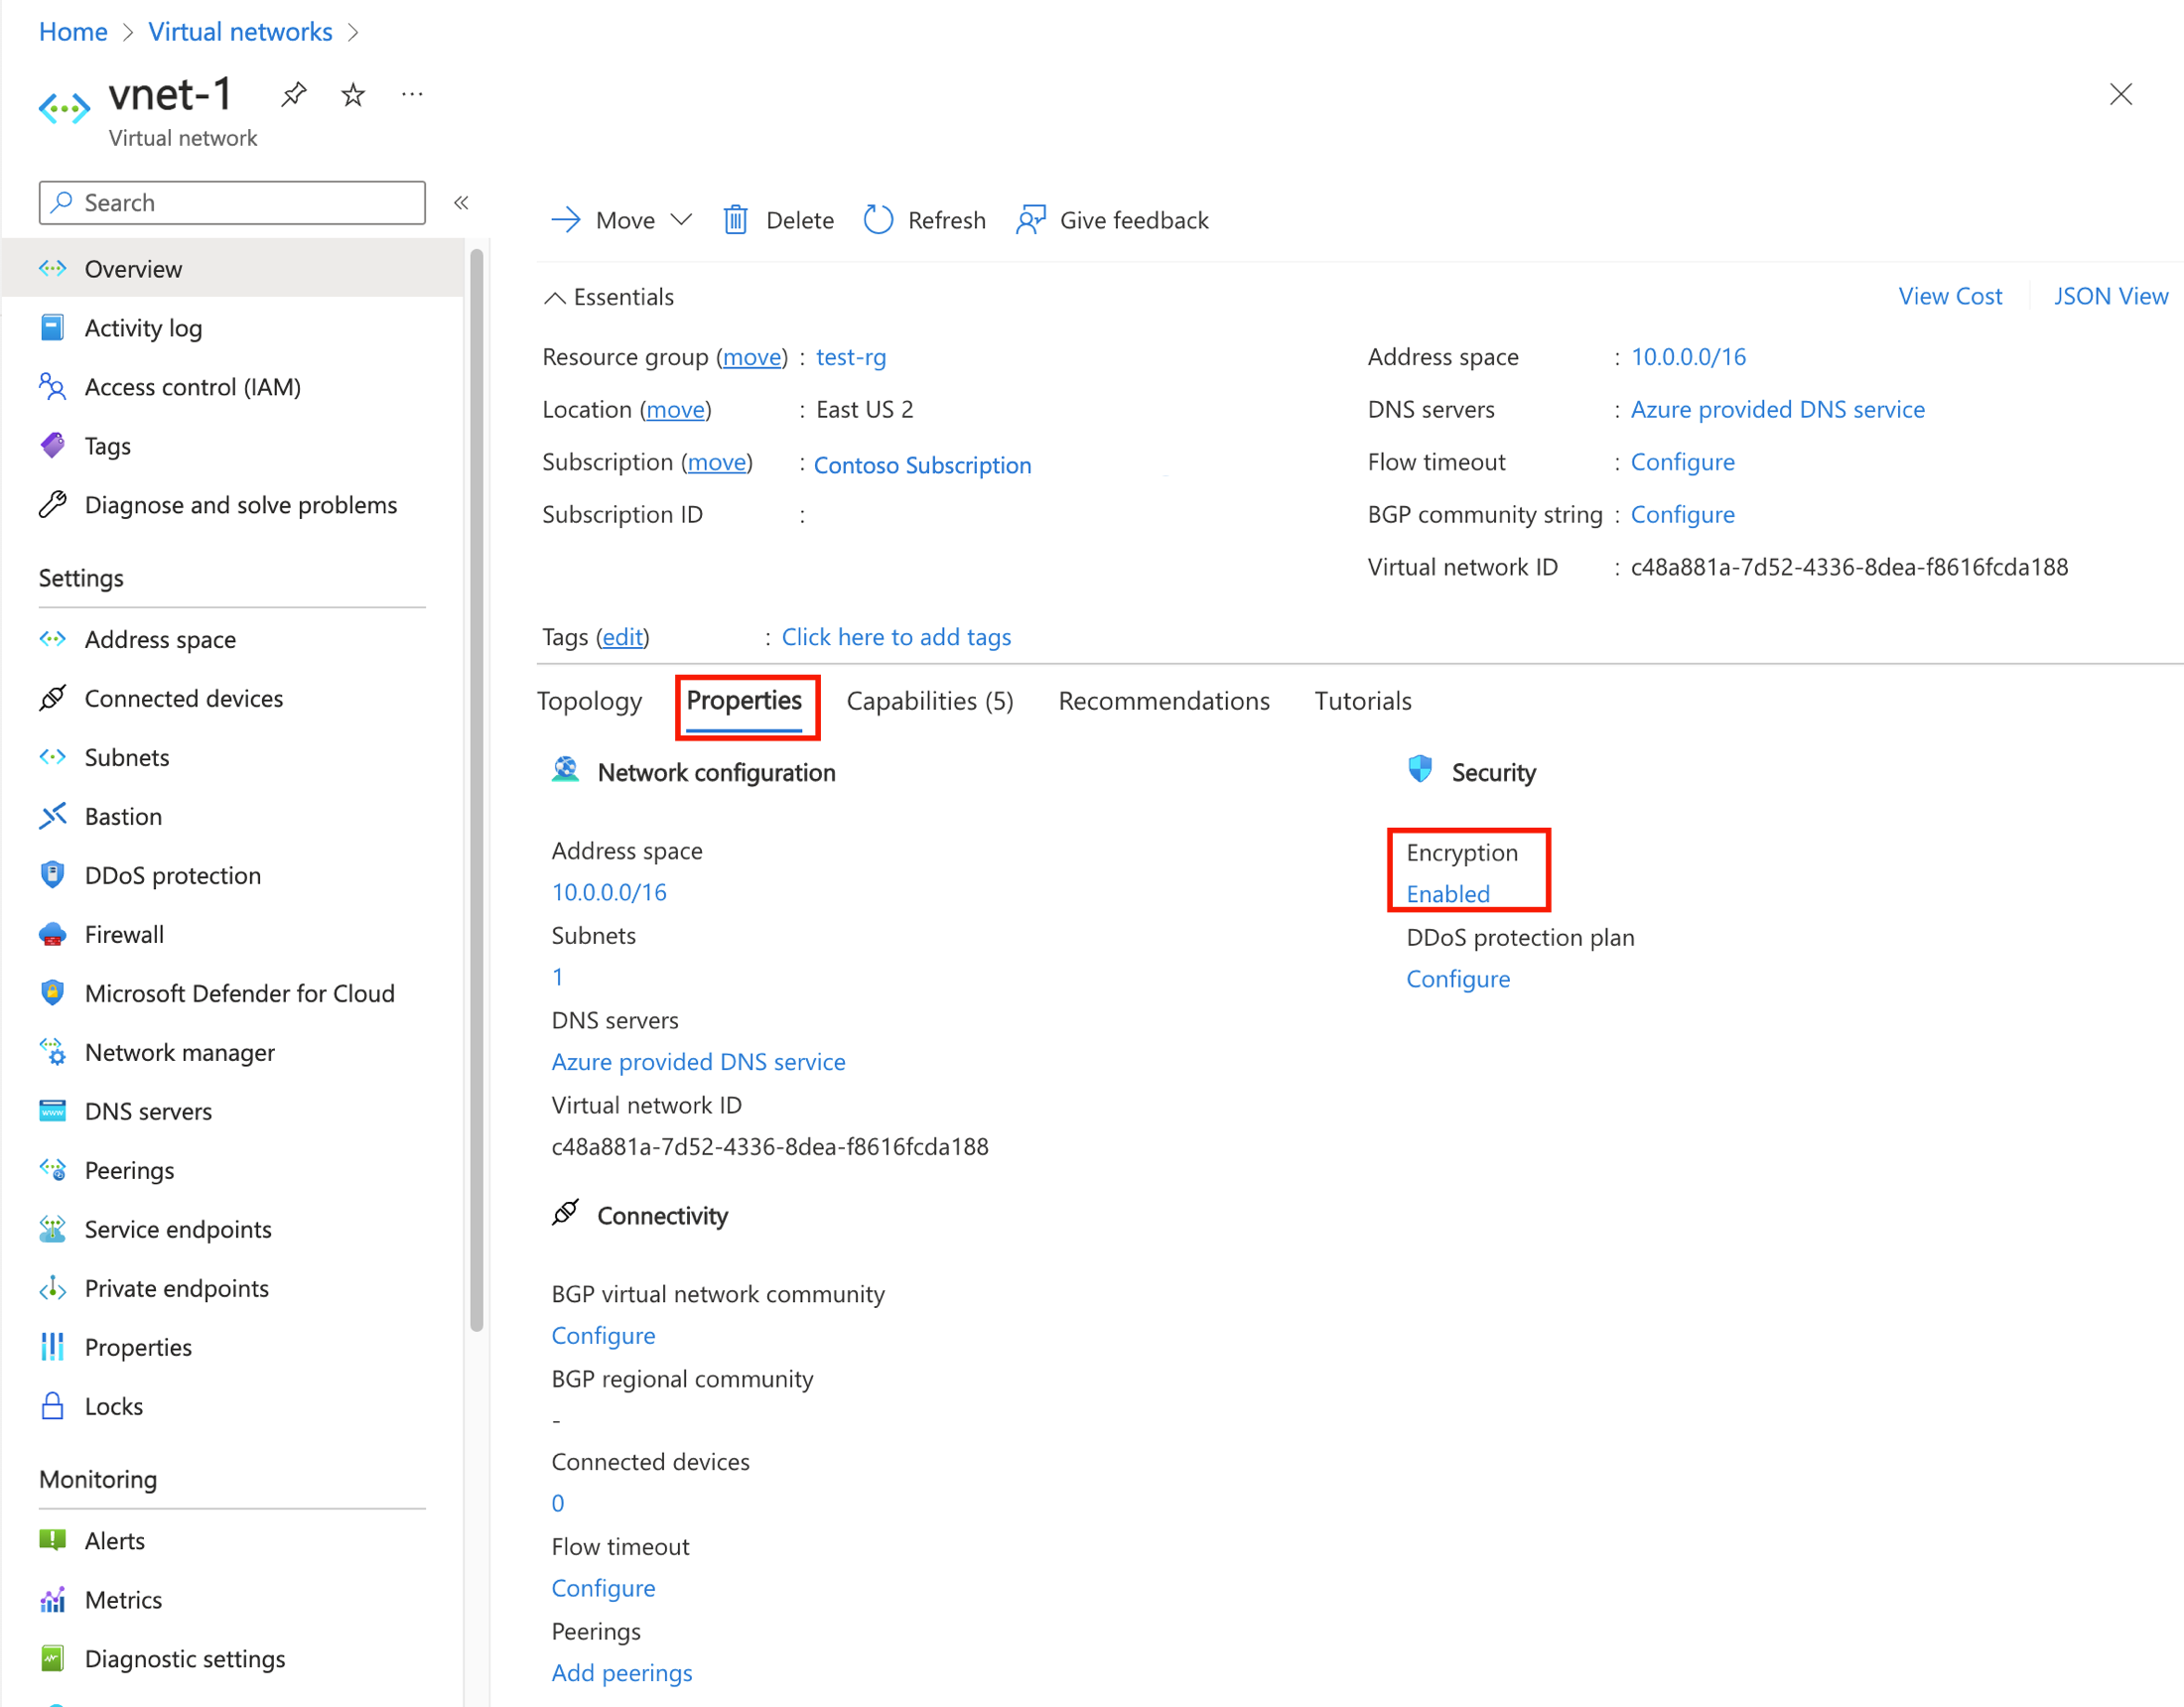
Select vnet-1.
In the Overview of vnet-1, select the Properties tab.
Verify that Encryption is set to Enabled.
Clean up resources
When you finish using the resources that you created, you can delete the resource group and all its resources:
In the Azure portal, search for and select Resource groups.
On the Resource groups page, select the test-rg resource group.
On the test-rg page, select Delete resource group.
Enter test-rg in Enter resource group name to confirm deletion, and then select Delete.
Next steps
For more information about Azure Virtual Networks, see What is Azure Virtual Network?
For more information about Azure Virtual Network encryption, see What is Azure Virtual Network encryption?
Atsiliepimai
Jau greitai: 2024 m. palaipsniui atsisakysime „GitHub“ problemų, kaip turiniui taikomo atsiliepimų mechanizmo, ir pakeisime jį nauja atsiliepimų sistema. Daugiau informacijos žr. https://aka.ms/ContentUserFeedback.
Pateikti ir peržiūrėti atsiliepimą, skirtą