Data Activator tutorial using sample data
Important
Data Activator is currently in preview.
This step-by-step tutorial uses the sample Packages data that comes with reflex. By the end of this tutorial, you'll have accomplished the following:
- Explored the main features of data activator.
- Created an object.
- Created and started a trigger.
Prerequisites
Before you begin, you need a workspace with a Fabric capacity. You can learn about Fabric workspaces in the Workspaces article.
Step-by-step guide
The following steps walk you through the tutorial and work with sample data for Data Activator.
Step 1: Create a sample reflex
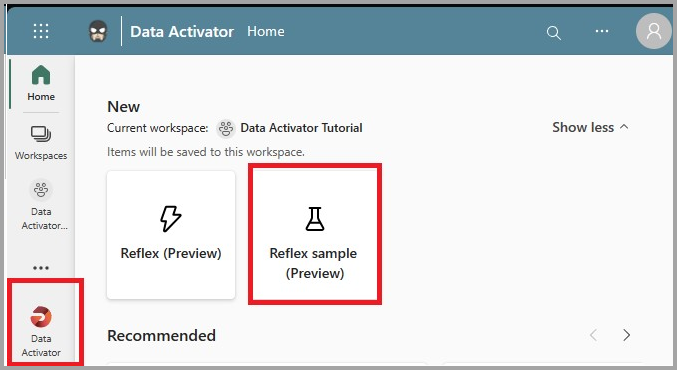
From the Fabric homepage, select a workspace with a Fabric capacity. Select the Data Activator experience then select Reflex sample to create a reflex that is prepopulated with sample events and objects.
Step 2: Explore the package events in data mode
In this step we explore data mode.
- In the newly created reflex, select on the data tab, then select the Package in Transit events stream. These events show the real-time status of packages that are in the process of being delivered by a logistics company. Look at the incoming events and note the columns on the events. The PackageId column uniquely identifies the Packages; this is the ID column that we use to assign the Package events to Package objects.
- Select on the other two event streams. These come from different sources in the logistics company, but they're also about packages. They also have a Package ID column.
Step 3: Explore the Package object in design mode
Now we explore design mode.
Select the Design tab at the bottom of the screen to enter design mode.
In the left navigation pane, look at the Events section of the Package object. All three event streams from data mode are linked to the package object. This enables you to create triggers about packages that use data from any of the three event streams.
Select the trigger called Medicine package too warm. Observe how it works:
- It selects the Temperature column from the Package in Transit events
- It detects the Temperature becoming greater than 50, but only if the Special Care column equals Medicine
- It sends an email if the condition is true
Look at the other triggers to learn how they work.
Step 4: Start the medicine package too warm trigger
Now that you have familiarized yourself with the packages events and objects, you're ready to start a trigger.
- Select the medicine too warm trigger
- Review the Act step, which sends an email. Make sure that the email address on the trigger is your email address. Alter the subject and message fields to your liking.
- Select Send me a test alert. You'll receive a test email (it might take a minute or two to arrive). Make sure it looks the way you expect.
- In the ribbon, select Start. This causes the trigger to email you whenever a medicine package is too warm. The trigger should fire several times every hour. (You might have to wait 10 minutes or so for it to fire.)
- Later, you can turn off the trigger using the Stop button.
Step 5: Create a City object
Now it's time to create an object of your own. In this section, you'll create a City object that tracks the status of package deliveries at the level of Cities, rather than individual packages.
- Return to data mode.
- Select the Package In Transit stream.
- Select Assign your data in the pane that appears in the right side of the screen.
- Name your new object City and choose City as the Key column.
- Select Save and go to design mode.
Step 6: Create a trigger on the City object
Now you'll create a trigger that alerts you if the average time in transit, for any city, exceeds a target.
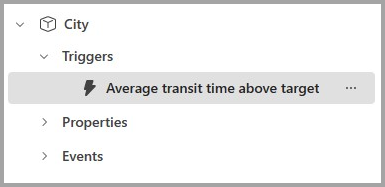
Go to design mode and select your new City object. Select New trigger then name it Average transit time above target. After this step, your City object will look like this:
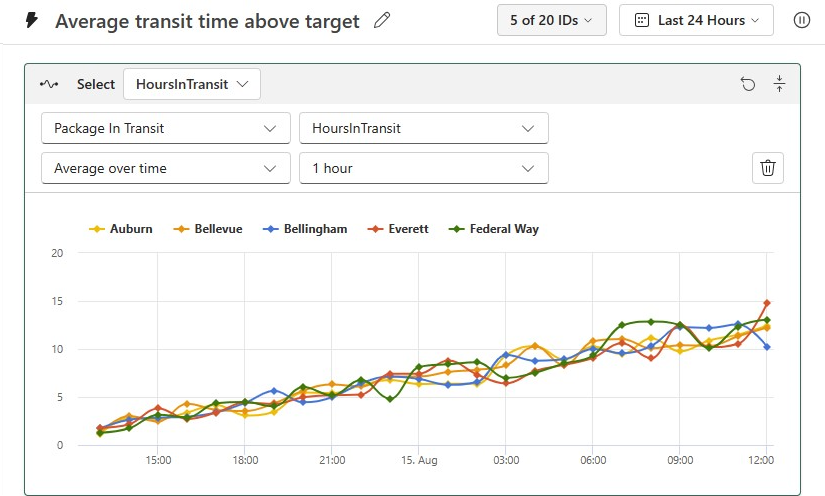
In your trigger’s select card, select HoursInTransit. Then select Add to set an Average over time aggregation of 1 hour. After this step, your trigger will look like this:
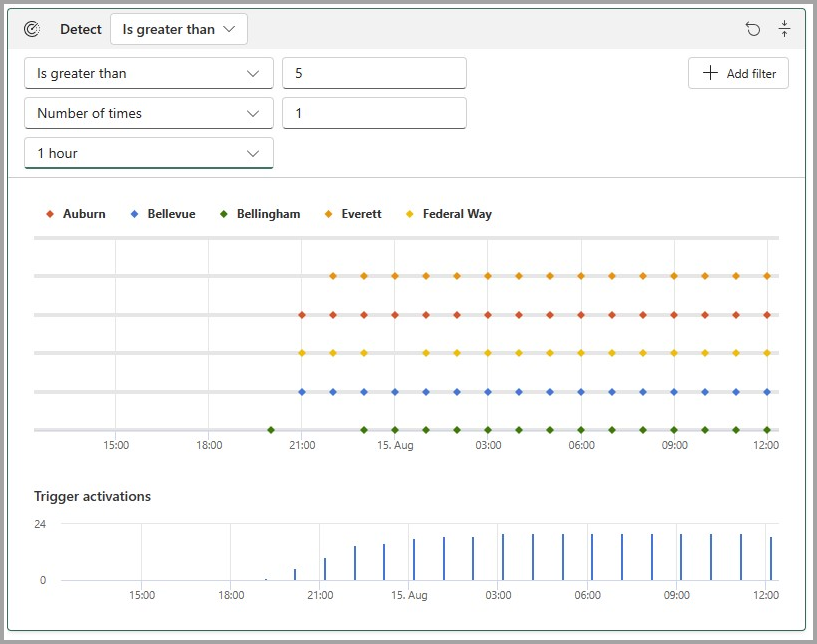
In the detect card, detect whether the average transit time for a given City is greater than 5 hours. Set the trigger to alert you once per hour per city. After you complete this step, your Detect card will look like this:
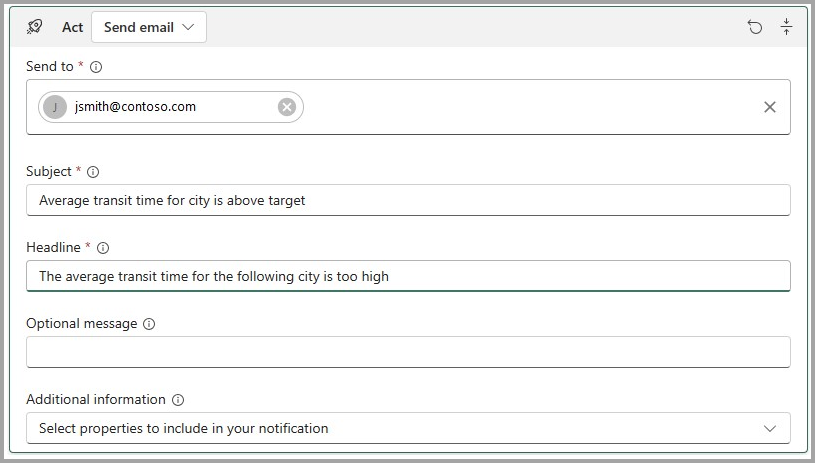
Specify an action for your trigger. You can choose Email or Teams. Customize your action according to how you would like it to appear:
Test your trigger by selecting the Send me a test alert button. Make sure you get an alert (it might take a minute or two to arrive.)
Start your trigger by selecting the Start button.
Congratulations on completing the tutorial
Congratulations on creating your first object and trigger. As next steps, you might want to try setting up some other triggers on either the City or Package objects. When you're ready to try using Data Activator on real data, follow the steps in the Get data for Data Activator article.
Once you’ve finished with the triggers you created as part of the tutorial, be sure to stop them so you don’t incur any charges for background processing of the trigger. Select each trigger in turn, and press the Stop button from the ribbon.

Related content
- What is Data Activator?
- Get started with Data Activator
- Get data for Data Activator from Power BI
- Get data for Data Activator from Eventstreams
- Assign data to objects in Data Activator
- Create Data Activator triggers in design mode
- Use Custom Actions to trigger Power Automate Flows
- Detection conditions in Data Activator
You can also learn more about Microsoft Fabric:
Atsiliepimai
Jau greitai: 2024 m. palaipsniui atsisakysime „GitHub“ problemų, kaip turiniui taikomo atsiliepimų mechanizmo, ir pakeisime jį nauja atsiliepimų sistema. Daugiau informacijos žr. https://aka.ms/ContentUserFeedback.
Pateikti ir peržiūrėti atsiliepimą, skirtą