Set up Microsoft license management
Independent software vendors (ISVs) can configure Microsoft license management for third-party SaaS apps in Partner Center as part of the offer publishing. This allows Teams admins or users to easily assign, unassign, use, and track SaaS licenses for their third-party app subscriptions within Teams.
To enable license management for a third-party app in Teams, follow the steps:
- Create an offer in Partner Center
- Update your Teams app
- Post purchase
- Integrate with Graph usageRights API
Create an offer in Partner Center
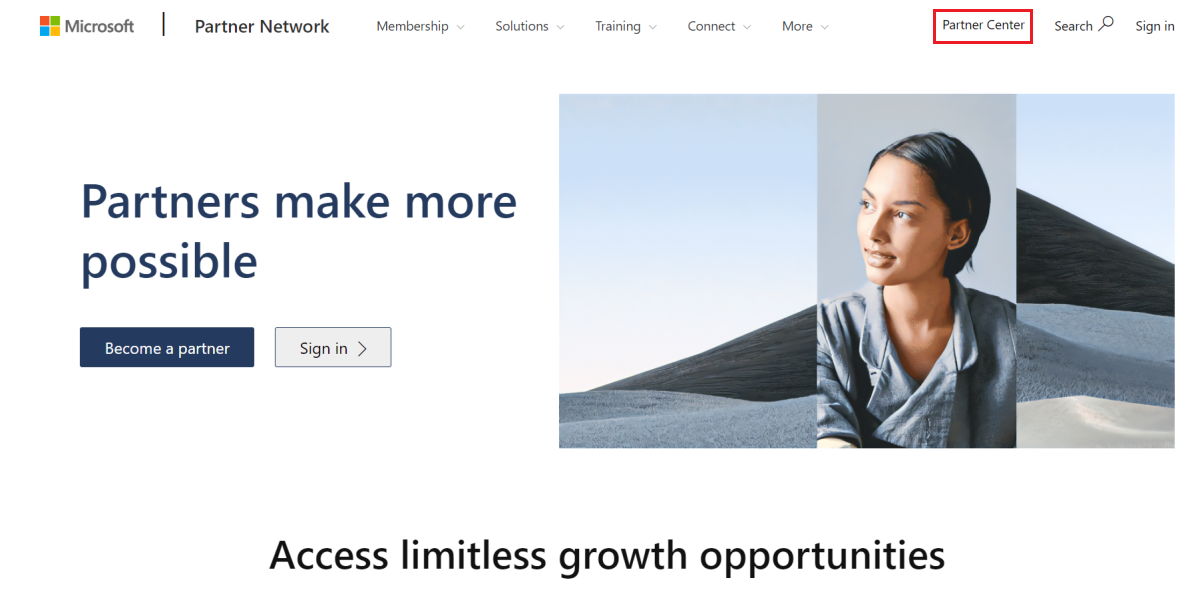
Sign in to Partner Center and select Partner Center.
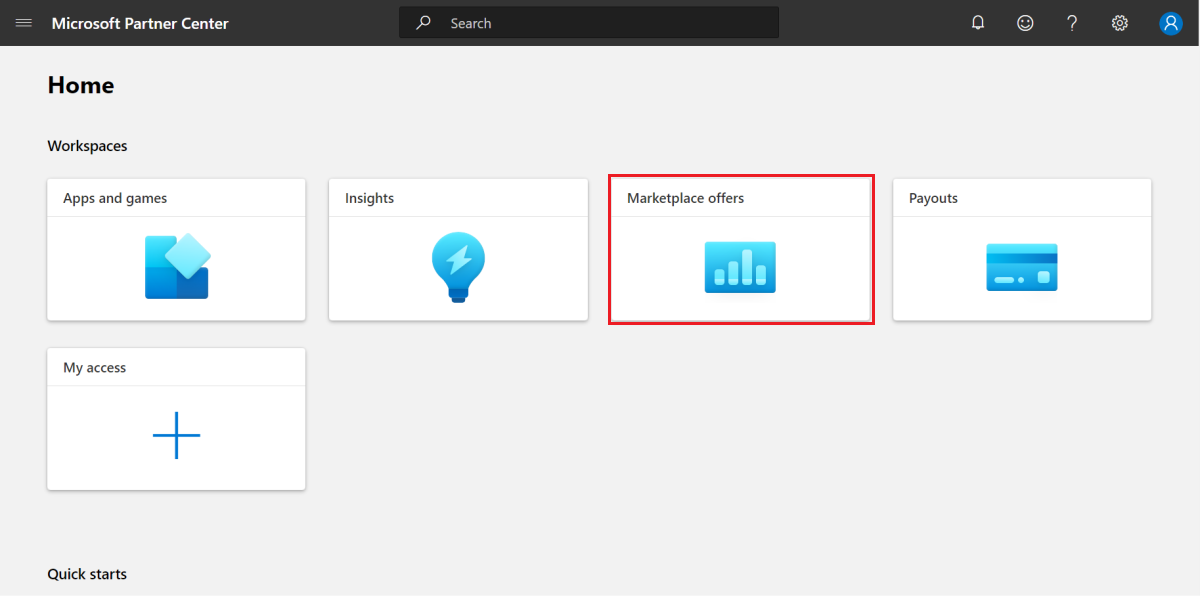
In the Home page, select Marketplace offers tab to define commercial marketplace offers.
Select Overview from the left pane.
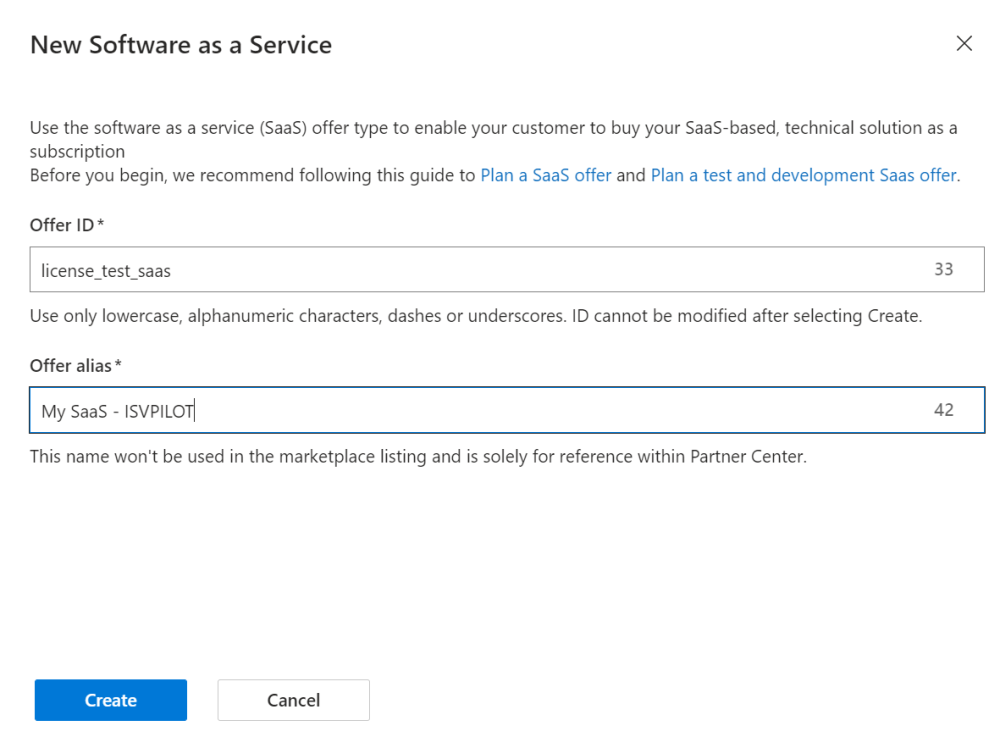
Select New Offer > Software as a Service.

Enter Offer ID and Offer alias and select Create.
Note
If you're creating an offer for testing purpose, add the text -ISVPILOT to the end of your offer alias. This indicates the certification team that the offer is for testing purposes. Microsoft delete offers with -ISVPILOT periodically. So, don't use this tag for reasons other than testing the license management capability.
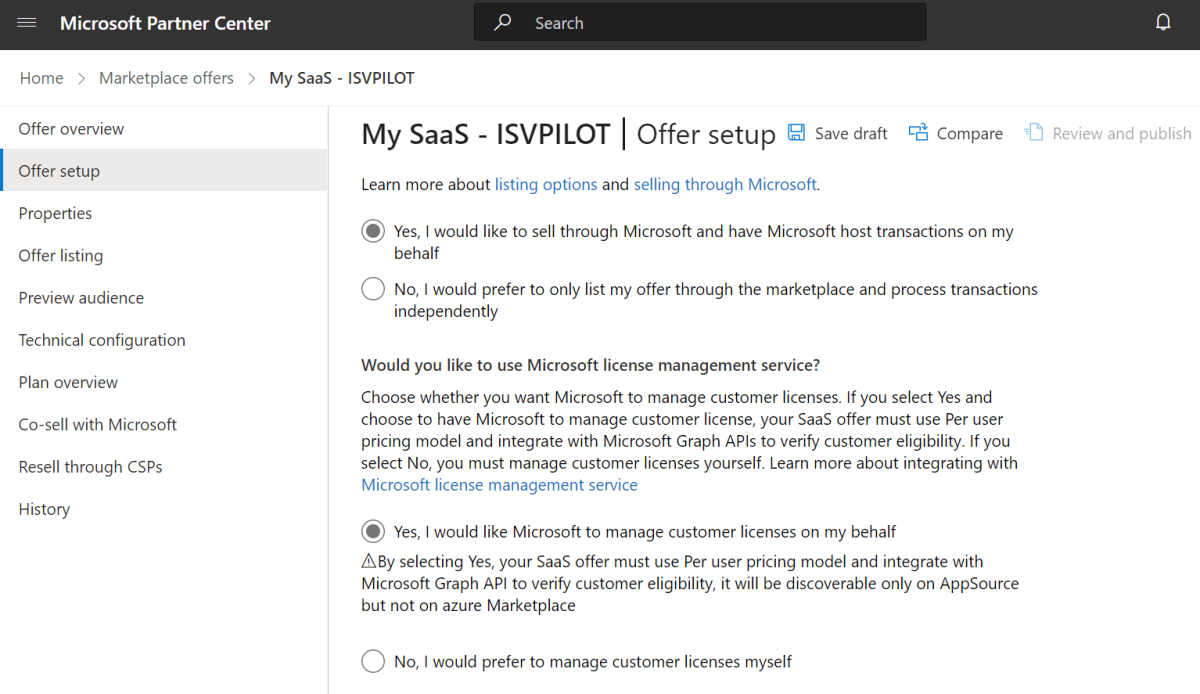
In the Offer setup page, under setup details, select the checkbox Yes, I would like Microsoft to manage customer licenses on my behalf.
Note
- This is a one-time setting and you can't change it once your offer is published. This allows the customer to manage licenses for your app within Teams.
- The App manifest supports only one offer for an app. Choose an appropriate license management solution for all the plans available in your offer and you can't change this option after the offer is pushed to live.
Select Save draft.
Select Plan overview from the left pane, and then select Create new plan.
Note
You need to add at least one plan.
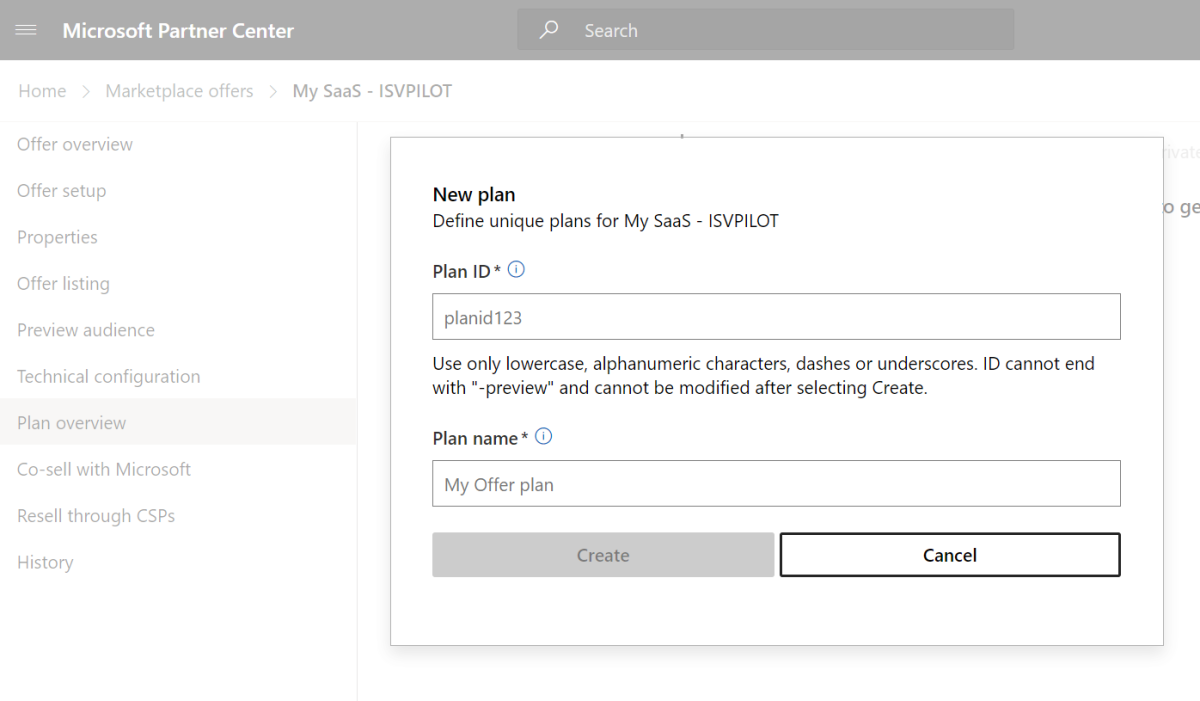
Enter Plan ID and Plan name, and then select Create.
Enter the Plan name and Plan description.
Note
The plan information displays on Teams marketplace and AppSource under offer listing (plans section).
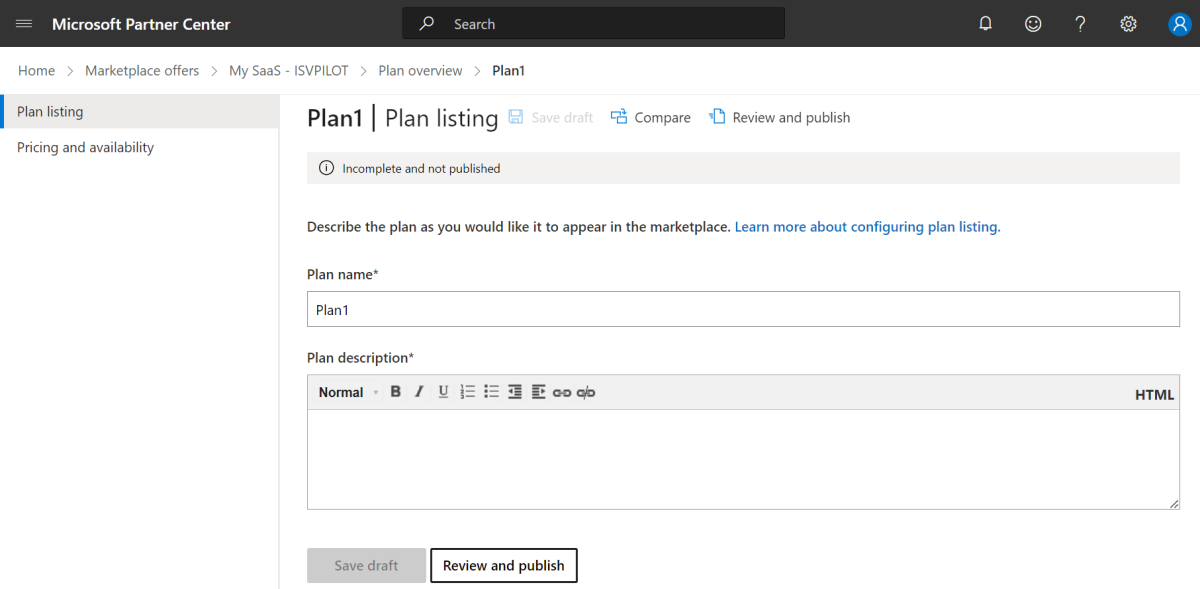
Select Save draft.
Select Pricing and availability from the left pane.
Add pricing and availability details.
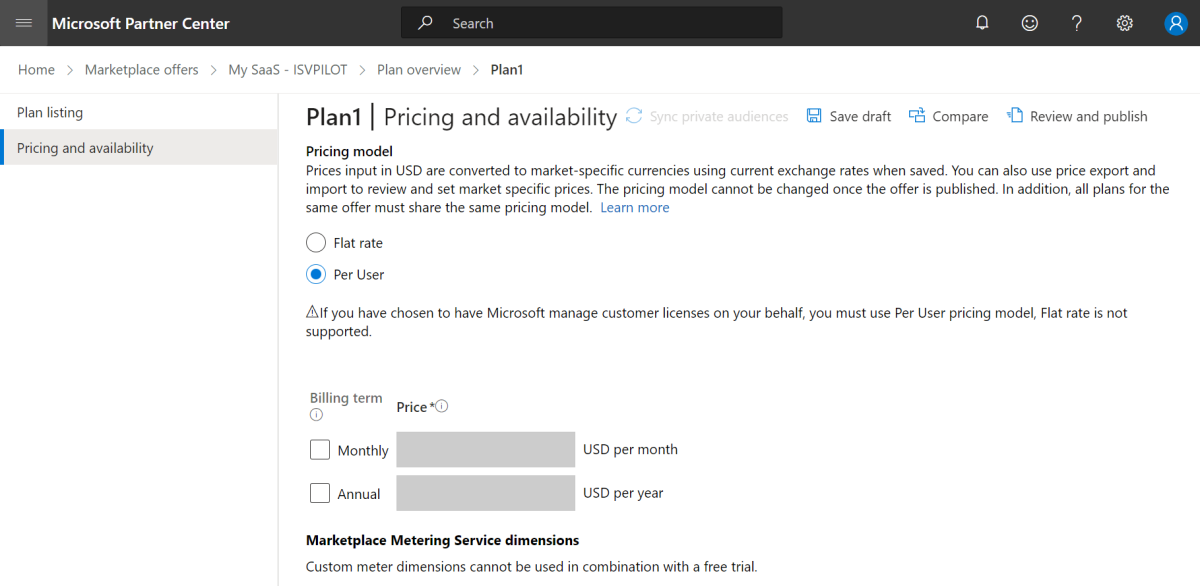
Select Save draft.
Select Plan overview at the top of the page to go to the listing page that shows all the plans you've created for this offer.
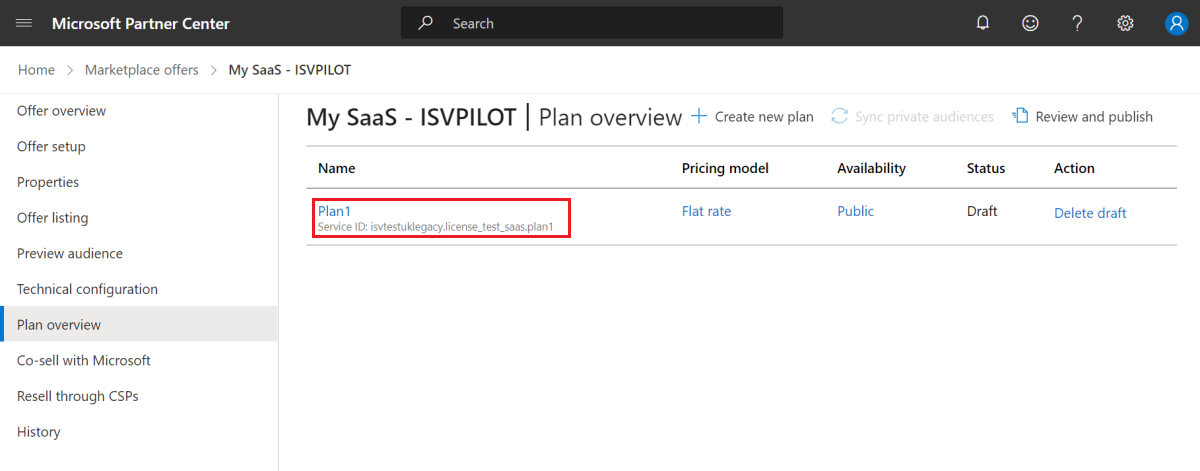
Copy the service ID of the plan you created to integrate with Microsoft Graph usageRights API.
Update your Teams app
Update your Teams app to map to the paid functionality and Map your Teams app to your offer and publish.
Post purchase
After activation, customer is redirected from landing page to Teams License Management.
Upon successful completion of subscription purchase, the customer is redirected to the app landing page for subscription activation. This is the existing experience for user purchasing Monetized apps in Teams.
After the customer activates the subscription purchase on landing page, customer is redirected to subscriptions page in Teams via a redirect URL link or button that the customer selects on the publisher landing page.
Integrate with Graph usageRights API
Integrate with Graph usageRights API to manage user permissions at the time of app launch by a customer who has a purchase license. You're required to determine the user’s permissions for the app with a Graph call to the usageRights API.
You can call Graph APIs to determine if the currently logged in user with a valid subscription of the plan has access to your app. To call Graph usageRights API to check user permissions, follow the steps:
Get user OBO token: Get access on behalf of a user.
Call Graph to get user’s object ID: Use the Microsoft Graph API.
Call usageRights API to determine the user has License to the plan: List user usageRights API.
Note
- You need to have minimum
User.Readpermissions to call usageRights. The usageRights API is currently in beta version. After the version is updated to V1, users must upgrade from beta to V1 version. - If the Microsoft Entra app is used for both SaaS Fulfillment APIs and usageRights API, ensure that the tenant under which the Microsoft Entra app is created is either the publishing tenant or the associated tenant in the Partner Center.
- You need to have minimum
To determine if the tenant for the Microsoft Entra app is part of the Partner Center setup, follow these steps:
- Sign in to Microsoft Partner Center with the publisher account that is used to publish the SaaS offer.
- On the upper-right corner, select the Settings icon.
- Select Account Settings.
- On the left pane, select Tenants. You can see all tenants associated with the Microsoft Partner Network (MPN) account. The tenant, who is the owner of the Microsoft Entra app, must be available in the list. If the tenant isn’t on the list, you can use the Associate Azure ID button to link the tenant.
Check license usage in Partner Center analytics
- Sign in to Partner Center.
- In the left pane, go to Commercial Marketplace > Analyze > Licensing.
- Select Plan and Tenant in the reporting widget to see the month wise usage.
See also
Platform Docs
Feedback
Coming soon: Throughout 2024 we will be phasing out GitHub Issues as the feedback mechanism for content and replacing it with a new feedback system. For more information see: https://aka.ms/ContentUserFeedback.
Submit and view feedback for