Build an Outlook add-in with the unified manifest for Microsoft 365 (preview)
There are two tools that you can use to create an Outlook Add-in project that uses the unified manifest for Microsoft 365. This article describes how to do it with the Yeoman generator for Office (also called "Yo Office"). Alternatively, you can create an Outlook add-in project with the Teams Toolkit as described at Create Office Add-in projects with Teams Toolkit (preview).
In this article, you'll walk through the process of building an Outlook task pane add-in that displays a property of a selected message, triggers a notification on the reading pane, and inserts text into a message on the compose pane. This add-in will use a preview version of the unified, JSON-formatted manifest that Teams extensions, like custom tabs and messaging extensions, use. For more information about this manifest, see Unified manifest for Microsoft 365 (preview).
Note
The new manifest is available for preview and is supported only on Outlook for Windows. It is subject to change based on feedback. We encourage experienced add-in developers to experiment with it. The preview manifest should not be used in production add-ins.
The preview is only supported in Office downloaded from a Microsoft 365 subscription and installed on Windows.
Tip
If you want to build an Outlook add-in using the XML manifest, see Build your first Outlook add-in.
Create the add-in
You can create an Office Add-in with the unified manifest by using the Yeoman generator for Office Add-ins. The Yeoman generator creates a Node.js project that can be managed with Visual Studio Code or any other editor.
Prerequisites
- .NET runtime for Windows. One of the tools used in the preview runs on .NET.
Node.js (the latest LTS version). Visit the Node.js site to download and install the right version for your operating system.
The latest version of Yeoman and the Yeoman generator for Office Add-ins. To install these tools globally, run the following command via the command prompt.
npm install -g yo generator-officeNote
Even if you've previously installed the Yeoman generator, we recommend you update your package to the latest version from npm.
Office connected to a Microsoft 365 subscription (including Office on the web).
Note
If you don't already have Office, you might qualify for a Microsoft 365 E5 developer subscription through the Microsoft 365 Developer Program; for details, see the FAQ. Alternatively, you can sign up for a 1-month free trial or purchase a Microsoft 365 plan.
Visual Studio Code (VS Code) or your preferred code editor
Outlook on Windows (connected to a Microsoft 365 account)
Create the add-in project
Run the following command to create an add-in project using the Yeoman generator. A folder that contains the project will be added to the current directory.
yo officeNote
When you run the
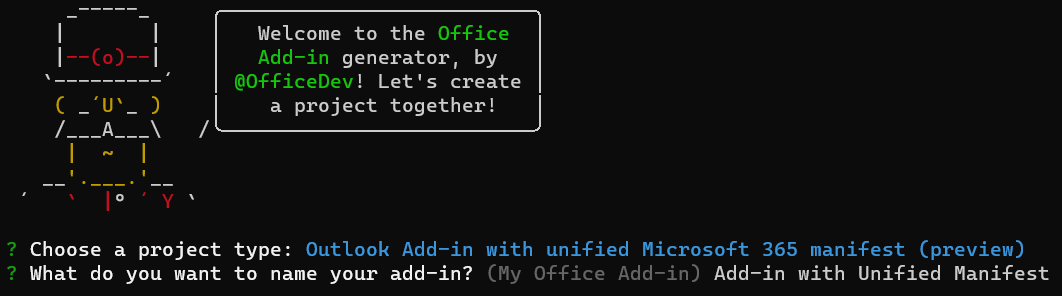
yo officecommand, you may receive prompts about the data collection policies of Yeoman and the Office Add-in CLI tools. Use the information that's provided to respond to the prompts as you see fit.When prompted, provide the following information to create your add-in project.
Choose a project type -
Outlook Add-in with unified Microsoft 365 Manifest (preview)What do you want to name your add-in? -
Add-in with Unified Manifest
Note
For this preview, the add-in name cannot be more than 30 characters.
After you complete the wizard, the generator will create the project and install supporting Node components.
Note
If you're using Node.js version 20.0.0 or later, you may see a warning when the generator runs the installation that you have an unsupported engine. We're working on a fix for this. In the meantime, the warning doesn't affect the generator or the project you generate, so it can be ignored.
Tip
You can ignore the next steps guidance that the Yeoman generator provides after the add-in project's been created. The step-by-step instructions within this article provide all of the guidance you'll need to complete this tutorial.
Navigate to the root folder of the web application project.
cd "Add-in with Unified Manifest"
Explore the project
The add-in project that you've created with the Yeoman generator contains sample code for a very basic task pane add-in.
- The ./manifest/manifest.json file in the root directory of the project defines the settings and capabilities of the add-in.
- The ./src/taskpane/taskpane.html file contains the HTML markup for the task pane.
- The ./src/taskpane/taskpane.css file contains the CSS that's applied to content in the task pane.
- The ./src/taskpane/taskpane.ts file contains code that calls the Office JavaScript library to facilitate interaction between the task pane and Outlook.
- The ./src/command/command.html file will be edited by WebPack at build time to insert an HTML
<script>tag that loads the JavaScript file that is transpiled from the command.ts file. - The ./src/command/command.ts file has little code in it at first. Later in this article, you'll add code to it that calls the Office JavaScript library and that executes when a custom ribbon button is selected.
Update the code
Open your project in VS Code or your preferred code editor.
Tip
On Windows, you can navigate to the root directory of the project via the command line and then enter
code .to open that folder in VS Code.Open the file ./src/taskpane/taskpane.html and replace the entire <main> element (within the <body> element) with the following markup. This new markup adds a label where the script in ./src/taskpane/taskpane.ts will write data.
<main id="app-body" class="ms-welcome__main" style="display: none;">
    <h2 class="ms-font-xl"> Discover what Office Add-ins can do for you today! </h2>
    <p><label id="item-subject"></label></p>
    <div role="button" id="run" class="ms-welcome__action ms-Button ms-Button--hero ms-font-xl">
        <span class="ms-Button-label">Run</span>
    </div>
</main>
Try it out
Note
Office Add-ins should use HTTPS, not HTTP, even while you're developing. If you're prompted to install a certificate after you run one of the following commands, accept the prompt to install the certificate that the Yeoman generator provides. You may also have to run your command prompt or terminal as an administrator for the changes to be made.
Open a command prompt as an administrator and run the following command in the root directory of your project. When you run this command, the local web server starts and your add-in will be sideloaded.
npm startNote
If this is the first time you've created an add-in on the computer, or the first time in over a month, you'll be prompted to install security certificates.
Use the classic ribbon in Outlook. The remainder of these instructions assume this.
View a message in the Reading Pane, or open the message in its own window. A new control group named Contoso Add-in appears on the Outlook Home tab (or the Message tab if you opened the message in a new window). The group has a button named Show Taskpane and one named Perform an action.
Select the Perform an action button. It executes a command to generate a small informational notification at the bottom of the message header, just above the message body.
When prompted with the WebView Stop On Load dialog box, select OK.
Note
If you select Cancel, the dialog won't be shown again while this instance of the add-in is running. However, if you restart your add-in, you'll see the dialog again.
To open the add-in task pane, choose Show Taskpane.
Note
If you receive the error "We can't open this add-in from localhost" in the task pane, follow the steps outlined in the troubleshooting article.
When prompted with the WebView Stop On Load dialog box, select OK.
Note
If you select Cancel, the dialog won't be shown again while this instance of the add-in is running. However, if you restart your add-in, you'll see the dialog again.
Scroll to the bottom of the task pane and choose the Run link to copy the message's subject to the task pane.
End the debugging session with the following command:
npm stopImportant
Closing the web server window doesn't reliably shut down the web server. If it isn't properly shut down, you'll encounter problems as you change and rerun the project.
Close all instances of Outlook.
Add a custom button to the ribbon
Add a custom button to the ribbon that inserts text into a message body.
Open your project in VS Code or your preferred code editor.
Tip
On Windows, you can navigate to the root directory of the project via the command line and then enter
code .to open that folder in VS Code.In your code editor, open the file ./src/command/command.ts and add the following code to the end of the file. This function will insert
Hello Worldat the cursor point in message body.function insertHelloWorld(event: Office.AddinCommands.Event) { Office.context.mailbox.item.body.setSelectedDataAsync("Hello World", {coercionType: Office.CoercionType.Text}); // Be sure to indicate when the add-in command function is complete event.completed(); } // Register the function with Office Office.actions.associate("insertHelloWorld", insertHelloWorld);Open the file ./manifest/manifest.json.
Note
When referring to nested JSON properties, this article uses dot notation. When an item in an array is referenced, the bracketed zero-based number of the item is used.
To write to a message, the add-in's permissions need to be raised. Scroll to the property
authorization.permissions.resourceSpecific[0].nameand change the value toMailboxItem.ReadWrite.User.When an add-in command runs code instead of opening a task pane, it must run the code in a runtime that is separate from the embedded webview where the task pane code runs. So the manifest must specify an additional runtime. Scroll to the property
extension.runtimesand add the following object to theruntimesarray. Be sure to put a comma after the object that is already in the array. Note the following about this markup.- The value of the
actions[0].idproperty must be exactly the same as the name of the function that you added to the commands.ts file, in this caseinsertHelloWorld. In a later step, you'll refer to the item by this ID.
{ "id": "ComposeCommandsRuntime", "type": "general", "code": { "page": "https://localhost:3000/commands.html", "script": "https://localhost:3000/commands.js" }, "lifetime": "short", "actions": [ { "id": "insertHelloWorld", "type": "executeFunction", "displayName": "insertHelloWorld" } ] }- The value of the
The Show Taskpane button appears when the user is reading an email, but the button for adding text should only appear when the user is composing a new email (or replying to one). So the manifest must specify a new ribbon object. Scroll to the property
extension.ribbonsand add the following object to theribbonsarray. Be sure to put a comma after the object that is already in the array. Note the following about this JSON:- The only value in the
contextsarray is "mailCompose", so the button will appear when in a compose (or reply) window but not in a message read window where the Show Taskpane and Perform an action buttons appear. Compare this value with thecontextsarray in the existing ribbon object, whose value is["mailRead"]. - The value of the
tabs[0].groups[0].controls[0].actionIdmust be exactly the same as the value ofactions[0].idproperty in the runtime object you created in an earlier step.
{ "contexts": ["mailCompose"], "tabs": [ { "builtInTabId": "TabDefault", "groups": [ { "id": "msgWriteGroup", "label": "Contoso Add-in", "icons": [ { "size": 16, "url": "https://localhost:3000/assets/icon-16.png" }, { "size": 32, "url": "https://localhost:3000/assets/icon-32.png" }, { "size": 80, "url": "https://localhost:3000/assets/icon-80.png" } ], "controls": [ { "id": "HelloWorldButton", "type": "button", "label": "Insert text", "icons": [ { "size": 16, "url": "https://localhost:3000/assets/icon-16.png" }, { "size": 32, "url": "https://localhost:3000/assets/icon-32.png" }, { "size": 80, "url": "https://localhost:3000/assets/icon-80.png" } ], "supertip": { "title": "Insert text", "description": "Inserts some text." }, "actionId": "insertHelloWorld" } ] } ] } ] }- The only value in the
Try out the updated add-in
Open a command prompt as an administrator and run the following command in the root directory of your project.
npm startIn Outlook, open a new message window (or reply to an existing message). A new control group named Contoso Add-in will appear on the Outlook Message tab. The group has a button named Insert text.
Put the cursor anywhere in the message body and choose the Insert text button.
When prompted with the WebView Stop On Load dialog box, select OK.
Note
If you select Cancel, the dialog won't be shown again while this instance of the add-in is running. However, if you restart your add-in, you'll see the dialog again.
The phrase "Hello World" will be inserted at the cursor.
End the debugging session with the following command:
npm stop
Troubleshooting
Ensure your environment is ready for Office development by following the instructions in Set up your development environment.
The automatic
npm installstep Yo Office performs may fail. If you see errors when trying to runnpm start, navigate to the newly created project folder in a command prompt and manually runnpm install. For more information about Yo Office, see Create Office Add-in projects using the Yeoman Generator.If your add-in shows an error (for example, "This add-in could not be started. Close this dialog to ignore the problem or click "Restart" to try again.") when you press F5 or choose Debug > Start Debugging in Visual Studio, see Debug Office Add-ins in Visual Studio for other debugging options.
Some of the sample code uses ES6 JavaScript. This isn't compatible with older versions of Office that use the Trident (Internet Explorer 11) browser engine. For information on how to support those platforms in your add-in, see Support older Microsoft webviews and Office versions. If you don't already have a Microsoft 365 subscription to use for development, you might qualify for a Microsoft 365 E5 developer subscription through the Microsoft 365 Developer Program; for details, see the FAQ. Alternatively, you can sign up for a 1-month free trial or purchase a Microsoft 365 plan.
See also
Office Add-ins
Feedback
Coming soon: Throughout 2024 we will be phasing out GitHub Issues as the feedback mechanism for content and replacing it with a new feedback system. For more information see: https://aka.ms/ContentUserFeedback.
Submit and view feedback for