Customize sample app templates
In this article, you'll learn about customizing sample app templates. For example, you may need to change the company logo, update the data inside the sample app templates to fit your business requirement, add or remove controls on the screens to extend the app.
Prerequisites
Install a sample app template. More details: Use sample app templates in Microsoft Teams.
Note
- Sections of this article uses one of the available sample app templates as an example. The tables, controls, screens and other components of the apps may vary depending on the app you installed. Use discretion when customizing the app that you select.
- Read Sample app template updates before you customize sample app templates to understand the impact of new releases to the sample app template versions.
Open the sample app templates in Power Apps Studio
To start with customizing the sample app templates, the first step is to open the app inside Power Apps Studio.
Sign in to Teams.
Select
 (More added apps).
Select Power Apps.

Select Build tab.
Select the team environment where you installed the sample app template.
Select Installed apps.
Select the sample app template that you installed.
If prompted, select the location.
More information: Edit an app in Power Apps Studio
Remove sample data
When you install sample app templates, the tables might be pre-populated with sample data. The following table lists the sample app templates and the list of tables with the sample data to be removed:
To remove data from the sample app templates:
Open the sample app template (for example, Manage inspections) in Power Apps Studio.
Select Data from the left pane.
Select
 next to the table name (for example, Area Inspection Task for Manage inspections app).
Select Edit data.
Delete all rows containing sample data.

Close the visual editor.
Repeat the previous steps for the remaining tables.
Add your logo to the loading screen
Open the sample app template (for example, Inspection) in Power Apps Studio.
Select Tree view from the left pane.
If not already selected, select Landing Screen.
Select Insert.
Select Image control in Media.

From the properties pane on the right side, select the Image drop-down, and then select + Add an image file.
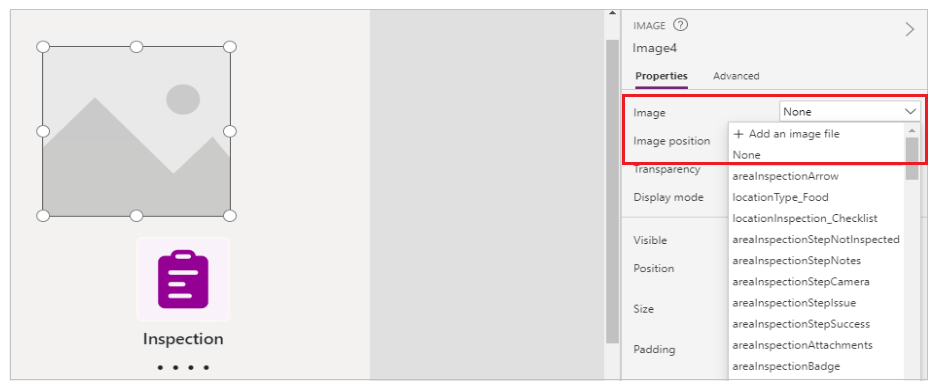
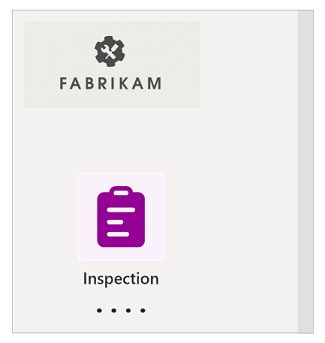
Select image for your company logo, and then select Open.
Position and size image control to the position you want on loading screen.
Change the welcome screen text
Note
The Inspection app welcome screen greeting text uses a formula containing global variables to correctly display the desired terminology for inspections and items being inspected. Use caution when changing this formula.
Open the sample app template (for example, Inspection) in Power Apps Studio.
Select the text label control with the greeting text Glad to have you here.
The formula for the greeting text is in this format:
"Glad to have you here, we are ready for you to " & If(Lower(gblWorkType)="inspection", "inspect", Lower(gblWorkType)) & Switch(
Left(
    Lower(areaLabel),
    1
),
"a",
" an ",
"e",
" an ",
"i",
" an ",
"o",
" an ",
"u",
" an ",
" a "
) & Lower(areaLabel)
Select the formula bar.
Select the phrase Glad to have you here.
Update the greeting text, such as We are happy that you are here.
"We are happy that you are here, we are ready for you to " & If(Lower(gblWorkType)="inspection", "inspect", Lower(gblWorkType)) & Switch(
Left(
    Lower(areaLabel),
    1
),
"a",
" an ",
"e",
" an ",
"i",
" an ",
"o",
" an ",
"u",
" an ",
" a "
) & Lower(areaLabel)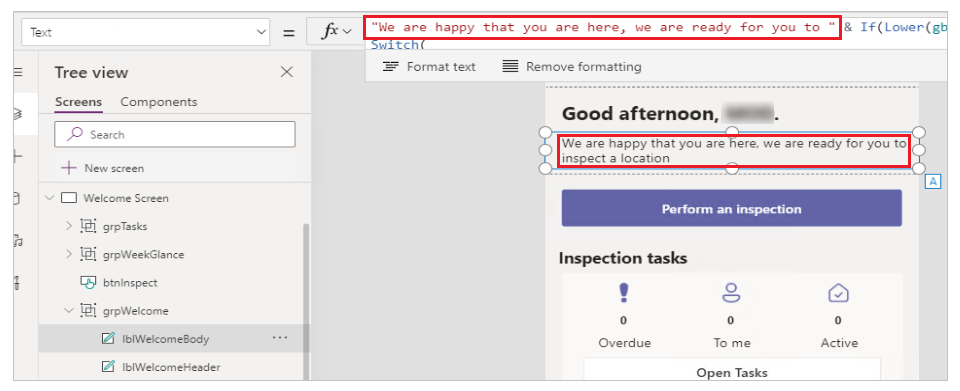
Change the screen background color
Note
The Inspection app leverages global theme variables to ensure consistent user experience. If you modify a screen fill, the modified screen will no longer use the standard app theme.
Open the sample app template (for example, Inspection) in Power Apps Studio.
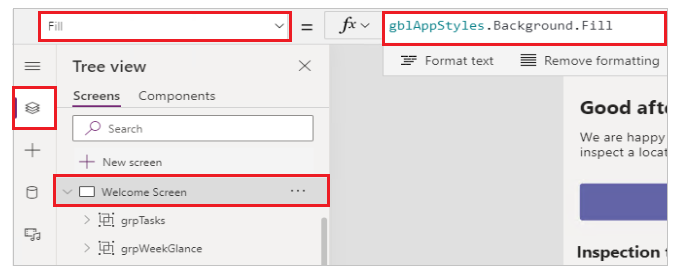
Select Tree view from the left pane.
Select Welcome Screen from Tree view.
Select Fill from the property list on the top-left.
In formula bar, replace the formula with the color that you want.
Screen background fill color will be set to the selected background color.
Bulk edit data
If you want to quickly edit the data in the app, you can open the table and modify or delete data.
Caution
Sample app templates uses several related tables, such as Area Inspection Locations and Area Inspection Location Types for Inspection app. Use caution when deleting records from the tables without checking data relationship and dependencies.
Open the sample app template (for example, Inspection) in Power Apps Studio.
Select Data from the left pane.
Select
 next to the table name (for example, Area Inspection Location Types for Inspection app).
Select the cell inside the Visual Editor, for example Food in the Name column.
Replace the text with the value you want.
Close the visual editor.
Data in the app should reflect the updated value, such as the location name in this example.

Add a column to the app
Important
The Inspection app customization steps in this section covers some of the advanced configuration options. This example requires that you have familiarity with the Power Apps Studio, are comfortable with modifying formulas, and work with controls such as containers.
Consider a scenario where you have multiple stores, and you want to associate locations and inspections with specific stores.
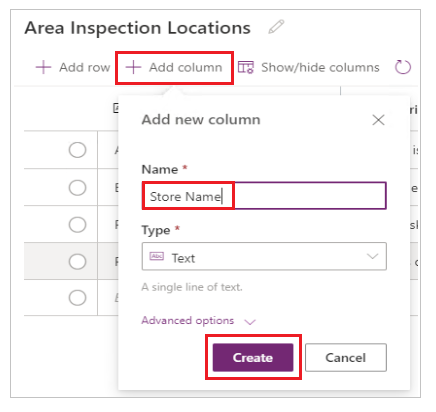
Add Store Name text column to the Location table
Open the Manage inspections app in Power Apps Studio.
Select Data from the left pane.
Select
 next to the table name (for example, Area Inspection Locations for Manage inspections app).
Select Add column.
Enter Name as "Store Name".
Select Create.
Close the visual editor.
Add Store Name column to the location form
Select the Locations Screen.
Tip
You can ignore the error about the use of the preview connectors in this app.
In Tree view, search for
btnArea_GroupedAreas.In the Grouped Areas on the form, drag the left edge to be parallel with the edge of the Title field.
Note
The Grouped Areas field control is in a container. Hence, the selected area may appear in a different part of the screen than where you see the column. Dragging the selected area resizes the column.
Select Insert from the left pane.
Select Label control.
Position the Label so that it's aligned horizontally with Grouped areas, and vertically with the Area type.

Select Text from the property list on the top-left.
Select the formula bar.
Change the formula to Store Name.
Select Insert from the left pane.
Select Text box control.
Drag the text box control to be aligned horizontally with Grouped area and vertically with Area type.
Select Value from the property list on the top-left.
In the formula bar, replace the current value with
gblLocation.'Store Name'Select ColorBackground from the property list on the top-left.
In the formula bar, enter "White".

Select Display mode from the property list on the top-left.
In the formula bar, enter "Edit" if not already present.
Hold the ALT key on your keyboard, and select the Edit.

Select Tree view from the left pane.
Search for
btnAreaDetails_Saveand select the returned control.Expand the formula bar.
At the end of the 17th line, add a comma and this formula:
'Store Name':Microsoft_CoreControls_TextBox1.ValueThis section of the formula should now look like the following:
{
	msft_name: txtArea_EditTitle.Text,
	'Location Type': cmbAreaDetails_AreaType.Selected,
	'Primary Image': picArea_UploadedImage.Image, 'Store Name':Microsoft_CoreControls_TextBox1.Value
}
Note
If the updated formula shows error, verify the text box name for the store name. For example, it may be
Microsoft_CoreControls_TextBox2instead ofMicrosoft_CoreControls_TextBox1, depending on your changes.Select the label control added in step 5.
Select the Y property from the property list on the top-left.
Select the formula bar.
Change the formula to:
If(gblEditLocation,250,200)Select text box added in step 11.
Select the Y property from the property list on the top-left.
Select the formula bar.
Change the formula to:
If(gblEditLocation,282,232)Hold the CTRL key on your keyboard, and select both the store name label and the text box.
Select Visible property from the property list on the top-left.
Select the formula bar.
Change the formula to:
If(gblViewInspection, false, true)
Publish app updates to Teams
To save and publish the changes to the sample app:
Select Save from the top-right.
Select Publish to Teams
Select Next.
To publish updated version of an app to an existing active tab, select Save + close.
To add published version of an app to a new tab in a different channel, Select (Add a tab) for the channel you want, and then select Save + close.
More information: Publish and add an app to Teams
Feedback
Coming soon: Throughout 2024 we will be phasing out GitHub Issues as the feedback mechanism for content and replacing it with a new feedback system. For more information see: https://aka.ms/ContentUserFeedback.
Submit and view feedback for